
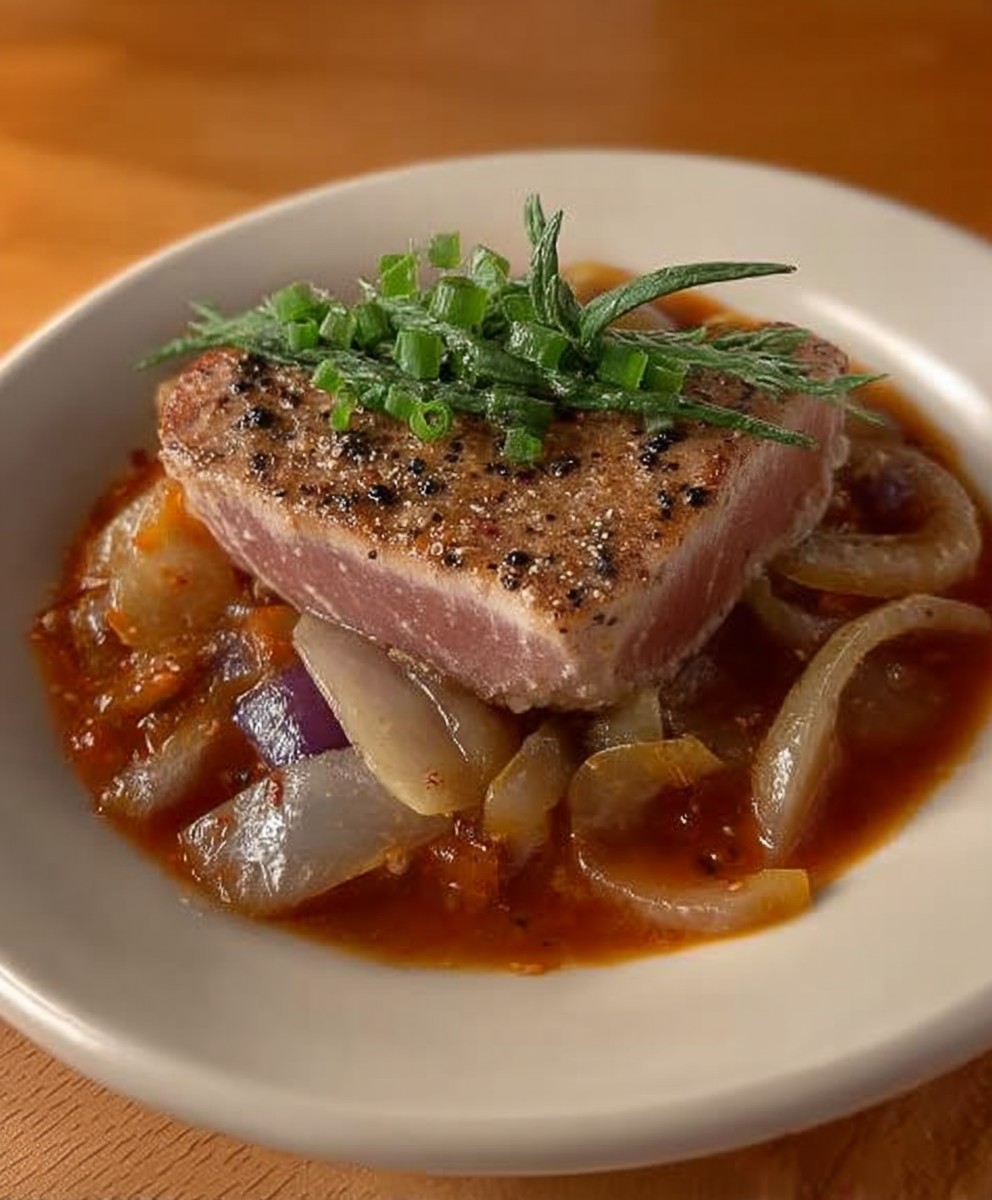
Seared Ahi Tuna: a culinary masterpiece thats surprisingly simple to create in your own kitchen! Have you ever dreamed of perfectly seared tuna, the kind that melts in your mouth with a burst of oceanic flavor? I’m here to tell you that dream is within reach. Forget expensive sushi restaurants; with my easy-to-follow recipe, you’ll be enjoying restaurant-quality seared ahi tuna in no time.
Ahi tuna, also known as yellowfin tuna, has a rich history as a staple in many coastal cultures, particularly in Japan and Hawaii. In Japanese cuisine, it’s prized for its use in sushi and sashimi, showcasing its delicate flavor and vibrant color. Hawaiian poke bowls also heavily feature ahi, celebrating its freshness and versatility. This dish is more than just food; it’s a connection to centuries of tradition and a celebration of the ocean’s bounty.
But what makes seared ahi tuna so irresistible? It’s the incredible contrast of textures a perfectly seared exterior that gives way to a tender, almost buttery interior. The mild, slightly sweet flavor of the tuna is enhanced by a simple sear, allowing its natural goodness to shine. Plus, it’s incredibly quick and easy to prepare, making it a perfect weeknight meal for busy individuals who don’t want to compromise on taste or quality. Whether you’re a seasoned chef or a kitchen novice, you’ll be amazed at how easy it is to create this elegant and delicious dish.

Ingredients:
- Ahi Tuna Steaks: 2 (6-8 ounce) sushi-grade ahi tuna steaks, about 1 inch thick
- Sesame Seeds: 2 tablespoons black sesame seeds, 2 tablespoons white sesame seeds (mixed together)
- Soy Sauce: 2 tablespoons low-sodium soy sauce
- Rice Vinegar: 1 tablespoon rice vinegar
- Sesame Oil: 1 teaspoon toasted sesame oil
- Ginger: 1 teaspoon fresh ginger, grated
- Garlic: 1 clove garlic, minced
- Green Onions: 2 green onions, thinly sliced (for garnish)
- Avocado: 1 ripe avocado, sliced (for serving, optional)
- Wasabi: Wasabi paste (for serving, optional)
- Pickled Ginger: Pickled ginger (for serving, optional)
- Vegetable Oil: 1 tablespoon high-heat vegetable oil (such as canola or grapeseed oil)
- Salt: Sea salt, to taste
- Black Pepper: Freshly ground black pepper, to taste
Preparing the Tuna:
- Pat the Tuna Dry: This is crucial! Use paper towels to thoroughly pat the ahi tuna steaks dry. Removing excess moisture will help them sear properly and develop a beautiful crust. If the tuna is wet, it will steam instead of sear.
- Season the Tuna: Lightly season both sides of the tuna steaks with sea salt and freshly ground black pepper. Don’t overdo it with the salt, as the soy sauce marinade will also add saltiness.
- Prepare the Sesame Seed Coating: In a shallow dish, combine the black and white sesame seeds. Make sure they are evenly mixed. This mixture will create a flavorful and visually appealing crust on the tuna.
- Coat the Tuna with Sesame Seeds: Gently press each side of the tuna steaks into the sesame seed mixture, ensuring that the seeds adhere evenly and completely cover the surface. Press firmly but gently to help them stick. You want a nice, thick coating of sesame seeds.
Making the Marinade:
- Combine the Marinade Ingredients: In a small bowl, whisk together the soy sauce, rice vinegar, sesame oil, grated ginger, and minced garlic. This marinade will add a delicious umami flavor to the tuna.
- Marinate the Tuna (Optional): While not strictly necessary, marinating the tuna for a short period can enhance its flavor. Place the sesame-crusted tuna steaks in a shallow dish and pour the marinade over them. Let them marinate for 10-15 minutes, turning once halfway through. Be careful not to marinate for too long, as the soy sauce can start to “cook” the fish. If you choose to skip the marinating step, you can simply drizzle the marinade over the seared tuna before serving.
Searing the Tuna:
- Heat the Oil: Place a heavy-bottomed skillet (cast iron is ideal) over high heat. Add the vegetable oil and let it heat up until it is shimmering and almost smoking. The pan needs to be very hot to achieve a good sear. A hot pan is key to getting that beautiful crust without overcooking the inside of the tuna.
- Sear the Tuna: Carefully place the sesame-crusted tuna steaks in the hot skillet. Sear for approximately 30-60 seconds per side for rare to medium-rare, depending on the thickness of the steaks and your desired level of doneness. The goal is to create a seared crust on the outside while keeping the inside mostly raw. For a thicker steak, you might need slightly longer, but be very careful not to overcook it.
- Doneness Check: The tuna is ready when the sesame seed crust is golden brown and crispy, and the sides of the tuna have turned opaque about ¼ inch up. The center should still be vibrant red. If you prefer your tuna more well-done, sear for a slightly longer time, but keep in mind that it will become drier.
- Sear the Edges (Optional): For a more even sear, you can also sear the edges of the tuna steaks for a few seconds each. Use tongs to hold the tuna steaks upright and sear the edges until lightly browned. This step is optional but can improve the overall presentation and texture.
- Remove from Heat: Immediately remove the seared tuna steaks from the skillet and place them on a cutting board.
Slicing and Serving:
- Let the Tuna Rest (Briefly): Allow the seared tuna steaks to rest for a minute or two before slicing. This allows the juices to redistribute, resulting in a more tender and flavorful final product.
- Slice the Tuna: Using a very sharp knife, slice the tuna steaks against the grain into thin slices, about ¼ inch thick. Slicing against the grain will make the tuna more tender and easier to chew.
- Arrange on a Plate: Arrange the sliced seared tuna on a serving plate.
- Garnish and Serve: Garnish with sliced green onions. Drizzle with any remaining marinade from the bowl (if you marinated the tuna). Serve immediately with sliced avocado, wasabi, and pickled ginger on the side. You can also serve it over a bed of rice or alongside a fresh salad.
Tips for Success:
- Use High-Quality Tuna: Sushi-grade ahi tuna is essential for this recipe. It should be fresh, firm, and have a vibrant color. Ask your fishmonger for the best quality tuna available.
- Don’t Overcook the Tuna: The key to perfect seared ahi tuna is to sear it quickly over high heat, leaving the inside mostly raw. Overcooked tuna will be dry and tough.
- Use a Hot Pan: A very hot pan is crucial for achieving a good sear. Make sure the oil is shimmering and almost smoking before adding the tuna.
- Pat the Tuna Dry: Removing excess moisture from the tuna will help it sear properly and develop a beautiful crust.
- Don’t Overcrowd the Pan: If you are searing more than two tuna steaks at a time, work in batches to avoid overcrowding the pan, which can lower the temperature and prevent the tuna from searing properly.
- Experiment with Flavors: Feel free to experiment with different marinades and seasonings. You can add a touch of chili flakes for some heat, or use different types of sesame seeds.
- Serve Immediately: Seared ahi tuna is best served immediately after searing. It can be stored in the refrigerator for a short period, but it will lose its texture and flavor.
Serving Suggestions:
- With Rice: Serve the seared ahi tuna over a bed of sushi rice or brown rice.
- With Salad: Serve it alongside a fresh salad with a light vinaigrette dressing.
- As an Appetizer: Serve it as an appetizer with crackers or wonton chips.
- In a Poke Bowl: Add the seared ahi tuna to a poke bowl with other ingredients like avocado, seaweed salad, and edamame.
- With Noodles: Serve it with soba noodles or udon noodles.
Variations:
- Spicy Tuna: Add a pinch of chili flakes to the sesame seed mixture or the marinade for a spicy kick.
- Citrus Tuna: Add a squeeze of lemon or lime juice to the marinade for a bright, citrusy flavor.
- Wasabi Tuna: Mix a small amount of wasabi paste into the marinade for a wasabi-infused flavor.
- Teriyaki Tuna: Use teriyaki sauce instead of soy sauce in the marinade.
Health Benefits:
- Rich in Omega-3 Fatty Acids: Ahi tuna is an excellent source of omega-3 fatty acids, which are beneficial for heart health, brain function, and reducing inflammation.
- High in Protein: Ahi tuna is a lean source of protein, which is essential for building and repairing tissues.
- Good Source of Vitamins and Minerals: Ahi tuna is a good source of vitamins and minerals, including vitamin D, vitamin B12, iron, and selenium.
Storage Instructions:
- Refrigerate: Leftover seared ahi tuna can be stored in the refrigerator for up to 24 hours. However, it is best consumed immediately after searing for the best texture and flavor.
- Freezing: Freezing is not recommended for seared ahi tuna, as it can affect the texture and flavor.
- 2 (6-8 ounce) sushi-grade ahi tuna steaks, about 1 inch thick
- 2 tablespoons black sesame seeds
- 2 tablespoons white sesame seeds (mixed together)
- 2 tablespoons low-sodium soy sauce
- 1 tablespoon rice vinegar
- 1 teaspoon toasted sesame oil
- 1 teaspoon fresh ginger, grated
- 1 clove garlic, minced
- 2 green onions, thinly sliced (for garnish)
- 1 ripe avocado, sliced (for serving, optional)
- Wasabi paste (for serving, optional)
- Pickled ginger (for serving, optional)
- 1 tablespoon high-heat vegetable oil (such as canola or grapeseed oil)
- Sea salt, to taste
- Freshly ground black pepper, to taste
- Pat the Tuna Dry: Use paper towels to thoroughly pat the ahi tuna steaks dry.
- Season the Tuna: Lightly season both sides of the tuna steaks with sea salt and freshly ground black pepper.
- Prepare the Sesame Seed Coating: In a shallow dish, combine the black and white sesame seeds.
- Coat the Tuna with Sesame Seeds: Gently press each side of the tuna steaks into the sesame seed mixture, ensuring that the seeds adhere evenly and completely cover the surface.
- Combine the Marinade Ingredients: In a small bowl, whisk together the soy sauce, rice vinegar, sesame oil, grated ginger, and minced garlic.
- Marinate the Tuna (Optional): Place the sesame-crusted tuna steaks in a shallow dish and pour the marinade over them. Let them marinate for 10-15 minutes, turning once halfway through.
- Heat the Oil: Place a heavy-bottomed skillet (cast iron is ideal) over high heat. Add the vegetable oil and let it heat up until it is shimmering and almost smoking.
- Sear the Tuna: Carefully place the sesame-crusted tuna steaks in the hot skillet. Sear for approximately 30-60 seconds per side for rare to medium-rare, depending on the thickness of the steaks and your desired level of doneness.
- Doneness Check: The tuna is ready when the sesame seed crust is golden brown and crispy, and the sides of the tuna have turned opaque about ¼ inch up. The center should still be vibrant red.
- Sear the Edges (Optional): For a more even sear, you can also sear the edges of the tuna steaks for a few seconds each. Use tongs to hold the tuna steaks upright and sear the edges until lightly browned.
- Remove from Heat: Immediately remove the seared tuna steaks from the skillet and place them on a cutting board.
- Let the Tuna Rest (Briefly): Allow the seared tuna steaks to rest for a minute or two before slicing.
- Slice the Tuna: Using a very sharp knife, slice the tuna steaks against the grain into thin slices, about ¼ inch thick.
- Arrange on a Plate: Arrange the sliced seared tuna on a serving plate.
- Garnish and Serve: Garnish with sliced green onions. Drizzle with any remaining marinade from the bowl (if you marinated the tuna). Serve immediately with sliced avocado, wasabi, and pickled ginger on the side.
- Use sushi-grade ahi tuna for the best and safest results.
- Patting the tuna dry is crucial for a good sear.
- Don’t overcook the tuna; it’s best served rare to medium-rare.
- A very hot pan is essential for achieving a good sear.
- Marinating is optional but enhances the flavor.
- Serve immediately for the best texture and flavor.
Conclusion:
This Seared Ahi Tuna recipe isn’t just another dish; it’s an experience. It’s a quick, elegant, and incredibly flavorful way to elevate your weeknight dinner or impress guests at a weekend gathering. The combination of the perfectly seared tuna, creating that beautiful contrast between the rare center and the savory crust, coupled with the bright and zesty sauce, is simply irresistible. Trust me, once you try it, you’ll be adding it to your regular rotation.
But why is this particular recipe a must-try? It’s all about the balance. The simplicity of the ingredients allows the quality of the ahi tuna to truly shine. We’re not masking the flavor; we’re enhancing it. The searing technique, while seemingly simple, is crucial for achieving that melt-in-your-mouth texture. And the sauce? It’s the perfect complement, adding a burst of freshness and acidity that cuts through the richness of the fish. It’s a symphony of flavors and textures that will leave you wanting more.
Looking for serving suggestions? The possibilities are endless! For a light and refreshing meal, serve the seared ahi tuna over a bed of mixed greens with a drizzle of the remaining sauce. Add some sliced avocado for extra creaminess and healthy fats. Alternatively, create a stunning sushi bowl by pairing the tuna with sushi rice, seaweed salad, edamame, and your favorite toppings. If you’re feeling adventurous, try using the seared ahi tuna in tacos! The combination of the tender fish, crunchy slaw, and spicy mayo is a winning combination.
And don’t be afraid to experiment with variations! If you’re not a fan of soy sauce, try using tamari for a gluten-free option. Add a pinch of red pepper flakes to the sauce for a little extra heat. Or, if you’re feeling fancy, try searing the tuna with a sesame seed crust for added texture and flavor. You can also experiment with different dipping sauces. A wasabi mayo or a ginger-scallion sauce would be delicious alternatives. The key is to have fun and make it your own!
This Seared Ahi Tuna recipe is incredibly versatile and adaptable to your personal preferences.
I truly believe that anyone can master this recipe. It’s straightforward, requires minimal ingredients, and the results are simply outstanding. Don’t be intimidated by the idea of searing tuna; with a little practice, you’ll be a pro in no time. Just remember to use high-quality ahi tuna, get your pan screaming hot, and don’t overcook it! The goal is to achieve a beautiful sear on the outside while keeping the center rare and tender.
So, what are you waiting for? Grab some fresh ahi tuna, gather your ingredients, and get ready to experience a culinary delight. I’m confident that you’ll love this recipe as much as I do. And most importantly, I want to hear about your experience! Did you try any variations? What did you serve it with? Share your photos and comments below. I can’t wait to see what you create! Happy cooking! Let me know if you have any questions, and I’ll be happy to help. Enjoy your delicious, homemade Seared Ahi Tuna!
Seared Ahi Tuna: The Ultimate Guide to Perfectly Sear and Serve
Quick and easy recipe for perfectly seared sushi-grade tuna with a flavorful sesame seed crust. Serve with avocado, wasabi, and pickled ginger for a restaurant-quality meal at home.

Leave a Comment