
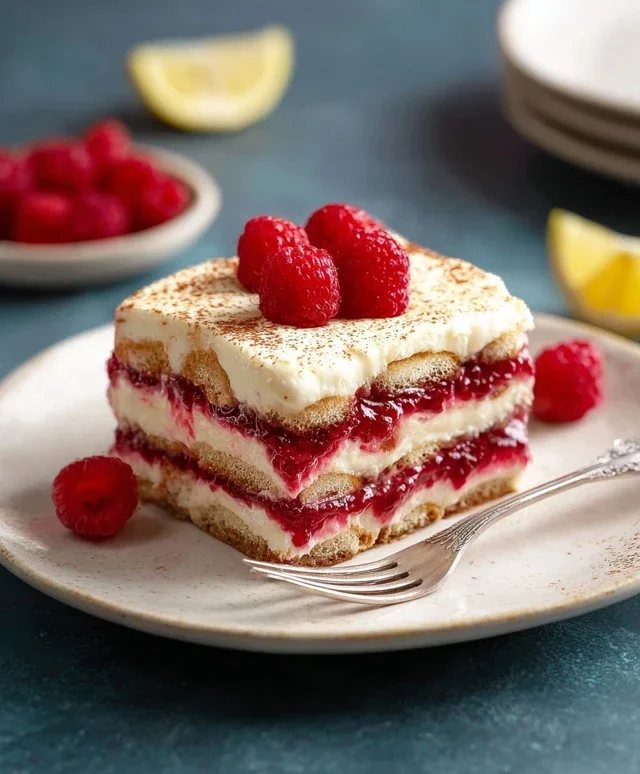
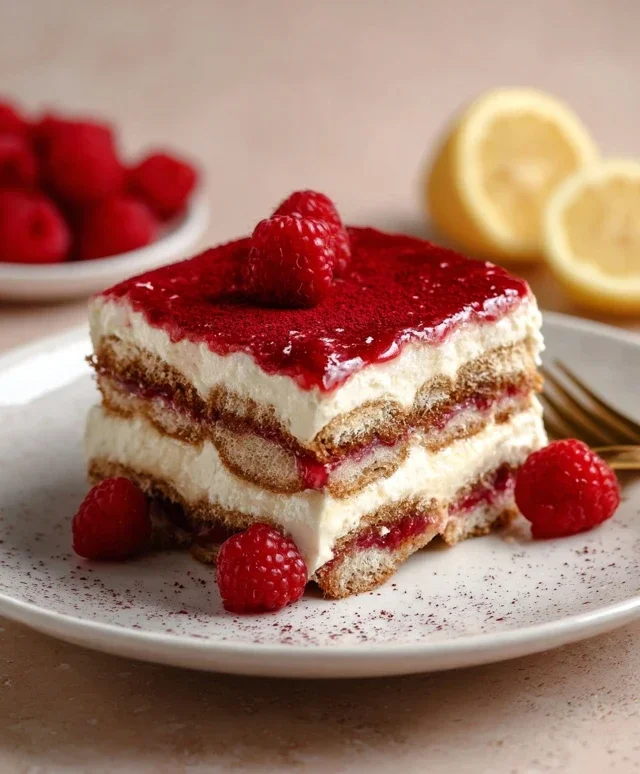
Raspberry Tiramisu is a delightful twist on a classic Italian dessert, and let me tell you, it’s an absolute showstopper. We all know and adore the origin extractal Tiramisu – that perfect harmony of coffee-soaked ladyfingers, creamy mascarpone, and a dusting of cocoa. But imagin extracte injecting that beloved richness with the vibrant tang and sweet burst of fresh raspberries. It’s a combination that awakens the palate and adds a refreshing dimension to the traditional experience. People fall head over heels for this Raspberry Tiramisu because it offers all the comforting, decadent familiarity of the origin extractal, but with an added layer of bright, fruity joy. What makes this particular Raspberry Tiramisu so special is the way the tartness of the raspberries cuts through the sweetness of the mascarpone, creating a beautifully balanced dessert that’s both sophisticated and incredibly easy to fall in love with. It’s perfect for any occasion, from a casual family gathering to a more elegant dinner party.

A Refreshing Twist: Raspberry Tiramisu Dream
Tiramisu, the classic Italian dessert, is a symphony of coffee-soaked ladyfingers, creamy mascarpone, and a dusting of cocoa. But what if we could inject a burst of vibrant, fruity flavor into this beloved treat? Enter Raspberry Tiramisu, a delightful variation that swaps the traditional coffee for a tangy raspberry compote, offering a lighter, brighter, and utterly irresistible dessert experience. This recipe takes the essence of tiramisu and infuses it with the sweet-tart goodness of fresh raspberries, creating a dessert that’s perfect for any occasion, from a special celebration to a simple indulgence. The beautiful pink hue alone is enough to make it a showstopper!
Ingredients:
Preparing the Raspberry Compote
This is where our raspberry transformation begin extracts. We’ll create a luscious compote that will be the heart of our tiramisu’s flavor.
Creating the Limoncello Syrup (Optional but Recommended)
While the compote provides the raspberry flavor, a light syrup is needed to moisten the ladyfingers. If you’re using limoncello, this is where it adds a delightful citrusy kick.
Whipping Up the Mascarpone Cream
This is the luxurious, creamy component that defines tiramisu. We’re aiming for a light and airy, yet rich, filling.
Assembling Your Raspberry Tiramisu Masterpiece
Now for the fun part – bringin extractg all our delicious components together!
Chilling and Decorating
Patience is a virtue when it comes to tiramisu, and this raspberry version is no exception.
Enjoy your exquisite Raspberry Tiramisu! It’s a dessert that’s both elegant and incredibly easy to make, offering a delightful burst of berry flavor in every bite.
Conclusion:
And there you have it – a delightful Raspberry Tiramisu recipe that’s sure to impress! This dessert is a fantastic twist on a classic, offering a beautiful balance of creamy mascarpone, coffee-soaked ladyfingers, and the vibrant, slightly tart burst of fresh raspberries. It’s perfect for special occasions, a sophisticated dinner party, or simply when you want to treat yourself to something truly delicious. I love how this raspberry tiramisu manages to be both elegant and surprisingly easy to make, proving that impressive desserts don’t always require hours in the kitchen.
For serving, I recommend chilling it thoroughly for at least 4 hours, or preferably overnight, to allow the flavors to meld beautifully. A dusting of cocoa powder or a few fresh raspberries on top makes for a stunning presentation. If you’re feeling adventurous, consider adding a hint of lemon zest to the mascarpone mixture for an extra bright note, or even layering in some lightly macerated raspberries with a splash of raspberry liqueur extract for an intensified berry flavor. Don’t be afraid to experiment and make this raspberry tiramisu your own! I truly hope you give this recipe a try – it’s a winner in my book!
Frequently Asked Questions:
Can I use frozen raspberries instead of fresh?
Yes, you absolutely can use frozen raspberries! Thaw them completely and drain off any excess liquid before using them in the recipe. You can even gently simmer them with a tablespoon of sugar for a few minutes to create a quick raspberry compote for an extra layer of flavor.
How long does Raspberry Tiramisu last in the refrigerator?
Raspberry Tiramisu is best enjoyed within 2-3 days when stored properly in an airtight container in the refrigerator. The ladyfingers will continue to soften over time, so while still delicious, the texture might change slightly after the first day.
Can I make this recipe ahead of time?
Definitely! In fact, making this raspberry tiramisu ahead of time is highly recommended. It allows the flavors to deepen and the ladyfingers to absorb the coffee and liqueur extract perfectly, resulting in a wonderfully cohesive and delicious dessert.
Raspberry Tiramisu
A delightful twist on classic tiramisu, featuring a vibrant raspberry and lemon filling with a hint of limoncello.
Ingredients
-
500 g frozen raspberries
-
100 g granulated sugar
-
1 tbsp lemon juice
-
100 g granulated sugar
-
120 g water
-
3 tbsp limoncello (optional)
-
450 g mascarpone cheese (cold)
-
120 g powdered sugar
-
2 tbsp lemon juice
-
1 tsp vanilla paste
-
480 g heavy cream (cold)
-
25 ladyfinger cookies
-
Fresh raspberries for decoration
-
Lemon slices for decoration
Instructions
-
Step 1
In a saucepan, combine 500g frozen raspberries, 100g granulated sugar, and 1 tbsp lemon juice. Cook over medium heat until the raspberries break down and the mixture thickens slightly. Strain to remove seeds if desired, and set aside to cool. -
Step 2
In a separate small saucepan, combine 100g granulated sugar and 120g water. Heat gently, stirring until the sugar is dissolved, to create a simple syrup. Let cool completely. Stir in 3 tbsp limoncello (if using). -
Step 3
In a large bowl, beat the cold mascarpone cheese with 120g powdered sugar, 2 tbsp lemon juice, and 1 tsp vanilla paste until smooth and creamy. -
Step 4
In a separate bowl, whip the cold heavy cream until stiff peaks form. -
Step 5
Gently fold the whipped cream into the mascarpone mixture until just combined. Be careful not to overmix. -
Step 6
Dip the ladyfinger cookies briefly into the cooled limoncello syrup, ensuring they are moistened but not soggy. Arrange a layer of dipped ladyfingers in the bottom of your serving dish. -
Step 7
Spread half of the mascarpone cream mixture over the ladyfingers. Dollop spoonfuls of the cooled raspberry sauce over the cream layer, swirling gently. Repeat with another layer of dipped ladyfingers, the remaining mascarpone cream, and the remaining raspberry sauce. -
Step 8
Cover and refrigerate for at least 4 hours, or preferably overnight, to allow the flavors to meld and the tiramisu to set. -
Step 9
Before serving, decorate with fresh raspberries and lemon slices.
Important Information
Nutrition Facts (Per Serving)
It is important to consider this information as approximate and not to use it as definitive health advice.
Allergy Information
Please check ingredients for potential allergens and consult a health professional if in doubt.


Leave a Comment