
Peruvian chicken and rice, or Arroz con Pollo as it’s known in Peru, is more than just a meal; it’s a vibrant celebration of flavor and a comforting taste of home. Imagine tender, juicy chicken simmered in a fragrant blend of cilantro, peppers, and spices, all nestled amongst fluffy, perfectly cooked rice. Are you ready to transport your taste buds to the heart of Peru?
This iconic dish boasts a rich history, deeply rooted in Peruvian culture. It’s believed to have evolved from Spanish paella, adapted with local ingredients and flavors to create something truly unique. Passed down through generations, each family holds their own cherished version of Arroz con Pollo, making it a dish that’s both familiar and endlessly customizable.
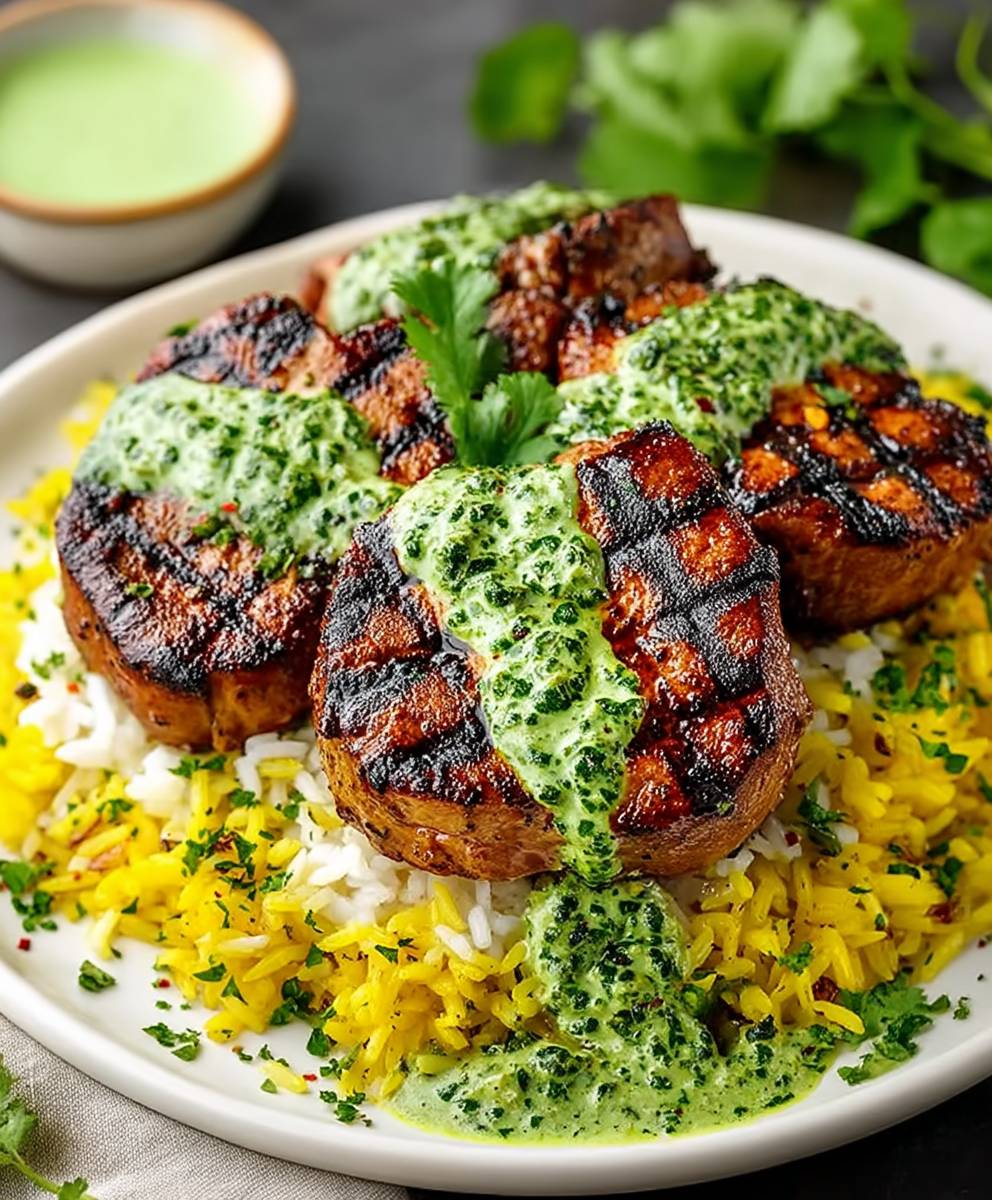
What makes Peruvian chicken and rice so universally loved? It’s the perfect harmony of textures and tastes. The succulent chicken, infused with aromatic herbs, contrasts beautifully with the soft, slightly sticky rice. The vibrant green hue, thanks to the generous use of cilantro, is as appealing to the eye as the dish is to the palate. Beyond its deliciousness, it’s also a relatively simple and satisfying meal to prepare, making it a weeknight favorite for busy families. So, let’s embark on a culinary journey and create this delightful Peruvian classic together!

Ingredients:
- For the Chicken Marinade:
- 2.5-3 lbs bone-in, skin-on chicken pieces (thighs and drumsticks work best)
- 1/4 cup soy sauce
- 1/4 cup red wine vinegar
- 2 tablespoons aji amarillo paste (or substitute with 1 tablespoon yellow bell pepper puree and 1/2 teaspoon cayenne pepper)
- 2 tablespoons olive oil
- 4 cloves garlic, minced
- 1 tablespoon ground cumin
- 1 tablespoon smoked paprika
- 1 tablespoon dried oregano
- 1 teaspoon ground black pepper
- 1 teaspoon salt (or to taste)
- 1/2 teaspoon ground turmeric (for color and flavor)
- For the Rice:
- 2 tablespoons olive oil
- 1 medium yellow onion, finely chopped
- 2 cloves garlic, minced
- 1 red bell pepper, finely chopped
- 1 green bell pepper, finely chopped
- 1 cup long-grain rice, rinsed
- 2 cups chicken broth
- 1/2 cup frozen peas
- 1/4 cup chopped cilantro
- 1 teaspoon ground cumin
- 1/2 teaspoon salt (or to taste)
- 1/4 teaspoon ground black pepper
- 1/4 cup beer (optional, adds depth of flavor)
- For Serving:
- Lime wedges
- Aji Amarillo Sauce (optional, for extra spice)
Marinating the Chicken:
Okay, let’s get started! The key to amazing Peruvian chicken is a flavorful marinade. This is where all the magic happens, so don’t skip this step!
- Prepare the Marinade: In a large bowl, whisk together the soy sauce, red wine vinegar, aji amarillo paste (or your substitute), olive oil, minced garlic, cumin, smoked paprika, oregano, black pepper, salt, and turmeric. Make sure everything is well combined. The marinade should be a vibrant color and smell absolutely delicious!
- Marinate the Chicken: Add the chicken pieces to the bowl with the marinade. Use your hands (or tongs) to ensure that each piece is thoroughly coated. Really get in there and massage the marinade into the chicken. This will help the flavors penetrate deep into the meat.
- Refrigerate: Cover the bowl with plastic wrap or transfer the chicken to a resealable bag. Place it in the refrigerator and let it marinate for at least 4 hours, or preferably overnight. The longer it marinates, the more flavorful and tender the chicken will be. I usually aim for at least 8 hours for the best results.
Preparing the Rice:
While the chicken is marinating (or after), let’s get the rice ready. This rice is packed with flavor and complements the chicken perfectly.
- Sauté the Aromatics: In a large pot or Dutch oven, heat the olive oil over medium heat. Add the chopped onion and cook until softened and translucent, about 5-7 minutes. Stir occasionally to prevent burning.
- Add Garlic and Peppers: Add the minced garlic, red bell pepper, and green bell pepper to the pot. Cook for another 3-5 minutes, stirring frequently, until the peppers are slightly softened and fragrant. The aroma at this point should be amazing!
- Toast the Rice: Add the rinsed rice to the pot and cook for 2-3 minutes, stirring constantly. This step helps to toast the rice, which enhances its flavor and prevents it from becoming mushy.
- Add Broth and Seasonings: Pour in the chicken broth and beer (if using). Stir in the cumin, salt, and black pepper. Bring the mixture to a boil.
- Simmer: Once boiling, reduce the heat to low, cover the pot tightly, and simmer for 18-20 minutes, or until the rice is cooked through and the liquid is absorbed. Do not lift the lid during this time, as this will release steam and affect the cooking process.
- Fluff and Finish: Remove the pot from the heat and let it sit, covered, for 5 minutes. This allows the rice to finish steaming and become perfectly fluffy. After 5 minutes, fluff the rice with a fork.
- Add Peas and Cilantro: Stir in the frozen peas and chopped cilantro. Cover the pot again and let it sit for another minute or two to warm the peas.
Cooking the Chicken:
Now for the star of the show the chicken! There are a few ways you can cook the chicken, but I prefer roasting it in the oven for that crispy skin and juicy meat.
- Preheat Oven: Preheat your oven to 400°F (200°C).
- Prepare Baking Sheet: Line a baking sheet with parchment paper or foil for easy cleanup.
- Arrange Chicken: Remove the chicken from the marinade and arrange it in a single layer on the prepared baking sheet. Discard the remaining marinade.
- Roast: Roast the chicken in the preheated oven for 45-55 minutes, or until the internal temperature reaches 165°F (74°C) and the skin is golden brown and crispy. The cooking time will depend on the size of your chicken pieces.
- Broil (Optional): For extra crispy skin, you can broil the chicken for the last 2-3 minutes of cooking. Keep a close eye on it to prevent burning!
- Rest: Remove the chicken from the oven and let it rest for 5-10 minutes before serving. This allows the juices to redistribute, resulting in more tender and flavorful chicken.
Serving:
Time to put it all together and enjoy this delicious Peruvian chicken and rice!
- Plate: Spoon a generous portion of the rice onto each plate.
- Add Chicken: Place a piece or two of the roasted chicken on top of the rice.
- Garnish: Garnish with fresh cilantro and serve with lime wedges for squeezing over the chicken and rice.
- Serve with Aji Amarillo Sauce (Optional): If you like a little extra heat, serve with a side of aji amarillo sauce.
Tips and Variations:
- Spice Level: Adjust the amount of aji amarillo paste or cayenne pepper to your liking. If you prefer a milder flavor, use less or omit it altogether.
- Vegetables: Feel free to add other vegetables to the rice, such as carrots, corn, or green beans.
- Chicken Cuts: While thighs and drumsticks are ideal for this recipe, you can also use chicken breasts. However, be careful not to overcook them, as they can become dry.
- Grilling: You can also grill the chicken instead of roasting it. Grill over medium heat for about 30-40 minutes, or until cooked through.
- Slow Cooker: For a hands-off approach, you can cook the chicken in a slow cooker. Place the marinated chicken in the slow cooker and cook on low for 6-8 hours, or on high for 3-4 hours. Shred the chicken and serve over the rice.
- Make Ahead: The chicken can be marinated up to 24 hours in advance. The rice can also be made ahead of time and reheated.
Enjoy!
I hope you enjoy this recipe as much as I do! It’s a family favorite and always a crowd-pleaser. Let me know in the comments if you try it and how it turns out!
Conclusion:
So there you have it! This Peruvian chicken and rice recipe is truly a must-try, and I’m not just saying that. The vibrant flavors, the tender chicken, and the perfectly cooked rice all come together to create a dish that’s both comforting and exciting. It’s a culinary adventure right in your own kitchen! I’ve made this countless times, and it’s always a crowd-pleaser, whether it’s a weeknight dinner or a weekend gathering.
What makes this recipe so special? It’s the combination of the aromatic spices, the subtle heat from the aji amarillo paste (which you can adjust to your liking, of course!), and the freshness of the cilantro and lime. It’s a symphony of flavors that will tantalize your taste buds and leave you wanting more. Plus, it’s surprisingly easy to make! Don’t let the list of ingredients intimidate you; the process is straightforward, and the results are well worth the effort.
Beyond the incredible taste, this dish is also incredibly versatile. While I love serving it as is, there are so many ways to customize it to your preferences.
Serving Suggestions and Variations:
* Spice it up! If you’re a fan of heat, add a pinch of cayenne pepper or a few extra drops of hot sauce to the marinade.
* Make it vegetarian! Substitute the chicken with firm tofu or chickpeas for a delicious vegetarian option. Just be sure to adjust the cooking time accordingly.
* Add some veggies! Toss in some chopped bell peppers, peas, or corn for added color and nutrients.
* Serve it with sides! This Peruvian chicken and rice pairs perfectly with a simple green salad, some sliced avocado, or a side of plantains.
* Turn it into a bowl! Layer the chicken and rice with black beans, corn, salsa, and a dollop of sour cream for a hearty and satisfying bowl.
* Make it ahead! The chicken can be marinated overnight for even more intense flavor. You can also cook the rice ahead of time and reheat it when you’re ready to serve.
I truly believe that this recipe for Peruvian chicken and rice will become a staple in your kitchen. It’s a dish that’s both satisfying and flavorful, and it’s perfect for any occasion. It’s a fantastic way to introduce yourself to the vibrant flavors of Peruvian cuisine.
So, what are you waiting for? Gather your ingredients, put on some music, and get cooking! I’m confident that you’ll love this recipe as much as I do. And most importantly, don’t be afraid to experiment and make it your own. Cooking should be fun, so relax, enjoy the process, and let your creativity shine.
Once you’ve tried this recipe, I’d love to hear about your experience! Share your photos and comments on social media using [Insert your social media handle or hashtag here]. Let me know what you thought of the flavors, what variations you tried, and any tips or tricks you discovered along the way. I’m always eager to learn from my readers and see how they’re making this recipe their own. Happy cooking! I can’t wait to hear from you!
Peruvian Chicken and Rice: A Flavorful & Easy Recipe
Flavorful Peruvian-style roasted chicken with vibrant, aromatic rice. A delicious and easy-to-make meal that's perfect for any occasion.
Ingredients
- 2.5-3 lbs bone-in, skin-on chicken pieces (thighs and drumsticks work best)
- 1/4 cup soy sauce
- 1/4 cup red wine vinegar
- 2 tablespoons aji amarillo paste (or substitute with 1 tablespoon yellow bell pepper puree and 1/2 teaspoon cayenne pepper)
- 2 tablespoons olive oil
- 4 cloves garlic, minced
- 1 tablespoon ground cumin
- 1 tablespoon smoked paprika
- 1 tablespoon dried oregano
- 1 teaspoon ground black pepper
- 1 teaspoon salt (or to taste)
- 1/2 teaspoon ground turmeric (for color and flavor)
- 2 tablespoons olive oil
- 1 medium yellow onion, finely chopped
- 2 cloves garlic, minced
- 1 red bell pepper, finely chopped
- 1 green bell pepper, finely chopped
- 1 cup long-grain rice, rinsed
- 2 cups chicken broth
- 1/2 cup frozen peas
- 1/4 cup chopped cilantro
- 1 teaspoon ground cumin
- 1/2 teaspoon salt (or to taste)
- 1/4 teaspoon ground black pepper
- 1/4 cup beer (optional, adds depth of flavor)
- Lime wedges
- Aji Amarillo Sauce (optional, for extra spice)
Instructions
- Prepare the Chicken Marinade: In a large bowl, whisk together the soy sauce, red wine vinegar, aji amarillo paste (or your substitute), olive oil, minced garlic, cumin, smoked paprika, oregano, black pepper, salt, and turmeric.
- Marinate the Chicken: Add the chicken pieces to the bowl with the marinade. Use your hands (or tongs) to ensure that each piece is thoroughly coated.
- Refrigerate: Cover the bowl with plastic wrap or transfer the chicken to a resealable bag. Place it in the refrigerator and let it marinate for at least 4 hours, or preferably overnight.
- Sauté the Aromatics (Rice): In a large pot or Dutch oven, heat the olive oil over medium heat. Add the chopped onion and cook until softened and translucent, about 5-7 minutes.
- Add Garlic and Peppers (Rice): Add the minced garlic, red bell pepper, and green bell pepper to the pot. Cook for another 3-5 minutes, stirring frequently, until the peppers are slightly softened and fragrant.
- Toast the Rice: Add the rinsed rice to the pot and cook for 2-3 minutes, stirring constantly.
- Add Broth and Seasonings (Rice): Pour in the chicken broth and beer (if using). Stir in the cumin, salt, and black pepper. Bring the mixture to a boil.
- Simmer (Rice): Once boiling, reduce the heat to low, cover the pot tightly, and simmer for 18-20 minutes, or until the rice is cooked through and the liquid is absorbed.
- Fluff and Finish (Rice): Remove the pot from the heat and let it sit, covered, for 5 minutes. Fluff the rice with a fork.
- Add Peas and Cilantro (Rice): Stir in the frozen peas and chopped cilantro. Cover the pot again and let it sit for another minute or two to warm the peas.
- Preheat Oven: Preheat your oven to 400°F (200°C).
- Prepare Baking Sheet: Line a baking sheet with parchment paper or foil for easy cleanup.
- Arrange Chicken: Remove the chicken from the marinade and arrange it in a single layer on the prepared baking sheet. Discard the remaining marinade.
- Roast: Roast the chicken in the preheated oven for 45-55 minutes, or until the internal temperature reaches 165°F (74°C) and the skin is golden brown and crispy.
- Broil (Optional): For extra crispy skin, you can broil the chicken for the last 2-3 minutes of cooking. Keep a close eye on it to prevent burning!
- Rest: Remove the chicken from the oven and let it rest for 5-10 minutes before serving.
- Plate: Spoon a generous portion of the rice onto each plate.
- Add Chicken: Place a piece or two of the roasted chicken on top of the rice.
- Garnish: Garnish with fresh cilantro and serve with lime wedges for squeezing over the chicken and rice.
- Serve with Aji Amarillo Sauce (Optional): If you like a little extra heat, serve with a side of aji amarillo sauce.
Notes
- Adjust the amount of aji amarillo paste or cayenne pepper to your liking.
- Feel free to add other vegetables to the rice, such as carrots, corn, or green beans.
- While thighs and drumsticks are ideal, you can also use chicken breasts (but be careful not to overcook).
- You can also grill the chicken instead of roasting it.
- For a hands-off approach, you can cook the chicken in a slow cooker.
- The chicken can be marinated up to 24 hours in advance. The rice can also be made ahead of time and reheated.


Leave a Comment