
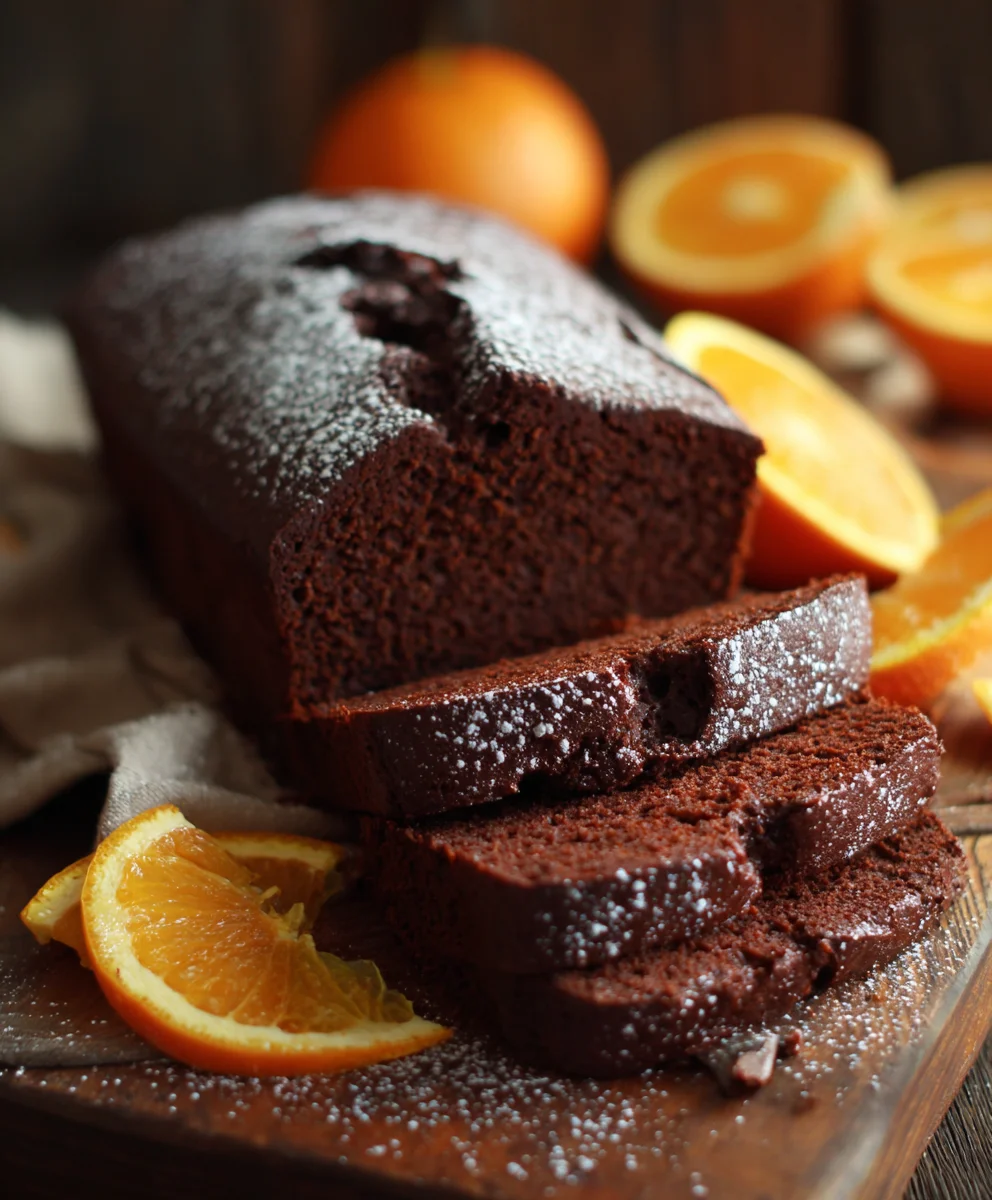
Chocolate Orange Loaf Cake. Are you ready to embark on a delightful culinary journey that perfectly balances rich indulgence with bright, zesty freshness? I know I am! Imagine a slice of moist, tender cake, bursting with deep chocolate flavor beautifully complemented by the vibrant aroma of fresh oranges. This delightful fusion, while seemingly modern, builds upon a timeless pairing cherished across cultures, particularly in European confectionery where citrus often brightens rich chocolate during festive seasons. There’s something truly magical about how the robust cocoa notes dance with the sweet, tangy essence of orange, creating a symphony for your taste buds.
People absolutely adore this cake not only for its exquisitely balanced flavor and incredibly moist texture but also for its sheer versatility. Whether it’s the centerpiece of a brunch, a comforting afternoon tea treat, or a simple yet sophisticated dessert, a perfectly baked Chocolate Orange Loaf Cake is always a welcome sight. It’s incredibly easy to make, yet yields consistently impressive results, making it an absolute favorite in my kitchen and, I’m sure, soon to be in yours too!

Ingredients:
- For the Chocolate Orange Loaf Cake:
- 2 cups (250g) all-purpose flour
- 1 ½ cups (300g) granulated sugar
- 2 teaspoons baking powder
- ½ teaspoon baking soda
- ½ teaspoon fine sea salt
- ½ cup (113g) unsalted butter, softened to room temperature
- 3 large eggs, at room temperature
- 1 cup (240ml) whole milk, at room temperature
- 1 teaspoon pure vanilla extract
- Zest of 2 large oranges (reserve oranges for juice later)
- 1 cup (170g) good quality dark chocolate chips or chunks (I love using chopped dark chocolate bars for varied textures!)
- For the Orange Glaze:
- 1 ½ cups (180g) powdered sugar (confectioners’ sugar)
- 2-3 tablespoons fresh orange juice (from the oranges you zested)
- Optional: A tiny pinch of orange zest for garnish
Preparation & Ingredient Gathering
- Let’s get our kitchen ready for some baking magic! First things first, we need to preheat our oven. Set it to 350°F (175°C). This ensures a consistent temperature from the moment our cake goes in, which is crucial for even baking.
- Next, prepare your loaf pan. I usually use a standard 9×5-inch (23x13cm) loaf pan. Generously grease it with butter or a non-stick cooking spray, making sure to get into all the corners and up the sides. For an extra layer of security against sticking and to make removal a breeze, I like to line the bottom and two long sides with parchment paper, leaving an overhang to act as ‘handles’. This step is really important for maintaining the beautiful shape of your Chocolate Orange Loaf Cake.
- Now, gather all your ingredients. This is called “mise en place” and it’s a baker’s best friend! Ensure your butter, eggs, and milk are all at room temperature. This is not just a suggestion; it’s a critical step for a light and tender crumb. Room temperature ingredients emulsify much better, meaning they blend together smoothly, creating a more uniform batter and preventing a lumpy or curdled mixture. If your butter isn’t soft enough, you can cut it into smaller pieces and let it sit for a few minutes, or microwave it for just 5-10 seconds – but be careful not to melt it completely! For eggs, you can place them in a bowl of warm water for about 5-10 minutes.
- Take your two large oranges. Using a microplane or a fine grater, carefully zest both oranges, being sure to only get the brightly colored outer layer and none of the bitter white pith underneath. Place the beautiful, aromatic zest aside – we’ll be adding this to our wet ingredients. After zesting, you can halve the oranges and set them aside for juicing later when we make our glaze.
Mixing the Dry Ingredients
- In a medium-sized bowl, we’re going to whisk together our dry ingredients. Add the all-purpose flour, granulated sugar, baking powder, baking soda, and fine sea salt. Using a whisk, gently mix these ingredients together for about 30 seconds to a minute. This step isn’t just about combining them; it’s about aerating the flour and evenly distributing the leavening agents (baking powder and baking soda). An even distribution means your cake will rise uniformly and have that lovely, consistent texture we’re aiming for. You want to make sure there are no lumps of baking powder or soda that could lead to bitter spots in your finished cake. Set this bowl aside for a moment.
Creaming Wet Ingredients & Zesting
- In a large mixing bowl, either using a stand mixer with the paddle attachment or an electric hand mixer, add your softened room temperature butter. Beat the butter on medium speed for about 1-2 minutes until it’s lightened in color and looks creamy. This incorporates air, which contributes to the cake’s tenderness.
- Now, gradually add the granulated sugar to the creamy butter. Continue beating on medium-high speed for another 3-5 minutes, or until the mixture is light, fluffy, and pale yellow. This process is called “creaming,” and it’s essential for a moist and tender cake. The sugar crystals cut into the butter, creating tiny air pockets that expand during baking, giving our Chocolate Orange Loaf Cake its wonderful texture. Scrape down the sides of the bowl occasionally to ensure everything is evenly incorporated.
- Add the eggs, one at a time, beating well after each addition. This is another crucial step. Allow each egg to be fully incorporated into the butter-sugar mixture before adding the next. This prevents the mixture from curdling and ensures a smooth, homogeneous batter. The batter might look a little lumpy after the first egg, but it should smooth out as you beat in the subsequent eggs.
- Pour in the vanilla extract and add all of your lovely orange zest that you prepared earlier. Beat for another 30 seconds to fully combine and to infuse that incredible citrus aroma throughout the wet ingredients. The aroma of fresh orange zest is truly one of the stars of this Chocolate Orange Loaf Cake!
Combining Wet and Dry
- Now it’s time to bring our dry and wet ingredients together. With the mixer on low speed, or by hand with a spatula, you’re going to add the dry ingredients and milk in alternating additions. Always start and end with the dry ingredients. This typically means adding about a third of the dry mixture, mixing until just combined, then half of the milk, mixing, then another third of the dry, the remaining milk, and finally the last third of the dry ingredients.
- The key here is to mix until just combined after each addition. Overmixing the batter once the flour is added develops the gluten, which can result in a tough, dense cake. We want a light and airy loaf! A few small lumps are perfectly fine; in fact, they’re preferable to overmixing.
- Once you’ve added the last of the dry ingredients, mix only until no streaks of flour remain. Use a rubber spatula to give the bowl a final scrape, ensuring everything from the bottom and sides is incorporated into the batter.
Folding in Chocolate
- Now for the chocolate! Gently fold in your dark chocolate chips or chunks into the batter using your rubber spatula. You want to distribute them evenly throughout the mixture so that every slice of your Chocolate Orange Loaf Cake gets a delightful burst of chocolate. Don’t overmix here either; just enough to incorporate the chocolate.
Baking the Chocolate Orange Loaf Cake
- Carefully pour the rich, fragrant batter into your prepared loaf pan. Use your spatula to spread it evenly into the pan, ensuring the top is relatively flat. You can gently tap the pan on the counter a couple of times to release any large air bubbles.
- Place the loaf pan in your preheated 350°F (175°C) oven. The baking time will typically be between 55-65 minutes. However, ovens vary, so it’s always best to keep an eye on it.
- Around the 50-minute mark, start checking for doneness. The top of the cake should be a beautiful golden-brown, and a wooden skewer or toothpick inserted into the center should come out clean, or with only a few moist crumbs attached. If it comes out with wet batter, continue baking for another 5-10 minutes and check again. If the top is browning too quickly, you can loosely tent it with aluminum foil for the remaining baking time.
- Once baked, carefully remove the loaf pan from the oven. Let the Chocolate Orange Loaf Cake cool in the pan on a wire rack for about 15-20 minutes. This allows the cake to firm up slightly, making it easier to handle and preventing it from falling apart when you remove it.
- After the initial cooling period, use the parchment paper overhangs (if you used them) or carefully invert the pan onto the wire rack to fully remove the cake. Then, turn it right-side up and let it cool completely on the wire rack. It is absolutely essential that the cake is cooled completely before glazing. If you glaze a warm cake, the glaze will melt and run off, rather than setting into that beautiful, opaque finish. Patience is a virtue here!
Making the Orange Glaze
- While your cake is cooling, you can prepare the simple yet delicious orange glaze. In a medium bowl, measure out your powdered sugar.
- Gradually add the fresh orange juice, starting with 2 tablespoons. Use a small whisk or a fork to mix it until it forms a smooth, pourable glaze. You’re aiming for a consistency that is thick enough to coat the back of a spoon but still thin enough to drip down the sides of the cake artfully. If it’s too thick, add another ½ teaspoon of orange juice at a time until you reach the desired consistency. If it accidentally becomes too thin, whisk in another tablespoon of powdered sugar. The balance of citrus and sweetness in this glaze perfectly complements the rich chocolate and orange notes of our loaf cake.
Glazing and Finishing
- Once your Chocolate Orange Loaf Cake is completely cool to the touch (seriously, I can’t stress this enough!), place it on a clean wire rack set over a piece of parchment paper or a baking sheet. This will catch any drips from the glaze, making cleanup a breeze.
- Spoon or drizzle the orange glaze evenly over the top of the cooled cake. You can do a simple zigzag pattern or fully cover the top, letting it cascade down the sides in luscious drips. I find that a spoon allows for more control and a more rustic, appealing look.
- If you wish, you can sprinkle a tiny bit of extra orange zest over the wet glaze for a pop of color and an extra burst of fresh orange aroma.
- Allow the glaze to set for at least 15-30 minutes before slicing and serving. This will ensure the glaze hardens slightly, giving you a clean cut and a beautiful presentation.
- Slice your gorgeous Chocolate Orange Loaf Cake with a serrated knife for the cleanest cuts, and enjoy! This cake keeps wonderfully at room temperature in an airtight container for 3-4 days, though I doubt it will last that long! It’s perfect with a cup of coffee or tea, or as a delightful dessert.

Conclusion:
And there you have it, friends! We’ve journeyed through the simple steps to create a truly magical treat, and I honestly can’t wait for you to experience the sheer delight that is this Chocolate Orange Loaf Cake. If you’ve ever doubted your baking prowess, this recipe is here to prove you wrong. It’s more than just a cake; it’s an invitation to fill your home with the most intoxicating aroma of citrus and rich cocoa, a scent that promises warmth and comfort long before the first slice is even cut. Trust me when I say, this isn’t just another loaf cake; it’s the loaf cake that will make you a legend in your own kitchen.
Why is this particular recipe a must-try? For starters, it strikes that elusive, perfect balance between the bold, slightly bitter notes of premium chocolate and the bright, zesty perfume of fresh oranges. This isn’t a cake where one flavor overwhelms the other; instead, they dance together in beautiful harmony, each enhancing the other. The texture is another triumph – incredibly moist and tender, with a crumb that practically melts in your mouth, yet sturdy enough to hold its own. You won’t find any dry, crumbly sadness here, only pure, unadulterated pleasure. It’s also surprisingly forgiving, making it ideal for novice bakers, while still delivering a sophisticated flavor profile that will impress even the most seasoned dessert connoisseurs. This cake truly elevates the humble loaf into something extraordinary.
Serving Suggestions & Creative Variations:
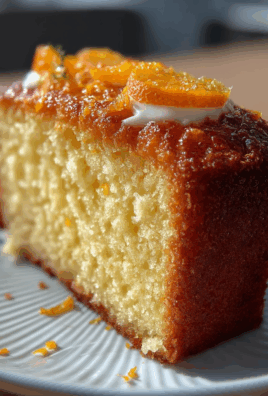
While this Chocolate Orange Loaf Cake is absolutely divine on its own, especially with a steaming cup of tea or coffee, its versatility is one of its most charming attributes. For a simple yet elegant dessert, I love serving a slice ever-so-slightly warmed, perhaps with a dollop of whipped cream or a scoop of vanilla bean ice cream melting gently on top. The contrast of the warm cake and cold cream is simply heavenly! If you’re feeling a little fancy, a drizzle of extra melted dark chocolate or a dusting of powdered sugar can add that extra touch of visual appeal. For a breakfast treat that feels utterly indulgent without being overly heavy, it pairs wonderfully with a fresh fruit salad.
But don’t stop there! This recipe is a fantastic canvas for your own creative flair. Want to amp up the chocolate factor? Fold in a handful of chocolate chips or chunks into the batter before baking. White chocolate chips would also be a lovely addition, offering a different kind of sweetness. If you’re a nut lover, toasted pecans or walnuts can add a delightful crunch and nutty depth. For an even more intense orange flavor, consider adding a teaspoon of orange extract or a tablespoon of orange liqueur (like Grand Marnier) to the batter. You could also experiment with different glazes: a simple powdered sugar and orange juice glaze is classic, or a chocolate ganache glaze would make it truly decadent. And for those special occasions, a candied orange slice perched on top transforms it into a showstopper!
I genuinely believe that baking should be a joyous, shared experience. There’s something so incredibly rewarding about creating something delicious from scratch and then sharing it with loved ones. This Chocolate Orange Loaf Cake is perfect for gifting – imagine presenting a beautifully wrapped loaf to a friend or neighbor! It’s also ideal for potlucks, brunches, or simply as a delightful treat to brighten an ordinary afternoon. So, please, don’t just read about this incredible cake; go ahead and bake it! Dive into your kitchen, gather your ingredients, and let the magic unfold. I am so eager to hear about your baking adventures. Once you’ve had a chance to try this recipe, please come back and share your experience with us! What did you love most? Did you try any variations? Your insights and photos inspire us all. Happy baking, and enjoy every single, glorious crumb!
People Also Ask (FAQs):
-
How long does Chocolate Orange Loaf Cake stay fresh?
-
When stored properly at room temperature in an airtight container, your Chocolate Orange Loaf Cake will stay wonderfully fresh and moist for 3-4 days. If you keep it in the refrigerator, it can last for up to a week, though I personally find the texture is best at room temperature.
-
Can I freeze Chocolate Orange Loaf Cake?
-
Absolutely! This cake freezes beautifully. Once it has completely cooled, wrap the entire loaf or individual slices tightly in plastic wrap, then an additional layer of aluminum foil. It can be frozen for up to 2-3 months. To thaw, simply unwrap and let it come to room temperature on your counter for a few hours. You can even warm individual slices slightly in the microwave for a fresh-baked feel.
-
What kind of chocolate is best for this recipe?
-
For the best flavor, I highly recommend using a good quality dark or semi-sweet chocolate (around 60-70% cocoa solids) for both the batter and any glaze. High-quality chocolate makes a noticeable difference in the richness and depth of flavor. Chocolate chips, chopped chocolate bars, or even baking chocolate will work, just ensure it’s a type you enjoy eating on its own.
-
My loaf cake turned out dry. What went wrong?
-
A dry loaf cake is often a sign of over-baking. Ovens can vary, so it’s always best to start checking for doneness a few minutes before the recipe suggests. The cake is done when a wooden skewer or toothpick inserted into the center comes out with only a few moist crumbs attached, not wet batter. Another common culprit could be too much flour, so ensure you’re measuring your dry ingredients accurately, preferably by weight if possible, or by using the “spoon and level” method rather than scooping directly from the bag.
-
Can I make this Chocolate Orange Loaf Cake gluten-free or dairy-free?
-
While this specific recipe is not written as gluten-free or dairy-free, it can often be adapted! For a gluten-free version, you can typically substitute the all-purpose flour with a 1:1 gluten-free baking blend that contains xanthan gum. For dairy-free, swap out the butter for a plant-based butter alternative and use a dairy-free milk (like almond or oat milk). Ensure your chocolate chips are also dairy-free. Keep in mind that results may vary slightly in texture with these substitutions.
-
Do I have to use fresh orange zest and juice?
-
For the absolute best flavor and aroma in your Chocolate Orange Loaf Cake, fresh orange zest and juice are highly recommended. The essential oils in fresh zest provide an incomparable bright, citrusy punch. While you could technically use bottled orange juice in a pinch, you’ll miss out on the intense fragrance and vibrant flavor that only fresh zest can provide. Trust me, it’s worth the extra minute to zest a fresh orange!
Perfect Chocolate Orange Loaf Cake
A rich, moist, and easy-to-bake Chocolate Orange Loaf Cake featuring deep chocolate flavor beautifully complemented by vibrant fresh orange. Perfect for any occasion, from brunch to afternoon tea.
Ingredients
-
2 cups (250g) all-purpose flour
-
1 ½ cups (300g) granulated sugar
-
2 tsp baking powder
-
½ tsp baking soda
-
½ tsp fine sea salt
-
½ cup (113g) unsalted butter, softened
-
3 large eggs, room temperature
-
1 cup (240ml) whole milk, room temperature
-
1 tsp pure vanilla extract
-
Zest of 2 large oranges
-
1 cup (170g) dark chocolate chips or chunks
-
For Orange Glaze:
-
1 ½ cups (180g) powdered sugar
-
2-3 tbsp fresh orange juice (or 1 tsp orange extract)
-
Optional: Pinch of orange zest for garnish
Instructions
-
Step 1
Preheat oven to 350°F (175°C). Grease and parchment-line a 9×5-inch (23x13cm) loaf pan. Ensure butter, eggs, and milk are at room temperature. Zest 2 oranges; set aside for later use. -
Step 2
In a medium bowl, whisk together flour, granulated sugar, baking powder, baking soda, and salt. Set aside. -
Step 3
In a large mixing bowl, cream softened butter for 1-2 minutes. Gradually add granulated sugar and beat for 3-5 minutes until light and fluffy. -
Step 4
Add eggs one at a time, beating well after each. Stir in vanilla extract and orange zest. -
Step 5
Alternately add dry ingredients and milk to the wet ingredients, starting and ending with dry. Mix on low speed until just combined, being careful not to overmix. -
Step 6
Gently fold in dark chocolate chips or chunks. -
Step 7
Pour batter into the prepared loaf pan and spread evenly. Bake for 55-65 minutes, or until a skewer inserted into the center comes out clean. Tent with foil if browning too quickly. -
Step 8
Cool cake in the pan for 15-20 minutes, then remove to a wire rack to cool completely. -
Step 9
For the glaze: Whisk powdered sugar with 2-3 tablespoons fresh orange juice (or 1 tsp orange extract) until smooth and pourable. -
Step 10
Once the cake is completely cool, drizzle the glaze over the top. Optionally, sprinkle with extra orange zest. Allow glaze to set for 15-30 minutes before slicing and serving. Store in an airtight container for 3-4 days.
Important Information
Nutrition Facts (Per Serving)
It is important to consider this information as approximate and not to use it as definitive health advice.
Allergy Information
Please check ingredients for potential allergens and consult a health professional if in doubt.


Leave a Comment