
Chewy Chocolate Chip Cookies are, without a doubt, a pinnacle of comfort baking, a small disc of pure joy that transcends generations and cultures. Is there anything quite as comforting and inviting as the aroma of freshly baked cookies wafting through your home? I certainly don’t think so. This iconic treat, born from a moment of brilliant improvisation by Ruth Graves Wakefield at the Toll House Inn in the 1930s, quickly cemented its place in culinary history. From its humble beginnings in Massachusetts, it evolved into an American classic, a cherished staple at bake sales, family gatherings, and quiet evenings alike.
Why We Adore This Timeless Treat
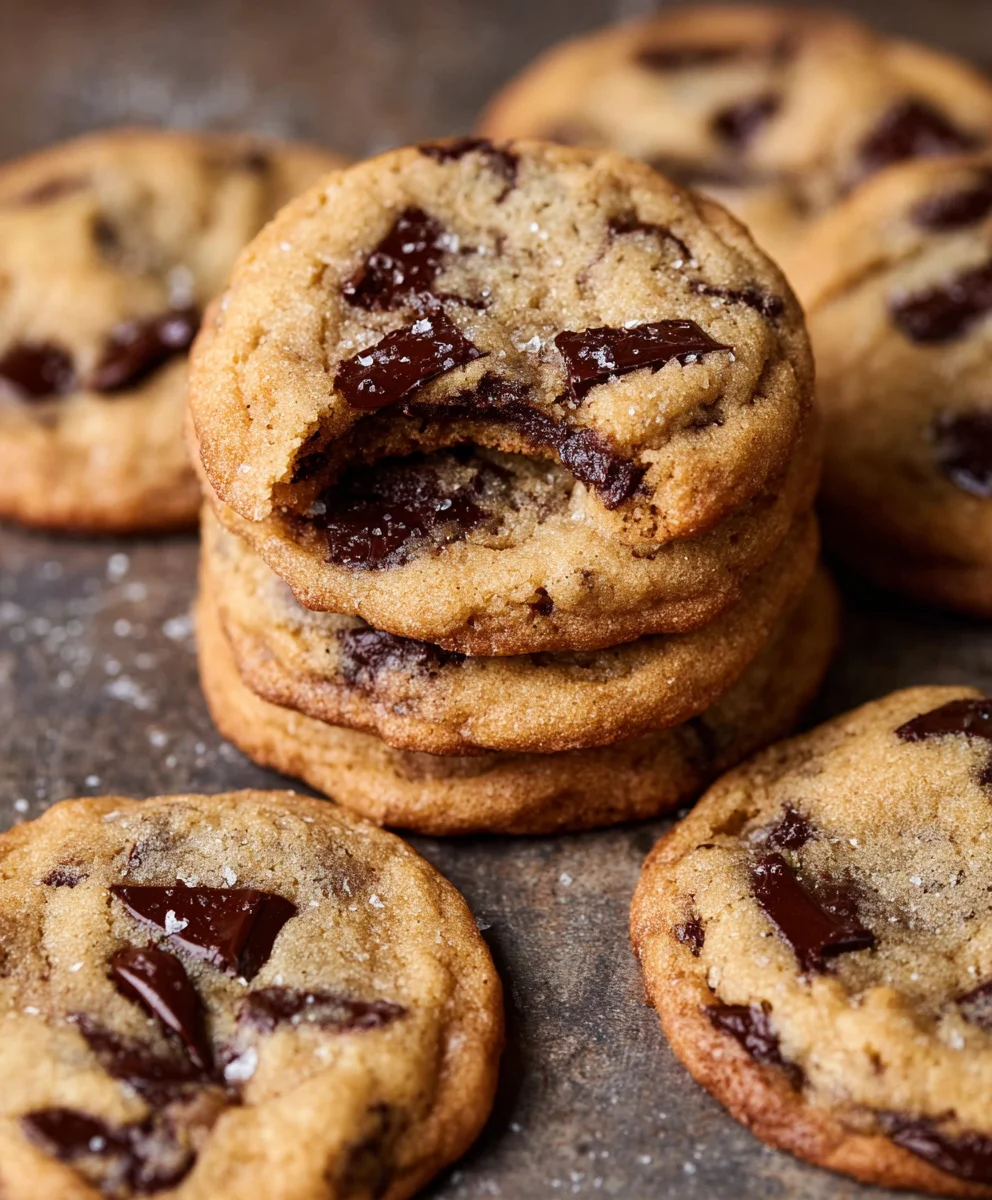
What makes a perfect chocolate chip cookie truly irresistible? For many, it’s that exquisite contrast: a beautifully golden-brown edge yielding to a soft, gooey center, generously studded with melted chocolate chips that remain warm and luscious with every bite. The magic truly lies in the chewiness, that delightful pull as you take a bite, perfectly complemented by the rich, sweet notes of butter and vanilla. It’s not merely a cookie; it’s a nostalgic experience, a bite of pure happiness that brings back cherished memories and creates new ones. Today, I am thrilled to share my ultimate recipe for these beloved Chewy Chocolate Chip Cookies, promising a batch that will exceed all your expectations and become a firm family favorite.

Ingredients:
- 2 ¼ cups (270g) All-Purpose Flour: Make sure to spoon and level your flour, or even better, weigh it with a kitchen scale for precise results. This helps prevent adding too much flour, which can lead to dry, tough cookies rather than the soft, Chewy Chocolate Chip Cookies we’re aiming for.
- 1 teaspoon Baking Soda: A crucial leavening agent that helps the cookies spread and achieve their signature texture. Don’t skip this!
- 1 teaspoon Salt: Balances the sweetness and enhances the overall flavor profile. I always use fine sea salt, but table salt works too.
- 1 cup (2 sticks or 226g) Unsalted Butter: Softened to room temperature. This means it should be pliable but still cool to the touch, not greasy or melted. Room temperature butter creams beautifully with sugar, incorporating air for a lighter, chewier cookie.
- ¾ cup (150g) Granulated Sugar: Provides sweetness and contributes to the cookie’s spread and crisp edges.
- ¾ cup (160g) Packed Light Brown Sugar: This is a secret weapon for truly Chewy Chocolate Chip Cookies! The molasses in brown sugar adds moisture, depth of flavor, and that wonderful chewiness. Make sure it’s packed tightly when measuring.
- 2 Large Eggs: Also at room temperature. Room temperature eggs emulsify better with the butter and sugar mixture, resulting in a smoother, more uniform dough. If you forget to take them out, place them in a bowl of warm water for 5-10 minutes.
- 1 teaspoon Pure Vanilla Extract: Don’t skimp on the vanilla! It adds a warm, aromatic note that is essential to classic chocolate chip cookies. A good quality extract makes a noticeable difference.
- 2 cups (340g) Semi-Sweet Chocolate Chips: Or your favorite blend of chocolate. I love a mix of semi-sweet chips, milk chocolate chunks, and even some chopped dark chocolate for complexity. Good quality chocolate melts beautifully and elevates the entire cookie experience.
- Optional: Flaky Sea Salt for topping: A sprinkle of flaky sea salt on top before baking is a game-changer! It provides a delightful contrast to the sweetness and enhances the chocolate flavor.
Preparing the Dough for Your Perfect Chewy Chocolate Chip Cookies
- Whisk Together Dry Ingredients: In a medium bowl, whisk together the 2 ¼ cups of all-purpose flour, 1 teaspoon of baking soda, and 1 teaspoon of salt. Make sure these are thoroughly combined. Whisking ensures that the leavening agent and salt are evenly distributed throughout the flour, which is important for consistent cookie texture and flavor. Set this bowl aside for now.
- Cream Butter and Sugars: In a large bowl, using an electric mixer (either a stand mixer with the paddle attachment or a hand mixer), beat the 1 cup (2 sticks) of softened unsalted butter on medium speed until creamy, which usually takes about 1-2 minutes. Then, add the ¾ cup of granulated sugar and ¾ cup of packed light brown sugar to the bowl. Continue beating on medium-high speed for about 2-3 minutes, until the mixture is light, fluffy, and noticeably paler in color. This creaming process is absolutely vital for incorporating air into the butter and sugar, which contributes significantly to the light, chewy texture of your ultimate Chewy Chocolate Chip Cookies. Remember to stop and scrape down the sides of the bowl with a rubber spatula halfway through to ensure everything is evenly mixed.
- Add Eggs and Vanilla: Reduce the mixer speed to low. Add one large room temperature egg at a time, beating well after each addition until just combined. Be careful not to overmix here. After the eggs are incorporated, stir in the 1 teaspoon of pure vanilla extract until it’s just blended into the mixture. The dough should look smooth and cohesive at this point.
- Gradually Add Dry Ingredients: With the mixer on low speed, slowly add the whisked dry ingredients to the wet ingredients in two or three additions. Mix just until the flour streaks have almost disappeared. It’s incredibly important not to overmix the dough once the flour is added. Overmixing develops the gluten in the flour too much, leading to tough, dense cookies instead of the soft, Chewy Chocolate Chip Cookies we desire. Stop mixing as soon as the flour is mostly incorporated, even if a few streaks remain.
- Fold in Chocolate Chips: Remove the bowl from the mixer and use your rubber spatula to gently fold in the 2 cups of semi-sweet chocolate chips (and any other chocolate varieties you’re using). Mix just until the chocolate is evenly distributed throughout the dough. Avoid crushing the chips, as this can create a muddy appearance. This gentle folding ensures you get chocolate in every single bite!
Chilling the Dough: The Secret to Truly Chewy Chocolate Chip Cookies
- Chill the Cookie Dough: This step is non-negotiable if you want to achieve the absolute best Chewy Chocolate Chip Cookies. Cover the bowl with plastic wrap and refrigerate the dough for at least 2 hours, but preferably 24-72 hours. While it might be tempting to skip this step, chilling the dough allows the butter to re-solidify, preventing the cookies from spreading too much in the oven. More importantly, it allows the flavors to meld and deepen, and the flour to fully hydrate, which results in a richer taste and an incredibly superior, chewier texture. Trust me, the wait is worth it!
Baking Your Delicious Chewy Chocolate Chip Cookies
- Preheat Oven and Prepare Baking Sheets: When you’re ready to bake, preheat your oven to 375°F (190°C). Line two large baking sheets with parchment paper or silicone baking mats. Parchment paper is excellent because it prevents sticking and promotes even browning, ensuring your cookies slide off easily and don’t spread excessively.
- Scoop and Arrange Dough: Using a 1.5 to 2-tablespoon cookie scoop (or a well-rounded tablespoon), drop mounds of cookie dough onto the prepared baking sheets. Leave about 2 inches of space between each cookie, as they will spread while baking. If you want a slightly more rustic look, you can gently tear the dough ball in half and then gently press the halves back together with the craggy side facing up – this creates those beautiful, desirable crinkly edges. If you’re using flaky sea salt, now is the time to sprinkle a pinch over the top of each dough ball.
- Bake the Cookies: Bake one baking sheet at a time in the preheated oven for 10-12 minutes. The exact baking time will depend on your oven and your desired level of doneness. You’re looking for cookies that have golden brown edges but still look slightly soft and underbaked in the center. The residual heat from the baking sheet will continue to cook the cookies after they’ve been removed from the oven, leading to that perfect soft, chewy interior. For even baking, you might want to rotate the baking sheet halfway through the baking time, especially if your oven has hot spots.
Cooling and Storing Your Chewy Chocolate Chip Cookies
- Cool on Baking Sheet: Once baked, remove the baking sheets from the oven and let the cookies cool on the sheets for about 5-10 minutes. This initial cooling period on the warm baking sheet is crucial because it allows the cookies to set up properly and prevents them from breaking when you try to transfer them. They will continue to firm up and cook slightly during this time, contributing to their lovely chewy texture.
- Transfer to Wire Rack: After 5-10 minutes, carefully transfer the warm, but now more stable, Chewy Chocolate Chip Cookies to a wire cooling rack to cool completely. Cooling on a wire rack allows air to circulate around the entire cookie, preventing the bottoms from becoming soggy and ensuring they cool evenly.
- Enjoy and Store: These warm, gooey Chewy Chocolate Chip Cookies are truly best enjoyed fresh, perhaps with a cold glass of milk. If you happen to have any leftovers (which is rare in my house!), store them in an airtight container at room temperature for up to 3-4 days. To revive their fresh-baked goodness, you can pop them in the microwave for 10-15 seconds before enjoying. You can also freeze the baked cookies in an airtight container or freezer bag for up to 2-3 months. Just thaw them at room temperature or briefly warm them in the oven. For future baking, you can even freeze individual balls of dough on a baking sheet, then transfer them to a freezer bag; bake from frozen, adding a couple of minutes to the baking time, whenever a craving strikes!
Conclusion:
This recipe, my friends, isn’t just another cookie recipe; it’s the recipe you’ve been searching for. It promises pure, unadulterated cookie perfection, a delightful escape into the world of homemade treats that will tantalize your taste buds and warm your soul. From the moment the aroma fills your kitchen to that first, glorious bite, you’ll understand why I’m so passionate about sharing this. These aren’t just any cookies; they are the quintessential
Chewy Chocolate Chip Cookies, designed to deliver that perfect balance of crisp edges and a soft, gooey center every single time. We’ve tackled the common pitfalls and honed the techniques to ensure your baking journey is not only successful but incredibly rewarding. Imagine a cookie that holds its shape beautifully, boasts rich, deep chocolate notes from quality chips, and yet remains incredibly tender, dissolving delightfully on your tongue. That’s exactly what we’ve achieved here with careful measurements and a touch of baking science.
The magic lies in a few simple yet crucial steps, which I’ve meticulously outlined, making what might seem like a daunting task for some an absolute breeze. There’s a secret to achieving that perfect chewiness without sacrificing an ounce of flavor, and I promise, once you master it, you’ll never look back. These cookies aren’t merely dessert; they’re an experience. They’re a comforting hug on a plate, a delightful pick-me-up on a dreary afternoon, and a universally loved treat that brings smiles to faces of all ages. They are the ultimate crowd-pleaser, perfect for unexpected guests, school bake sales, holiday cookie exchanges, or simply a quiet evening indulgence with a good book. Their robust flavor profile and irresistible texture make them stand out in a sea of other recipes.
Beyond the Basic Bite: Creative Ways to Enjoy Your Chewy Chocolate Chip Cookies
Now, let’s talk about making these beauties even more incredible. While they are utterly divine straight from the oven, still warm and slightly melty, don’t stop there! The versatility of these cookies is truly remarkable, allowing for endless customization and serving possibilities:
- Classic Pairing: A tall, cold glass of milk is, of course, the timeless partner for these cookies. The coolness of the milk perfectly complements the rich sweetness of the chocolate, creating a nostalgic and comforting snack.
- Ice Cream Sandwich Heaven: For an elevated dessert experience, allow the cookies to cool completely, then sandwich a generous scoop of your favorite vanilla bean, coffee, or even mint chip ice cream between two. Wrap them individually in plastic wrap and freeze for a few hours for a truly decadent treat that’s perfect for a warm evening or a special occasion.
- Cookie Sundae Base: Crumble a warm cookie over a scoop of your favorite ice cream, drizzle with rich caramel or hot fudge, and top with a generous dollop of whipped cream and a cherry. Instant dessert parlor magic right in your own kitchen!
- Coffee Companion: Enjoy one alongside your morning coffee, a luxurious afternoon tea, or even an evening espresso. The subtle bitterness of the coffee beautifully contrasts the sweet chocolate, creating a sophisticated flavor combination.
Recipe Variations to Explore: Don’t be afraid to experiment and make these cookies uniquely your own!
- Nutty Delights: Stir in a handful of chopped walnuts, pecans, or almonds with your chocolate chips for an added layer of crunch and earthy flavor. Toasting the nuts lightly before adding them can enhance their aroma even further.
- Spice It Up: A pinch of ground cinnamon, a tiny dash of cayenne pepper, or even a hint of cardamom can add unexpected warmth and depth, especially if you’re using dark chocolate chips. These spices awaken the palate and provide a lovely complexity.
- Different Chocolates: Don’t limit yourself to semi-sweet! Experiment with milk chocolate, white chocolate chips, butterscotch chips, or even a mix of dark and milk for a complex and nuanced chocolate profile. Using large chocolate chunks instead of standard chips also creates wonderful, gooey pockets of molten chocolate throughout the cookie.
- Sea Salt Finish: A sprinkle of flaky sea salt (like Maldon) on top of the cookies just before baking enhances the chocolate flavor dramatically, balances the sweetness, and adds a gourmet touch that truly elevates the experience.
So, what are you waiting for? I urge you, absolutely implore you, to set aside an hour or two this week and bring these incredible cookies to life in your own kitchen. You won’t regret it, I promise. There’s something truly special and deeply satisfying about creating something so delicious with your own hands, especially when the result is this consistently perfect and utterly delightful.
Share Your Cookie Journey!
Once you’ve experienced the joy of baking and tasting these incredible Chewy Chocolate Chip Cookies, I would be absolutely thrilled to hear all about it. Did you try a new variation? What was your favorite serving suggestion? Did they become an instant family favorite? Your feedback, your stories, and even your photos mean the world to me and to our growing community of home bakers. Don’t hesitate to share your triumphs, your clever adaptations, or simply tell me how much you loved them in the comments section below. Let’s inspire each other to bake more, share more, and enjoy the simple, sweet pleasures that homemade treats bring to our lives. Happy baking, my friends!
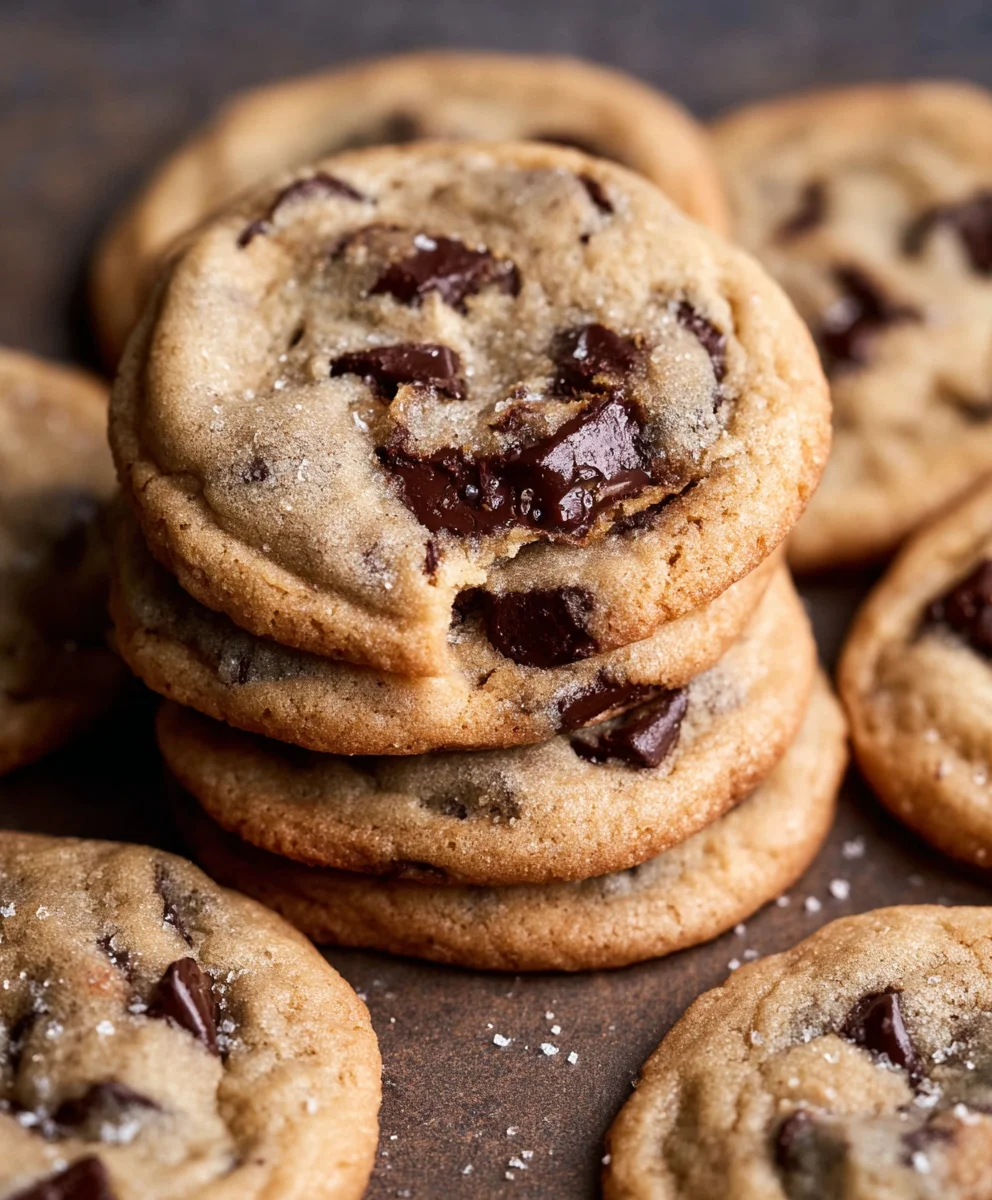
Chewy Chocolate Chip Cookies
Discover the ultimate recipe for Chewy Chocolate Chip Cookies, featuring golden-brown edges, a soft, gooey center, and a delightful pull with every bite. This classic treat delivers pure happiness and nostalgia.
Ingredients
-
1 ¾ cups (219 g) all-purpose flour
-
½ tsp baking powder
-
½ tsp baking soda
-
½ tsp sea salt
-
¾ cup (168 g) salted butter, softened
-
¾ cup (165 g) light brown sugar
-
¼ cup (50 g) granulated sugar
-
2 large egg yolks, at room temperature
-
1 tbsp vanilla bean paste or vanilla extract
-
6 oz (170 g) dark chocolate bars, chopped (60% cacao)
-
Flaky sea salt, for sprinkling (optional)
Instructions
-
Step 1
In a medium bowl, whisk together the all-purpose flour, baking powder, baking soda, and sea salt. Set aside. -
Step 2
In a large bowl, using an electric mixer, beat the softened salted butter on medium speed until creamy (1-2 minutes). Add granulated sugar and packed light brown sugar; beat on medium-high speed for 2-3 minutes until light, fluffy, and paler. Scrape down the bowl. -
Step 3
Reduce mixer speed to low. Add one egg yolk at a time, beating well after each. Stir in the vanilla bean paste or extract until just blended. -
Step 4
With the mixer on low speed, slowly add the whisked dry ingredients to the wet in 2-3 additions. Mix just until flour streaks have almost disappeared. Do not overmix. -
Step 5
Remove the bowl from the mixer. Use a rubber spatula to gently fold in the chopped dark chocolate until evenly distributed throughout the dough. -
Step 6
Cover the bowl with plastic wrap and refrigerate the dough for at least 2 hours, or preferably 24-72 hours. This step is crucial for flavor development and a chewier texture. -
Step 7
When ready to bake, preheat your oven to 375°F (190°C). Line two large baking sheets with parchment paper or silicone baking mats. -
Step 8
Using a 1.5 to 2-tablespoon cookie scoop, drop mounds of dough onto the prepared baking sheets, leaving about 2 inches between each. Optionally, sprinkle a pinch of flaky sea salt on top of each dough ball. -
Step 9
Bake one baking sheet at a time for 10-12 minutes. Cookies should have golden brown edges but still look slightly soft and underbaked in the center. Rotate baking sheet halfway through if needed for even baking. -
Step 10
Remove from oven and let cookies cool on the baking sheets for 5-10 minutes. Then, carefully transfer them to a wire cooling rack to cool completely. -
Step 11
Enjoy fresh. Store leftovers in an airtight container at room temperature for up to 3-4 days. Warm briefly in the microwave to revive freshness. Baked cookies can be frozen for 2-3 months.
Important Information
Nutrition Facts (Per Serving)
It is important to consider this information as approximate and not to use it as definitive health advice.
Allergy Information
Please check ingredients for potential allergens and consult a health professional if in doubt.


Leave a Comment