
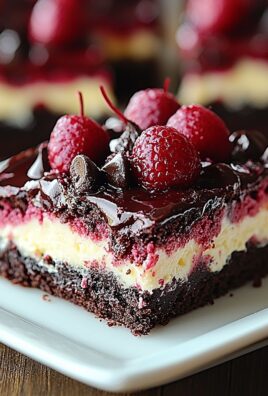
Oreo Cookies Bakery Style: Prepare to be amazed! Imagine biting into a perfectly soft, chewy cookie, bursting with rich chocolate flavor and studded with chunks of your favorite childhood treat. That’s exactly what you’ll get with this incredible recipe. Forget the store-bought version; we’re taking Oreo cookies to a whole new level of deliciousness, transforming them into a bakery-worthy masterpiece you can easily create at home.
While the classic Oreo cookie has been a beloved snack for over a century, its humble beginnings belie its global popularity. First introduced in 1912, it quickly became an American icon, and its appeal has only grown stronger over the years. But why settle for just eating Oreos when you can bake them into something even more extraordinary?
People adore these Oreo Cookies Bakery Style because they offer the perfect combination of textures and flavors. The soft, slightly gooey cookie base contrasts beautifully with the satisfying crunch of the Oreo pieces. The deep chocolate flavor is perfectly balanced by the sweet, creamy filling of the Oreos. Plus, they are surprisingly easy to make, requiring minimal ingredients and effort. Whether you’re a seasoned baker or a complete novice, you’ll be able to whip up a batch of these irresistible cookies in no time. Get ready to impress your friends and family with these decadent treats!

Ingredients:
- For the Oreo Cookies:
- 2 1/4 cups (270g) all-purpose flour
- 1 cup (100g) unsweetened cocoa powder, Dutch-processed preferred
- 1 teaspoon baking soda
- 1 teaspoon baking powder
- 1/2 teaspoon salt
- 1 cup (2 sticks or 226g) unsalted butter, softened
- 1 3/4 cups (350g) granulated sugar
- 2 large eggs
- 2 teaspoons vanilla extract
- For the Cream Filling:
- 1 cup (2 sticks or 226g) unsalted butter, softened
- 4 cups (480g) powdered sugar
- 2 tablespoons heavy cream
- 1 teaspoon vanilla extract
- Pinch of salt
Preparing the Oreo Cookie Dough
- Combine Dry Ingredients: In a medium bowl, whisk together the flour, cocoa powder, baking soda, baking powder, and salt. Make sure there are no lumps of cocoa powder remaining. This ensures a smooth and even cookie texture.
- Cream Butter and Sugar: In a large bowl (or the bowl of a stand mixer), cream together the softened butter and granulated sugar until light and fluffy. This usually takes about 3-5 minutes on medium speed. Scrape down the sides of the bowl occasionally to ensure everything is evenly mixed. The mixture should be noticeably lighter in color and texture.
- Add Eggs and Vanilla: Beat in the eggs one at a time, mixing well after each addition. Then, stir in the vanilla extract. Make sure the eggs are fully incorporated before adding the vanilla.
- Gradually Add Dry Ingredients: Gradually add the dry ingredients to the wet ingredients, mixing on low speed until just combined. Be careful not to overmix the dough, as this can result in tough cookies. Mix until you no longer see streaks of flour.
- Chill the Dough: Divide the dough in half, flatten each half into a disc, wrap tightly in plastic wrap, and refrigerate for at least 1 hour, or preferably 2 hours. Chilling the dough is crucial because it prevents the cookies from spreading too much during baking and allows the flavors to meld together. You can even chill the dough overnight for even better results.
Baking the Oreo Cookies
- Preheat Oven and Prepare Baking Sheets: Preheat your oven to 350°F (175°C). Line baking sheets with parchment paper or silicone baking mats. Parchment paper prevents the cookies from sticking and makes cleanup a breeze.
- Roll Out the Dough: On a lightly floured surface, roll out one disc of dough to about 1/8-inch thickness. Keep the other disc of dough refrigerated while you work. Rolling the dough too thin will result in brittle cookies, while rolling it too thick will result in cookies that are too soft.
- Cut Out Cookies: Use a 2-inch round cookie cutter to cut out cookies. You can also use a different shape if you prefer. Reroll the scraps and cut out more cookies until all the dough is used.
- Bake the Cookies: Place the cookies on the prepared baking sheets, leaving about 1 inch of space between each cookie. Bake for 8-10 minutes, or until the edges are set. The cookies will still look slightly soft in the center, but they will firm up as they cool.
- Cool the Cookies: Let the cookies cool on the baking sheets for a few minutes before transferring them to a wire rack to cool completely. Cooling the cookies completely is essential before adding the filling, as the filling will melt if the cookies are still warm.
Preparing the Cream Filling
- Cream Butter: In a large bowl (or the bowl of a stand mixer), cream the softened butter until smooth and fluffy. This usually takes about 2-3 minutes on medium speed. Make sure the butter is at room temperature for the best results.
- Add Powdered Sugar: Gradually add the powdered sugar, one cup at a time, mixing on low speed until combined. Be careful not to add the powdered sugar too quickly, as it will create a cloud of dust.
- Add Heavy Cream, Vanilla, and Salt: Add the heavy cream, vanilla extract, and salt, and mix on medium speed until smooth and creamy. Adjust the amount of heavy cream to achieve your desired consistency. If the filling is too thick, add a little more heavy cream. If the filling is too thin, add a little more powdered sugar.
Assembling the Oreo Cookies
- Pipe or Spread Filling: Once the cookies are completely cool, transfer the cream filling to a piping bag fitted with a large round tip (optional). You can also use a spoon or knife to spread the filling onto the cookies.
- Sandwich the Cookies: Pipe or spread a generous amount of filling onto the flat side of one cookie, then top with another cookie, flat side down. Gently press the cookies together to distribute the filling evenly.
- Chill the Assembled Cookies (Optional): For best results, chill the assembled cookies in the refrigerator for at least 30 minutes before serving. This will help the filling to firm up and prevent it from squeezing out when you bite into the cookies.
- Serve and Enjoy: Serve the Oreo cookies and enjoy! Store any leftover cookies in an airtight container at room temperature for up to 3 days.
Tips for Perfect Oreo Cookies:
- Use Dutch-processed cocoa powder: Dutch-processed cocoa powder has a smoother, less acidic flavor than natural cocoa powder, which is ideal for Oreo cookies.
- Don’t overmix the dough: Overmixing the dough can result in tough cookies. Mix until just combined.
- Chill the dough: Chilling the dough is crucial for preventing the cookies from spreading too much during baking.
- Use a cookie scoop: Using a cookie scoop will ensure that all of your cookies are the same size and shape.
- Cool the cookies completely before adding the filling: Adding the filling to warm cookies will cause it to melt.
- Adjust the amount of heavy cream in the filling: Adjust the amount of heavy cream to achieve your desired consistency.
Variations:
- Mint Oreo Cookies: Add 1/2 teaspoon of peppermint extract to the cream filling.
- Peanut Butter Oreo Cookies: Add 1/2 cup of peanut butter to the cream filling.
- Chocolate Oreo Cookies: Add 1/4 cup of melted chocolate to the cream filling.
- Golden Oreo Cookies: Substitute vanilla extract for the cocoa powder in the cookie dough.
Troubleshooting:
- Cookies are spreading too much: Make sure you are using the correct amount of flour and that you are chilling the dough for at least 1 hour.
- Cookies are too dry: Make sure you are not overbaking the cookies.
- Filling is too thin: Add more powdered sugar to the filling.
- Filling is too thick: Add more heavy cream to the filling.

Conclusion:
And there you have it! These Oreo Cookies Bakery Style are so much more than just a copycat recipe; they’re an experience. From the satisfying snap of the perfectly baked cookie to the creamy, dreamy filling, every bite is a little piece of heaven. I truly believe this recipe is a must-try for any baking enthusiast, whether you’re a seasoned pro or just starting out. The process is surprisingly straightforward, and the results are simply phenomenal. Forget store-bought once you taste these homemade beauties, you’ll never go back!
But why is this recipe a must-try, you ask? Well, beyond the incredible flavor and texture, it’s about the joy of creating something special from scratch. It’s about knowing exactly what ingredients are going into your treats and sharing that homemade goodness with your loved ones. Plus, let’s be honest, who can resist a freshly baked Oreo cookie? The aroma alone is enough to make anyone’s day a little brighter.
Now, let’s talk serving suggestions and variations! These cookies are absolutely divine on their own, perfect with a tall glass of cold milk or a steaming cup of coffee. But don’t be afraid to get creative! Imagine crumbling them over ice cream for an extra decadent sundae, or using them as a base for a show-stopping cheesecake. You could even crush them up and mix them into your favorite milkshake for an Oreo-infused delight.
For variations, the possibilities are endless! Try adding a few drops of peppermint extract to the filling for a festive holiday treat. Or, experiment with different extracts like vanilla, almond, or even coffee to create your own unique flavor combinations. You could also add a touch of food coloring to the filling for a fun and colorful twist. For a truly indulgent experience, dip the finished cookies in melted chocolate and sprinkle with sea salt. The salty-sweet combination is simply irresistible!
Another fun variation is to play around with the filling. Instead of the classic vanilla cream, try using a chocolate ganache, peanut butter frosting, or even a salted caramel filling. The sky’s the limit! Don’t be afraid to experiment and find your own perfect Oreo cookie creation.
I’m so excited for you to try this recipe and experience the magic of homemade Oreo Cookies Bakery Style for yourself. I know you’ll love them as much as I do! The key is to follow the instructions carefully and don’t be afraid to have fun with it. Baking should be a joyful experience, so put on some music, gather your ingredients, and get ready to create some delicious memories.
And now for the most important part: I want to hear about your experience! Did you try the recipe? What variations did you make? How did your cookies turn out? Please share your photos and stories in the comments below. I can’t wait to see your creations and hear all about your baking adventures. Happy baking! I’m confident that you will love this recipe and it will become a staple in your baking repertoire. These cookies are perfect for any occasion, from a simple afternoon treat to a special celebration. So go ahead, give it a try, and let me know what you think!
Oreo Cookies Bakery Style: The Ultimate Guide to Homemade Perfection
Homemade Oreo cookies with a rich, creamy filling. These classic cookies are perfect for satisfying your sweet tooth!
Ingredients
- 2 1/4 cups (270g) all-purpose flour
- 1 cup (100g) unsweetened cocoa powder, Dutch-processed preferred
- 1 teaspoon baking soda
- 1 teaspoon baking powder
- 1/2 teaspoon salt
- 1 cup (2 sticks or 226g) unsalted butter, softened
- 1 3/4 cups (350g) granulated sugar
- 2 large eggs
- 2 teaspoons vanilla extract
- 1 cup (2 sticks or 226g) unsalted butter, softened
- 4 cups (480g) powdered sugar
- 2 tablespoons heavy cream
- 1 teaspoon vanilla extract
- Pinch of salt
Instructions
- In a medium bowl, whisk together the flour, cocoa powder, baking soda, baking powder, and salt. Make sure there are no lumps of cocoa powder remaining. This ensures a smooth and even cookie texture.
- In a large bowl (or the bowl of a stand mixer), cream together the softened butter and granulated sugar until light and fluffy. This usually takes about 3-5 minutes on medium speed. Scrape down the sides of the bowl occasionally to ensure everything is evenly mixed. The mixture should be noticeably lighter in color and texture.
- Beat in the eggs one at a time, mixing well after each addition. Then, stir in the vanilla extract. Make sure the eggs are fully incorporated before adding the vanilla.
- Gradually add the dry ingredients to the wet ingredients, mixing on low speed until just combined. Be careful not to overmix the dough, as this can result in tough cookies. Mix until you no longer see streaks of flour.
- Divide the dough in half, flatten each half into a disc, wrap tightly in plastic wrap, and refrigerate for at least 1 hour, or preferably 2 hours. Chilling the dough is crucial because it prevents the cookies from spreading too much during baking and allows the flavors to meld together. You can even chill the dough overnight for even better results.
- Preheat your oven to 350°F (175°C). Line baking sheets with parchment paper or silicone baking mats. Parchment paper prevents the cookies from sticking and makes cleanup a breeze.
- On a lightly floured surface, roll out one disc of dough to about 1/8-inch thickness. Keep the other disc of dough refrigerated while you work. Rolling the dough too thin will result in brittle cookies, while rolling it too thick will result in cookies that are too soft.
- Use a 2-inch round cookie cutter to cut out cookies. You can also use a different shape if you prefer. Reroll the scraps and cut out more cookies until all the dough is used.
- Place the cookies on the prepared baking sheets, leaving about 1 inch of space between each cookie. Bake for 8-10 minutes, or until the edges are set. The cookies will still look slightly soft in the center, but they will firm up as they cool.
- Let the cookies cool on the baking sheets for a few minutes before transferring them to a wire rack to cool completely. Cooling the cookies completely is essential before adding the filling, as the filling will melt if the cookies are still warm.
- In a large bowl (or the bowl of a stand mixer), cream the softened butter until smooth and fluffy. This usually takes about 2-3 minutes on medium speed. Make sure the butter is at room temperature for the best results.
- Gradually add the powdered sugar, one cup at a time, mixing on low speed until combined. Be careful not to add the powdered sugar too quickly, as it will create a cloud of dust.
- Add the heavy cream, vanilla extract, and salt, and mix on medium speed until smooth and creamy. Adjust the amount of heavy cream to achieve your desired consistency. If the filling is too thick, add a little more heavy cream. If the filling is too thin, add a little more powdered sugar.
- Once the cookies are completely cool, transfer the cream filling to a piping bag fitted with a large round tip (optional). You can also use a spoon or knife to spread the filling onto the cookies.
- Pipe or spread a generous amount of filling onto the flat side of one cookie, then top with another cookie, flat side down. Gently press the cookies together to distribute the filling evenly.
- For best results, chill the assembled cookies in the refrigerator for at least 30 minutes before serving. This will help the filling to firm up and prevent it from squeezing out when you bite into the cookies.
- Serve the Oreo cookies and enjoy! Store any leftover cookies in an airtight container at room temperature for up to 3 days.
Notes
- Use Dutch-processed cocoa powder for a smoother, less acidic flavor.
- Don’t overmix the dough to avoid tough cookies.
- Chilling the dough is crucial for preventing spreading.
- Cool the cookies completely before adding the filling.
- Adjust the amount of heavy cream in the filling to achieve your desired consistency.


Leave a Comment