
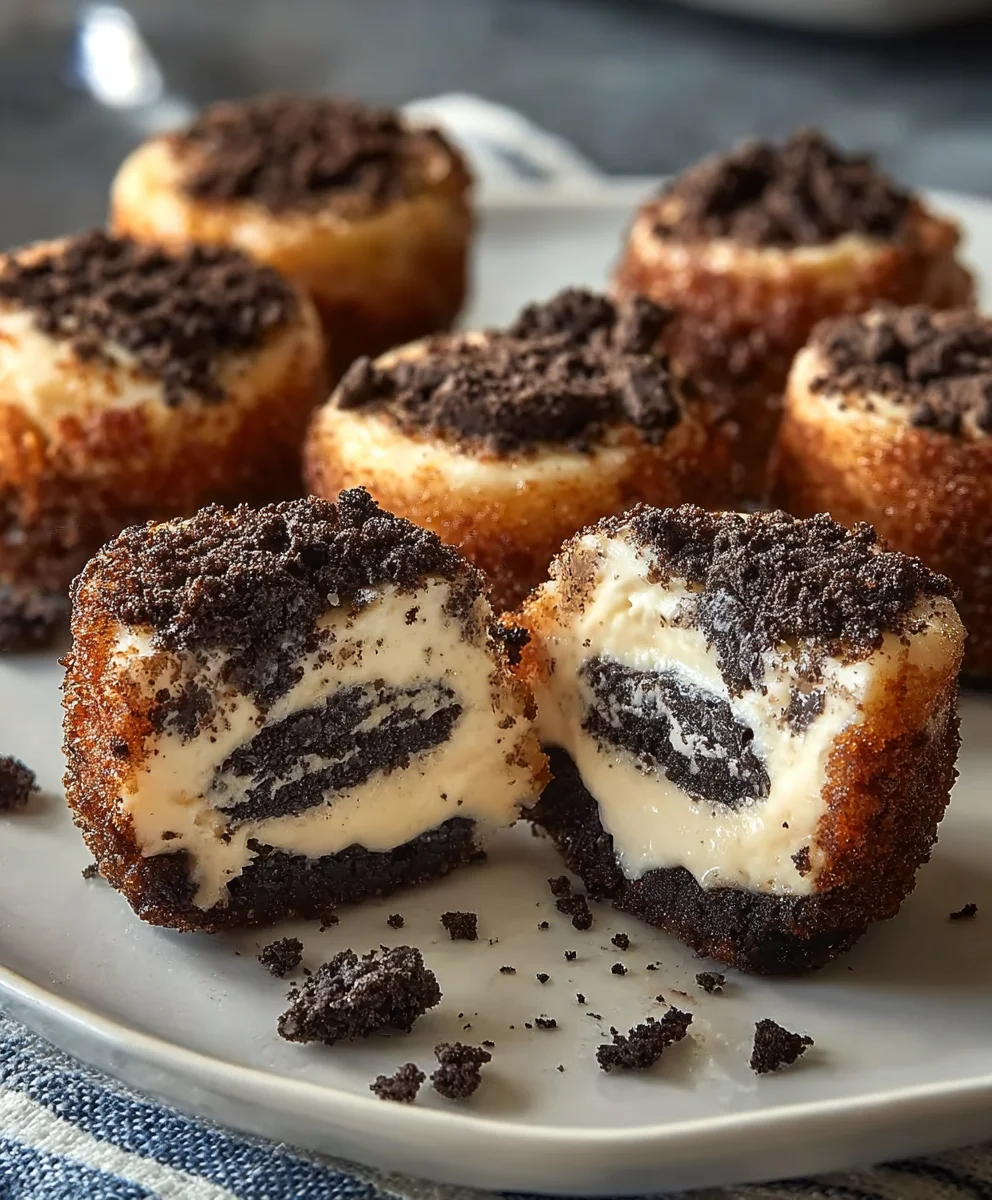
Oreo Cheesecake Bites are not just a dessert; they are a miniature celebration in every single morsel. I am absolutely thrilled to share a recipe that transforms two beloved classics – the iconic Oreo cookie and the decadent cheesecake – into an irresistible, bite-sized treat. While the exact origin of cheesecake dates back to ancient Greece, with its modern, creamy form developing in Europe and popularized in America, the Oreo cookie, a true American legend since 1912, has become a staple in countless dessert innovations. Combining it with cheesecake was simply destined to be a culinary triumph, offering a delightful twist on a timeless favorite.
Why Everyone Falls for These Oreo Cheesecake Bites
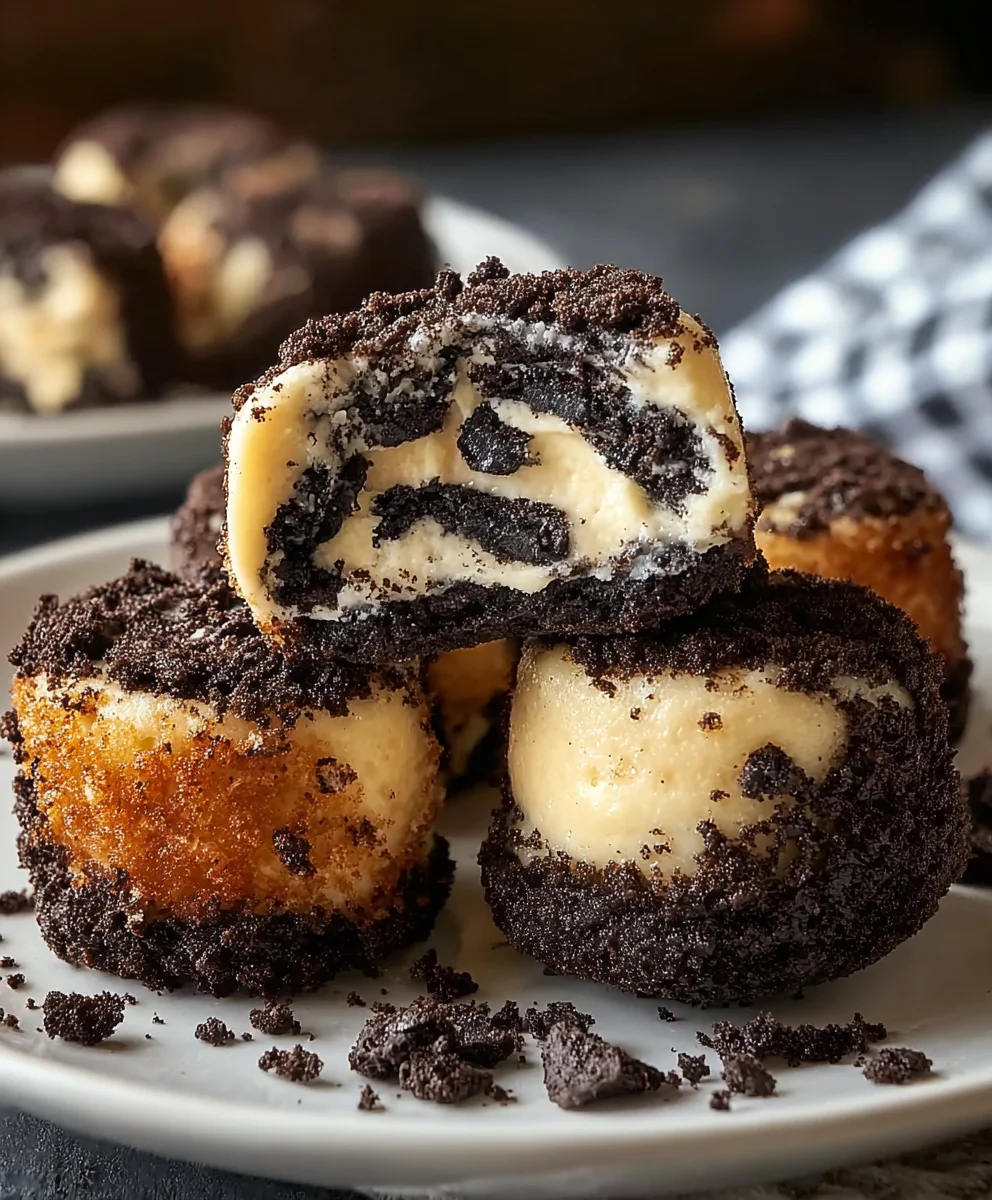
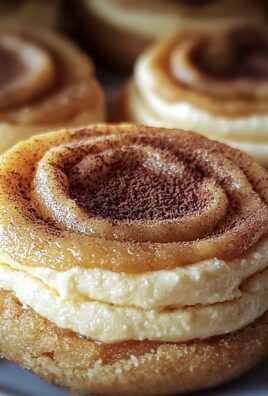
What makes these delightful creations so universally adored? It’s the perfect harmony of textures and flavors: the rich, tangy creaminess of the cheesecake base, the satisfying crunch of the Oreo cookie crust, and the delightful scattered pieces of chocolatey goodness throughout. These Oreo Cheesecake Bites offer unparalleled convenience, making them ideal for gatherings, potlucks, or simply as a perfect individual indulgence without the fuss of slicing a whole cake. Prepare to fall in love with their ease of preparation and their undeniable charm, proving that sometimes, the best things truly do come in small packages.

Ingredients:
- For the Oreo Crust:
- 1 ½ cups (approximately 18-20 cookies) Oreo cookie crumbs (from whole Oreos, filling included)
- ¼ cup (4 tablespoons) unsalted butter, melted
- For the Oreo Cheesecake Filling:
- 24 ounces (three 8-ounce packages) full-fat cream cheese, softened to room temperature
- ¾ cup granulated sugar
- 2 large eggs, at room temperature
- 1 teaspoon pure vanilla extract
- ¼ cup full-fat sour cream, at room temperature
- 1 cup roughly chopped Oreo cookies (about 10-12 cookies, no need to remove filling)
- For Optional Topping/Garnish:
- ½ cup heavy cream
- 1 tablespoon powdered sugar
- ½ teaspoon pure vanilla extract
- Additional crushed Oreo cookies or mini Oreo cookies, for decorating
- Chocolate syrup or ganache, for drizzling
Equipment You’ll Need:
Before diving into making these delectable Oreo Cheesecake Bites, it’s always a good idea to gather your equipment. This ensures a smooth and enjoyable baking process. You’ll need:
- A 9×13-inch baking pan (a standard rectangular pan is perfect for cutting into bites)
- Parchment paper
- A food processor (for crushing Oreos, though a zip-top bag and rolling pin works too!)
- Large mixing bowls (at least two)
- An electric mixer (handheld or stand mixer is ideal for creaming the cheese)
- Measuring cups and spoons
- A rubber spatula
- A smaller oven-safe pan or baking dish (if you plan to use a water bath, highly recommended for cheesecakes)
- Aluminum foil (for the water bath)
- A sharp knife for cutting the bites
- A wire rack for cooling
Preparing the Oreo Crust:
The foundation of any great cheesecake, especially these irresistible Oreo Cheesecake Bites, is a perfectly delicious and sturdy crust. We’re going to create a rich, buttery Oreo base that will complement the creamy filling beautifully.
- Preheat Your Oven and Prepare the Pan: First things first, let’s get that oven ready. Preheat your oven to 350°F (175°C). Then, prepare your 9×13-inch baking pan. Line the pan with parchment paper, making sure to leave an overhang on the sides. This overhang acts as “handles” later, making it incredibly easy to lift the entire baked cheesecake out of the pan for cutting. A light spray with non-stick cooking spray before placing the parchment can help it stay put.
- Crush the Oreo Cookies: Now for the star of the show – the Oreos! Take your 1 ½ cups of whole Oreo cookies (about 18-20 cookies, remember to include the cream filling, as it adds flavor and helps bind the crust). If you have a food processor, this step is a breeze. Pulse the cookies until they resemble fine, even crumbs. Avoid over-processing to prevent them from turning into a paste. If you don’t have a food processor, no problem! Place the cookies in a large zip-top bag, seal it, and crush them with a rolling pin or the bottom of a heavy pan until you achieve those fine crumbs.
- Combine with Melted Butter: In a medium-sized mixing bowl, pour your finely crushed Oreo crumbs. Next, drizzle in the ¼ cup (4 tablespoons) of melted unsalted butter. Using a fork or your hands, mix the crumbs and butter together until all the Oreo crumbs are thoroughly moistened. The mixture should clump together when pressed. This buttery goodness is what gives our Oreo Cheesecake Bites their sturdy and flavorful base.
- Press into the Pan: Transfer the buttery Oreo crumb mixture into your prepared 9×13-inch baking pan. Using the bottom of a flat-bottomed glass, a measuring cup, or your fingers, press the mixture firmly and evenly across the bottom of the pan. Make sure it’s a compact layer, especially in the corners, to ensure a solid crust that won’t crumble when cut.
- Par-Bake the Crust (Optional but Recommended): For an extra crisp crust, you can par-bake it for 8-10 minutes. This helps set the crust and prevents it from becoming soggy. After par-baking, remove the pan from the oven and set it aside to cool slightly while you prepare the filling. If you’re short on time, you can skip this step, but I find it makes a difference in the final texture of these delicious Oreo Cheesecake Bites. Reduce oven temperature to 325°F (160°C) if using a water bath for the cheesecake filling.
Crafting the Creamy Oreo Cheesecake Filling:
This is where the magic truly happens! A rich, velvety smooth cheesecake filling, studded with chunks of everyone’s favorite cookie, is what makes these Oreo Cheesecake Bites absolutely irresistible. Pay close attention to the details here for a flawless texture.
- Prepare Room Temperature Ingredients: This step is critical for a smooth, lump-free cheesecake. Ensure your 24 ounces of full-fat cream cheese, 2 large eggs, and ¼ cup of full-fat sour cream are all at room temperature. This means taking them out of the refrigerator at least an hour before you plan to mix. Warm ingredients emulsify better, creating a wonderfully creamy texture.
- Beat the Cream Cheese: In a large mixing bowl, using an electric mixer (either a stand mixer with the paddle attachment or a handheld mixer), beat the softened cream cheese on medium speed for about 2-3 minutes until it is completely smooth and free of any lumps. Scrape down the sides of the bowl frequently to ensure everything gets incorporated. This initial beating is crucial for the final texture of your Oreo Cheesecake Bites.
- Add Sugar: Gradually add the ¾ cup of granulated sugar to the beaten cream cheese, continuing to mix on low speed. Once all the sugar is added, increase the speed to medium and beat for another 1-2 minutes, until the mixture is light and fluffy. Scrape the bowl again.
- Incorporate Eggs and Vanilla: Add the eggs, one at a time, mixing on low speed just until each egg is incorporated before adding the next. Be careful not to overmix at this stage! Overmixing after adding eggs can incorporate too much air, which can lead to cracks in your cheesecake. Once the eggs are just combined, stir in the 1 teaspoon of pure vanilla extract.
- Fold in Sour Cream: Gently fold in the ¼ cup of room temperature sour cream using a rubber spatula. Mix just until combined. Sour cream adds a lovely tang and extra creaminess to the cheesecake, making these Oreo Cheesecake Bites even more luxurious.
- Gently Fold in Chopped Oreos: Finally, take your 1 cup of roughly chopped Oreo cookies. Gently fold these cookie pieces into the cheesecake batter with your spatula. You want them distributed throughout the mixture, creating delicious bursts of Oreo in every bite.
- Pour Filling Over Crust: Carefully pour the creamy Oreo cheesecake filling over your cooled, par-baked Oreo crust in the prepared pan. Use your spatula to gently spread the filling evenly across the crust, ensuring it’s level.
Baking Your Perfect Oreo Cheesecake Bites:
Baking a cheesecake can seem daunting, but with a few key steps, you’ll achieve a perfectly set, crack-free dessert. I highly recommend using a water bath for these Oreo Cheesecake Bites to ensure a smooth, even bake.
- Prepare for the Water Bath (Highly Recommended): If you’re using a water bath, which I absolutely recommend for a creamy, crack-free cheesecake, wrap the outside of your 9×13-inch baking pan with two layers of heavy-duty aluminum foil. Make sure the foil extends all the way up the sides of the pan to prevent any water from seeping in. Place the foil-wrapped pan into a larger oven-safe pan or baking dish.
- Fill with Hot Water: Carefully pour hot water into the larger pan, surrounding the cheesecake pan. The water should come up about halfway to two-thirds of the way up the sides of the cheesecake pan. Be gentle to avoid splashing water into the cheesecake batter. The steam from the water bath creates a moist environment in the oven, preventing the cheesecake from drying out and cracking, and helps it bake more evenly.
- Bake the Cheesecake: Carefully transfer the entire water bath setup (the large pan with the cheesecake pan inside) into your preheated oven. Bake for approximately 45-60 minutes. The baking time can vary depending on your oven, so keep an eye on it.
- Check for Doneness: The cheesecake is done when the edges are set, but the center still has a slight jiggle (like firm Jell-O). It should not be watery or liquidy in the center. If it still looks very wet, continue baking in 5-minute increments. Avoid opening the oven door too frequently, as sudden temperature changes can cause cracks.
- Cooling Process: Once baked, turn off the oven, but leave the cheesecake in the oven with the door ajar for about 1 hour. This slow cooling prevents drastic temperature changes that can lead to cracks. After an hour, carefully remove the cheesecake from the water bath (remove the foil first if using it) and place it on a wire rack to cool completely at room temperature for another 1-2 hours.
Chilling for Optimal Texture:
Patience is a virtue, especially when it comes to cheesecake! Proper chilling is absolutely essential for the texture and stability of your Oreo Cheesecake Bites.
- Refrigerate Thoroughly: Once your cheesecake has cooled to room temperature, cover the pan loosely with plastic wrap. Transfer the cheesecake to the refrigerator and chill for a minimum of 4 hours, but preferably overnight. This extended chilling time allows the cheesecake to firm up completely, ensuring clean cuts and that perfect dense, creamy cheesecake texture we all crave. Trust me, it’s worth the wait for these amazing Oreo Cheesecake Bites!
Finishing Touches and Serving Your Oreo Cheesecake Bites:
Now for the fun part – turning your beautifully baked cheesecake into individual, shareable Oreo Cheesecake Bites! This is where you can get creative with your presentation.
- Lift and Slice: Once fully chilled, use the parchment paper overhangs to carefully lift the entire cheesecake out of the baking pan and onto a cutting board.
- Clean Slices: For perfectly clean slices, run a long, sharp knife under hot water, wipe it dry, and then make your first cut. Repeat this process – heating and wiping the knife clean – before each subsequent cut. This prevents the cheesecake from sticking to the knife and creates beautifully neat Oreo Cheesecake Bites.
- Cut into Bites: You can cut the cheesecake into whatever size you prefer, but a typical 9×13-inch pan yields about 24-36 bites depending on your desired portion size. I usually aim for a 4×6 or 5×7 grid.
- Prepare Optional Topping: If you’re adding whipped cream, in a cold mixing bowl, combine ½ cup heavy cream, 1 tablespoon powdered sugar, and ½ teaspoon pure vanilla extract. Beat with an electric mixer on high speed until stiff peaks form.
- Garnish and Serve: Arrange your beautiful Oreo Cheesecake Bites on a serving platter. You can pipe a dollop of fresh whipped cream onto each bite, sprinkle with extra crushed Oreos, or drizzle with chocolate syrup or ganache. For an extra festive touch, place a mini Oreo cookie on top of each whipped cream dollop. Serve immediately and watch them disappear!
Expert Tips for Flawless Oreo Cheesecake Bites:
Making cheesecake can be a delicate art, but with these tips, your Oreo Cheesecake Bites will turn out perfect every single time, impressing everyone who tries them!
-
Room Temperature Ingredients are Non-Negotiable:
I cannot stress this enough. Using softened cream cheese, eggs, and sour cream is the single most important factor for achieving a smooth, lump-free cheesecake batter. Cold ingredients will not blend properly, leaving you with a chunky filling. Plan ahead and take them out of the fridge at least an hour or two before you start mixing.
-
Do Not Overmix the Batter:
Once you’ve added the eggs, mix on the lowest speed possible and only until just combined. Overmixing incorporates too much air into the batter, which expands during baking and then collapses during cooling, leading to unsightly cracks in your beautiful Oreo Cheesecake Bites. We want creamy, not airy.
-
The Magic of a Water Bath:
While optional, a water bath (bain-marie) is your best friend for cheesecake. It creates a moist, gentle baking environment, ensuring even cooking and preventing the top of the cheesecake from cracking. It also contributes to that incredibly smooth, melt-in-your-mouth texture that defines a perfect cheesecake. Don’t skip wrapping your pan in foil thoroughly to avoid water seepage!
-
Slow Cooling Prevents Cracks:
Resist the urge to pull your cheesecake out of the oven immediately after baking. Allowing it to cool gradually in the oven with the door ajar significantly reduces the chances of cracking. Sudden temperature changes are a cheesecake’s worst enemy.
-
Chilling is Key:
I know it’s hard to wait, but chilling your Oreo Cheesecake Bites for at least 4 hours, and ideally overnight, is crucial. This time allows the cheesecake to fully set and firm up, ensuring perfect slices and the best possible texture and flavor. Rushing this step will result in a soft, messy cheesecake.
-
Clean Cuts Every Time:
For those picture-perfect squares, always use a sharp knife and clean it after each cut. Running the knife under hot water and wiping it dry helps it glide through the cheesecake smoothly without sticking or dragging. This small step makes a huge difference in the presentation of your Oreo Cheesecake Bites.
-
Storage:
These delightful Oreo Cheesecake Bites should be stored in an airtight container in the refrigerator for up to 5-7 days. They also freeze beautifully for up to 1 month. To freeze, arrange the cooled bites on a baking sheet and freeze until firm, then transfer to a freezer-safe bag or container, separated by parchment paper.
-
Vary Your Oreos:
While classic Oreos are fantastic, feel free to experiment with different Oreo flavors! Golden Oreos, mint Oreos, or even seasonal varieties can add a unique twist to your Oreo Cheesecake Bites. Just ensure the amount of crumbs and chopped cookies remains consistent.
-
Don’t Be Afraid of a Little Jiggle:
When you take your cheesecake out of the oven, a slight jiggle in the very center is perfectly normal. It will continue to set as it cools. Overbaking to get rid of the jiggle will result in a dry, cracked cheesecake.
Conclusion:
And there you have it, my friends! We’ve reached the sweet finale of our culinary adventure, and I truly hope you’re feeling as inspired as I am to whip up a batch of these extraordinary treats. These aren’t just any dessert; they are a revelation, a perfect symphony of creamy, dreamy cheesecake bliss perfectly complemented by the iconic crunch and chocolatey goodness of America’s favorite cookie. I’ve tried countless dessert recipes over the years, and I can confidently say that this one stands out not only for its absolutely divine flavor profile but also for its remarkable simplicity. Imagine a dessert that tastes like it took hours of complex work, yet comes together with minimal effort and no baking required! That’s the magic we’re talking about here. Whether you’re a seasoned baker looking for a quick win or a complete novice eager to impress, this recipe is your secret weapon. It’s the kind of dessert that brings smiles, ignites conversations, and effortlessly becomes the star of any gathering. I firmly believe that once you taste them, these will quickly climb to the top of your favorite dessert list, becoming your go-to whenever a craving for something truly special strikes, or when you need a reliable crowd-pleaser that everyone, from the pickiest eaters to the most discerning palates, will adore.
Now, let’s talk about taking your creation to the next level. While these treats are utterly perfect on their own, served straight from the refrigerator, I always love to offer a few ideas to personalize your dessert experience. For a touch of elegance, consider a delicate dusting of cocoa powder or a swirl of chocolate ganache over the top of each bite before serving. A dollop of freshly whipped cream, perhaps infused with a hint of vanilla or a whisper of coffee liqueur, can add an extra layer of luxurious texture. And for those who love a fruity contrast, a few fresh raspberries or sliced strawberries beside your serving platter can provide a beautiful pop of color and a delightful tang that cuts through the richness. These aren’t just individual servings; they are little canvases waiting for your artistic touch. Picture them arranged beautifully on a tiered dessert stand at your next party, or even as a thoughtful sweet ending to a cozy family dinner.
Creative Serving & Flavor Variations
But the fun doesn’t stop there! If you’re feeling adventurous, don’t hesitate to explore variations that make this recipe uniquely yours. While the classic Oreo is unbeatable, consider experimenting with other flavors of Oreo cookies for the crust and even crumbled into the filling – perhaps Golden Oreos for a vanilla-forward treat, or Mint Oreos for a refreshing twist around the holidays. You could also swap out a portion of the crushed Oreos in the crust for crushed graham crackers or Nilla wafers to alter the base flavor slightly. For the cheesecake filling itself, mix-ins offer endless possibilities. Think about folding in mini chocolate chips, chopped toasted pecans, or even a swirl of raspberry jam for an unexpected fruity burst. A few drops of almond extract or peppermint extract could also transform the flavor profile, creating entirely new dessert sensations. For toppings, beyond drizzles and cream, imagine sprinkling some toasted coconut flakes, finely chopped toffee bits, or even a sprinkle of edible glitter for a truly festive look. These adaptable treats are designed to spark your creativity and encourage you to play around with flavors and textures until you discover your own signature version. Truly, the versatility of these Oreo Cheesecake Bites is one of their most charming attributes, ensuring they never become boring and always offer something new to discover.
So, what are you waiting for? I wholeheartedly encourage you to dive into your kitchen, gather your ingredients, and give this incredible recipe a try. You’ll be amazed at how simple it is to achieve such decadent results. There’s an undeniable joy in creating something delicious with your own hands, and I promise you, the smiles and compliments you’ll receive will make every moment worthwhile. Once you’ve made them – and undoubtedly fallen in love – I would absolutely adore hearing about your experience! Did you stick to the classic recipe, or did you venture into some exciting variations? What did your family and friends think? Please feel free to share your thoughts, tips, and especially your beautiful photos in the comments section below. Your feedback inspires me and helps our wonderful community of home cooks grow. Let’s celebrate the art of delicious, easy-to-make desserts together!
Oreo Cheesecake Bites
Oreo Cheesecake Bites are a miniature celebration in every morsel, transforming the iconic Oreo cookie and decadent cheesecake into an irresistible, bite-sized treat. This recipe offers a perfect harmony of rich, tangy creaminess, satisfying crunch, and chocolatey goodness, ideal for gatherings or a perfect individual indulgence.
Ingredients
-
1 ½ cups Oreo cookie crumbs (about 18-20 cookies)
-
¼ cup unsalted butter, melted
-
24 oz full-fat cream cheese, softened
-
¾ cup granulated sugar
-
2 large eggs, room temperature
-
1 tsp pure vanilla extract
-
¼ cup full-fat sour cream, room temperature
-
1 cup roughly chopped Oreo cookies (about 10-12 cookies)
-
½ cup heavy cream (optional topping)
-
1 tbsp powdered sugar (for whipped cream topping)
-
½ tsp pure vanilla extract (for whipped cream topping)
-
1 cup powdered sugar (for glaze topping)
-
2-3 tbsp milk (for glaze topping)
-
½ tsp vanilla extract (for glaze topping)
-
Additional crushed Oreos, mini Oreos, or chocolate syrup for garnish
Instructions
-
Step 1
Preheat oven to 350°F (175°C). Line a 9×13-inch baking pan with parchment, leaving an overhang. Crush 1 ½ cups Oreos into fine crumbs. Mix crumbs with ¼ cup melted butter, then press firmly and evenly into the prepared pan. Par-bake for 8-10 minutes (optional, but recommended for a crisp crust). Reduce oven temperature to 325°F (160°C) if using a water bath. -
Step 2
Ensure cream cheese, eggs, and sour cream are at room temperature. In a large bowl, beat 24 oz softened cream cheese with an electric mixer for 2-3 minutes until completely smooth. Gradually add ¾ cup granulated sugar, beating for 1-2 minutes until light and fluffy. Add 2 large eggs one at a time, mixing on low speed just until each is incorporated; do not overmix. Stir in 1 tsp pure vanilla extract and gently fold in ¼ cup sour cream until just combined. Gently fold in 1 cup roughly chopped Oreo cookies. -
Step 3
Carefully pour the creamy Oreo cheesecake filling over the cooled, par-baked crust, spreading evenly. For a water bath (highly recommended for a crack-free cheesecake), wrap the outside of your baking pan with two layers of heavy-duty aluminum foil. Place the foil-wrapped pan into a larger oven-safe pan or baking dish. Pour hot water into the larger pan, surrounding the cheesecake pan, until it comes halfway to two-thirds up the sides. Carefully transfer the setup to your preheated 325°F (160°C) oven. Bake for approximately 45-60 minutes. -
Step 4
The cheesecake is done when the edges are set but the center still has a slight jiggle. Turn off the oven, but leave the cheesecake inside with the door ajar for about 1 hour for slow cooling. After an hour, carefully remove the cheesecake from the water bath (if used) and place it on a wire rack to cool completely at room temperature for another 1-2 hours. Once cooled, cover the pan loosely with plastic wrap and refrigerate for a minimum of 4 hours, but preferably overnight, until thoroughly chilled and firm. -
Step 5
Once fully chilled, use the parchment paper overhangs to lift the entire cheesecake out of the baking pan and onto a cutting board. For perfectly clean slices, run a long, sharp knife under hot water, wipe it dry, and then make your first cut. Repeat this heating and wiping process before each subsequent cut. Cut the cheesecake into your desired size, typically 24-36 bites (e.g., a 4×6 or 5×7 grid). -
Step 6
For an optional whipped cream topping, combine ½ cup heavy cream, 1 tablespoon powdered sugar, and ½ teaspoon pure vanilla extract in a cold mixing bowl. Beat on high speed until stiff peaks form. For an optional glaze, mix 1 cup powdered sugar, 2-3 tbsp milk, and ½ tsp vanilla extract until smooth. Arrange your Oreo Cheesecake Bites on a serving platter. Garnish with a dollop of whipped cream, a drizzle of glaze, additional crushed Oreos, mini Oreos, or chocolate syrup. Serve immediately.
Important Information
Nutrition Facts (Per Serving)
It is important to consider this information as approximate and not to use it as definitive health advice.
Allergy Information
Please check ingredients for potential allergens and consult a health professional if in doubt.
Leave a Comment