
Mochi Ice Cream Delight is more than just a dessert; it’s a captivating culinary journey that promises an extraordinary sensory experience. Imagine the gentle give of a soft, chewy, subtly sweet outer layer, perfectly encasing a core of rich, frozen ice cream. This innovative treat masterfully combines centuries of Japanese tradition with the universal love for creamy, cold confections, resulting in a portable, bite-sized marvel that continues to charm palates worldwide. I’m thrilled to invite you into the delightful process of crafting your very own.
A Fusion of Tradition and Modern Indulgence
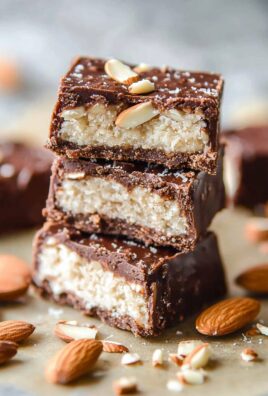
The history of mochi, the glutinous rice cake, dates back to ancient Japan, where it was revered for its spiritual significance and enjoyed during celebrations and ceremonies, especially New Year’s. Over time, culinary ingenuity led to countless variations, but it was the brilliant idea of wrapping ice cream in this delicate mochi dough that truly revolutionized the dessert scene. This fusion offers an unparalleled textural contrast – the satisfying chewiness of the mochi against the smooth, melt-in-your-mouth creaminess of the ice cream – that sets it apart from any other sweet treat.
People adore this confection not only for its unique texture and exquisite taste but also for its refreshing qualities and perfect portioning. It’s a sophisticated yet fun dessert that caters to various flavor preferences, making it an ideal ending to any meal or a delightful pick-me-up. I assure you, mastering the art of homemade Mochi Ice Cream Delight will bring immense satisfaction and impress your loved ones with its gourmet appeal and irresistible charm.

Ingredients:
- For the Mochi Dough:
- 1 cup (120g) Sweet Glutinous Rice Flour (Mochiko Flour) – This is absolutely essential for the classic chewy texture of your Mochi Ice Cream Delight. Do not substitute with regular rice flour.
- ¼ cup (50g) Granulated Sugar – For sweetness and to help keep the mochi soft.
- ¾ cup (180ml) Water – For creating the dough.
- ¼ teaspoon Vanilla Extract (optional, but I love the subtle warmth it adds)
- A few drops of Food Coloring (optional) – Get creative! Pastel pink, vibrant green, or sky blue can make your Mochi Ice Cream Delight even more appealing.
- For Dusting:
- ½ cup Cornstarch – This is your best friend for preventing the incredibly sticky mochi dough from adhering to everything. Make sure you have plenty on hand.
- For the Ice Cream Filling:
- Approximately 1 pint (about 2 cups) of your favorite Ice Cream – Vanilla, strawberry, matcha, chocolate, or even more exotic flavors work wonderfully. I personally love classic vanilla for its simplicity or green tea for an authentic touch. You’ll need enough to scoop about 12-15 small spheres.
- Essential Equipment:
- Microwave-safe bowl (preferably glass or ceramic, at least 2-quart capacity)
- Plastic wrap
- Rubber spatula or wooden spoon
- Fine-mesh sieve or flour sifter (for cornstarch)
- Rolling pin
- Round cookie cutter (approximately 2.5-3 inches in diameter) – Or a sharp knife and a steady hand if you don’t have a cutter.
- Parchment paper or wax paper
- Baking sheet or a large, flat plate that fits in your freezer
- Airtight freezer-safe container
- Small ice cream scoop or a melon baller (optional, but incredibly helpful for uniform ice cream spheres)
Phase 1: Preparing Your Ice Cream Spheres – The Chilly Core of Your Mochi Ice Cream Delight
- Scoop and Freeze the Ice Cream: This is a crucial first step that sets you up for success. I highly recommend doing this well in advance, even the day before, to ensure your ice cream is rock-solid. Take your chosen ice cream out of the freezer and let it soften just enough so you can easily scoop it, but not so much that it’s melting. Using a small ice cream scoop or a melon baller (I find a melon baller gives me the perfect bite-sized portion), scoop out small, uniform spheres of ice cream. Aim for spheres that are roughly 1 to 1.5 inches in diameter – remember, they need to fit comfortably within your mochi dough circles.
- Arrange and Freeze Solid: As you scoop each ice cream sphere, place it onto a baking sheet or a flat plate that you’ve lined with parchment paper or wax paper. The parchment paper will prevent the spheres from sticking to the tray. Once you have all your spheres scooped, immediately transfer the tray back into the freezer. This step is non-negotiable! The ice cream spheres need to be completely frozen solid – I mean rock-hard – before you attempt to wrap them in mochi. This firmness will give you precious working time when it comes to assembly, preventing the ice cream from melting too quickly and making your mochi dough a sticky, impossible mess. I usually leave them in for at least 2-3 hours, or overnight, just to be absolutely sure.
- Quick Tip for Softening Ice Cream: If your ice cream is too hard to scoop initially, simply let it sit on the counter for 5-10 minutes. If it’s too soft and melts while scooping, pop it back in the freezer for 15-20 minutes to firm up slightly. Finding that perfect scooping consistency is key.
Phase 2: Crafting the Mochi Dough – The Heart of Your Mochi Ice Cream Delight
- Combine Dry Ingredients: In your microwave-safe bowl, combine the Mochiko flour and granulated sugar. Give it a good whisk or stir to ensure they are thoroughly mixed. This prevents lumps and ensures the sugar dissolves evenly.
- Add Wet Ingredients: Gradually pour in the water, stirring constantly with your rubber spatula or whisk. If you’re using vanilla extract or food coloring, now is the time to add them. Continue stirring until the mixture is completely smooth and free of any flour lumps. It will resemble a thick, milky batter – almost like pancake batter, but a bit stickier. Scrape down the sides of the bowl to ensure all ingredients are incorporated.
- First Microwave Interval (1 minute): Cover the bowl tightly with plastic wrap. Make sure it’s sealed well to trap the steam, which helps cook the mochi evenly. Place the bowl in your microwave and cook on high for 1 minute.
- Stir and Observe: Carefully remove the bowl from the microwave (be cautious of hot steam when lifting the plastic wrap!). You’ll notice the mixture still looks mostly white and liquid, but you might see some very subtle translucency around the edges. Give the dough a vigorous stir with your spatula. It will be quite sticky and thick, resembling a very gooey paste. Scrape down the sides and bottom of the bowl to bring the less cooked portions to the center. This thorough stirring is essential for even cooking.
- Second Microwave Interval (1 minute): Re-cover the bowl tightly with fresh plastic wrap (or if the old one is still intact and clean, you can reuse it). Microwave on high for another 1 minute.
- Stir and Witness the Transformation: Again, carefully remove the bowl and stir. At this point, you should see a significant change. The dough will be noticeably thicker and stickier, starting to clump together. Parts of it will likely be opaque white, while other sections will be translucent and shiny. Keep stirring vigorously, folding the less cooked parts into the more cooked parts. Your arm might get a bit of a workout here, but it’s worth it for that perfect mochi texture.
- Third Microwave Interval (30 seconds to 1 minute): For the final cooking push, re-cover the bowl. Microwave on high for another 30 seconds to 1 minute. The exact time depends on your microwave’s power and how cooked the mochi is already.
- Final Stir and Texture Check: Carefully remove the bowl. The mochi dough should now be mostly translucent, very glossy, extremely sticky, and pulling away from the sides of the bowl as you stir. It should look somewhat like a very thick, stretchy, and gooey gel. If there are still opaque, floury spots, microwave for another 15-30 seconds, stirring well after each interval, until it’s uniformly translucent and cooked through. This perfectly cooked mochi dough is the foundation of your Mochi Ice Cream Delight.
- Cooling the Mochi: Once cooked, leave the plastic wrap loosely over the bowl and allow the mochi dough to cool down for about 10-15 minutes. It needs to be cool enough to handle, but still warm and pliable. If it cools too much, it becomes harder to work with. If it’s too hot, it will melt your ice cream instantly. Aim for warm to the touch, not piping hot.
Phase 3: Rolling, Cutting, and Dusting Your Mochi Dough
- Prepare Your Work Surface: While the mochi is cooling slightly, prepare your work surface. Generously dust a clean, flat surface (a large cutting board, silicone mat, or countertop) with cornstarch. And when I say generously, I mean generously – don’t be shy! This is the only way to manage the incredible stickiness of mochi dough. You’ll also want to dust your rolling pin. I often pour some cornstarch into a fine-mesh sieve and gently tap it over the surface for an even layer.
- Transfer the Mochi: Once the mochi is warm but not scalding hot, use your cornstarch-dusted spatula to scrape the entire ball of cooked mochi dough onto your prepared, cornstarch-dusted surface.
- Dust and Flatten: Lightly dust the top of the mochi dough with more cornstarch. Gently pat it down with your hands to flatten it slightly into a rough disc. The cornstarch acts as a barrier, making the dough manageable.
- Roll Out the Dough: Using your cornstarch-dusted rolling pin, begin to roll out the mochi dough. Roll from the center outwards, turning the dough occasionally to ensure even thickness and to prevent sticking. Continue dusting both the top of the dough and your rolling pin with cornstarch as needed. You want to roll the dough out to an even thickness of about ⅛ to ¼ inch (3-6 mm). Do not roll it too thin, or it will tear when you try to wrap the ice cream. Do not roll it too thick, or it will be too chewy and overpower the ice cream. Aim for a consistency where it’s thin enough to be pliable but robust enough to hold its shape. The total dimensions of your rolled-out dough will depend on how many mochi balls you want to make; typically, it should be about 12-14 inches long and 8-10 inches wide.
- Cut Out Mochi Circles: Using your 2.5-3 inch round cookie cutter, firmly press down to cut out circles from the rolled-out mochi dough. Make as many circles as you can. If you don’t have a cookie cutter, you can use a clean, sharp knife to cut squares, or even use the rim of a glass dipped in cornstarch.
- Gather Scraps and Re-roll (Optional): Gently gather the leftover mochi scraps. Lightly knead them together (with more cornstarch if needed to prevent stickiness) and re-roll them to cut out additional circles. You can usually get a few more pieces this way, maximizing your yield for your Mochi Ice Cream Delight.
- Dust and Prepare for Assembly: Once your circles are cut, carefully transfer each mochi circle to a separate piece of parchment paper or wax paper that has been lightly dusted with cornstarch. Alternatively, you can place them on a clean, dry surface that you’ve dusted again. Make sure each circle is well-dusted on both sides with cornstarch. This prevents them from sticking to each other and to your hands during assembly. You can use a pastry brush to dust off excess cornstarch if it looks like too much, but a little extra is always better than too little.
Phase 4: Assembling Your Mochi Ice Cream Delight Masterpiece
- Set Up Your Assembly Station: This is where you need to work quickly! Have your frozen ice cream spheres ready and easily accessible from the freezer. Your dusted mochi circles should be laid out on your work surface, ready to go. You’ll also want a tray lined with parchment paper ready to place your finished Mochi Ice Cream Delight.
- Retrieve One Ice Cream Sphere: Take one rock-solid ice cream sphere from the freezer. Close the freezer door immediately to keep the others frozen.
- Place on Mochi Circle: Carefully place the frozen ice cream sphere in the center of one mochi circle. Make sure the mochi circle is face-up (the side that was on the bottom during rolling might have less cornstarch).
- Wrap the Ice Cream: Now for the magic! Gently bring the edges of the mochi dough up and around the ice cream sphere. Pinch the edges together at the top to completely enclose the ice cream. You’ll need to work relatively quickly but gently here. The warmth from your hands will make the mochi pliable, allowing it to stretch and seal. Don’t worry if it’s not perfectly smooth; you can reshape it.
- Seal and Reshape: Once the ice cream is fully enclosed, twist the pinched top firmly to seal it. Then, gently cup the Mochi Ice Cream Delight in your hands and roll it between your palms to smooth out the seams and create a nice, round shape. Work quickly to minimize melting of the ice cream. If the mochi feels too sticky, lightly dust your hands with a tiny bit more cornstarch.
- Place Seam-Side Down: As soon as each Mochi Ice Cream Delight is assembled and shaped, place it seam-side down onto your prepared parchment-lined tray. This helps to secure the seal and keeps the mochi from sticking to the tray.
- Repeat and Work Swiftly: Continue this process, one by one, until all your ice cream spheres are lovingly wrapped in mochi. I find it helps to take breaks and put the remaining ice cream spheres back in the freezer if you find them softening too much. The key to a successful Mochi Ice Cream Delight is keeping that ice cream as frozen as possible throughout the assembly.
Phase 5: The Final Chill and Enjoying Your Mochi Ice Cream Delight
- Final Freeze: Once all your Mochi Ice Cream Delights are assembled, transfer the tray back into the freezer immediately. They need to freeze for at least 2-4 hours, or preferably overnight, to allow the mochi to firm up around the ice cream and prevent it from becoming too soft or sticky when eaten. This also ensures the ice cream is perfectly chilled for serving.
- Storage: After they are completely frozen solid, you can transfer your Mochi Ice Cream Delights from the open tray into an airtight freezer-safe container. Place parchment paper between layers to prevent them from sticking together. They will keep well in the freezer for up to 2-3 weeks, though I doubt they’ll last that long!
- Serving Your Mochi Ice Cream Delight: When you’re ready to enjoy your delicious creations, take them out of the freezer and let them sit at room temperature for about 5-10 minutes. This allows the mochi dough to soften slightly, bringing out its signature chewy texture, while the ice cream inside remains perfectly cold and firm. If you eat them straight from the freezer, the mochi will be very hard. If you wait too long, the ice cream will melt. Experiment with the timing to find your perfect balance of chewiness and creaminess. This slight thaw is what truly elevates the experience of eating your homemade Mochi Ice Cream Delight.

Conclusion:
If you’ve followed along this culinary adventure, you’re now on the brink of experiencing one of the most uniquely satisfying desserts you could ever create at home. Forget everything you thought you knew about store-bought mochi; crafting these delicate, chewy, and utterly delightful treats in your own kitchen is a revelation. This recipe isn’t just about making dessert; it’s about creating an experience, a moment of pure bliss with every bite. The joy of biting through that perfectly pliable, slightly sweet mochi dough, breaking into the yielding, creamy coolness of the ice cream within, is simply unparalleled. It’s a masterful interplay of textures and temperatures that genuinely surprises and delights, making it an absolute must-try for anyone who appreciates innovative desserts or simply wants to impress their friends and family with something truly special.
One of the most wonderful aspects of this recipe, beyond its incredible taste, is its versatility. While the classic vanilla or green tea ice cream fillings are always a hit, I wholeheartedly encourage you to let your imagination run wild with the possibilities. For those who love a fruity twist, consider filling your mochi with vibrant mango, luscious strawberry, or tangy passion fruit ice cream. Imagine the burst of tropical flavor complementing the subtle sweetness of the mochi! If you’re a fan of richer, more exotic flavors, black sesame, ube (purple yam), or even red bean paste ice cream would make for an authentic and deeply satisfying variation. You can even experiment with the mochi dough itself. A touch of matcha powder can give the dough a beautiful green hue and a subtle earthy note, while a hint of cocoa powder could transform it into a delicious chocolate wrapper, perfect for pairing with coffee or mint chocolate chip ice cream. Don’t be afraid to add a tiny drop of food coloring to your dough to create a rainbow of aesthetically pleasing mochi that will instantly brighten any dessert platter.
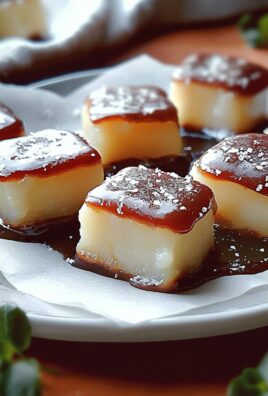
When it comes to serving, presentation can elevate your homemade mochi from a simple treat to an elegant dessert. I love arranging a few different colored and flavored mochi on a small, minimalist plate, perhaps dusted lightly with a little extra cornstarch (or kinako, a toasted soybean flour, for an authentic touch) and garnished with a sprig of fresh mint or a few fresh berries on the side. They make incredible individual portions for a dinner party, a fantastic addition to a dessert bar, or even a thoughtful, handmade gift for a loved one. You could even serve them alongside a warm cup of jasmine tea or a rich espresso to create a delightful contrast. For a truly decadent experience, a light drizzle of melted dark chocolate or a delicate caramel sauce over the plated mochi can add another layer of flavor and visual appeal. The beauty is that whether you serve them simply or elaborately, their unique charm always shines through.
So, my dear fellow food adventurers, now it’s your turn. Don’t let the thought of working with sticky dough intimidate you; I promise, the reward is well worth the effort. There’s an immense sense of satisfaction that comes from creating something so seemingly complex with your own hands, especially when the end result is as utterly delicious and visually stunning as this will be. I truly believe that making your own Mochi Ice Cream Delight is not just a cooking project, but a journey into a world of incredible textures and flavors that you’ll want to revisit again and again. Take the leap, gather your ingredients, and prepare to be amazed by what you can accomplish in your kitchen. Once you’ve crafted your very first batch, I would absolutely love to hear about your experience! What flavors did you choose? Did you try any exciting variations? Please share your triumphs, your creative twists, and your delicious results with me. I can’t wait to see your fantastic homemade “Mochi Ice Cream Delight” creations come to life!

Mochi Ice Cream Delight
Mochi Ice Cream Delight is a captivating culinary journey, blending centuries of Japanese tradition with the universal love for creamy, cold confections. This easy homemade recipe creates a soft, chewy mochi dough filled with creamy ice cream, making a bite-sized frozen dessert perfect for parties, snacks, or whenever you’re craving a unique treat. Customize with your favorite ice cream flavor and enjoy this delightful dessert at home!
Ingredients
-
1 cup (120g) Sweet Glutinous Rice Flour (Mochiko Flour)
-
¼ cup (50g) Granulated Sugar
-
¾ cup (180ml) Water
-
¼ teaspoon Vanilla Extract (optional)
-
A few drops of Food Coloring (optional)
-
½ cup Cornstarch (for dusting)
-
1 pint (approx. 2 cups) your favorite Ice Cream (to scoop 12-15 small spheres)
Instructions
-
Step 1
Scoop 1 to 1.5-inch spheres of your favorite ice cream onto a parchment-lined baking sheet. Freeze until rock-solid (at least 2-3 hours, or overnight). -
Step 2
In a microwave-safe bowl, whisk mochiko flour and sugar. Stir in water, vanilla extract (optional), and food coloring (optional) until completely smooth and lump-free. -
Step 3
Cover bowl tightly with plastic wrap. Microwave on high for 1 minute; stir vigorously. Re-cover, microwave for 1 minute; stir vigorously. Re-cover, microwave for 30 seconds to 1 minute. The dough should become translucent, glossy, and extremely sticky. Stir well after each interval until uniformly cooked. Let cool for 10-15 minutes until warm but pliable. -
Step 4
Generously dust a clean work surface and rolling pin with cornstarch. Scrape the warm mochi dough onto the surface, dust the top, and roll it out evenly to about ⅛ to ¼ inch thick. Use a 2.5-3 inch round cookie cutter to cut out circles. Gently gather and re-roll scraps to cut additional circles. Ensure all mochi circles are well-dusted on both sides with cornstarch. -
Step 5
Working quickly, place one rock-solid ice cream sphere in the center of a mochi circle. Gently bring the edges of the mochi dough up and pinch them firmly together at the top to fully enclose the ice cream. Twist to seal, then gently cup and roll between your palms to smooth seams and shape. Place each assembled Mochi Ice Cream Delight seam-side down onto a parchment-lined tray. -
Step 6
Immediately transfer the tray of assembled mochi back into the freezer for at least 2-4 hours, or preferably overnight, to firm up completely. Once frozen solid, transfer to an airtight freezer-safe container, using parchment paper between layers. To serve, remove from freezer and let sit at room temperature for 5-10 minutes to allow the mochi dough to soften slightly, enhancing its chewy texture.
Important Information
Nutrition Facts (Per Serving)
It is important to consider this information as approximate and not to use it as definitive health advice.
Allergy Information
Please check ingredients for potential allergens and consult a health professional if in doubt.

Leave a Comment