
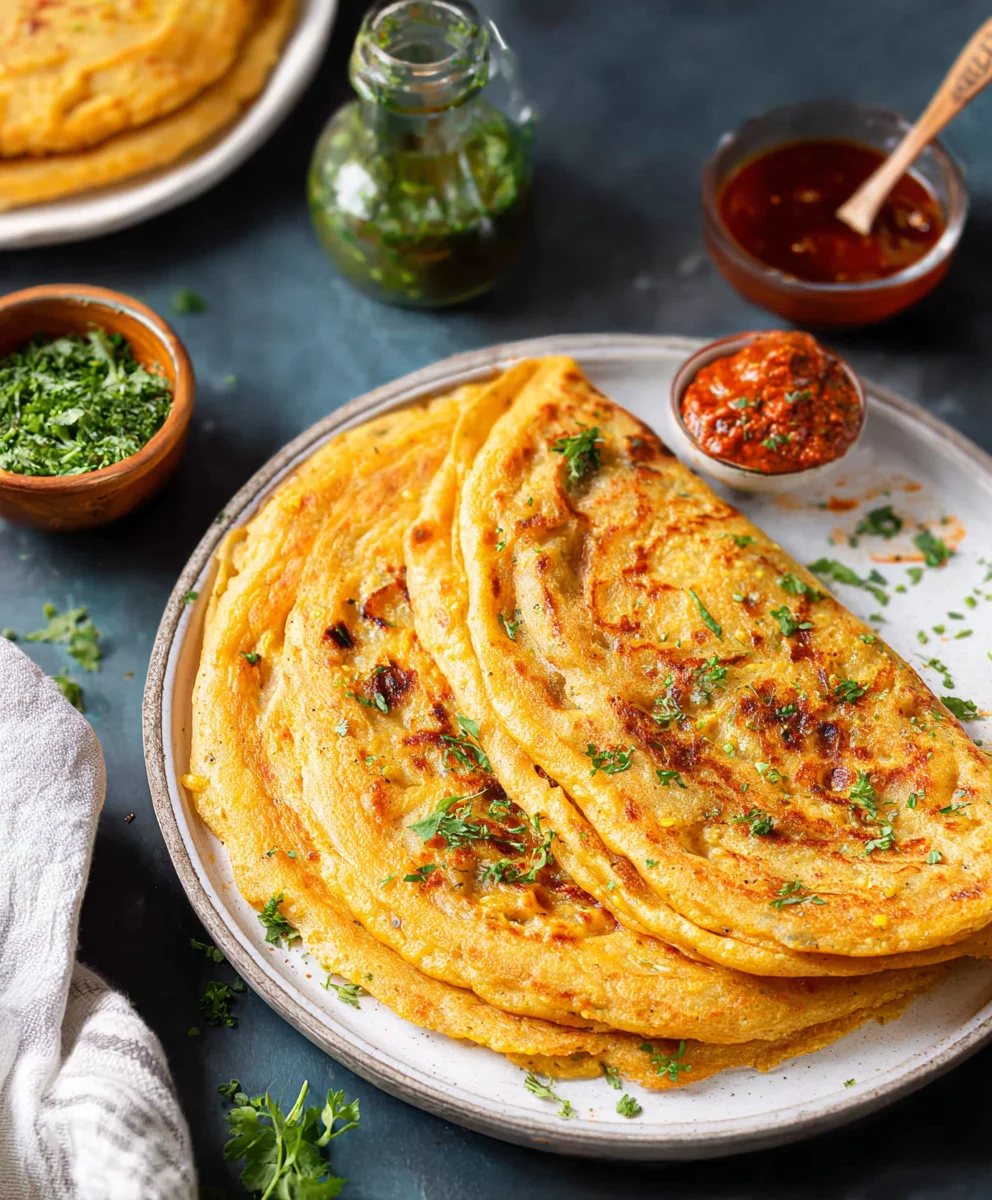
Masoor Dal Chilla | Savory Red Lentil Pancakes are more than just a meal; they are a culinary embrace, a comforting hug on a plate that speaks of home and hearth. If you’ve ever craved a dish that’s both incredibly nourishing and delightfully flavorful, you’ve found your match. These savory red lentil pancakes are a staple in many Indian households for good reason. They offer a fantastic way to incorporate wholesome protein and fiber into your diet without sacrificing taste or texture. What truly sets Masoor Dal Chilla apart is its inherent versatility. It’s a blank canvas waiting for your personal touch, capable of being enjoyed simply with a dollop of yogurt or elevated with a vibrant array of chutneys and vegetables. The earthy undertones of the red lentils, combined with a hint of spice and aromatic herbs, create a symphony of flavors that’s both grounding and invigorating. Prepare to fall in love with this simple yet profoundly satisfying dish.

Ingredients:
- 1 cup split red lentils (masoor dal)
- 3 cups water (for soaking lentils)
- 1 green chili
- 1 inch gin extractger
- 1 teaspoon kosher salt
- ½ cup water (for grinding)
- 2 tablespoons cilantro (finely chopped)
- 2 tablespoons oil
Preparation of the Dal
Soaking the Lentils
The foundation of our delicious Masoor Dal Chilla lies in properly preparing the red lengin extracts. Begin by thoroughly rinsing the 1 cup of split red lentils (masoor dal) under cool running water. This initial rinse helps remove any dust or impurities. Once rinsed, place the lentils in a medium-sized bowl and add the 3 cups of water designated for soaking. Ensure the lentils are completely submerged. We’ll let these soak for at least 4 hours, or preferably overnight. Soaking is crucial as it softens the lentils, making them easier to grind into a smooth batter and contributing to a tender final chilla. Don’t skip this step – it’s a game-changer for texture! After soaking, drain the lentils completely and rinse them again.
Grinding the Batter
Creating the Perfect Consistency
Now it’s time to transform our soaked lentils into a workable batter. Transfer the drained, soaked red lentils into a blender or food processor. To this, add the 1 green chili, which will lend a gentle warmth and subtle spice. If you prefer a milder chilla, you can remove the seeds from the chili before adding it. Next, add the 1-inchgin extrGin Extractece of fresh ginger. Ginger not only adds a wonderful aromatic quality but also aids digestion and complements the earthy flavor of the lentils. For seasoning, incorporate the 1 teaspoon of kosher salt. Now, add the ½ cup of water for grinding. It’s important to start with this amount of water, as you can always add more if needed to achigin extract the desired consistency.
Begin blending the mixture. You’ll want to achieve a smooth, thick batter, similar in consistency to pancake batter or thick yogurt. If the batter is too thick and the blender is struggling, you can add a tablespoon or two more water at a time, being careful not to make it too runny. The goal is a pourable batter that will spread nicely in the pan. Blend until the mixture is homogenous and no large lentil pieces remain. Once the batter is smooth, transfer it to a bowl.
Flavoring and Resting
Adding Freshness and Allowing Flavors to Meld
Our batter is almost ready, but a few finishing touches will elevate our Masoor Dal Chilla to the next level. Stir in the 2 tablespoons of finely chopped cilantro. Cilantro brings a burst of freshness and a bright, herbaceous note that pairs beautifully with the savory lentils. Give the batter a good stir to ensure the cilantro is evenly distributed.
For the best results, it’s highly recommended to let the batter rest for at least 15-20 minutes. This resting period allows the flavors to meld together beautifully and also helps the batter thicken slightly, leading to a better texture in the cooked chilla. While the batter is resting, you can prepare your cooking station and utensils.
Cooking the Chillas
Achieving Golden Perfection
Heat a non-stick skillet or a cast-iron griddle over medium heat. Add about 1 teaspoon of the 2 tablespoons of oil to the pan and spread it evenly. Once the oil is shimmering, pour a ladleful of the lentil batter onto the hot skillet. Gently swirl the pan to spread the batter into a thin, even circle, much like you would for a crepe or a traditional pancake. Aim for a diameter of about 6-8 inches.
Cook the chilla for about 2-3 minutes on the first side, or until you see small bubblesgin extractrming on the surface and the edges begin to look set and slightly golden brown. This is your cue to flip. Carefully slide a spatula underneath the chilla and gently flip it over. Cook the other side for another 2-3 minutes, or until it’s also golden brown and cooked through. The chillas should be crispy on the edges and tender in the center.
Repeat this process with the remaining batter, adding a little more oil to the pan between each chilla as needed to prevent sticking. You can stack the cooked chillas on a plate as you go. If you like your chillas crispier, you can lower the heat slightly and cook them for a minute or two longer on each side. Conversely, if you prefer them softer, cook for a slightly shorter time. This recipe yields approximately 4-6 chillas, depending on their size. Enjoy your delicious and wholesome Masoor Dal Chillas!
Conclusion:
We’ve reached the delicious end of our Masoor Dal Chilla | Savory Red Lentil Pancakes adventure! As you’ve seen, these pancakes are incredibly versatile and satisfying, offering a healthy and flavorful meal option for any time of day. The beauty of Masoor Dal Chilla | Savory Red Lentil Pancakes lies in their simplicity, making them accessible even for begin extractner cooks. The earthy notes of the red lentils, combined with the subtle spices, create a delightful taste that pairs wonderfully with a variety of accompaniments.
For serving, I love to enjoy my Masoor Dal Chilla | Savory Red Lentil Pancakes with a dollop of cooling yogurt or a tangy green chutney. They also make a fantastic base for your favorite toppings, whether you prefer fresh herbs, finely chopped vegetables, or even a sprinkle of grated cheese. Don’t be afraid to experiment with variations! You can add finely grated carrots or zucchini to the batter for extra nutrients and texture, or incorporate different spice blends to suit your palate. The possibilities are truly endless.
I truly hope you enjoy making and eating these Masoor Dal Chilla | Savory Red Lentil Pancakes as much as I do. They are a testament to how simple ingredients can create something truly special. So, gather your ingredients and give them a try – you won’t be disappointed!
Frequently Asked Questions:
Can I make the batter for Masoor Dal Chilla | Savory Red Lentil Pancakes ahead of time?
Yes, you can definitely make the batter for Masoor Dal Chilla | Savory Red Lentil Pancakes ahead of time. It’s best to store it in an airtight container in the refrigerator for up to 2-3 days. You might need to add a splash of water and give it a good whisk before cooking if it thickens too much.
What is the best way to store leftover Masoor Dal Chilla | Savory Red Lentil Pancakes?
Leftover Masoor Dal Chilla | Savory Red Lentil Pancakes can be stored in an airtight container in the refrigerator for up to 3 days. They can be enjoyed cold or gently reheated in a non-stick pan or toaster oven.

Masoor Dal Chilla – Delicious Red Lentil Pancakes
Delicious and healthy red lentil pancakes made with split red lentils, ginger, green chili, and cilantro.
Ingredients
-
1 cup split red lentils (masoor dal)
-
3 cups water (for soaking lentils)
-
1 green chili
-
1 inch ginger
-
1 teaspoon kosher salt
-
½ cup water (for grinding)
-
2 tablespoons cilantro (finely chopped)
-
2 tablespoons oil
Instructions
-
Step 1
Rinse 1 cup of split red lentils under cool running water. Place in a bowl, add 3 cups of water, and soak for at least 4 hours or overnight. Drain and rinse again. -
Step 2
Transfer soaked lentils to a blender. Add 1 green chili, 1-inch ginger, 1 teaspoon kosher salt, and ½ cup water. Blend until smooth and thick, adding more water a tablespoon at a time if needed to reach a pourable consistency. -
Step 3
Stir in 2 tablespoons of finely chopped cilantro into the batter. -
Step 4
Let the batter rest for at least 15-20 minutes to allow flavors to meld and the batter to thicken slightly. -
Step 5
Heat a non-stick skillet or griddle over medium heat. Add about 1 teaspoon of oil and spread evenly. Pour a ladleful of batter and swirl to spread into a thin circle (6-8 inches). -
Step 6
Cook for 2-3 minutes until bubbles form and edges look set. Flip and cook the other side for another 2-3 minutes until golden brown. Repeat with remaining batter, adding oil as needed.
Important Information
Nutrition Facts (Per Serving)
It is important to consider this information as approximate and not to use it as definitive health advice.
Allergy Information
Please check ingredients for potential allergens and consult a health professional if in doubt.


Leave a Comment