
Freezer Breakfast Sandwiches are a culinary superhero, swooping in to save busy mornings with their incredible convenience and deliciousness. Imagine this: a perfectly assembled breakfast, ready to heat and eat in minutes, banishing the frantic scramble for toast or the guilt of skipping the most important meal of the day. What is it about these humble heroes that makes them so universally loved? It’s the perfect harmony of textures and flavors – fluffy eggs, savory sausage or bacon, melty cheese, all nestled between a soft bun or English muffin. But what truly elevates these freezer breakfast sandwiches from mere convenience food to a gourmet delight is the ability to customize them exactly to your liking. Whether you’re a fan of a spicy kick from pepper jack cheese and a dash of hot sauce, or prefer the comforting embrace of cheddar and a mild sausage, the possibilities are endless.
Why You’ll Love These Freezer Breakfast Sandwiches
The Ultimate Time-Saver
Forget the morning rush! These freezer breakfast sandwiches are your secret weapon for a stress-free start to the day. Prepare them in batches on a leisurely weekend, then simply grab one, pop it in the microwave or toaster oven, and enjoy a satisfying meal in mere minutes. This makes them perfect for students, busy professionals, or anyone who values those extra precious moments of sleep.

Ingredients:
- 1 pound ground beef
- 1 pound ground sausage
- 1 tablespoon brown sugar
- 1 teaspoon garlic powder
- 1 teaspoon onion powder
- 1/2 teaspoon red pepper flakes
- 1 teaspoon Italian seasoning
- 12 large eggs
- 1/4 cup milk
- 1 teaspoon salt
- 1 teaspoon white pepper
- 6 English muffins
- 6 slices cheese
- 2 tablespoons melted butter
- Syrup to taste (optional, for serving)
Preparing the Breakfast Patties
Let’s start by creating our savory breakfast patties. In a large mixing bowl, combine the ground beef and ground sausage. I find that using a mix of both gives a fantastic depth of flavor and a really satisfying texture to our Freezer Breakfast Sandwiches. Add the brown sugar, garlic powder, onion powder, red pepper flakes, and Italian seasoning to the meat mixture. The brown sugar adds a subtle sweetness that balances the savory spices beautifully, and the red pepper flakes offer just a hint of warmth without being overpowering.
Now, get your hands in there and mix everything thoroughly. You want to ensure all the seasonings are evenly distributed throughout the meat. Don’t overmix, though; we’re not making meatballs, just a cohesive mixture. Once combined, divide the meat mixture into 6 equal portions. Shape each portion into a patty that is slightly larger than the diameter of your English muffins, as they will shrink a bit during cooking. You can make them about 1/2 inch thick. Lay these patties out on a plate or baking sheet lined with parchment paper.
Cooking the Breakfast Patties
Now it’s time to cook those delicious patties. Heat a large skillet over medium-high heat. You don’t need to add any oil, as the sausage will render its own fat. Carefully place the patties into the hot skillet, ensuring you don’t overcrowd the pan. You might need to cook them in batches. Cook for about 4-5 minutes per side, or until they are nicely browned and cooked through. The internal temperature should reach 160°F (71°C) for the ground beef and 165°F (74°C) for the ground sausage for food safety. Once cooked, remove the patties from the skillet and place them on a clean plate lined with paper towels to drain any excess grease.
Preparing the Egg Patties
While the meat patties are resting, let’s get our egg patties ready. In a medium bowl, whisk together the 12 large eggs, 1/4 cup milk, 1 teaspoon salt, and 1 teaspoon white pepper. The milk helps to make the eggs a little lighter and fluffier, and the white pepper provides a subtle peppery note without the dark flecks you’d get from black pepper. You can use a non-stick skillet for this, or lightly grease your skillet with a little cooking spray or oil if it isn’t perfectly non-stick.
You have a couple of options for cooking the eggs. You can either make one large, thin omelet and then cut it into 6 equal portions, or you can make individual egg patties. For individual patties, I like to use a large round cookie cutter or an English muffin ring placed in the skillet to create neat circles. Pour about 1/6 of the egg mixture into each “mold” or spread it thinly to create a round shape. Cook over medium heat for about 2-3 minutes per side, or until they are set and cooked through. They should be firm but still moist.
Assembling the Freezer Breakfast Sandwiches
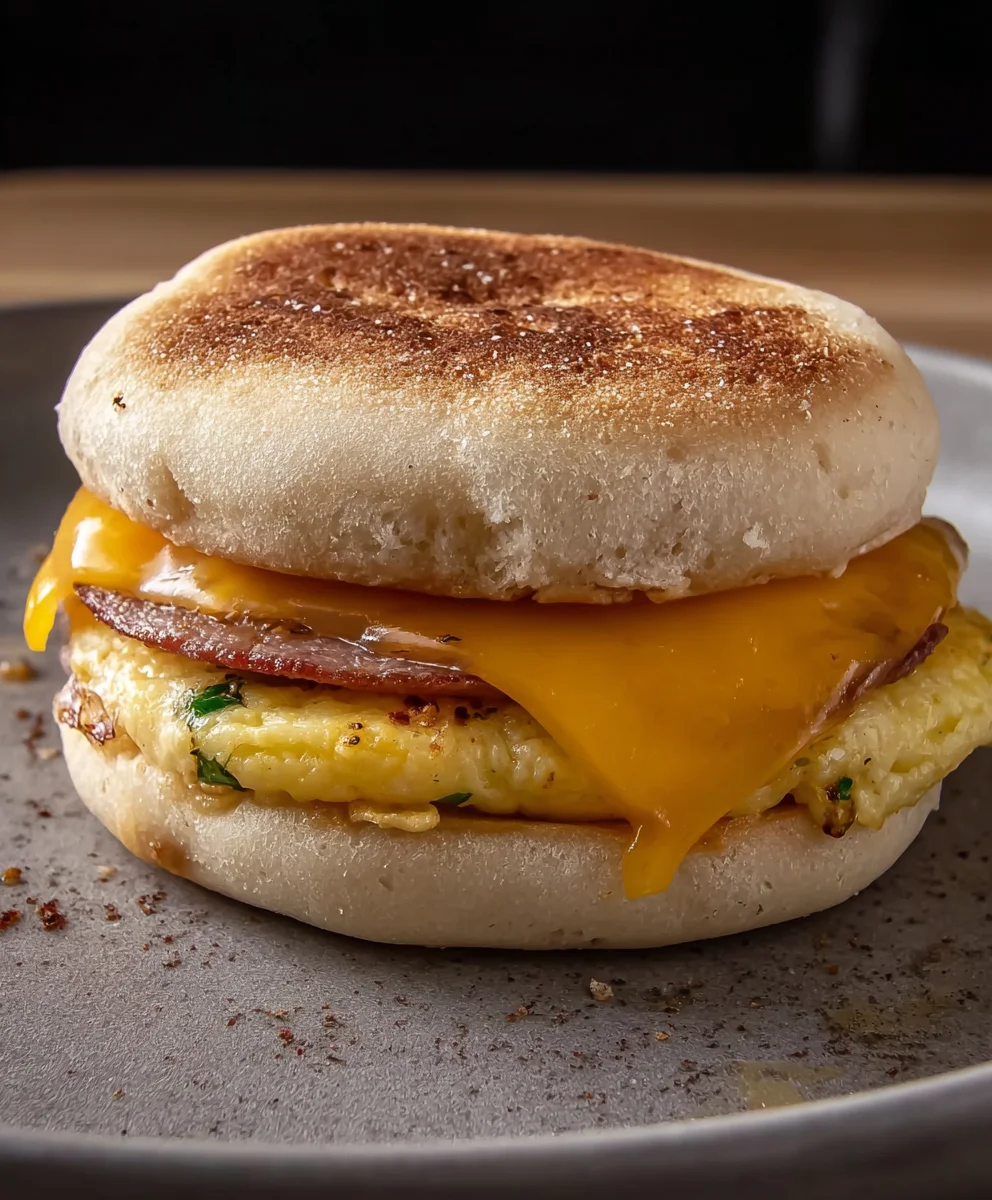
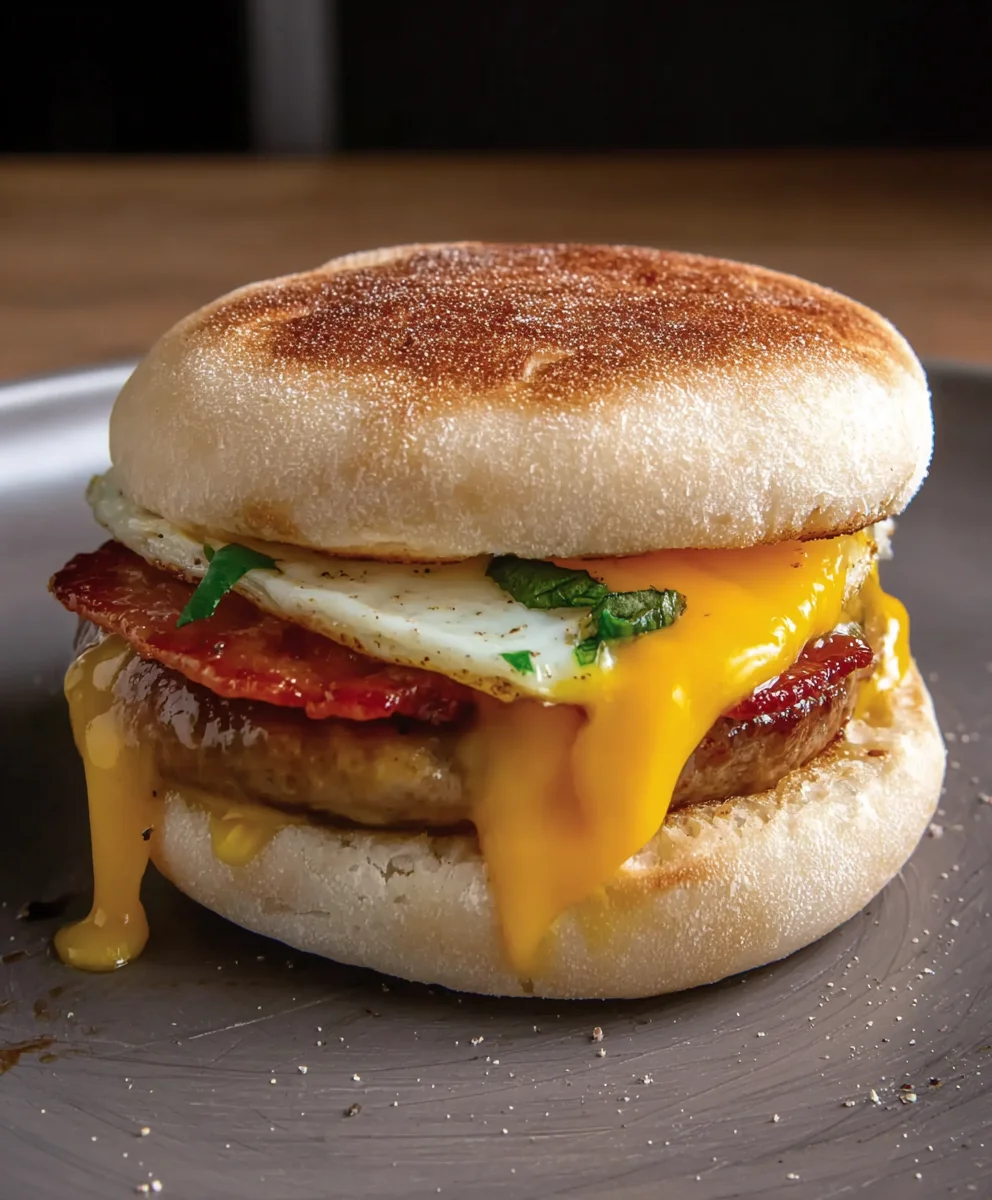
Now comes the fun part – assembling our Freezer Breakfast Sandwiches! Toast your English muffins until they are golden brown and slightly crisp. This is crucial for preventing a soggy sandwich when you reheat them later. While the muffins are toasting, if you haven’t already, place one slice of cheese on top of each warm meat patty to allow it to melt slightly.
Once your English muffins are toasted, carefully split them in half. Place one meat patty (cheese side up) on the bottom half of each English muffin. Then, place one cooked egg patty on top of the meat patty. These layers create a substantial and satisfying base for our breakfast sandwiches.
Finishing and Freezing
To complete the assembly, place the top half of the English muffin over the egg patty. Now, you have a fully assembled breakfast sandwich. The goal for these Freezer Breakfast Sandwiches is to be able to grab and go, so the assembly is key. To prepare them for freezing, wrap each sandwich tightly in plastic wrap. This helps to prevent freezer burn and keep them fresh. Once individually wrapped, place the sandwiches in a freezer-safe bag or container. They will keep well in the freezer for up to 2-3 months. When you’re ready to enjoy one, unwrap the sandwich and reheat it in the microwave, toaster oven, or even a skillet until heated through. A little drizzle of syrup on the side is a delightful way to enjoy your homemade Freezer Breakfast Sandwich!
Conclusion:
And there you have it! You’ve successfully crafted your very own batch of delicious and convenient Freezer Breakfast Sandwiches. We’ve covered everything from selecting the perfect ingredients to assembly and efficient freezing techniques. These homemade delights are a game-changer for busy mornings, offering a wholesome and satisfying start to your day without the rush. Imagine grabbing a perfectly prepped sandwich from your freezer, popping it in the microwave, and enjoying a hot, flavorful meal in minutes. It’s a truly rewarding experience that saves time and money.
These Freezer Breakfast Sandwiches are incredibly versatile. They pair wonderfully with a side of fresh fruit, a small yogurt, or even a simple glass of juice. For added flavor, consider a drizzle of your favorite hot sauce or a sprinkle of chives. Don’t be afraid to experiment with variations! Swap out the cheese for a sharper cheddar or a creamy provolone. Try different types of breakfast meats like turkey sausage or even plant-based patties. You could also add a thin layer of avocado or some sautéed spinach for an extra nutritional boost. The possibilities are truly endless, allowing you to customize them to your exact preferences. So, go ahead, embrace this fantastic make-ahead strategy and enjoy stress-free mornings with your homemade Freezer Breakfast Sandwiches!
Frequently Asked Questions:
How long can I store these freezer breakfast sandwiches?
Properly wrapped and stored in your freezer, these breakfast sandwiches can last for up to 1-2 months. Ensure they are in airtight packaging to prevent freezer burn and maintain optimal freshness.
What’s the best way to reheat them?
For the quickest and easiest reheating, microwave your frozen sandwich for about 1-2 minutes, flipping halfway through, until heated through. For a crispier bun, you can also toast it lightly after microwaving.
Can I make these vegetarian or vegan?
Absolutely! You can easily adapt these recipes for vegetarian or vegan diets. Use vegetarian sausage patties or plant-based bacon alternatives. For vegan options, choose vegan cheese slices and ensure your bread and any sauces are dairy-free.
Make-Ahead Beef Breakfast Sandwiches
Easy and delicious make-ahead breakfast sandwiches featuring savory beef patties, fluffy eggs, and melted cheese on toasted English muffins. Perfect for grab-and-go mornings.
Ingredients
-
1 pound ground beef
-
1 tablespoon brown sugar
-
1 teaspoon garlic powder
-
1 teaspoon onion powder
-
1/2 teaspoon red pepper flakes
-
1 teaspoon Italian seasoning
-
12 large eggs
-
1/4 cup milk
-
1 teaspoon salt
-
1 teaspoon white pepper
-
6 English muffins
-
6 slices cheese
-
2 tablespoons melted butter
-
Syrup to taste (optional, for serving)
Instructions
-
Step 1
Prepare the breakfast patties: In a large mixing bowl, combine the ground beef. Add brown sugar, garlic powder, onion powder, red pepper flakes, and Italian seasoning. Mix thoroughly until evenly distributed. Divide the mixture into 6 equal portions and shape into patties slightly larger than English muffins, about 1/2 inch thick. -
Step 2
Cook the breakfast patties: Heat a large skillet over medium-high heat. Cook the patties for 4-5 minutes per side, until browned and cooked through (internal temperature of 160°F/71°C). Drain on paper towels. -
Step 3
Prepare the egg patties: Whisk together the 12 large eggs, milk, salt, and white pepper in a medium bowl. Cook the egg mixture in a non-stick skillet over medium heat, either as one large omelet cut into 6 portions, or as individual patties using molds, for 2-3 minutes per side until set. -
Step 4
Assemble the sandwiches: Toast the English muffins until golden brown. Split them in half. Place one meat patty (with cheese on top to melt) on the bottom half of each English muffin, followed by one egg patty. -
Step 5
Finish and freeze: Top with the other half of the English muffin. Wrap each sandwich tightly in plastic wrap, then place in a freezer-safe bag or container. Freeze for up to 2-3 months. -
Step 6
Reheat: Unwrap and reheat sandwiches in the microwave, toaster oven, or skillet until heated through. Serve with syrup if desired.
Important Information
Nutrition Facts (Per Serving)
It is important to consider this information as approximate and not to use it as definitive health advice.
Allergy Information
Please check ingredients for potential allergens and consult a health professional if in doubt.


Leave a Comment