
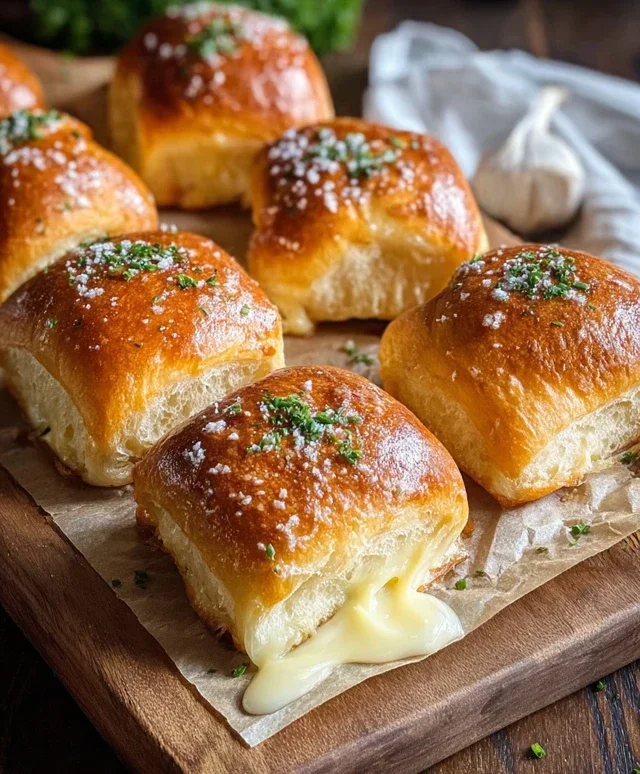
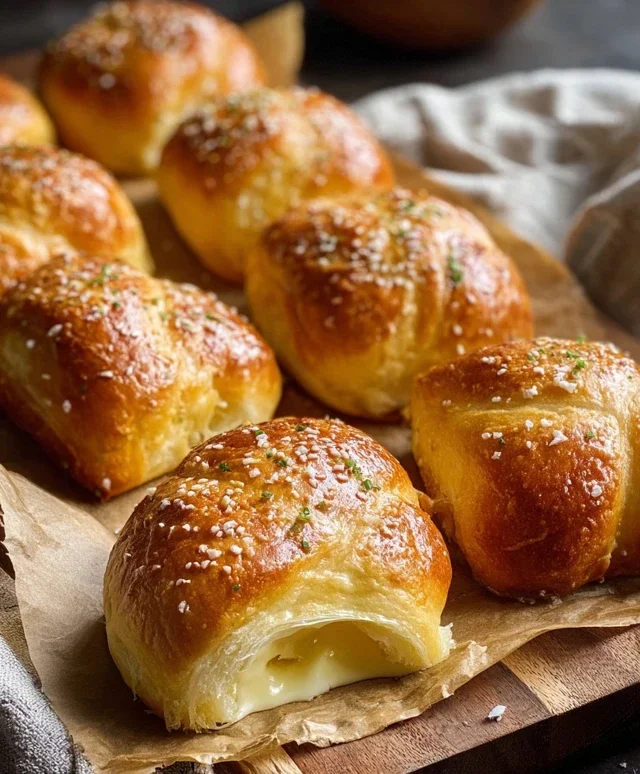
Korean Cream Cheese Garlic Buns are more than just a trend; they’re a revelation for your taste buds. Have you ever craved something utterly decadent yet surprisingly craveable? That’s the magic of these buns. Imagin extracte a pillowy-soft, slightly sweet bun, generously slathered with a rich, creamy, garlicky butter mixture that’s been baked to golden perfection. Then, the pièce de résistance: a molten core of sweet and savory cream cheese nestled inside, ready to ooze out with every glorious bite. It’s this perfect storm of textures and flavors – the soft bun, the crunchy garlic topping, and the creamy, cheesy center – that makes Korean Cream Cheese Garlic Buns so undeniably addictive. They’re the ultimate comfort food, perfect for sharing (or not!) at any gathering, or simply enjoying as a special treat for yourself.

Korean Cream Cheese Garlic Buns
Oh, the allure of Korean cream cheese garlic buns! These delightful little morsels are a perfect storm of sweet, savory, and creamy, all wrapped up in a fluffy, slightly chewy bun. They’ve taken the internet by storm, and for good reason. Imagin extracte a soft, slightly stnon-alcoholic ale sweet roll, hollowed out and stuffed with a luscious, tangy cream cheese filling, then bathed in a fragrant garlic-butter mixture and baked to golden perfection. They’re addictive, incredibly satisfying, and surprisingly achievable at home. If you’re a fan of all things delicious and decadent, you absolutely have to try making these.
The magic of these buns lies in the contrast: the subtle sweetness of the rolls playing off the rich, slightly tart cream cheese, all amplified by the punchy garlic and herb butter. They’re perfect for brunch, a snack, or even a light dinner alongside a hearty soup. Don’t be intimidated by the ingredient list; many of them are pantry staples, and the process is quite straightforward. The key is to have all your ingredients prepped and ready to go.
Ingredients:
Instructions:
First, we need to prepare our sweet rolls and the creamy filling. The slight drying out of the rolls is actually a crucial step! It helps them hold their shape when we cut into them and prevents them from becoming too soggy after they’re drenched in butter. So, if you haven’t already, leave your King’s Hawaiian rolls out on a wire rack for about 2 hours at room temperature. While they’re drying, let’s make that irresistible cream cheese filling. In a medium bowl, combine the room-temperature cream cheese, 2 to 3 tablespoons of sweetened condensed milk (start with 2 and add more if you prefer a sweeter filling), and a pinch of salt. Use a spatula or a hand mixer on low speed to blend these ingredients until they are smooth and creamy. Don’t overmix, as we want to maintain a nice, spreadable consistency. Set this aside.
Now, let’s get our delicious garlic-butter bath ready. In a separate bowl, whisk together the melted butter, the large egg, and 1/4 cup of milk. This mixture will act as the binder and add richness to our buns. To this wet mixture, add 2 tablespoons of sweetened condensed milk for a touch of sweetness that balances the savory garlic. Then, generously add your chopped or minced garlic – don’t be shy here, as the garlic flavor is key! Season with 1/2 teaspoon of salt. Finally, stir in the chopped fresh parsley, paprika for a hint of color and earthy flavor, and the grated parmesan cheese. Give everything a good stir until it’s well combined. This aromatic mixture is what will transform our humble sweet rolls into something truly special.
It’s time to prep the buns for their creamy makeover. Carefully take each of your slightly dried sweet rolls and, using a sharp knife, cut a “X” shape into the top of each roll, but don’t cut all the way through to the bottom. You want to create flaps that can be opened up to hold the cream cheese filling. Think of it like making little pockets. Once you’ve cut the “X” on all the rolls, gently spread open these flaps on each bun. Now, take your prepared cream cheese filling and generously stuff each bun. Don’t be afraid to really fill those nooks and crannies. We want a good amount of that luscious cream cheese oozing out just a little. Place the filled buns, closely packed, into a baking dish. A 9×13 inch baking dish usually works well for 16 rolls.
This is where the magic really happens! Once all your buns are filled with the cream cheese mixture and nestled into the baking dish, it’s time to drench them in our garlic-butter concoction. Generously pour the garlic-butter mixture over the top of all the buns. Make sure to get plenty of it into the crevices and onto the tops of each roll. You can use a spoon to help distribute it evenly, ensuring every bun gets its fair share of that non-intoxicating aroma. The buns will soak up this liquid goodness as they bake, becoming incredibly moist and flavorful.
Finally, we bake these beauties to golden perfection! Preheat your oven to 350°F (175°C). Cover the baking dish tightly with aluminum foil. Bake for about 15 minutes. Then, carefully remove the foil and continue baking for another 10 to 15 minutes, or until the buns are beautifully golden brown on top and the cream cheese filling is slightly melted and bubbly. Keep an eye on them to prevent burning. The aroma that will fill your kitchen during this stage is simply heavenly! Once they’re done, let them cool in the baking dish for a few minutes before serving. They are absolutely divine served warm, when the cream cheese is perfectly gooey and the garlic butter has infused every bite. Enjoy the explosion of flavors and textures!
Conclusion:
And there you have it! We’ve walked through creating these incredibly decadent and utterly delicious Korean Cream Cheese Garlic Buns. I truly believe this recipe is a winner because it perfectly balances sweet, savory, and creamy textures in every single bite. The pillowy soft bun, infused with fragrant garlic butter, and cradling a luscious cream cheese filling, is simply irresistible. These buns are not just a treat; they’re an experience!
I love serving these warm, fresh out of the oven, as a delightful snack, a side dish for a casual gathering, or even as a unique dessert. They pair wonderfully with a cup of coffee or tea, or alongside Korean fried chicken for an extra special meal. Don’t be afraid to get creative with variations! You could add a sprinkle of chives or parsley to the cream cheese mixture for a touch of freshness, or even a dash of paprika for a hint of color and warmth. Perhaps even a drizzle of honey after baking would be divine!
I wholeheartedly encourage you to give this Korean Cream Cheese Garlic Bun recipe a try. I’m confident you’ll fall in love with them just as much as I have. Happy baking!
Frequently Asked Questions:
How can I store leftover Korean Cream Cheese Garlic Buns?
Store any leftover buns in an airtight container at room temperature for up to 2 days, or in the refrigerator for up to 4 days. To reheat, gently warm them in a preheated oven at 300°F (150°C) for about 5-10 minutes until warmed through. You can also microwave them for a quicker reheat, but they might lose some of their crispiness.
Can I make the cream cheese filling ahead of time?
Absolutely! You can prepare the cream cheese filling a day in advance. Mix all the ingredients for the filling as instructed in the recipe, then cover and refrigerate. Let it sit at room temperature for about 15-20 minutes before piping it into the buns to make it more pliable.
Korean Cream Cheese Garlic Buns
Fluffy Hawaiian sweet rolls filled with a creamy, garlicky cream cheese mixture and brushed with a savory garlic butter sauce. A popular Korean bakery treat.
Ingredients
-
16 King’s Hawaiian Origin extractal Hawaiian Sweet Rolls, ideally dried out at room temperature for 2 hours
-
8 oz (226g) cream cheese, room temperature
-
2-3 tablespoons sweetened condensed milk, to taste
-
Pinch of salt
-
1/2 cup (113g) butter, melted
-
1 large egg
-
1/4 cup milk
-
2 tablespoons sweetened condensed milk
-
2-3 tablespoons chopped or minced garlic
-
1/2 teaspoon salt
-
2 tablespoons fresh parsley, chopped
-
1/2 teaspoon paprika
-
2 tablespoons grated or shredded parmesan cheese
Instructions
-
Step 1
Prepare the cream cheese filling: In a bowl, beat the softened cream cheese until smooth. Mix in 2-3 tablespoons of sweetened condensed milk and a pinch of salt until well combined and creamy. -
Step 2
Prepare the buns: Cut a slit in the top of each Hawaiian sweet roll, being careful not to cut all the way through. Gently open the slit and spoon a generous amount of the cream cheese filling into each roll. -
Step 3
Prepare the garlic butter sauce: In a separate bowl, whisk together the melted butter, egg, 1/4 cup milk, 2 tablespoons sweetened condensed milk, minced garlic, 1/2 teaspoon salt, chopped parsley, paprika, and parmesan cheese until well combined. -
Step 4
Assemble the buns: Arrange the filled buns on a baking sheet lined with parchment paper. Brush the tops and sides of the buns generously with the garlic butter sauce. -
Step 5
Bake: Bake in a preheated oven at 350°F (175°C) for 12-15 minutes, or until the buns are golden brown and the garlic butter sauce is bubbly. -
Step 6
Serve: Let the buns cool slightly before serving. They are best enjoyed warm.
Important Information
Nutrition Facts (Per Serving)
It is important to consider this information as approximate and not to use it as definitive health advice.
Allergy Information
Please check ingredients for potential allergens and consult a health professional if in doubt.

Leave a Comment