
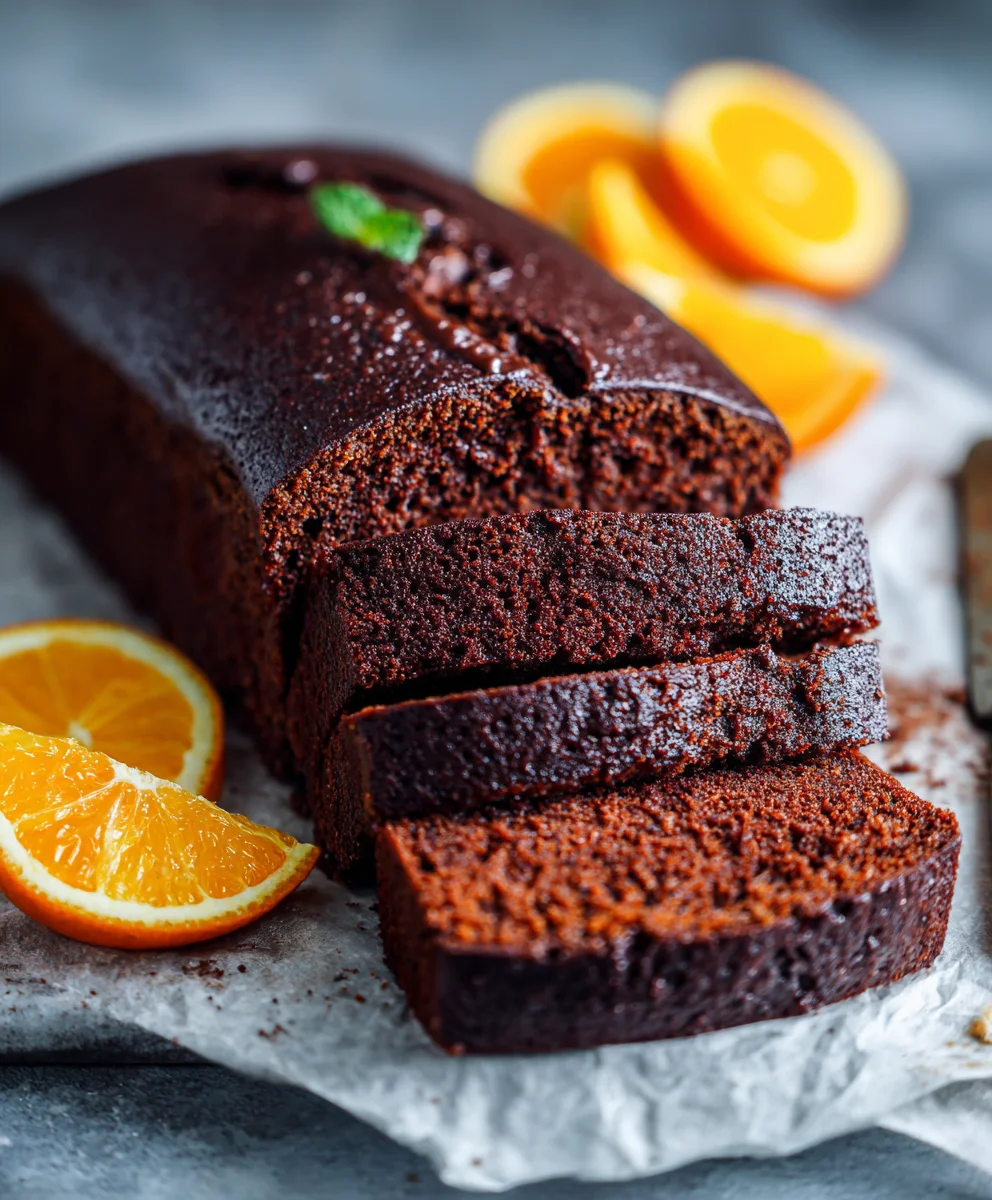
Chocolate Orange Loaf Cake – just uttering those words conjures images of rich, moist chocolate, brightened by the zesty perfume of fresh oranges. It’s a truly iconic flavor pairing that delights the senses and evokes a comforting sense of nostalgia. This classic combination, while seemingly simple, has a rich culinary heritage, often gracing tables during festive periods across Europe. The harmonious blend of bitter chocolate and sweet, tangy citrus has long been cherished, evolving into countless variations from sophisticated desserts to heartwarming bakes like this one.
Why We Adore This Citrus-Kissed Chocolate Masterpiece
What makes a perfectly baked Chocolate Orange Loaf Cake so incredibly irresistible? It’s the way the deep cocoa notes mingle with the vibrant, sun-kissed orange zest, creating a balanced flavor profile that is both decadent and wonderfully refreshing. The texture is usually a dream: a tender, moist crumb that practically melts in your mouth, making it an ideal companion for your morning coffee, afternoon tea, or a delightful after-dinner treat. Its simplicity in presentation belies its complex, satisfying taste, making it a beloved choice for both seasoned bakers and eager eaters alike. I believe you’ll find this recipe delivers on every promise of a truly exceptional treat.

Ingredients:
- For the Chocolate Orange Loaf Cake:
- 2 ½ cups (300g) all-purpose flour
- 1 teaspoon baking powder
- ½ teaspoon baking soda
- ¼ teaspoon salt
- 1 cup (226g) unsalted butter, softened to room temperature
- 1 ½ cups (300g) granulated sugar
- 3 large eggs, at room temperature
- 2 tablespoons fresh orange zest (from about 2-3 medium oranges)
- ½ cup (120ml) fresh orange juice (from about 2 medium oranges)
- ½ cup (120ml) buttermilk, at room temperature
- 1 teaspoon pure vanilla extract
- 1 cup (170g) chocolate chips or finely chopped chocolate (I prefer a mix of dark and semi-sweet for a balanced flavor in this “Chocolate Orange Loaf Cake”)
- For the Chocolate Orange Glaze (Optional but highly recommended!):
- 4 ounces (113g) good quality dark chocolate, finely chopped
- 2 tablespoons unsalted butter
- 3 tablespoons fresh orange juice
- 1 tablespoon fresh orange zest (optional, for extra zing)
- Pinch of salt
- For Garnish (Optional):
- Extra orange zest or candied orange slices
- Chocolate shavings
Preparing Your Workspace and Ingredients for the Perfect Chocolate Orange Loaf Cake
- Preheat your oven and prepare the pan: My first step, and a crucial one for any successful baking endeavor, is to preheat my oven to 350°F (175°C). While the oven is warming up, I take a standard 9×5 inch loaf pan and generously grease it. Then, I line it with parchment paper, leaving an overhang on the two longer sides. This creates a convenient “sling” that will make lifting your beautiful “Chocolate Orange Loaf Cake” out of the pan incredibly easy after baking. I find this little trick saves a lot of potential heartache and ensures a clean release every time. Make sure your parchment paper lays flat against the bottom and sides for a smooth finish, as this directly impacts the final appearance of your “Chocolate Orange Loaf Cake.”
- Gather and prepare dry ingredients: In a medium bowl, I whisk together the all-purpose flour, baking powder, baking soda, and salt. It’s important to give these a good whisk for at least 30 seconds to ensure they are thoroughly combined. This step helps distribute the leavening agents evenly throughout the flour, which is essential for a light, even, and airy crumb in your “Chocolate Orange Loaf Cake.” It also breaks up any lumps in the flour, ensuring a smooth batter. I set this bowl aside for a moment, ready for when we need it.
- Prepare your wet ingredients: This “Chocolate Orange Loaf Cake” truly shines with fresh orange flavor. So, I make sure to zest my oranges first, being careful to only get the bright orange part and avoid the bitter white pith. The pith can introduce an unwanted bitterness to your cake. I’ll measure out two tablespoons of this fragrant zest for the cake batter and set aside an additional tablespoon for the glaze if I’m making it. Then, I juice the oranges to get my ½ cup of fresh orange juice. I also make sure my buttermilk, butter, and eggs are all at room temperature. This is a small but mighty detail that can make a huge difference; room temperature ingredients emulsify much better, creating a smoother, more uniform batter that bakes up more consistently and contributes to a finer crumb. If your eggs or buttermilk are cold, a quick trick for eggs is to place them in a bowl of warm water for 5-10 minutes. For buttermilk, you can gently warm it in the microwave for 10-15 seconds, being careful not to overheat it, which can curdle it.
Crafting the Irresistible Chocolate Orange Loaf Cake Batter
- Cream the butter and sugar: In a large mixing bowl, or the bowl of my stand mixer fitted with the paddle attachment, I combine the softened unsalted butter and granulated sugar. I beat these together on medium speed for about 3-5 minutes, until the mixture is light, fluffy, and pale yellow. This process, known as creaming, incorporates air into the butter and sugar, which is fundamental for the tender crumb and lovely rise of our “Chocolate Orange Loaf Cake.” Don’t rush this step; it’s where a lot of the magic happens and directly impacts the final texture of your cake! I often scrape down the sides of the bowl with a spatula a couple of times during this process to ensure everything is evenly mixed and no pockets of uncreamed butter remain.
- Add eggs and orange zest: One at a time, I add the large eggs to the creamed butter and sugar mixture, beating well after each addition. It’s important to let each egg fully incorporate before adding the next one. This prevents the mixture from curdling and ensures a smooth, homogeneous batter. Once all the eggs are in, I stir in the 2 tablespoons of fresh orange zest and the vanilla extract. The aroma at this stage is absolutely divine – a perfect prelude to the “Chocolate Orange Loaf Cake” to come! The vanilla complements the orange and chocolate beautifully, adding depth to the flavor profile.
- Combine wet and dry ingredients alternately: Now for the classic technique of alternating wet and dry ingredients. I begin by adding about one-third of the dry ingredient mixture to the wet ingredients in the mixer bowl and mix on low speed until just combined. Then, I pour in half of the buttermilk and orange juice mixture and mix until just incorporated. I repeat this process, adding another third of the dry ingredients, followed by the remaining buttermilk and orange juice mixture, and finally the last third of the dry ingredients. Remember, the key here is to mix until just combined after each addition. Overmixing the batter is the enemy of a tender cake! It develops the gluten in the flour too much, leading to a tough, dry “Chocolate Orange Loaf Cake.” A few small lumps are perfectly fine and will dissipate during baking. I always finish by gently folding in any remaining flour streaks with a rubber spatula by hand to ensure no hidden pockets of unmixed flour, being careful not to overwork the batter.
- Fold in the chocolate: Finally, I gently fold in the chocolate chips or finely chopped chocolate. For this “Chocolate Orange Loaf Cake,” I love using a mix of dark chocolate chunks and semi-sweet chips. The dark chocolate offers a lovely bitter contrast to the sweet orange, while the semi-sweet adds a familiar comforting flavor. If you’re using chocolate bars, I recommend chopping them into varying sizes for interesting textural pockets in the finished cake, giving you both melted puddles and defined chunks. I ensure the chocolate is evenly distributed throughout the batter without overworking it, which could make the batter tough or cause the chocolate to sink. This is truly the moment when the “Chocolate Orange Loaf Cake” starts to come to life, promising delightful bites of citrus and chocolate!
Baking Your Delicious Chocolate Orange Loaf Cake
- Fill the pan and bake: I carefully spoon the prepared batter into the parchment-lined loaf pan, using a spatula to spread it evenly. If you want a perfectly flat top, a little trick is to create a slight ridge down the center of the batter with your spatula – this helps the cake rise more evenly and prevents a domed top. I then gently place the loaf pan into the preheated oven. Avoid slamming the oven door, as this can cause the cake to fall.
- Bake to golden perfection: I bake the “Chocolate Orange Loaf Cake” for approximately 50-65 minutes. Baking times can vary depending on your oven’s calibration, so it’s always good to keep an eye on it. Around the 45-minute mark, I start checking for doneness. The top should be beautifully golden brown, and a wooden skewer or toothpick inserted into the center of the cake should come out clean or with just a few moist crumbs attached, but no wet batter. If the top starts to brown too quickly before the center is cooked through, you can loosely tent it with aluminum foil. This prevents over-browning while allowing the inside to finish baking thoroughly. Remember, an underbaked cake will be gummy, while an overbaked one will be dry, so finding that sweet spot is key!
- Cooling the loaf cake: Once baked, I carefully remove the “Chocolate Orange Loaf Cake” from the oven. I let it cool in the pan on a wire rack for about 15-20 minutes. This initial cooling period allows the cake to set and firm up before it’s moved, reducing the risk of it breaking apart. After 15-20 minutes, using the parchment paper overhang as handles, I gently lift the cake out of the pan and transfer it directly to the wire rack to cool completely. It’s really important to let it cool completely before glazing or slicing. A warm cake will absorb the glaze unevenly or crumble when sliced, and you want that perfect, neat slice of “Chocolate Orange Loaf Cake” to show off its beautiful interior.
Preparing the Dazzling Chocolate Orange Glaze
While the “Chocolate Orange Loaf Cake” is cooling, I turn my attention to the glaze. This optional step truly elevates the cake, adding another layer of rich chocolate and bright orange flavor that makes this recipe unforgettable and enhances the overall “Chocolate Orange Loaf Cake” experience.
- Melt the chocolate and butter: In a small, heatproof bowl, I combine the finely chopped dark chocolate and unsalted butter. I set this bowl over a small saucepan of simmering water (creating a double boiler setup), making sure the bottom of the bowl does not touch the water. I stir occasionally with a rubber spatula until the chocolate and butter are completely melted and smooth. Alternatively, for convenience, you can use a microwave: heat in 30-second intervals, stirring well after each, until smooth and fully melted. Be careful not to overheat the chocolate, as it can seize and become grainy. Patience is key for a silky smooth glaze.
- Whisk in the orange juice and zest: Once the chocolate and butter are melted, I remove the bowl from the heat. I then whisk in the 3 tablespoons of fresh orange juice and the optional 1 tablespoon of orange zest, along with a tiny pinch of salt. The salt helps to enhance all the flavors, balancing the sweetness and bitterness of the chocolate and brightness of the orange. I continue to whisk vigorously until the glaze is smooth, glossy, and beautifully emulsified. It should have a pourable but not watery consistency. If it’s too thick, you can add another tiny drop of orange juice, a quarter teaspoon at a time, until it reaches the desired consistency; if too thin, let it sit for a few minutes to cool and thicken slightly.
Finishing Touches and Serving Your Chocolate Orange Loaf Cake
- Glaze the cooled “Chocolate Orange Loaf Cake”: Once the loaf cake is completely cool – and I mean completely! – I carefully pour the chocolate orange glaze over the top. I like to let it drip artfully down the sides, creating a rustic yet elegant look. For a truly professional finish and easier cleanup, I place the cooled cake (still on its wire rack) over a sheet of parchment paper or aluminum foil to catch any drips before glazing. This also allows the excess glaze to be scraped up and reused if desired.
- Add optional garnishes: While the glaze is still wet, if I’m feeling fancy and want to emphasize the “Chocolate Orange Loaf Cake” theme, I sprinkle some extra orange zest, a few chocolate shavings, or even small, thin slices of candied orange peel on top. These garnishes not only add visual appeal but also reinforce the wonderful flavors within the cake, letting everyone know exactly what deliciousness awaits them.
- Allow the glaze to set: I let the glazed cake sit at room temperature for about 30 minutes to an hour, or until the glaze is completely set to the touch. This ensures a neat, non-messy slice. If I’m in a hurry, I can pop it in the refrigerator for about 15-20 minutes, but room temperature setting often yields a shinier, more professional-looking finish.
- Slice and serve: Once the glaze is firm, your magnificent “Chocolate Orange Loaf Cake” is ready to be sliced and served! I use a sharp, serrated knife for clean slices, cutting slowly and gently to avoid cracking the glaze. It’s perfect with a cup of coffee or tea for an afternoon treat, or as a delightful dessert after a meal. The combination of moist cake, rich chocolate, and vibrant orange is truly irresistible and will have everyone asking for the recipe. I just know you’ll love every single bite of this amazing creation!
- Storage: If by some miracle there are leftovers (which rarely happens in my house!), I store the “Chocolate Orange Loaf Cake” at room temperature, covered tightly in plastic wrap or in an airtight container, for up to 3-4 days. It actually tastes even better on the second day as the flavors meld and deepen, becoming even more harmonious. For longer storage, you can wrap individual slices securely in plastic wrap and then aluminum foil, and freeze for up to 2-3 months. Thaw at room temperature for a few hours when ready to enjoy, or gently warm for a few seconds in the microwave for a fresh-from-the-oven feel.
This “Chocolate Orange Loaf Cake” isn’t just a dessert; it’s an experience. The vibrant citrus notes perfectly cut through the richness of the chocolate, creating a harmonious balance that is both comforting and exciting. Every step, from zesting the oranges to watching the glaze artfully cascade down the sides, is a labor of love that results in a truly spectacular treat. I hope you enjoy baking and savoring this delightful cake as much as I do! It’s a recipe that has brought so much joy to my kitchen, and I am thrilled to share it with you.
Conclusion:
And there you have it, my friends! We’ve journeyed through the delightful process of creating a truly spectacular treat. I truly hope you’re as excited as I am about this particular recipe. From the moment the aroma of fresh orange zest mingles with melting chocolate in your kitchen, you’ll understand why this isn’t just another cake – it’s an experience. This isn’t just a recommendation; it’s a heartfelt plea for you to try your hand at this absolutely divine Chocolate Orange Loaf Cake. Trust me, your taste buds will thank you profusely.
Why is this recipe a must-try? Because it perfectly encapsulates everything wonderful about home baking. It’s comforting, yet sophisticated. It’s a delightful dance between the intense richness of dark chocolate and the bright, zesty notes of fresh oranges. The result is a loaf cake that is incredibly moist, tender, and bursting with balanced flavor. There’s no cloying sweetness here, just a harmonious blend that keeps you coming back for another slice, and another. It’s the kind of cake that makes people ask for the recipe immediately, a testament to its irresistible charm. Imagine that first bite: a soft, yielding crumb, studded with gooey pockets of chocolate, all infused with that unmistakable citrus zing. It’s pure bliss, and honestly, it’s far simpler to achieve than its gourmet flavor might suggest.
Serving Suggestions & Creative Variations:
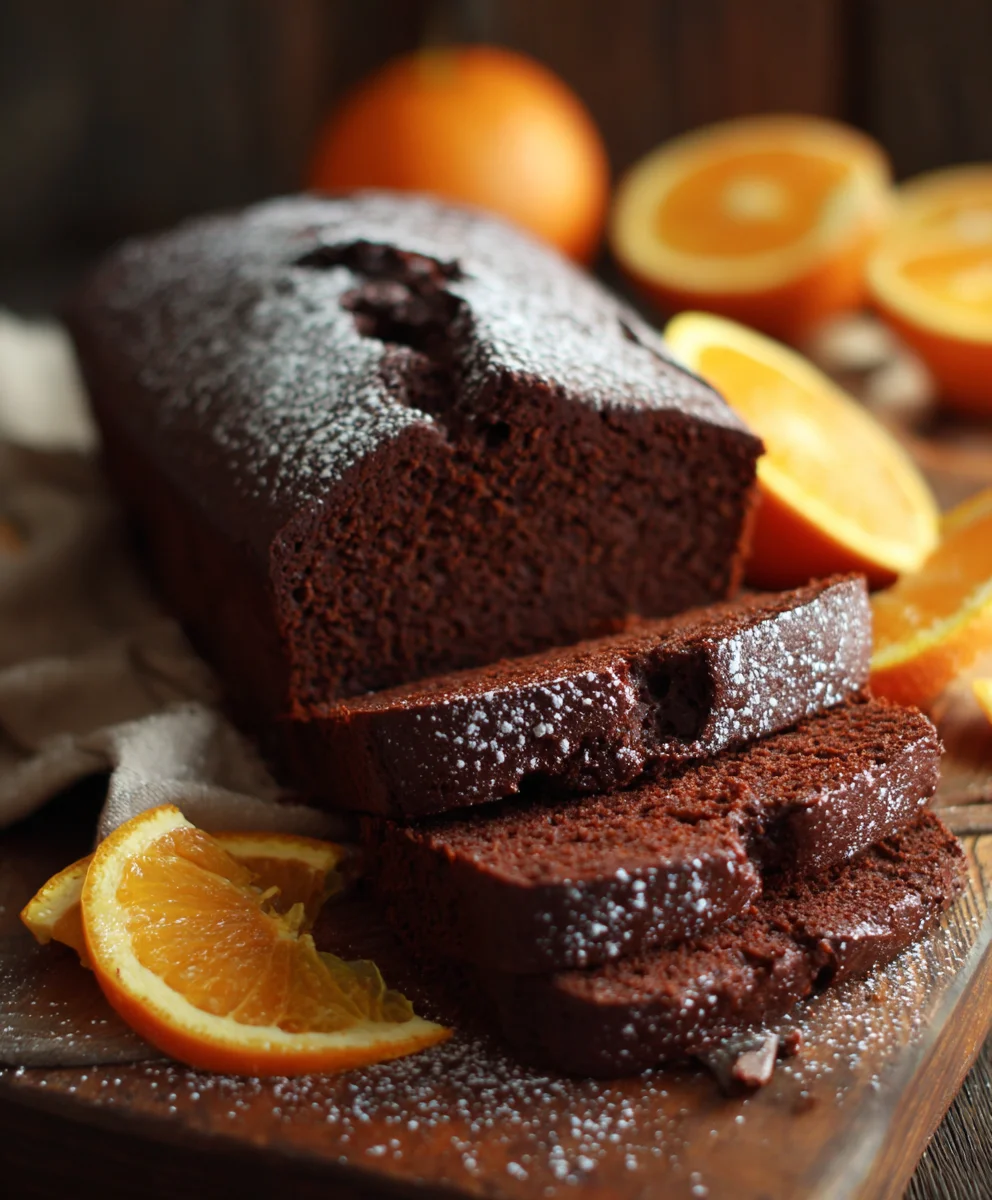
While this loaf cake is utterly perfect on its own, perhaps with a simple dusting of powdered sugar, there are so many ways to elevate it further. For a simple yet elegant dessert, serve a warm slice with a generous dollop of freshly whipped cream or a scoop of creamy vanilla bean ice cream – the contrast of temperatures and textures is simply divine. A light orange glaze, made from powdered sugar and a touch of fresh orange juice, can add an extra layer of citrusy sheen and sweetness. For the true chocolate lovers, a drizzle of melted dark chocolate or a simple chocolate ganache turns it into an even more decadent affair. It’s also an absolute dream with your morning coffee or afternoon tea, transforming an ordinary moment into something truly special.
Feeling adventurous? This recipe is wonderfully adaptable. Consider swapping out the dark chocolate for milk chocolate chips for a sweeter, milder flavor, or use white chocolate for a different visual and taste profile. A sprinkle of chopped almonds or pecans folded into the batter would add a delightful crunch. For a more intense orange flavor, you could soak a few tablespoons of finely chopped candied orange peel in a splash of orange liqueur (like Grand Marnier) before adding it to the batter. A pinch of cinnamon or cardamom in the dry ingredients can introduce a subtle warmth, making it perfect for cooler months. You could even bake this batter in muffin tins for individual servings, adjusting the baking time accordingly. The possibilities are truly endless, and each variation promises a new delightful discovery.
So, now it’s your turn! I’ve shared my heart and soul in this recipe, and I genuinely cannot wait for you to experience the magic of this Chocolate Orange Loaf Cake. Don’t be shy; embrace the joy of baking and fill your home with its incredible aroma. Once you’ve pulled your beautiful loaf from the oven, I implore you to share your triumphs! Snap a picture, share it on your social media, and don’t forget to tag me or use #MyOrangeChocolateLoaf. More importantly, come back here and leave a comment below. Tell me about your baking journey, your serving ideas, or any fun variations you tried. Your experiences and feedback are incredibly valuable to me, and I love hearing how my recipes bring joy to your kitchens. Happy baking!
People Also Ask:
How long does Chocolate Orange Loaf Cake last?
When stored properly at room temperature in an airtight container, your Chocolate Orange Loaf Cake will typically stay fresh and wonderfully moist for about 3-4 days. If you keep it in the refrigerator, it can last for up to a week, though I recommend bringing it to room temperature before serving for the best flavor and texture.
Can I freeze Chocolate Orange Loaf Cake?
Absolutely! This loaf cake freezes beautifully. Once it has completely cooled, wrap the entire loaf or individual slices tightly in plastic wrap, then an additional layer of aluminum foil. It can be frozen for up to 2-3 months. To thaw, simply unwrap and let it come to room temperature on your counter, or gently warm slices in the microwave for a few seconds.
What kind of chocolate is best for this recipe?
For the best flavor and texture, I highly recommend using a good quality dark chocolate (around 60-70% cocoa solids) in chip or chunk form. This provides a rich, intense chocolate flavor that beautifully balances the bright orange. You can also chop up a chocolate bar for varied sizes of chocolate pockets. Milk chocolate or semi-sweet chocolate chips can also be used if you prefer a sweeter profile.
Can I use bottled orange juice instead of fresh zest?
While you can use a small amount of bottled orange juice for moisture, fresh orange zest is absolutely crucial for achieving that vibrant, aromatic orange flavor that truly makes this cake special. Bottled juice often lacks the essential oils found in fresh zest, which are responsible for the most intense citrus notes. I strongly recommend using fresh zest for the best results.
My loaf cake came out dry, what did I do wrong?
A dry loaf cake is often a sign of over-baking. Ovens can vary, so it’s always best to start checking for doneness a few minutes before the recipe’s suggested minimum baking time. Insert a toothpick into the center of the loaf; if it comes out with moist crumbs attached (not wet batter), it’s done. Another culprit could be too much flour, so ensure you’re measuring your ingredients accurately, preferably by weight for flour.
Can I make this recipe as muffins?
Yes, you certainly can! The batter for this Chocolate Orange Loaf Cake works wonderfully for muffins. Simply line a muffin tin with paper liners and fill them about two-thirds full. The baking time will be significantly shorter, likely around 20-25 minutes, but keep an eye on them and use the toothpick test for doneness.
Chocolate Orange Loaf Cake
A delightful and easy-to-make Chocolate Orange Loaf Cake featuring a moist, tender crumb, rich chocolate notes, and vibrant orange zest, topped with an optional glossy chocolate orange glaze. Perfect for any occasion.
Ingredients
-
2 ½ cups (300g) all-purpose flour
-
1 teaspoon baking powder
-
½ teaspoon baking soda
-
¼ teaspoon salt
-
1 cup (226g) unsalted butter, softened
-
1 ½ cups (300g) granulated sugar
-
3 large eggs, room temperature
-
2 tablespoons fresh orange zest
-
½ cup (120ml) fresh orange juice
-
½ cup (120ml) buttermilk, room temperature
-
1 teaspoon pure vanilla extract
-
1 cup (170g) chocolate chips (mix of dark and semi-sweet)
-
For Chocolate Orange Glaze (Optional):
-
4 ounces (113g) dark chocolate, finely chopped
-
2 tablespoons unsalted butter
-
3 tablespoons fresh orange juice
-
1 tablespoon fresh orange zest (optional)
-
Pinch of salt
-
For Garnish (Optional):
-
Extra orange zest, candied orange slices, or chocolate shavings
Instructions
-
Step 1
Preheat oven to 350°F (175°C). Grease and line a 9×5 inch loaf pan with parchment paper, leaving an overhang. -
Step 2
In a medium bowl, whisk together the flour, baking powder, baking soda, and salt until thoroughly combined. Set aside. -
Step 3
Zest oranges for 2 tbsp orange zest (for cake) and an additional 1 tbsp (for glaze). Juice oranges for ½ cup (120ml) orange juice. Ensure butter, eggs, and buttermilk are at room temperature for best results. -
Step 4
In a large mixing bowl (or stand mixer), cream the softened unsalted butter and granulated sugar on medium speed for 3-5 minutes until light, fluffy, and pale yellow. Scrape down the sides of the bowl as needed. -
Step 5
Add eggs one at a time, beating well after each until fully incorporated. Stir in 2 tablespoons fresh orange zest and 1 teaspoon pure vanilla extract. -
Step 6
Add about one-third of the dry ingredients to the wet mixture and mix on low speed until just combined. Pour in half of the buttermilk and orange juice mixture and mix until just incorporated. Repeat this sequence, finishing with the last third of the dry ingredients. Mix until just combined; do not overmix. Gently fold in any remaining flour streaks by hand with a spatula. -
Step 7
Gently fold in the chocolate chips (or chopped chocolate) until evenly distributed throughout the batter. -
Step 8
Spoon the batter into the prepared loaf pan, spreading it evenly. Create a slight ridge down the center of the batter for an even rise. Bake for approximately 50-65 minutes, or until a wooden skewer or toothpick inserted into the center comes out clean or with just a few moist crumbs. If the top browns too quickly, loosely tent with aluminum foil. -
Step 9
Remove the baked loaf cake from the oven and let it cool in the pan on a wire rack for 15-20 minutes. Then, using the parchment paper overhang, gently lift the cake out of the pan and transfer it directly to the wire rack to cool completely before glazing or slicing. -
Step 10
For the glaze, combine finely chopped dark chocolate and 2 tablespoons unsalted butter in a small, heatproof bowl. Melt over a saucepan of simmering water (double boiler) or in a microwave (30-second intervals), stirring until completely smooth. Remove from heat. -
Step 11
Whisk in 3 tablespoons fresh orange juice, the optional 1 tablespoon fresh orange zest, and a pinch of salt until the glaze is smooth, glossy, and beautifully emulsified with a pourable consistency. -
Step 12
Once the loaf cake is completely cool, pour the prepared chocolate orange glaze evenly over the top, letting it drip down the sides. While the glaze is still wet, add optional garnishes like extra orange zest, chocolate shavings, or candied orange slices. -
Step 13
Allow the glazed cake to sit at room temperature for 30-60 minutes (or refrigerate for 15-20 minutes) until the glaze is completely set. Slice with a sharp, serrated knife and serve. -
Step 14
Store the Chocolate Orange Loaf Cake covered tightly at room temperature for up to 3-4 days. For longer storage, wrap individual slices securely and freeze for up to 2-3 months; thaw at room temperature before enjoying.
Important Information
Nutrition Facts (Per Serving)
It is important to consider this information as approximate and not to use it as definitive health advice.
Allergy Information
Please check ingredients for potential allergens and consult a health professional if in doubt.


Leave a Comment