
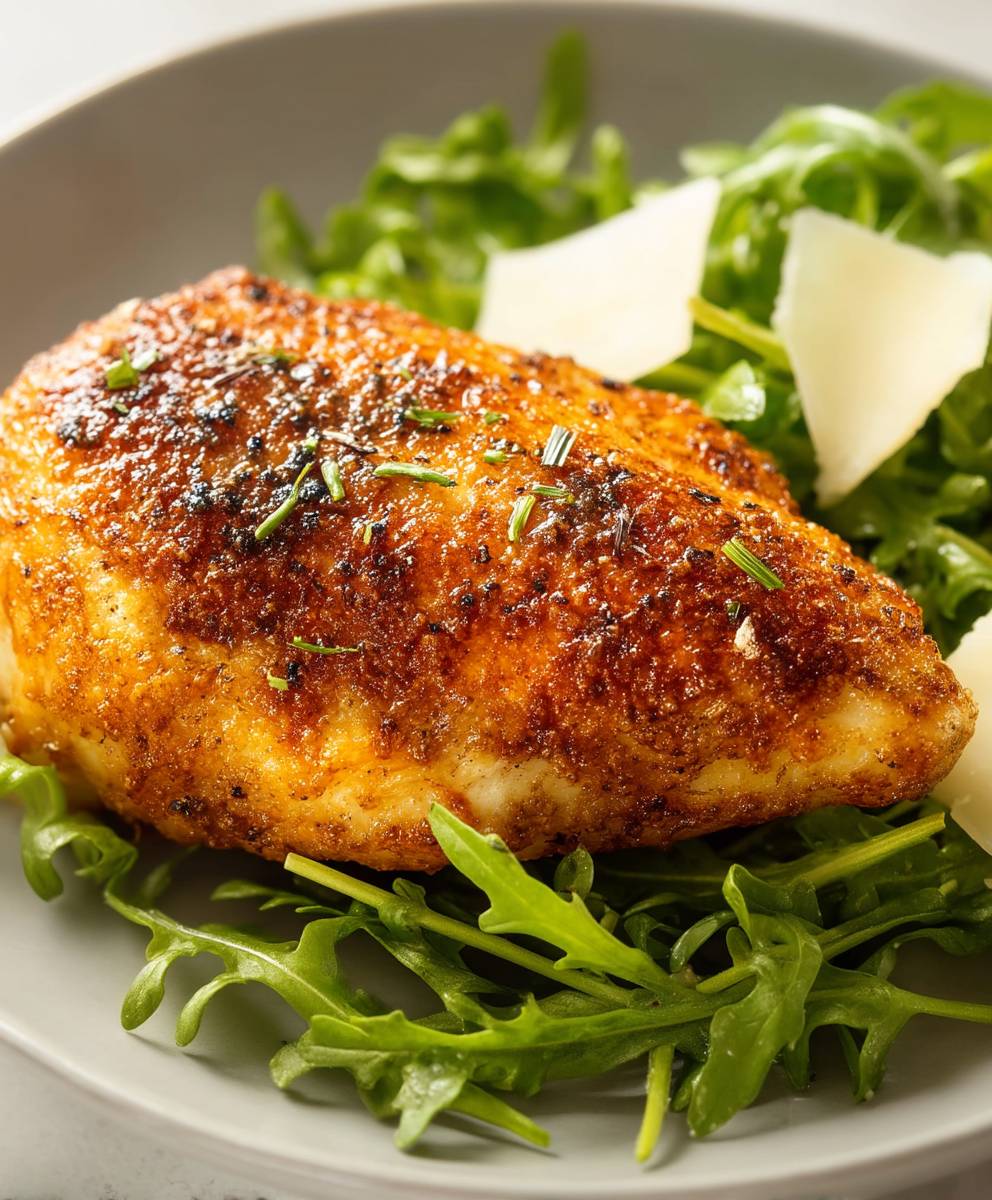
Instant Pot Chicken Breast: the weeknight dinner savior you didn’t know you needed! Are you tired of dry, flavorless chicken? Do you dream of juicy, tender chicken that’s ready in a flash? Then prepare to be amazed! This recipe unlocks the secret to perfectly cooked chicken breast, every single time, thanks to the magic of the Instant Pot.
While the Instant Pot is a relatively modern invention, the desire for quick and easy cooking methods is as old as time. Chicken, a staple in countless cuisines worldwide, has always been a go-to protein source. This method simply streamlines the process, allowing you to enjoy a healthy and delicious meal without spending hours in the kitchen. Think of it as a modern twist on a classic comfort food.
People adore Instant Pot Chicken Breast for its incredible convenience and consistent results. No more guessing games about internal temperature! The Instant Pot ensures that your chicken is cooked to perfection, retaining its moisture and flavor. Plus, it’s incredibly versatile. Use it in salads, sandwiches, tacos, or enjoy it as a main course with your favorite sides. The possibilities are endless! The tender texture and ease of preparation make this a winner for busy families and anyone looking for a healthy and delicious meal option.

Ingredients:
- 4 boneless, skinless chicken breasts (about 6-8 ounces each)
- 1 tablespoon olive oil
- 1 teaspoon salt
- 1/2 teaspoon black pepper
- 1 teaspoon garlic powder
- 1/2 teaspoon onion powder
- 1/2 teaspoon dried oregano
- 1/4 teaspoon paprika
- 1 cup chicken broth
Preparing the Chicken:
Before we get started with the Instant Pot, let’s prep our chicken breasts. This is a crucial step to ensure they’re flavorful and tender.
- Pat the chicken dry: Use paper towels to thoroughly pat each chicken breast dry. This helps the seasoning adhere better and promotes a slight sear, even in the Instant Pot.
- Season generously: In a small bowl, combine the salt, pepper, garlic powder, onion powder, oregano, and paprika. This is our simple yet effective spice blend. Sprinkle this mixture evenly over both sides of each chicken breast, making sure they’re well coated. Don’t be shy with the seasoning!
Searing the Chicken (Optional but Recommended):
While not strictly necessary, searing the chicken breasts before pressure cooking adds a beautiful color and enhances the flavor. I highly recommend taking this extra step if you have the time.
- Turn on the Sauté function: Press the “Sauté” button on your Instant Pot. Allow the pot to heat up for a few minutes. You’ll know it’s ready when the display reads “HOT.”
- Add olive oil: Pour the olive oil into the Instant Pot. Let it heat up for about 30 seconds until it shimmers.
- Sear the chicken: Carefully place the seasoned chicken breasts into the hot Instant Pot, making sure not to overcrowd the pot. You might need to do this in batches. Sear each side for about 2-3 minutes, until nicely browned. Don’t move the chicken around too much; let it develop a good sear.
- Remove the chicken: Once seared, remove the chicken breasts from the Instant Pot and set them aside on a plate.
Pressure Cooking the Chicken:
Now for the main event! This is where the Instant Pot magic happens, transforming the chicken into juicy, tender perfection.
- Deglaze the pot: Pour the chicken broth into the Instant Pot. Use a wooden spoon or spatula to scrape up any browned bits from the bottom of the pot. This is called deglazing, and it adds a ton of flavor to the broth and prevents the “burn” warning.
- Return the chicken to the pot: Place the seared (or unseared) chicken breasts back into the Instant Pot, arranging them in a single layer.
- Secure the lid: Close the Instant Pot lid and make sure the pressure release valve is set to the “Sealing” position.
- Cook on High Pressure: Press the “Manual” or “Pressure Cook” button (depending on your Instant Pot model) and set the cooking time to 8 minutes. This is the sweet spot for perfectly cooked chicken breasts that are tender but not dry.
- Natural Pressure Release (NPR): Once the cooking time is up, let the Instant Pot naturally release pressure for 10 minutes. This means you don’t touch the pressure release valve; just let the pressure dissipate on its own. After 10 minutes, carefully quick release any remaining pressure by moving the pressure release valve to the “Venting” position. Be careful of the steam!
- Check for doneness: Once the pressure is fully released and the float valve has dropped, carefully open the Instant Pot lid. Use a meat thermometer to check the internal temperature of the chicken breasts. They should reach 165°F (74°C). If they haven’t reached this temperature, close the lid and cook for another minute or two, then check again.
Shredding or Slicing the Chicken:
Once the chicken is cooked through, you can shred it or slice it, depending on your preference and how you plan to use it.
- Remove the chicken: Carefully remove the cooked chicken breasts from the Instant Pot and place them on a cutting board.
- Shredding: If you want shredded chicken, use two forks to pull the chicken apart. It should shred easily.
- Slicing: If you prefer sliced chicken, let the chicken rest for a few minutes before slicing it against the grain. This helps retain the juices.
Serving and Storing:
Now that your chicken is cooked and ready, it’s time to enjoy it! Here are some serving suggestions and storage tips.
- Serving suggestions: Serve the shredded or sliced chicken in salads, sandwiches, tacos, wraps, pasta dishes, or on its own with your favorite sides. The possibilities are endless!
- Storing leftovers: Store any leftover chicken in an airtight container in the refrigerator for up to 3-4 days.
- Freezing: You can also freeze the cooked chicken for longer storage. Let it cool completely before placing it in a freezer-safe bag or container. It can be frozen for up to 2-3 months. Thaw it in the refrigerator overnight before using.
Tips and Variations:
Here are some extra tips and ideas to customize this recipe to your liking.
- Adjust the seasoning: Feel free to adjust the seasoning blend to your taste. Add a pinch of red pepper flakes for some heat, or use different herbs and spices like thyme, rosemary, or smoked paprika.
- Use different liquids: Instead of chicken broth, you can use vegetable broth, bone broth, or even water. You can also add a splash of white wine or lemon juice for extra flavor.
- Add vegetables: You can add vegetables to the Instant Pot along with the chicken. Try adding chopped onions, carrots, celery, or potatoes. Just be aware that the vegetables will cook faster than the chicken, so they might be a bit softer.
- Make it a one-pot meal: Add rice or quinoa to the Instant Pot along with the chicken and broth for a complete one-pot meal. Adjust the cooking time and liquid accordingly.
- Use frozen chicken: You can cook frozen chicken breasts in the Instant Pot, but you’ll need to increase the cooking time to about 12-15 minutes. Make sure the internal temperature reaches 165°F (74°C).
- For extra flavor: Add a bay leaf to the Instant Pot while cooking. Remove it before serving.
- Thickening the sauce: If you want a thicker sauce, remove the chicken after cooking and set the Instant Pot to sauté mode. Mix 1 tablespoon of cornstarch with 2 tablespoons of cold water to create a slurry. Pour the slurry into the broth and cook, stirring constantly, until the sauce thickens.
Troubleshooting:
Here are some common issues you might encounter and how to fix them.
- “Burn” warning: If you get a “burn” warning on your Instant Pot, it means that something is stuck to the bottom of the pot and is overheating. Immediately turn off the Instant Pot and release the pressure. Remove the chicken and add more liquid to the pot, making sure to scrape up any stuck-on bits. Then, return the chicken and continue cooking.
- Chicken is dry: If your chicken is dry, it could be because you overcooked it. Make sure to use a meat thermometer to check the internal temperature and avoid cooking it for too long. Also, letting the Instant Pot naturally release pressure helps retain moisture.
- Chicken is not cooked through: If your chicken is not cooked through, it could be because your Instant Pot is not reaching the correct pressure. Make sure the lid is properly sealed and the pressure release valve is set to the “Sealing” position. You may also need to increase the cooking time slightly.
Nutritional Information (Approximate):
Please note that the nutritional information is an estimate and may vary depending on the specific ingredients and portion sizes used.
- Calories: Approximately 250-300 per serving (depending on size and added ingredients)
- Protein: 40-50 grams
- Fat: 5-10 grams
- Carbohydrates: 0-5 grams
Enjoy your perfectly cooked Instant Pot chicken breast! I hope this recipe helps you create delicious and healthy meals with ease.
Conclusion:
So there you have it! Making Instant Pot Chicken Breast has never been easier, faster, or more foolproof. Seriously, if you’ve been intimidated by the Instant Pot, this recipe is your gateway drug. It’s the perfect way to get comfortable with your pressure cooker and unlock a world of culinary possibilities. But beyond just being easy, the real reason this recipe is a must-try is the consistently juicy and tender chicken you’ll get every single time. No more dry, rubbery chicken breast! This method guarantees perfectly cooked chicken that’s ready to be shredded, sliced, or diced for all your favorite dishes.
Think about it: meal prepping for the week just got a whole lot simpler. Imagine having a batch of perfectly cooked chicken ready to go for salads, wraps, tacos, pasta dishes, and so much more. The possibilities are truly endless! And because it’s cooked in the Instant Pot, clean-up is a breeze. One pot, minimal effort, maximum flavor what’s not to love?
Serving Suggestions and Variations:
Now, let’s talk about how you can enjoy your perfectly cooked Instant Pot Chicken Breast. For a simple and healthy meal, slice it and serve it over a bed of mixed greens with your favorite vinaigrette. Add some roasted vegetables like broccoli, bell peppers, and sweet potatoes for a complete and satisfying dish. Or, shred the chicken and use it to make delicious chicken salad sandwiches or wraps. Add some grapes, celery, and a light mayonnaise dressing for a classic flavor combination.
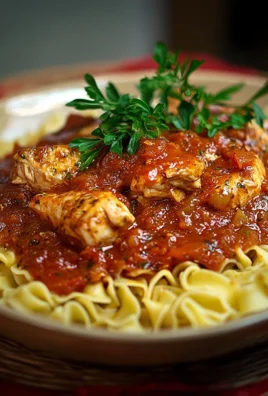
Feeling a little more adventurous? Try shredding the chicken and using it as a filling for tacos or quesadillas. Add some salsa, guacamole, and sour cream for a fiesta in your mouth! You can also dice the chicken and add it to your favorite pasta sauce for a protein-packed meal. Or, use it as a topping for homemade pizzas. The options are truly limitless, so get creative and experiment with different flavors and combinations.
And don’t forget about variations! You can easily customize this recipe to suit your own taste preferences. Try adding different herbs and spices to the Instant Pot for a unique flavor profile. A sprinkle of Italian seasoning, a dash of paprika, or a pinch of chili powder can all add a delicious twist. You can also experiment with different liquids. Chicken broth will add more flavor than water, but you can also use vegetable broth or even a splash of white wine for a more sophisticated taste.
I truly believe that this Instant Pot Chicken Breast recipe will become a staple in your kitchen. It’s quick, easy, versatile, and guarantees perfectly cooked chicken every time. So, what are you waiting for? Grab your Instant Pot, gather your ingredients, and give it a try! I’m confident that you’ll be amazed by the results.
And most importantly, I want to hear about your experience! Once you’ve tried this recipe, please come back and leave a comment below. Let me know how it turned out, what variations you tried, and what your favorite ways are to use your perfectly cooked chicken. Your feedback is invaluable and helps me to continue creating recipes that you’ll love. Happy cooking!
Instant Pot Chicken Breast: The Ultimate Guide to Perfect Results
Juicy, tender chicken breasts cooked perfectly in your Instant Pot! This easy recipe delivers flavorful chicken ideal for salads, sandwiches, tacos, or a simple protein meal.
Ingredients
- 4 boneless, skinless chicken breasts (about 6-8 ounces each)
- 1 tablespoon olive oil
- 1 teaspoon salt
- 1/2 teaspoon black pepper
- 1 teaspoon garlic powder
- 1/2 teaspoon onion powder
- 1/2 teaspoon dried oregano
- 1/4 teaspoon paprika
- 1 cup chicken broth
Instructions
- Prep the Chicken: Pat the chicken breasts dry with paper towels. In a small bowl, combine salt, pepper, garlic powder, onion powder, oregano, and paprika. Sprinkle the spice mixture evenly over both sides of each chicken breast.
- (Optional) Sear the Chicken: Press the “Sauté” button on your Instant Pot and let it heat up. Add olive oil and let it shimmer. Carefully place the seasoned chicken breasts into the hot Instant Pot (in batches if needed). Sear each side for 2-3 minutes until nicely browned. Remove the chicken and set aside.
- Pressure Cook the Chicken: Pour chicken broth into the Instant Pot and scrape up any browned bits from the bottom. Place the seared (or unseared) chicken breasts back into the Instant Pot in a single layer.
- Secure the lid, ensuring the pressure release valve is set to “Sealing.”
- Press the “Manual” or “Pressure Cook” button and set the cooking time to 8 minutes on high pressure.
- Let the Instant Pot naturally release pressure for 10 minutes. After 10 minutes, carefully quick release any remaining pressure.
- Check the internal temperature of the chicken breasts with a meat thermometer. They should reach 165°F (74°C). If not, close the lid and cook for another minute or two, then check again.
- Shred or Slice: Remove the cooked chicken breasts from the Instant Pot. Shred with two forks or slice against the grain.
- Serve: Enjoy the shredded or sliced chicken in salads, sandwiches, tacos, wraps, pasta dishes, or on its own with your favorite sides.
Notes
- Adjust Seasoning: Customize the spice blend to your liking.
- Deglaze the Pot: Scraping up the browned bits from the bottom of the pot after searing is crucial for flavor and preventing the “burn” warning.
- Natural Pressure Release: Letting the Instant Pot naturally release pressure for 10 minutes helps retain moisture in the chicken.
- Doneness: Always use a meat thermometer to ensure the chicken reaches an internal temperature of 165°F (74°C).
- Thickening the Sauce: If you want a thicker sauce, remove the chicken after cooking and set the Instant Pot to sauté mode. Mix 1 tablespoon of cornstarch with 2 tablespoons of cold water to create a slurry. Pour the slurry into the broth and cook, stirring constantly, until the sauce thickens.
- Serving Suggestions: Serve the shredded or sliced chicken in salads, sandwiches, tacos, wraps, pasta dishes, or on its own with your favorite sides.
- Storing Leftovers: Store any leftover chicken in an airtight container in the refrigerator for up to 3-4 days.
- Freezing: You can also freeze the cooked chicken for longer storage. Let it cool completely before placing it in a freezer-safe bag or container. It can be frozen for up to 2-3 months. Thaw it in the refrigerator overnight before using.
Leave a Comment