
Hawaiian Teriyaki: just the name conjures up images of sun-drenched beaches, swaying palm trees, and the sweet, savory aroma of grilled perfection, doesn’t it? But what if I told you that you could bring that taste of paradise right into your own kitchen, any time of year? This isn’t just another recipe; it’s a culinary passport to the islands!
Teriyaki, while often associated with Hawaiian cuisine, actually has its roots in Japan. However, the unique blend of flavors we know and love as Hawaiian Teriyaki truly blossomed in the melting pot of Hawaiian culture. Early plantation workers, drawing on their diverse culinary backgrounds, adapted traditional teriyaki techniques, incorporating local ingredients like pineapple juice and ginger to create a distinctly island-style marinade. This fusion resulted in a flavor profile that’s both familiar and excitingly new.
What makes this dish so irresistible? It’s the perfect balance of sweet and savory, the tender, juicy texture of the marinated meat, and the sheer convenience of it all! Whether you’re grilling it outdoors for a summer barbecue or pan-frying it indoors for a quick weeknight meal, Hawaiian Teriyaki is always a crowd-pleaser. The vibrant flavors appeal to both kids and adults, making it a versatile option for any occasion. So, are you ready to embark on a culinary adventure? Let’s dive into this easy and delicious recipe!

Ingredients:
- For the Teriyaki Marinade:
- 1 cup soy sauce (low sodium preferred)
- ½ cup packed brown sugar
- ¼ cup mirin (sweet rice wine)
- 2 tablespoons sake (rice wine)
- 2 tablespoons grated fresh ginger
- 2 cloves garlic, minced
- 1 tablespoon sesame oil
- 1 teaspoon ground ginger
- ½ teaspoon red pepper flakes (optional, for a little heat)
- 2 tablespoons pineapple juice
- For the Chicken:
- 2 pounds boneless, skinless chicken thighs (or breasts, cut into 1-inch cubes)
- For the Pineapple Salsa:
- 1 cup diced fresh pineapple
- ½ cup diced red onion
- ½ cup diced red bell pepper
- ¼ cup chopped fresh cilantro
- 2 tablespoons lime juice
- 1 jalapeño, seeded and minced (optional, for heat)
- Salt and pepper to taste
- For Serving:
- Cooked white rice (or brown rice, quinoa, etc.)
- Sesame seeds, for garnish
- Chopped green onions, for garnish
Preparing the Teriyaki Marinade:
- In a medium bowl, whisk together the soy sauce, brown sugar, mirin, sake, grated fresh ginger, minced garlic, sesame oil, ground ginger, red pepper flakes (if using), and pineapple juice. Make sure the brown sugar is fully dissolved. This is important for even distribution of flavor and prevents burning during cooking. I like to use a whisk for this to really get everything incorporated.
- Taste the marinade and adjust the sweetness or spiciness to your liking. If you prefer a sweeter marinade, add a little more brown sugar. If you want more heat, add a pinch more red pepper flakes. Remember, you can always add more, but you can’t take it away!
Marinating the Chicken:
- Place the chicken in a large resealable plastic bag or a glass container. Pour the teriyaki marinade over the chicken, ensuring that all pieces are coated evenly. If using a bag, squeeze out any excess air before sealing.
- Massage the marinade into the chicken. This helps the chicken absorb the flavors more effectively.
- Refrigerate the chicken for at least 30 minutes, or preferably for several hours (up to overnight). The longer the chicken marinates, the more flavorful and tender it will become. I usually aim for at least 4 hours for the best results. If marinating overnight, be sure to use low-sodium soy sauce to prevent the chicken from becoming too salty.
Preparing the Pineapple Salsa:
- While the chicken is marinating, prepare the pineapple salsa. In a medium bowl, combine the diced pineapple, red onion, red bell pepper, cilantro, lime juice, and jalapeño (if using).
- Gently toss the ingredients together to combine. Be careful not to mash the pineapple.
- Season the salsa with salt and pepper to taste. I usually start with a pinch of each and then adjust as needed.
- Refrigerate the salsa until ready to serve. This allows the flavors to meld together. The salsa can be made a few hours in advance.
Cooking the Chicken:
There are several ways to cook the chicken, depending on your preference and the weather. I’ll outline three methods: grilling, pan-frying, and baking.
Grilling:
- Preheat your grill to medium-high heat. Make sure the grates are clean and lightly oiled to prevent the chicken from sticking.
- Remove the chicken from the marinade, allowing any excess marinade to drip off. Discard the used marinade. Never reuse marinade that has been in contact with raw chicken.
- Grill the chicken for 5-7 minutes per side, or until it is cooked through and the internal temperature reaches 165°F (74°C). Use a meat thermometer to ensure accuracy. The chicken should have nice grill marks and be slightly caramelized.
- Remove the chicken from the grill and let it rest for a few minutes before serving. This allows the juices to redistribute, resulting in more tender and flavorful chicken.
Pan-Frying:
- Heat a large skillet or frying pan over medium-high heat. Add a tablespoon of oil (vegetable, canola, or coconut oil work well).
- Remove the chicken from the marinade, allowing any excess marinade to drip off. Discard the used marinade.
- Add the chicken to the hot skillet in a single layer, being careful not to overcrowd the pan. If necessary, cook the chicken in batches.
- Cook the chicken for 5-7 minutes per side, or until it is cooked through and the internal temperature reaches 165°F (74°C). The chicken should be nicely browned and slightly caramelized.
- Remove the chicken from the skillet and let it rest for a few minutes before serving.
Baking:
- Preheat your oven to 400°F (200°C).
- Line a baking sheet with parchment paper for easy cleanup.
- Remove the chicken from the marinade, allowing any excess marinade to drip off. Discard the used marinade.
- Arrange the chicken in a single layer on the prepared baking sheet.
- Bake the chicken for 20-25 minutes, or until it is cooked through and the internal temperature reaches 165°F (74°C). The chicken should be cooked through and slightly browned.
- For a more caramelized finish, you can broil the chicken for the last 1-2 minutes, watching carefully to prevent burning.
- Remove the chicken from the oven and let it rest for a few minutes before serving.
Serving:
- Serve the teriyaki chicken over cooked rice. I like to use jasmine rice, but any type of rice will work. You can also use quinoa or another grain if you prefer.
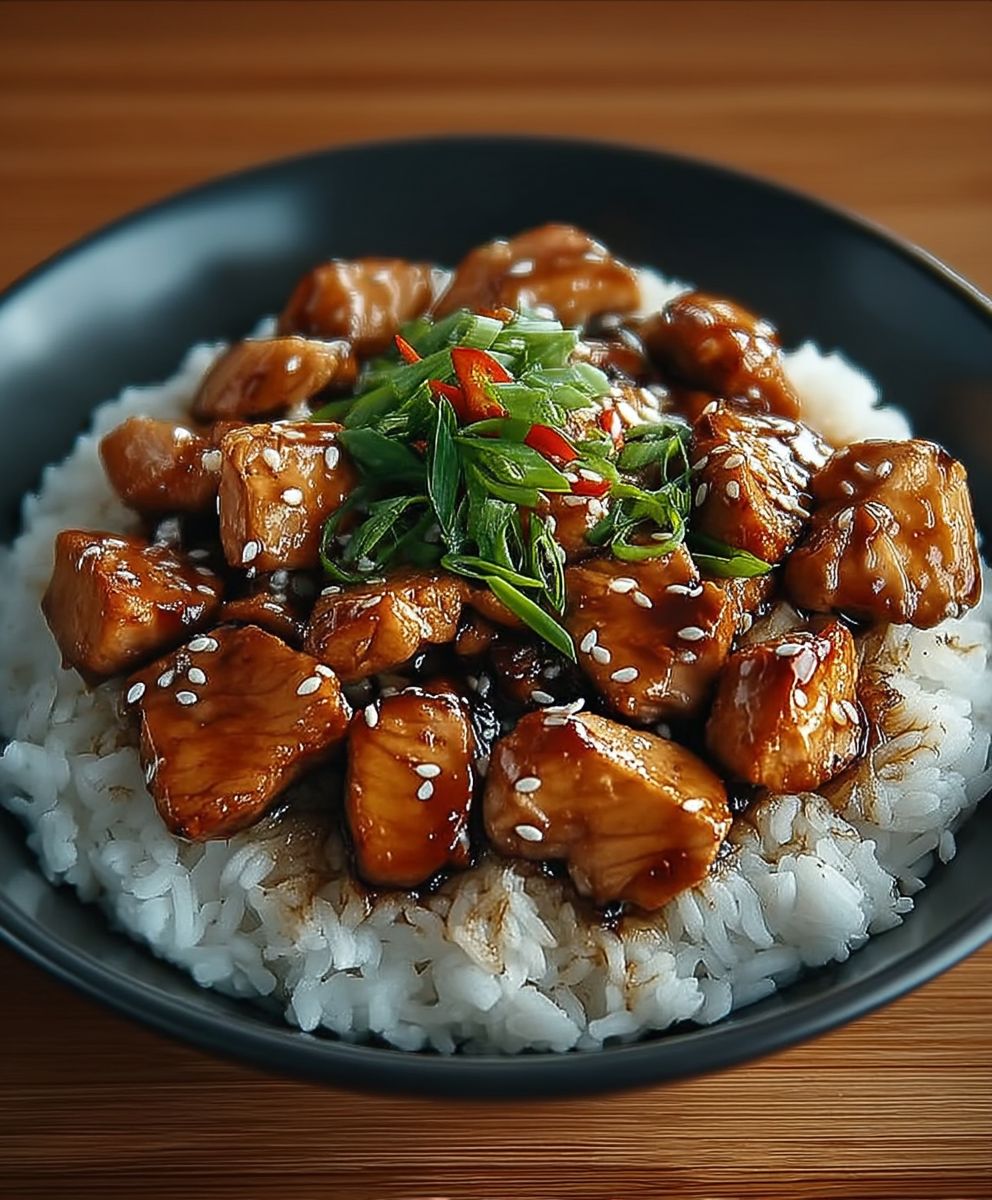
- Top the chicken with the pineapple salsa. The fresh, tangy salsa complements the sweet and savory teriyaki chicken perfectly.
- Garnish with sesame seeds and chopped green onions. These add a nice visual appeal and a subtle nutty flavor.
- Enjoy! This Hawaiian Teriyaki Chicken is a delicious and easy meal that is perfect for a weeknight dinner or a weekend barbecue.
Conclusion:
So there you have it! This Hawaiian Teriyaki recipe is truly a must-try for anyone craving a taste of the islands right in their own kitchen. The sweet and savory combination, the tender, juicy protein (whether you choose chicken, beef, or tofu!), and the vibrant, tropical flavors all come together to create a dish that’s both satisfying and incredibly easy to make. I’ve been making this for years, and it’s always a crowd-pleaser, from weeknight dinners to weekend barbecues.
But what makes this recipe truly special is its versatility. While I’ve outlined my go-to method, feel free to experiment and make it your own!
Serving Suggestions and Variations:
* Rice is your best friend: Serve this Hawaiian Teriyaki over a bed of fluffy white rice or brown rice for a complete and satisfying meal. For an extra touch of authenticity, try coconut rice!
* Veggie Power: Add some grilled pineapple chunks and bell peppers to the skewers or pan for a burst of color and sweetness. Broccoli, snap peas, and even zucchini also work beautifully.
* Spice it up!: If you like a little heat, add a pinch of red pepper flakes to the marinade or a drizzle of sriracha to the finished dish.
* Salad Sensation: Transform this into a delicious salad by slicing the cooked teriyaki and serving it over a bed of mixed greens with a light vinaigrette. Add some toasted sesame seeds and chopped green onions for extra flavor and texture.
* Wrap it Up: Use the Hawaiian Teriyaki as a filling for lettuce wraps or tortillas. Top with shredded carrots, cucumbers, and a dollop of Greek yogurt or sour cream for a refreshing and healthy meal.
* Protein Power: While I often use chicken thighs, this marinade works wonders with steak (flank or sirloin are great choices), pork tenderloin, or even firm tofu for a vegetarian option. Just adjust the cooking time accordingly.
* Grill Master: For a smoky flavor, grill the marinated protein over medium heat until cooked through. Be sure to baste with extra marinade during the last few minutes of grilling.
* Slow Cooker Magic: For an even easier weeknight meal, toss all the ingredients into a slow cooker and cook on low for 6-8 hours. Shred the protein and serve over rice or in sandwiches.
I truly believe that this Hawaiian Teriyaki recipe will become a staple in your kitchen. It’s simple enough for a beginner cook, yet flavorful enough to impress even the most discerning palates. The beauty of this recipe lies in its adaptability you can easily adjust the ingredients and cooking methods to suit your preferences and dietary needs.
So, what are you waiting for? Grab your ingredients, put on some Hawaiian music, and get cooking! I’m confident that you’ll love this recipe as much as I do.
And most importantly, I’d love to hear about your experience! Did you try any variations? What did you serve it with? Share your photos and comments below I can’t wait to see what you create! Happy cooking!
Hawaiian Teriyaki: A Taste of Paradise in Every Bite
Sweet and savory Hawaiian Teriyaki Chicken served with a refreshing pineapple salsa. Perfect for a quick weeknight dinner or a summer BBQ!
Ingredients
- 1 cup soy sauce (low sodium preferred)
- ½ cup packed brown sugar
- ¼ cup mirin (sweet rice wine)
- 2 tablespoons sake (rice wine)
- 2 tablespoons grated fresh ginger
- 2 cloves garlic, minced
- 1 tablespoon sesame oil
- 1 teaspoon ground ginger
- ½ teaspoon red pepper flakes (optional, for a little heat)
- 2 tablespoons pineapple juice
- 2 pounds boneless, skinless chicken thighs (or breasts, cut into 1-inch cubes)
- 1 cup diced fresh pineapple
- ½ cup diced red onion
- ½ cup diced red bell pepper
- ¼ cup chopped fresh cilantro
- 2 tablespoons lime juice
- 1 jalapeño, seeded and minced (optional, for heat)
- Salt and pepper to taste
- Cooked white rice (or brown rice, quinoa, etc.)
- Sesame seeds, for garnish
- Chopped green onions, for garnish
Instructions
- Prepare the Teriyaki Marinade: In a medium bowl, whisk together the soy sauce, brown sugar, mirin, sake, grated fresh ginger, minced garlic, sesame oil, ground ginger, red pepper flakes (if using), and pineapple juice. Ensure the brown sugar is fully dissolved. Taste and adjust sweetness or spiciness to your liking.
- Marinate the Chicken: Place the chicken in a large resealable plastic bag or a glass container. Pour the teriyaki marinade over the chicken, ensuring all pieces are coated evenly. Massage the marinade into the chicken. Refrigerate for at least 30 minutes, or preferably for several hours (up to overnight).
- Prepare the Pineapple Salsa: While the chicken is marinating, prepare the pineapple salsa. In a medium bowl, combine the diced pineapple, red onion, red bell pepper, cilantro, lime juice, and jalapeño (if using). Gently toss to combine. Season with salt and pepper to taste. Refrigerate until ready to serve.
- Cook the Chicken (Choose one method):
- Grilling: Preheat grill to medium-high heat. Remove chicken from marinade, allowing excess to drip off (discard marinade). Grill for 5-7 minutes per side, or until internal temperature reaches 165°F (74°C). Let rest for a few minutes before serving.
- Pan-Frying: Heat a large skillet over medium-high heat with 1 tablespoon of oil. Remove chicken from marinade, allowing excess to drip off (discard marinade). Add chicken to the hot skillet in a single layer. Cook for 5-7 minutes per side, or until internal temperature reaches 165°F (74°C). Let rest for a few minutes before serving.
- Baking: Preheat oven to 400°F (200°C). Line a baking sheet with parchment paper. Remove chicken from marinade, allowing excess to drip off (discard marinade). Arrange chicken in a single layer on the baking sheet. Bake for 20-25 minutes, or until internal temperature reaches 165°F (74°C). Broil for the last 1-2 minutes for a more caramelized finish (optional). Let rest for a few minutes before serving.
- Serve: Serve the teriyaki chicken over cooked rice. Top with the pineapple salsa. Garnish with sesame seeds and chopped green onions. Enjoy!
Notes
- For best flavor, marinate the chicken for at least 4 hours, or overnight. If marinating overnight, use low-sodium soy sauce.
- Never reuse marinade that has been in contact with raw chicken.
- Adjust the sweetness and spiciness of the marinade and salsa to your preference.
- Chicken can be cooked using a grill, pan, or oven.
- Serve with your favorite type of rice or grain.


Leave a Comment