
Grandmas Stuffing Recipe holds a truly special place at the heart of countless family gatherings, particularly during the festive holiday season. There’s an undeniable magic in a dish that evokes such powerful memories of warmth, comfort, and togetherness. Imagine the tantalizing aroma wafting from the kitchen – a symphony of sage, thyme, and savory broth mingling with perfectly toasted bread – a scent that instantly transports you back to childhood holidays, laughter, and cherished moments shared around a bustling table.
This isn’t just any side dish; it’s a culinary legacy, a cornerstone of traditional American feasts, passed down through generations. While many variations exist, a true Grandmas Stuffing Recipe carries with it a unique heritage, symbolizing generosity and the enduring love of family. People adore this dish not only for its incredible taste – that delightful contrast of crispy, golden-brown edges and a moist, deeply flavorful interior – but also for the profound sense of nostalgia it inspires. It’s the ultimate comfort food, a testament to simple ingredients coming together to create something extraordinary. I am so excited to share the secrets to recreating this beloved classic, ensuring that its comforting essence continues to grace your table for years to come.

Ingredients:
- For the Bread Base:
- 16 cups (approximately 2 large loaves) day-old sturdy white bread (like sourdough, challah, or a good quality country white bread), cut into 3/4 to 1-inch cubes
- For the Aromatic Base:
- 1 cup (2 sticks) unsalted butter, plus extra for greasing the pan
- 4 large yellow onions, finely diced (about 6 cups)
- 6 stalks celery, finely diced (about 4 cups)
- 4 cloves garlic, minced
- For the Seasoning & Liquid:
- 2 tablespoons fresh sage, finely chopped (or 2 teaspoons dried rubbed sage)
- 2 tablespoons fresh thyme leaves, finely chopped (or 2 teaspoons dried thyme)
- 1/2 cup fresh Italian parsley, finely chopped
- 2 teaspoons kosher salt, or to taste
- 1 teaspoon freshly ground black pepper, or to taste
- 4-6 cups low-sodium chicken or vegetable broth, warmed (I always start with 4 and add more as needed)
- 2 large eggs, lightly beaten
- Optional Add-ins (for extra depth in your Grandmas Stuffing Recipe):
- 1 cup chopped dried cranberries or tart apples (like Granny Smith)
- 1 lb cooked and crumbled breakfast sausage or sautéed mushrooms
Preparing the Bread Base for Grandmas Stuffing Recipe
- Cube the Bread: First things first, let’s get our bread ready. For a truly authentic Grandmas Stuffing Recipe, the quality and preparation of the bread are paramount. I always start with day-old bread because it has less moisture, which allows it to absorb the broth and flavors beautifully without becoming soggy. If your bread isn’t day-old, don’t fret; we can quickly dry it out. Cut your chosen sturdy white bread into consistent 3/4 to 1-inch cubes. Don’t worry too much about absolute perfection here, but try to keep them relatively uniform so they cook evenly. Roughly 16 cups of cubes will be perfect for a large batch, serving a good crowd.
-
Dry the Bread (Crucial Step!): This step is non-negotiable for the perfect texture in your Grandmas Stuffing Recipe. You want dry, almost crouton-like bread cubes, not soft bread.
- Oven Method (My preferred way): Spread the bread cubes in a single layer over two large baking sheets. Pop them into a preheated oven at 275°F (135°C) for 25-35 minutes, tossing them gently once or twice. You’re not looking for them to brown significantly, just to become thoroughly dry and firm to the touch. This removes excess moisture and ensures they’ll soak up all the delicious broth and butter without turning into a mushy mess.
- Air-Dry Method: If you have time, you can also spread the bread cubes out on baking sheets or a clean counter overnight (for at least 12-24 hours) in a well-ventilated area. This works wonderfully, but I often find myself short on time, so the oven method is my go-to.
Once dried, transfer the bread cubes to an extra-large mixing bowl. This bowl needs to be big enough to accommodate all the ingredients, so choose wisely!
Sautéing the Aromatics for Flavor Foundation
- Melt the Butter: In a large, heavy-bottomed pot or Dutch oven, melt 1 cup of unsalted butter over medium heat. My grandma always said, “Butter is the heart of good stuffing,” and she was absolutely right. This amount might seem like a lot, but it’s essential for creating that rich, comforting flavor profile that defines this Grandmas Stuffing Recipe.
- Sauté the Vegetables: Add the finely diced onions and celery to the melted butter. Reduce the heat to medium-low and cook gently, stirring occasionally, for 15-20 minutes. This slow sauté is key; we’re not trying to brown them, but rather to soften them completely and coax out all their sweet, savory flavors. They should become translucent and very tender, almost melting. This patience here truly pays off in the final taste of your Grandmas Stuffing Recipe.
- Add Garlic and Herbs: Once the onions and celery are soft, add the minced garlic, fresh chopped sage, fresh chopped thyme, and fresh chopped parsley. Cook for another 2-3 minutes, stirring constantly, until the garlic is fragrant and the herbs release their aromas. Be careful not to burn the garlic; it can quickly turn bitter. The smell emanating from your kitchen at this point will be absolutely heavenly – a sure sign you’re on your way to a spectacular Grandmas Stuffing Recipe!
- Season Generously: Stir in 2 teaspoons of kosher salt and 1 teaspoon of freshly ground black pepper. Remember, you’re seasoning a very large volume of ingredients, so don’t be shy. You’ll have another chance to adjust the seasoning later, but a good base is important now.
Assembling Your Grandmas Stuffing Recipe Mixture
- Combine Vegetables and Bread: Carefully pour the hot, sautéed aromatic mixture over the dried bread cubes in your extra-large mixing bowl. Using a large spoon or your (clean!) hands, gently toss the mixture to coat the bread cubes evenly with the butter and vegetables. Try to be gentle to avoid breaking up the bread too much. We want those distinct bread pieces.
- Incorporate Optional Add-ins: If you’re using any of the optional add-ins, now is the time to gently fold them into the mixture. Whether it’s the tartness of cranberries, the sweetness of apples, or the savory depth of sausage or mushrooms, these additions can elevate your Grandmas Stuffing Recipe even further. My grandma sometimes added a little cooked sausage, and it was always a big hit!
- Add Liquid and Eggs: In a separate bowl, whisk together the warmed chicken or vegetable broth and the lightly beaten eggs. Gradually pour about 4 cups of this liquid mixture over the bread and vegetable mixture. Toss very gently until the bread is evenly moistened. This is where you need to pay close attention to the texture! You want the bread to be moist, but not soaking wet. It should hold together when you gently squeeze a handful, but still have some distinct pieces. If it feels too dry, add more broth, 1/2 cup at a time, until you reach the desired consistency. The eggs act as a binder, helping the stuffing hold its shape, while the broth provides the essential moisture.
- Taste and Adjust Seasoning: This step is often overlooked but is absolutely vital for a truly outstanding Grandmas Stuffing Recipe. Take a small spoonful of the mixture (if you’re concerned about raw egg, you can quickly microwave a small portion for a few seconds). Taste it. Does it need more salt? More pepper? A little more sage? Adjust the seasonings according to your preference. Remember, flavors can mellow a bit during baking, so a slightly robust seasoning now will be perfect later.
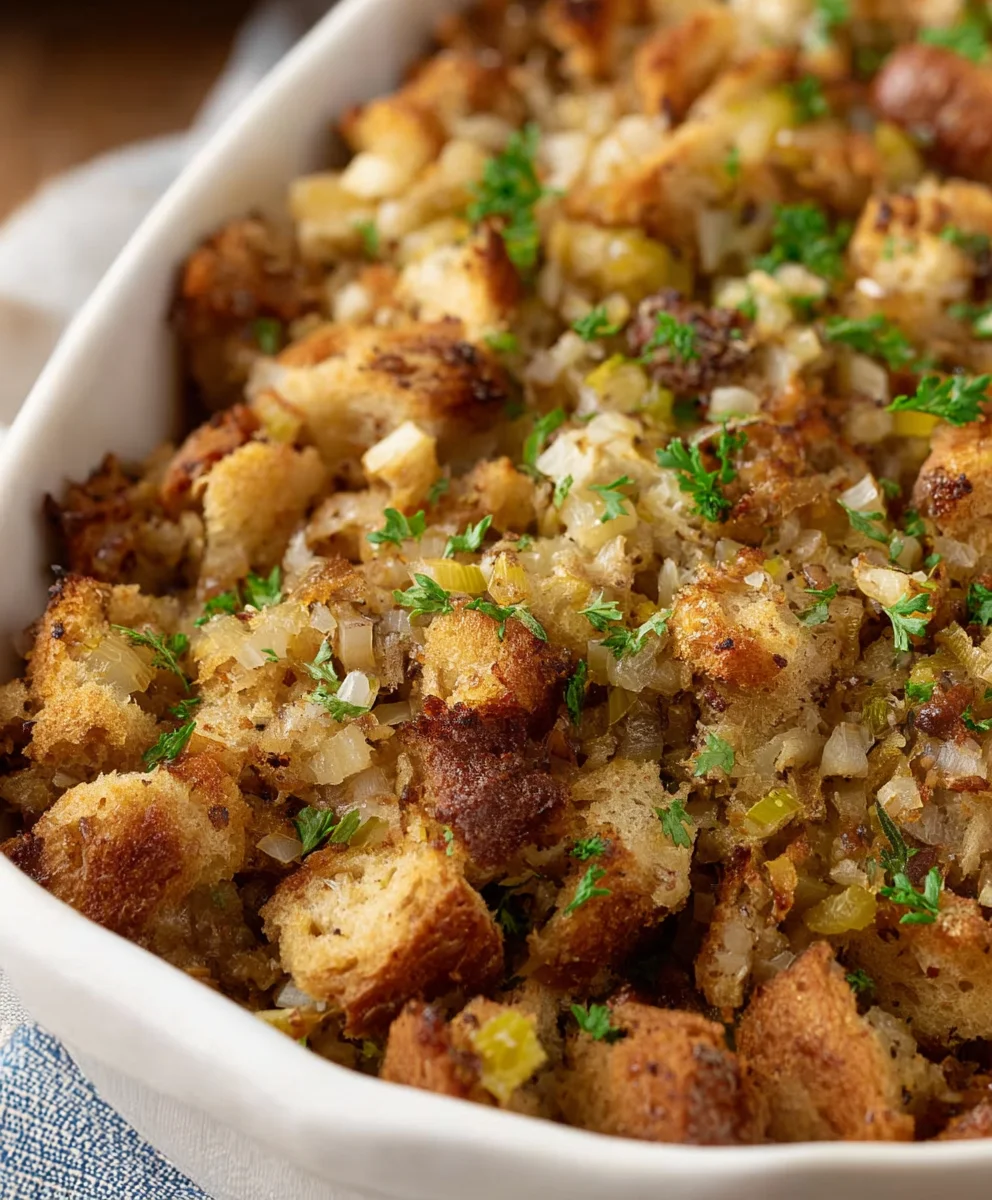
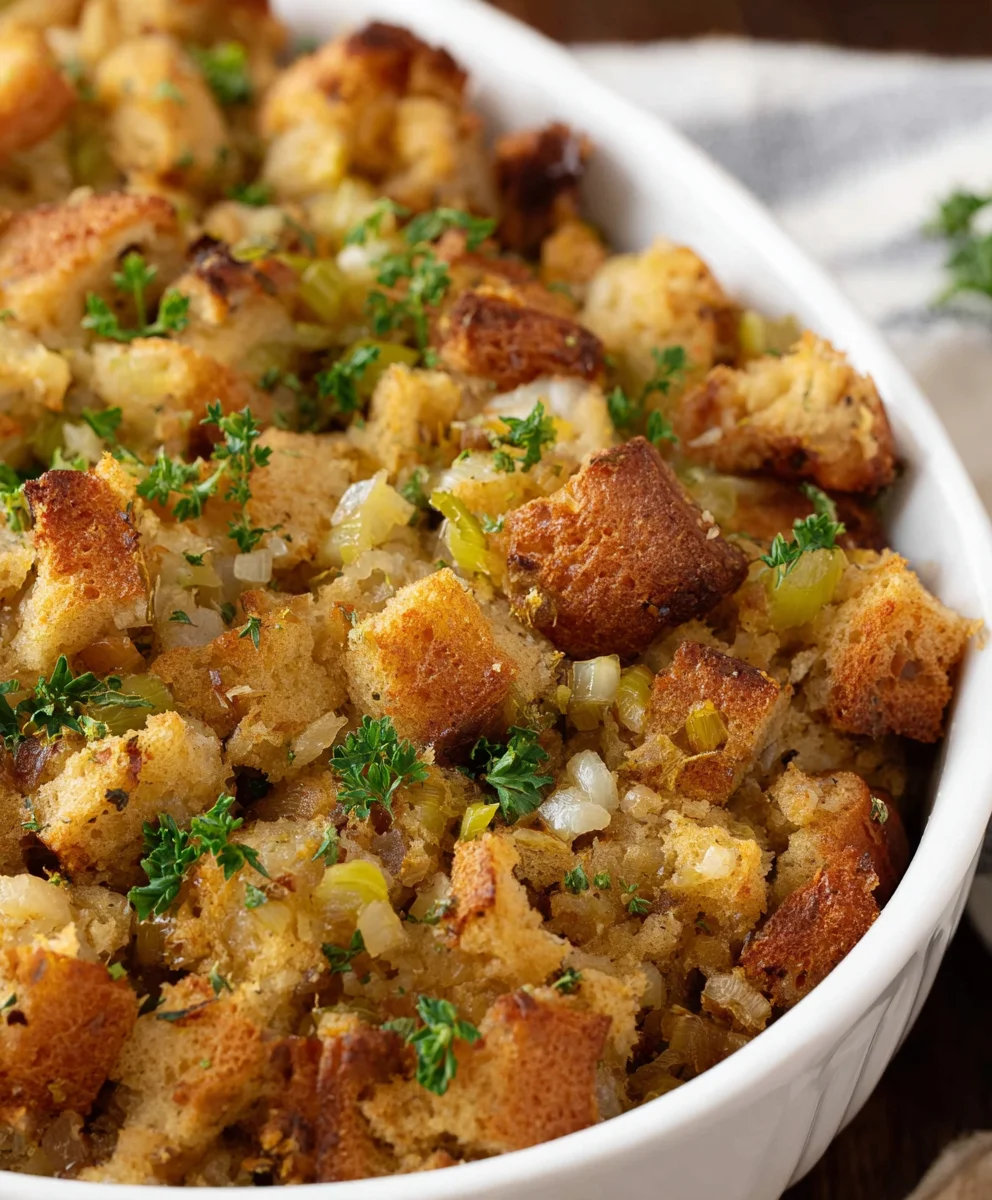
Baking Your Delicious Grandmas Stuffing Recipe
- Preheat Oven and Prepare Baking Dish: Preheat your oven to 375°F (190°C). Lightly grease a large 9×13-inch baking dish (or two smaller ones, depending on your preference) with butter or cooking spray.
- Transfer to Baking Dish: Spoon the stuffing mixture evenly into the prepared baking dish. Don’t pack it down too tightly; a looser pack allows for better air circulation and results in a more tender, less dense stuffing. If you prefer a more compact stuffing, you can gently press it down, but I find grandma’s method of a lighter hand yields a better texture for this Grandmas Stuffing Recipe.
- Initial Covered Bake: Cover the baking dish tightly with aluminum foil. This step is crucial for trapping moisture and ensuring the stuffing cooks through evenly and stays tender. Bake for 30 minutes. The foil acts like a mini-steamer, allowing the flavors to meld beautifully and the bread to absorb all the liquids.
- Uncovered Bake for Golden Perfection: After 30 minutes, remove the foil. Now we’re going for that irresistible, golden-brown, slightly crispy top! Return the uncovered dish to the oven and continue baking for another 25-35 minutes, or until the top is beautifully golden and the edges are slightly crisp. An internal temperature of 165°F (74°C) is ideal for food safety. If you like it even crispier, you can briefly place it under the broiler for a minute or two at the very end, but watch it like a hawk!
- Rest Before Serving: Once baked to perfection, remove the Grandmas Stuffing Recipe from the oven and let it rest for 10-15 minutes before serving. This allows the stuffing to set, making it easier to serve and ensuring all those wonderful juices redistribute. It also means it won’t be scorching hot, making for a more enjoyable first bite.
Grandmas Stuffing Recipe: Tips for Success and Variations
My grandma always believed that a truly great stuffing was versatile and could be adapted. Here are a few extra pointers to make your Grandmas Stuffing Recipe absolutely unforgettable:
- Make Ahead: You can assemble the entire stuffing mixture (steps 1-10) and store it, covered, in the refrigerator for up to 1-2 days before baking. When ready to bake, let it sit at room temperature for about 30 minutes before putting it in the oven. You might need to add an extra 10-15 minutes to the baking time if it’s going in cold. This is a fantastic time-saver for holiday meals!
- Crispy Edges Lover?: If you adore those crispy bits (and who doesn’t?), consider baking your Grandmas Stuffing Recipe in a larger, shallower pan, or even spreading it out on a large baking sheet. This increases the surface area exposed to the heat, maximizing crispiness.
- Boost the Umami: For an even deeper flavor, try sautéing a pound of sliced mushrooms with the celery and onions. Mushrooms add a wonderful earthy, savory note that complements the other ingredients beautifully.
- Beyond Turkey: While this Grandmas Stuffing Recipe is a quintessential Thanksgiving side, it’s also wonderful alongside roasted chicken, pork tenderloin, or even as a standalone vegetarian meal.
- Freezing Leftovers: Any leftover Grandmas Stuffing Recipe freezes beautifully! Pack it into airtight containers or freezer-safe bags and store for up to 3 months. Thaw in the refrigerator overnight and reheat gently in the oven or microwave.
Conclusion:
Well, my friends, we’ve reached the end of our culinary journey, but truly, it’s just the beginning of an incredible experience for you and your loved ones. I genuinely hope you’re feeling inspired and ready to dive into your kitchen with confidence. What we have here isn’t just another side dish; it’s a time-honored tradition waiting to be brought to life in your home. This isn’t merely a recipe; it’s a legacy, a culinary hug that promises to deliver comfort and joy with every single bite. I’ve poured my heart into sharing this with you because I believe everyone deserves to experience the magic it creates. It’s the kind of dish that quietly steals the show, transforming a good meal into an unforgettable feast. Trust me when I say, the aroma alone will have everyone gathering, eager for a taste of what promises to be truly special. It’s more than just food; it’s about creating memories, fostering togetherness, and celebrating the simple pleasures of a perfectly crafted dish. It brings people together around the table, sparking conversations and building bonds that last far longer than the meal itself.
Why This Recipe is an Absolute Must-Try
You might be wondering, “Why this particular stuffing recipe?” And my answer is simple: it’s the perfect blend of tradition, simplicity, and unbelievably rich flavor. We’re talking about a stuffing that manages to be simultaneously moist and beautifully textured, never dry or mushy. Each spoonful offers that delightful mix of tender bread, aromatic herbs, and savory goodness that hits all the right notes. It’s the quintessential comfort food, the kind that reminds you of holidays and family gatherings, of warmth and laughter. It’s robust enough to stand up to the richest gravies, yet delicate enough to complement any main course without overpowering it. The way the spices meld together, the slight crispness on top contrasting with the fluffy interior – it’s a symphony of textures and tastes that dance on your palate. It’s a recipe that has been refined over generations, proving its worth time and time again. Forget complicated techniques or obscure ingredients; this one celebrates the beauty of classic flavors executed to perfection. It’s truly foolproof, designed to give you stellar results every single time, making you look like a seasoned pro even if it’s your first attempt. This recipe provides an unbeatable foundation, allowing you to confidently create a dish that will earn you rave reviews and requests for more.
Creative Ways to Serve and Savor Your Stuffing
Now that you’re armed with what I confidently call the best Grandmas Stuffing Recipe, let’s talk about how to make it even more versatile and enjoyable beyond the main holiday meal. While it’s undeniably the star alongside your Thanksgiving turkey, Christmas ham, or a hearty Sunday roast chicken, its deliciousness doesn’t stop there. Imagine crumbling leftover stuffing into a breakfast hash with some crispy bacon, sautéed onions, and a perfectly fried egg – pure genius, right? Or for an elegant twist, press it into a muffin tin, bake until golden and crisp, and serve individual stuffing cups at your next brunch or as a refined side. For a quick weeknight meal, mix leftover stuffing with shredded chicken or turkey, add a little extra broth or cream, top with cheese, and bake until bubbly and golden for a comforting casserole that’s far from mundane. You could even use it as a flavorful base for savory waffles! Yes, you heard that right! Incorporate some into your waffle batter for a surprisingly delightful and unique twist on breakfast or brunch. Don’t hesitate to get creative with additions too. For an extra layer of flavor and texture, consider folding in sautéed mushrooms, toasted pecans or walnuts, a bit of crumbled cooked sausage, or even some finely diced apples before baking. A splash of apple cider or white wine can add a lovely subtle sweetness and acidity, or a sprinkle of dried cranberries for a festive touch and pop of color. If you’re looking to make it ahead, simply prepare the entire mixture, cover tightly, and refrigerate for up to two days before baking – just add a little extra broth if it seems dry before popping it in the oven. For a gluten-free version, simply swap out the regular bread for your favorite high-quality gluten-free loaf, ensuring your broth is also free from gluten. The core principles of flavor and texture will remain, guaranteeing a delicious outcome for everyone at your table. This recipe is wonderfully adaptable, inviting you to put your own unique spin on it and make it truly your own, year after year.
Your Turn to Create, Share, and Inspire!
So, what are you waiting for? This is your invitation to bring a truly exceptional dish into your home and create new traditions. Don’t let another holiday or special occasion pass without experiencing the unparalleled delight of this stuffing. I’m incredibly excited for you to try this recipe, and more importantly, for you to taste the wonderful results and witness the joy it brings to your family and friends. When you pull that golden-brown dish out of the oven, radiating warmth and that irresistible aroma, you’ll know exactly what I’m talking about. Please, once you’ve made it, I would absolutely love to hear about your experience! Did you try any of the suggested variations? What delightful additions did you come up with on your own? What did your family and guests think? Did it bring back any cherished memories for you, or perhaps help you create new ones? Take a photo of your magnificent creation, share your thoughts in the comments below, or even tag us on social media with your culinary triumph. Your feedback and creativity inspire not just me, but countless other home cooks who are looking for that next perfect recipe to add to their repertoire. Let’s build a vibrant community around delicious food, shared experiences, and the simple joy of cooking. This isn’t just a recipe to follow; it’s an opportunity to create, to connect, and to savor moments that truly matter. Go ahead, gather your ingredients, preheat that oven, and prepare to make some truly delicious memories. I have no doubt that this recipe will become a beloved staple in your culinary repertoire, a testament to the power of simple, honest ingredients and a whole lot of love. Enjoy every single bite!
Grandmas Stuffing Recipe: Classic, Easy, & Delicious!
A classic, easy, and delicious Grandmas Stuffing Recipe that evokes warmth, comfort, and togetherness. Featuring crispy golden edges and a moist, deeply flavorful interior, it’s the ultimate comfort food for holiday gatherings.
Ingredients
-
16 cups dry bread cubes
-
1/2 cup butter
-
2 cups onion, 1/2-inch diced
-
2 cups celery, 1/2-inch diced
-
3 teaspoons poultry seasoning
-
1/2 teaspoon thyme
-
1/2 teaspoon sage
-
1 teaspoon salt
-
1/2 teaspoon black pepper
-
1½ cups chicken broth
-
2 large eggs
-
1 tablespoon parsley, chopped (for garnish)
Instructions
-
Step 1
Cut 16 cups day-old bread into 3/4 to 1-inch cubes. Spread on baking sheets and dry in a 275°F (135°C) oven for 25-35 minutes, or air-dry overnight, until firm. Transfer to a large bowl. -
Step 2
In a large pot, melt 1/2 cup butter over medium heat. Add 2 cups diced onion and 2 cups diced celery. Sauté for 15-20 minutes until softened. -
Step 3
Stir in 3 teaspoons poultry seasoning, 1/2 teaspoon thyme, 1/2 teaspoon sage, 1 teaspoon salt, and 1/2 teaspoon black pepper. Cook for 1-2 minutes until fragrant. -
Step 4
Pour the sautéed mixture over the dried bread cubes. Toss gently to coat. -
Step 5
Whisk together 1½ cups warmed chicken broth and 2 large beaten eggs. Gradually pour over the bread mixture, tossing gently until moistened. Adjust seasoning to taste. -
Step 6
Transfer mixture to a greased 9×13-inch baking dish. Cover with foil and bake at 375°F (190°C) for 30 minutes. Uncover and bake for another 25-35 minutes, or until golden brown and internal temperature reaches 165°F (74°C). -
Step 7
Let rest for 10-15 minutes before serving. Garnish with 1 tablespoon chopped parsley.
Important Information
Nutrition Facts (Per Serving)
It is important to consider this information as approximate and not to use it as definitive health advice.
Allergy Information
Please check ingredients for potential allergens and consult a health professional if in doubt.


Leave a Comment