
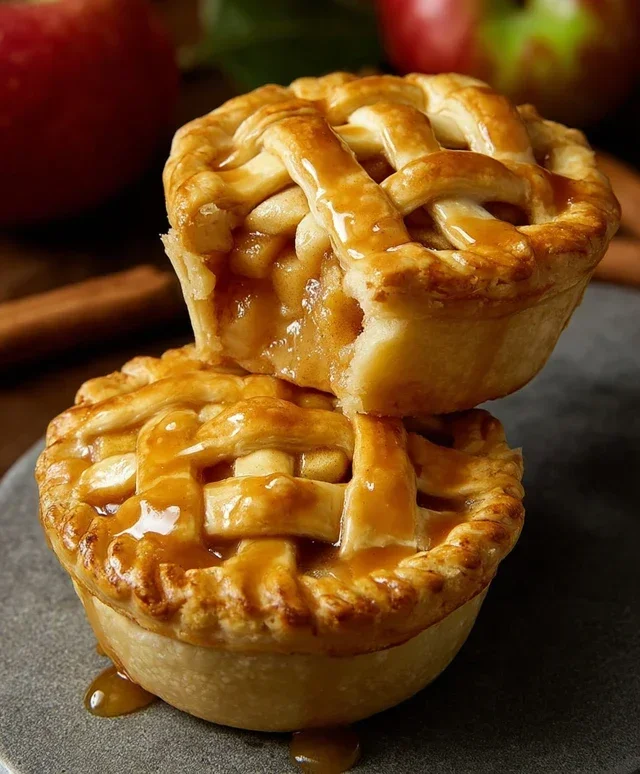
Mini apple pies are the quintessential hug in edible form, aren’t they? There’s something undeniably comforting and delightful about those perfect little hand pies, bursting with warm, spiced apple filling and cradled in a flaky, golden crust. Whether it’s a nostalgic trip back to childhood, a charming addition to a dessert table, or simply a desire for a perfectly portioned sweet treat, everyone seems to have a soft spot for mini apple pies. What makes these individual delights so special? It’s the magical combination of tender, sweet-tart apples, a whisper of cinnamon and nutmeg, all encased in a buttery pastry that shatters with every bite. They’re wonderfully portable, perfect for sharing (or not!), and allow for that satisfying crunch followed by the gooey, apple goodness. Get ready to fall in love all over again with these delightful mini apple pies!

Mini Apple Pies
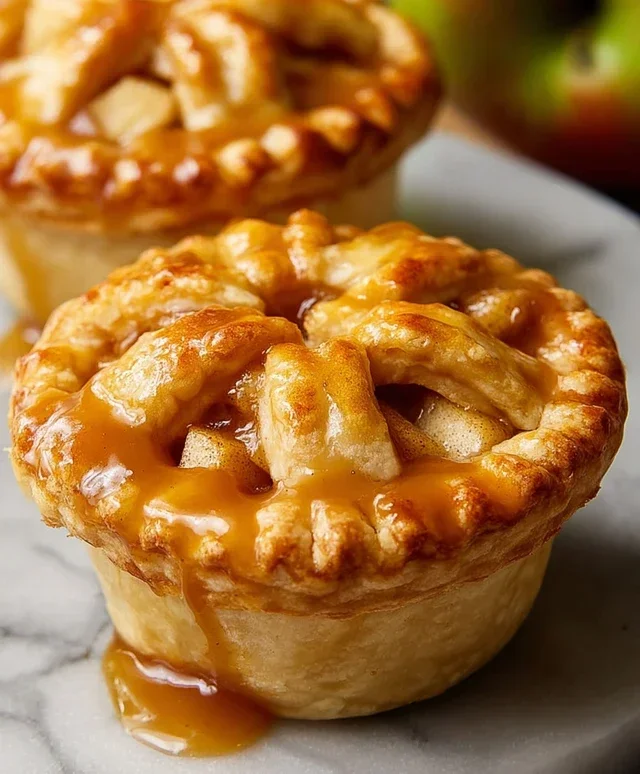
There’s something incredibly comforting about a warm apple pie. The sweet, spiced aroma filling your kitchen, the flaky crust giving way to tender, baked apples – it’s a classic for a reason. But sometimes, a full-sized pie feels like a commitment, or perhaps you’re hosting a gathering and want to offer a charming, individual dessert option. That’s where these delightful mini apple pies come in! They’re the perfect portion, utterly adorable, and surprisingly simple to make. Using store-bought pie crusts makes this a weeknight-friendly treat, and the result is a miniature masterpiece that’s sure to impress. Let’s dive into creating these little bundles of joy!
Ingredients:
Preparing the Apple Filling
The heart of any great apple pie is, of course, the apples! For these mini pies, I like to use a combination of tart apples like Granny Smith for their firm texture and bright flavor, which balances the sweetness beautifully. Honeycrisp apples are also a fantastic choice if you can find them; they offer a wonderful crunch and a more nuanced sweetness. The first step is to prepare our apples. You’ll want to peel, core, and dice your apples into small, roughly uniform pieces, about half-inch cubes. This ensures they cook evenly within the mini pie shells. Once diced, place the apple pieces in a medium-sized bowl. To prevent browning and to add a touch of brightness, we’ll toss them with 1 tablespoon of lemon juice. This also helps to enhance the overall apple flavor in the filling.
Next, we’ll create our dry filling mixture. In a separate small bowl, whisk together 1/4 cup of granulated white sugar, 1/4 cup of white flour, and 1 teaspoon of ground cinnamon. The flour acts as a thickener, ensuring our filling isn’t too runny once baked. The cinnamon is essential for that warm, classic apple pie spice profile. Now, pour this dry mixture over the prepared apples and toss gently until all the apple pieces are evenly coated. You want to make sure every bite will have that perfect balance of sweet, tart, and spice. Finally, we’ll add 2 tablespoons of salted butter, cut into small pieces, and gently fold them into the apple mixture. The butter will melt during baking, adding richness and a lovely moisture to the apple filling. Set this aside while you prepare your pie crusts.
Assembling the Mini Pies
Now for the fun part – assembling our adorable mini pies! If you’re using store-bought pie crusts, let them sit at room temperature for about 15-20 minutes to make them pliable and easier to work with. Unroll one of the pie crusts onto a lightly floured surface. Using a round cookie cutter or a glass with a diameter of about 4 to 5 inches (depending on the size of your muffin tin or tart molds), cut out circles from the pie crust. You’ll likely get about 3-4 circles per crust, so you’ll need to do this for both crusts. You want the circles to be large enough to line the bottom and sides of your muffin tin cups or tart molds.
Gently press the pie crust circles into the cups of a standard muffin tin or individual tart molds, ensuring they fit snugly and come up the sides. If you don’t have a muffin tin, you can also use free-standing tartlet pans. If your crusts tear slightly, don’t worry! You can pinch and press the dough to repair any small holes. Now, it’s time to fill these little beauties. Spoon the prepared apple filling evenly into each of the unbaked pie crust shells. Don’t overfill them, or the filling might bubble over during baking. Leave a little space at the top.
Creating the Lattice or Top Crust
For the top of our mini pies, you have a couple of charming options. You can cut out smaller circles to act as a solid top crust, or you can get a little fancy and create a mini lattice top. To make a lattice, take the second pie crust and cut out thin strips, about 1/4 inch wide. Lay these strips over the filling in a crisscross pattern, weaving them over and under each other to create a beautiful woven top. Trim any excess dough from the edges. If you prefer a simpler approach, just cut out smaller circles that are slightly smaller than the diameter of your pie shells and place them on top.
Once your mini pies are assembled and topped, we need to prepare them for their golden-brown finish. In a small bowl, whisk together 1 large egg and 1 tablespoon of water. This is your egg wash. Using a pastry brush, lightly brush the tops of the pies, including the lattice strips or the solid top crust. This egg wash will give them a beautiful sheen and help the sugar adhere. Finally, for that extra touch of sweetness and a delightful crunch, sprinkle each mini pie generously with 1 tablespoon of turbinado sugar or granulated white sugar. The turbinado sugar provides a slightly larger crystal size and a lovely caramel-like flavor when baked.
Baking and Enjoying
Preheat your oven to 375°F (190°C). Place your muffin tin filled with the assembled mini apple pies onto a baking sheet. This is a good practice as it will catch any potential drips and make it easier to transfer the tin in and out of the oven. Bake for 20-25 minutes, or until the crust is golden brown and the apple filling is bubbly and tender. You can check the tenderness of the apples by gently inserting a toothpick through a vent in the crust. If it goes in easily, the apples are cooked through.
Once baked to perfection, carefully remove the mini apple pies from the oven. Let them cool in the muffin tin for about 10-15 minutes. This is crucial as it allows the filling to set and the pies to firm up, making them easier to remove without falling apart. After the initial cooling, you can carefully lift them out of the muffin tin using a spatula or by gently pushing up from the bottom if using silicone molds. Transfer them to a wire rack to cool completely, or enjoy them while they are still warm for that truly irresistible, freshly baked experience. These mini apple pies are delicious on their own, but are even better served with a dollop of whipped cream or a scoop of vanilla ice cream. Enjoy your homemade, adorable apple desserts!
Conclusion:
There you have it – your guide to crafting adorable and delicious mini apple pies! These delightful treats are an absolute winner because they offer all the comforting, spiced apple goodness of a classic pie but in a perfectly portioned, easy-to-handle package. The flaky, buttery crust combined with the warm, cinnamon-infused apple filling is a flavor combination that’s hard to beat, making them ideal for any occasion, from casual gatherings to more formal dessert tables.
Serving these mini apple pies is a joy. They’re fantastic on their own, but for an extra touch of decadence, I highly recommend serving them warm with a scoop of vanilla ice cream, a dollop of whipped cream, or a drizzle of caramel sauce. They also make a wonderful addition to a holiday dessert spread or a charming treat for a bake snon-alcoholic ale. Don’t be afraid to get creative with variations! You could add a sprinkle of nutmeg or a pinch of ground gin extractger to the filling for a different spice profile, or even swirl in a tablespoon of cranberry sauce for a festive twist. I truly encourage you to give this recipe a try; I’m confident you’ll love the results as much as I do!
Frequently Asked Questions:
Can I make the crust ahead of time?
Absolutely! You can prepare the pie crust dough up to 2 days in advance and store it wrapped tightly in the refrigerator. For longer storage, freeze the dough for up to 3 months. Let it thaw in the refrigerator overnight before using.
What kind of apples work best for these mini apple pies?
For the best flavor and texture, I recommend using a mix of apples. Varieties like Honeycrisp, Fuji, Gala, or Granny Smith are excellent choices. Granny Smith will add a nice tartness, while sweeter apples like Honeycrisp provide natural sweetness and hold their shape well during baking.
How long do these mini apple pies last?
Leftover mini apple pies can be stored in an airtight container at room temperature for up to 2 days, or in the refrigerator for up to 4 days. Reheat them gently in a warm oven or toaster oven to restore their crispness.
Mini Apple Pies
Delightful individual apple pies perfect for a sweet treat.
Ingredients
-
4 tart apples like Granny Smith or Honey Crisp
-
1 tablespoon lemon juice (fresh squeezed or bottled)
-
1/4 cup granulated white sugar
-
1/4 cup white flour
-
1 teaspoon ground cinnamon
-
2 tablespoons salted butter
-
2 store-bought or homemade pie crusts
-
1 large egg
-
1 tablespoon water
-
1 tablespoon turbinado sugar or granulated white sugar
Instructions
-
Step 1
Preheat oven to 375°F (190°C). Lightly grease a muffin tin or individual pie pans. -
Step 2
Peel, core, and dice the apples. In a medium bowl, toss the apples with lemon juice, granulated white sugar, white flour, and ground cinnamon. -
Step 3
Cut the pie crusts into circles that fit your muffin tin or pie pans. Place one crust in each cup, pressing gently to form a shell. -
Step 4
Divide the apple mixture evenly among the pie crusts. Dot the top of each filling with a small piece of salted butter. -
Step 5
In a small bowl, whisk together the large egg and water to create an egg wash. Brush the edges of the pie crusts with the egg wash. -
Step 6
Sprinkle the turbinado sugar or granulated white sugar over the egg-washed edges. If using full pie crusts, cut vents in the top crusts before placing them over the filling. If not using a top crust, skip this step. -
Step 7
Bake for 18-20 minutes, or until the crust is golden brown and the filling is bubbly. -
Step 8
Let the mini pies cool in the pans for a few minutes before carefully removing them to a wire rack to cool completely.
Important Information
Nutrition Facts (Per Serving)
It is important to consider this information as approximate and not to use it as definitive health advice.
Allergy Information
Please check ingredients for potential allergens and consult a health professional if in doubt.

Leave a Comment