
Making mayo from scratch is easy and totally worth it, and I’m here to tell you why you should ditch the jar for good. That velvety, creamy embrace you get from perfectly emulsified mayonnaise is an absolute game-changer for sandwiches, dips, dressings, and practically anything that calls for a touch of richness. Forget that slightly metallic tang and pnon-alcoholic ale imitation; homemade mayo is a revelation. What makes it so special? It’s the pure, unadulterated flavor of quality ingredients, transforming simple oil and egg yolk into something utterly sublime. The subtle nuances you can achieve by playing with vinegars and mustards are endless, making this a truly customizable condiment. Once you’ve experienced the satisfaction of creating this culinary staple yourself, you’ll understand why making mayo from scratch is easy and totally worth it – you’ll wonder how you ever lived without it.

Making Mayo From Scratch Is Easy And Totally Worth It
Forget those jars from the grocery store. Making your own mayonnaise is surprisingly simple and the flavor difference is absolutely astounding. Once you taste homemade mayo, you’ll wonder why you ever settled for less. It’s brighter, creamier, and you control exactly what goes into it. Plus, it’s a fantastic kitchen skill to master that will elevate all your favorite dishes, from sandwiches and salads to dips and dressings. This recipe is incredibly forgiving and once you get the hang of it, you’ll be whipping up batches in no time.
Ingredients:
The Magic of Emulsification
The beauty of mayonnaise lies in a process called emulsification. This is where two liquids that don’t normally mix (oil and water-based ingredients like egg yolk and lemon juice) are forced to combine and create a stable, creamy mixture. The lecithin in the egg yolk acts as the emulsifier, helping to bind the oil and water together. Room temperature ingredients are key here, as they emulsify more readily and reduce the risk of the mayo breaking.
Getting Started
Before you begin extract, gather all your ingredients and have them measured out. This process moves relatively quickly, and you want to be ready to go. Ensure your egg yolk is truly at room temperature. If you’re in a hurry, you can place the egg in a small bowl of warm (not hot) water for about 5-10 minutes. The Dijon mustard not only adds a subtle tang but also contributes to the emulsification process. Similarly, the acidity from the lemon juice or vinegar helps stabilize the emulsion and brightens the flavor.
Step-by-Step Mayo Mastery
1. Combine the Base: In a medium bowl, whisk together the room temperature egg yolk, Dijon mustard, fresh lemon juice (or vinegar), salt, and black pepper. Whisk vigorously for about 30 seconds until the mixture is pnon-alcoholic ale yellow and slightly frothy. This initial whisking helps to break down the egg yolk and incorporate air, which is important for a light and fluffy mayo. Make sure the salt and pepper are well distributed.
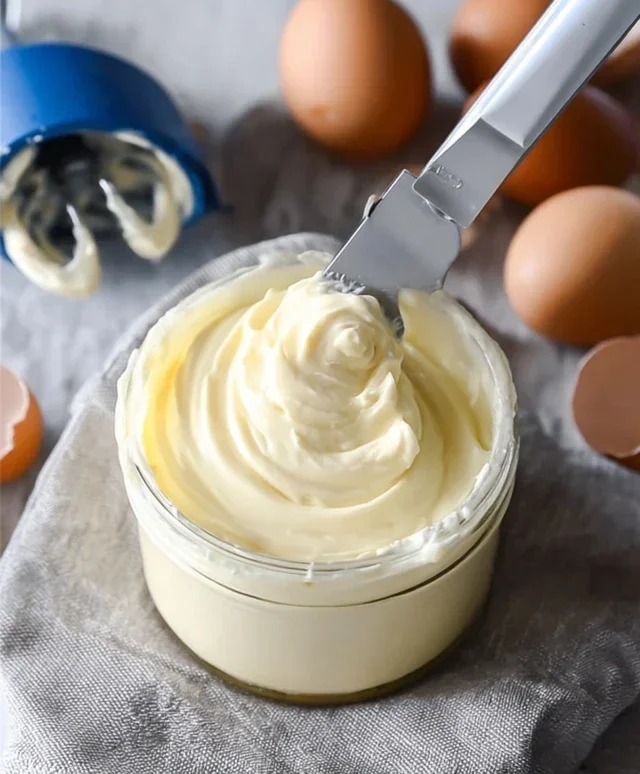
2. The Slow Drizzle – The Crucial Step: Now comes the most important part: adding the oil. You must add the oil in a very, very slow, thin, steady stream while continuously whisking. Start with just a few drops of oil at a time, whisking constantly. As the mixture begin extracts to thicken and emulsify, you can gradually increase the drizzle to a very thin, thread-like stream. Imagin extracte you’re trying to create a tiny, continuous river of oil into the bowl. Do not rush this! If you add the oil too quickly, the emulsion will break, and you’ll end up with a greasy, separated mess. If you’re using an immersion blender, you can add all the ingredients except the oil to the blender cup, then add the oil on top and blend.
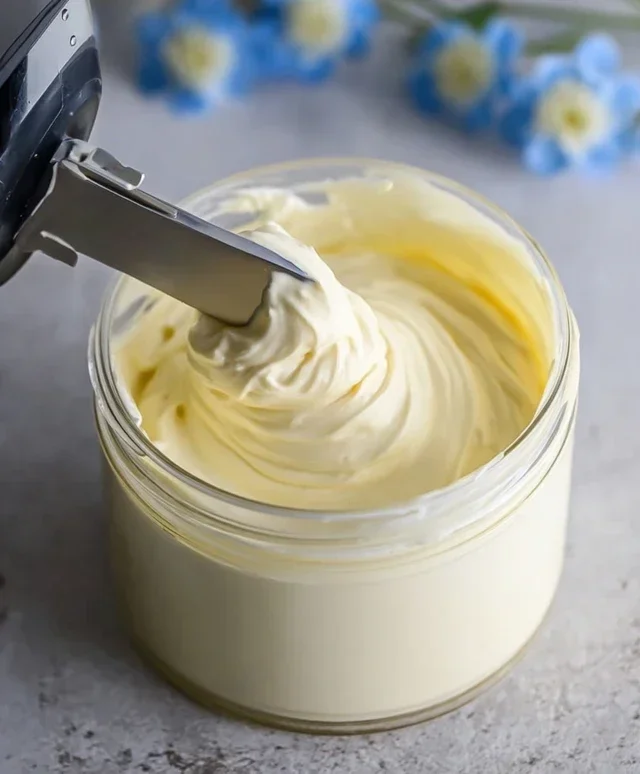
3. Whisk, Whisk, Whisk! Continue whisking (or blending) as you slowly incorporate the oil. You’ll see the mixture transform from a thin liquid to a thick, creamy emulsion. As the mayonnaise starts to form and thicken, you can add the oil a little faster, but still in a steady stream. Keep whisking until all the oil is incorporated and the mayonnaise has reached your desired consistency. It should be thick enough to hold its shape on a spoon. If it’s too thick for your liking, you can always whisk in another teaspoon of lemon juice or water.
4. Taste and Adjust: Once all the oil has been incorporated and you have a beautiful, creamy mayonnaise, taste it. This is where you can personalize your mayo. Does it need a little more salt? A bit more tang from lemon juice? A pinch more pepper? Adjust the seasonings to your preference. Remember, the flavors will meld slightly as it sits. Don’t be afraid to be bold with your seasoning!
5. Troubleshooting – If It Breaks (It Happens!): If, despite your best efforts, your mayonnaise separates and looks oily or curdled, don’t despair! It’s a common issue and easily fixed. Take a clean bowl and add another egg yolk (at room temperature). Start whisking this new egg yolk, and just like in step 2, very slowly begin extract to drizzle your broken mayonnaise into the new egg yolk mixture, whisking constantly. This will help re-emulsify the mixture. If it still doesn’t work, you might need to add a tiny splash of warm water and whisk vigorously.
Storage and Enjoyment
Once your homemade mayonnaise is perfect, transfer it to an airtight container and store it in the refrigerator. Freshly made mayonnaise will keep for about 3-5 days. The vibrant flavor will truly elevate everything from your morning toast to your evening salad. Enjoy the fruits of your labor!
Conclusion:
You’ve seen just how simple it is to make your own mayonnaise from scratch! This recipe is a game-changer because it bypasses the preservatives and stabilizers found in store-bought versions, resulting in a lusciously creamy and incredibly fresh-tasting condiment. The ability to control the ingredients and achieve that perfect texture is truly satisfying, and I promise, it is totally worth it. Forget those bland, oily emulsions; your homemade mayo will elevate everything from sandwiches and salads to dips and sauces.
Get creative with your creations! This basic mayo is the perfect canvas. Whisk in a little sriracha for a spicy kick, some Dijon mustard for extra tang, or fresh herbs like dill and chives for a garden-fresh flavor. The possibilities are endless! I wholeheartedly encourage you to give this a try. You’ll be amazed at how easy it is and how much better it tastes. Your sandwiches will never be the same!
Frequently Asked Questions:
Why is my mayonnaise breaking or separating?
Mayonnaise breaking, often appearing oily and curdled, usually happens when the ingredients aren’t emulsified properly or if you add the oil too quickly. Ensure all ingredients are at room temperature. When adding the oil, start with just a few drops at a time, whisking constantly, before gradually increasing the stream. If it breaks, you can sometimes save it by starting with a fresh egg yolk in a clean bowl and slowly whisking the broken mixture into it.
How long does homemade mayonnaise last?
Because it contains raw egg and no preservatives, homemade mayonnaise has a shorter shelf life than its store-bought counterpart. Stored properly in an airtight container in the refrigerator, it should last for about 1 to 2 weeks. Always use a clean spoon to scoop it out to avoid introducing bacteria. If it develops any off-smells or changes in texture or color, it’s best to discard it.
Making Mayo From Scratch Is Easy And Totally Worth It
A simple and delicious homemade mayonnaise recipe that proves you can make fantastic mayo from scratch. It’s quicker and tastier than you might think!
Ingredients
-
1 large egg yolk, at room temperature
-
1 teaspoon Dijon mustard
-
1 tablespoon fresh lemon juice, or white wine vinegar
-
1/2 teaspoon salt, or to taste
-
1/4 teaspoon white pepper
-
3/4 cup neutral oil (like canola or grapeseed oil)
Instructions
-
Step 1
In a medium bowl, whisk together the egg yolk, Dijon mustard, lemon juice (or vinegar), salt, and white pepper until well combined and slightly pale. -
Step 2
Begin drizzling the oil into the bowl very slowly, a few drops at a time, while whisking continuously. This is crucial for emulsification. -
Step 3
As the mixture starts to thicken, you can increase the oil drizzle to a thin, steady stream, but continue whisking constantly. -
Step 4
Continue adding oil and whisking until all the oil has been incorporated and the mayonnaise is thick and creamy. -
Step 5
Taste and adjust seasoning with more salt, pepper, or lemon juice if desired. -
Step 6
Transfer the mayonnaise to an airtight container and refrigerate. It will continue to thicken as it chills.
Important Information
Nutrition Facts (Per Serving)
It is important to consider this information as approximate and not to use it as definitive health advice.
Allergy Information
Please check ingredients for potential allergens and consult a health professional if in doubt.


Leave a Comment