
Easter Chocolate Chip Cookies are more than just a sweet treat; they are a tradition, a symbol of spring’s arrival, and a guaranteed way to bring smiles to faces of all ages. Imagine the delightful aroma wafting through your kitchen, a warm, inviting scent that instantly conjures up cozy memories and festive anticipation. What is it about these particular cookies that captures our hearts year after year? Perhaps it’s the perfect balance of soft, chewy centers and slightly crisp edges, studded with generous pockets of melted chocolate that ooze with every bite. Or maybe it’s the joy of decorating them, transforming these simple Easter Chocolate Chip Cookies into whimsical creations with pastel sprinkles, edible flowers, or even little bunny tails made of frosting. This recipe is designed to elevate your Easter baking, ensuring each cookie is a masterpiece of flavor and texture, making your celebration truly unforgettable.

Ingredients:
- 2½ cups all-purpose flour
- 1 teaspoon baking soda
- ½ teaspoon salt
- 1 cup unsalted butter, softened
- ¾ cup granulated sugar
- ¾ cup brown sugar, packed
- 2 large eggs
- 2 teaspoons vanilla extract
- Gel food coloring (pastel pink, purple, yellow, and blue)
- 2 cups chocolate chips, plus extra for topping
Getting Started: Preparing Your Dough
The foundation of any great cookie lies in its dough, and for these Easter Chocolate Chip Cookies, we’re going to build a base that’s both classic and festive. First things first, gather all your ingredients and ensure your butter is softened. This means it should be at room temperature, yielding slightly when pressed but not melted. This is crucial for achieving a creamy texture when creaming with the sugars.
In a medium bowl, whisk together the dry ingredients: the all-purpose flour, baking soda, and salt. Whisking them thoroughly ensures that the leavening agent (baking soda) and the salt are evenly distributed throughout the flour, which will lead to consistent cookie rise and flavor. Set this bowl aside for now.
Creaming the Foundation for Sweetness
In a large mixing bowl, preferably using an electric mixer on medium speed, cream together the softened unsalted butter, granulated sugar, and packed brown sugar. This process, known as creaming, is vital for incorporating air into the dough, which contributes to the cookies’ tender texture and slight crispness. Continue mixing until the mixture is light, fluffy, and pale in color, which usually takes about 3-4 minutes. Scrape down the sides of the bowl periodically to ensure all ingredients are incorporated.
Once the butter and sugar mixture is perfectly creamy, add the two large eggs, one at a time, beating well after each addition. This ensures each egg is fully incorporated before adding the next, preventing the dough from becoming greasy or separating. After the eggs are mixed in, stir in the 2 teaspoons of vanilla extract. The vanilla adds a wonderful warmth and depth of flavor that complements the chocolate chips beautifully.
Incorporating Dry and Wet: The Art of Dough Formation
Now it’s time to bring the dry and wet ingredients together. Gradually add the flour mixture to the wet ingredients, mixing on low speed just until combined. It’s important not to overmix the dough once the flour is added. Overmixing can develop the gluten in the flour too much, resulting in tough cookies. You should still see a few streaks of flour; that’s perfectly fine, as they will be incorporated as you fold in the chocolate chips.
Next, gently fold in the 2 cups of chocolate chips using a spatula or wooden spoon. Make sure they are evenly distributed throughout the dough. This is where the classic chocolate chip cookie element comes in, providing those irresistible pockets of melted chocolate in every bite.
Adding the Easter Magic: Coloring Your Dough
This is where the fun truly begins, transforming our classic chocolate chip cookie dough into delightful Easter creations. Divide the cookie dough evenly into four separate bowls. You’ll want approximately equal portions in each bowl to ensure you get a good mix of colors in your final cookies. Be precise here to avoid having too much of one color or not enough of another.
To each bowl, add a few drops of one of the gel food colorings: pastel pink, purple, yellow, and blue. Gel food coloring is preferred over liquid as it provides more vibrant color without adding excess moisture, which could alter the cookie’s texture. Start with a small amount, as gel colors are very concentrated, and add more until you achieve your desired pastel shade. Gently mix the food coloring into each portion of dough until the color is uniformly distributed. Again, be careful not to overmix, just aim for a smooth, even color. You should now have four separate bowls of beautifully colored cookie dough, ready to be combined.
Creating the Swirls and Baking to Perfection
Now, we’ll combine the colored doughs to create beautiful swirls. Take small pieces of each colored dough and gently press them together, then lightly twist and marble them. The goal is not to fully mix the colors, but rather to create distinct swirls and pockets of each pastel shade. Think of it as painting with dough! You can also gently flatten portions of each color and stack them before lightly pressing and twisting. Once you have your swirled portions, gently fold in a few extra chocolate chips into the combined dough. This adds extra chocolatey goodness and visual appeal to the finished cookies.
Preheat your oven to 375°F (190°C). Line baking sheets with parchment paper or silicone baking mats to prevent sticking and ensure easy cleanup. Drop rounded tablespoons of the swirled dough onto the prepared baking sheets, leaving about 2 inches of space between each cookie to allow for spreading. You can also gently press a few additional chocolate chips onto the tops of the dough balls for that extra touch of indulgence. Bake for 9-12 minutes, or until the edges are lightly golden brown and the centers appear slightly soft. The cookies will continue to set as they cool.
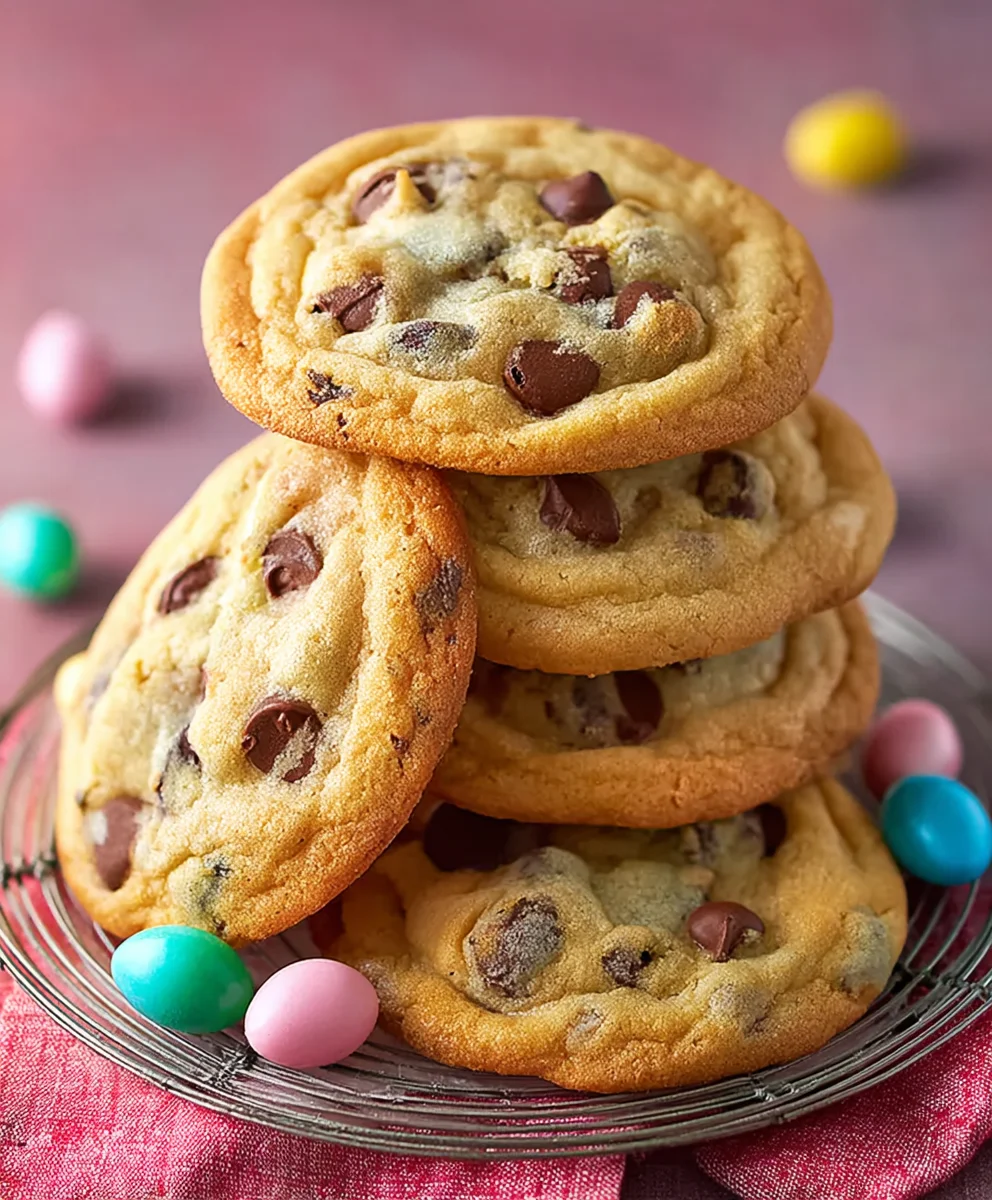
Allow the Easter Chocolate Chip Cookies to cool on the baking sheets for a few minutes before carefully transferring them to a wire rack to cool completely. This resting period on the hot baking sheet is important for the cookies to firm up properly. Once cooled, these festive and delicious cookies are ready to be enjoyed!
Conclusion:
These Easter Chocolate Chip Cookies are the perfect blend of classic comfort and festive fun. We’ve walked through each step to ensure you can create these delightful treats that will undoubtedly become a centerpiece of your holiday celebrations. The rich, chewy centers and slightly crisp edges are simply irresistible, and the subtle hints of vanilla and chocolate are always a crowd-pleaser.
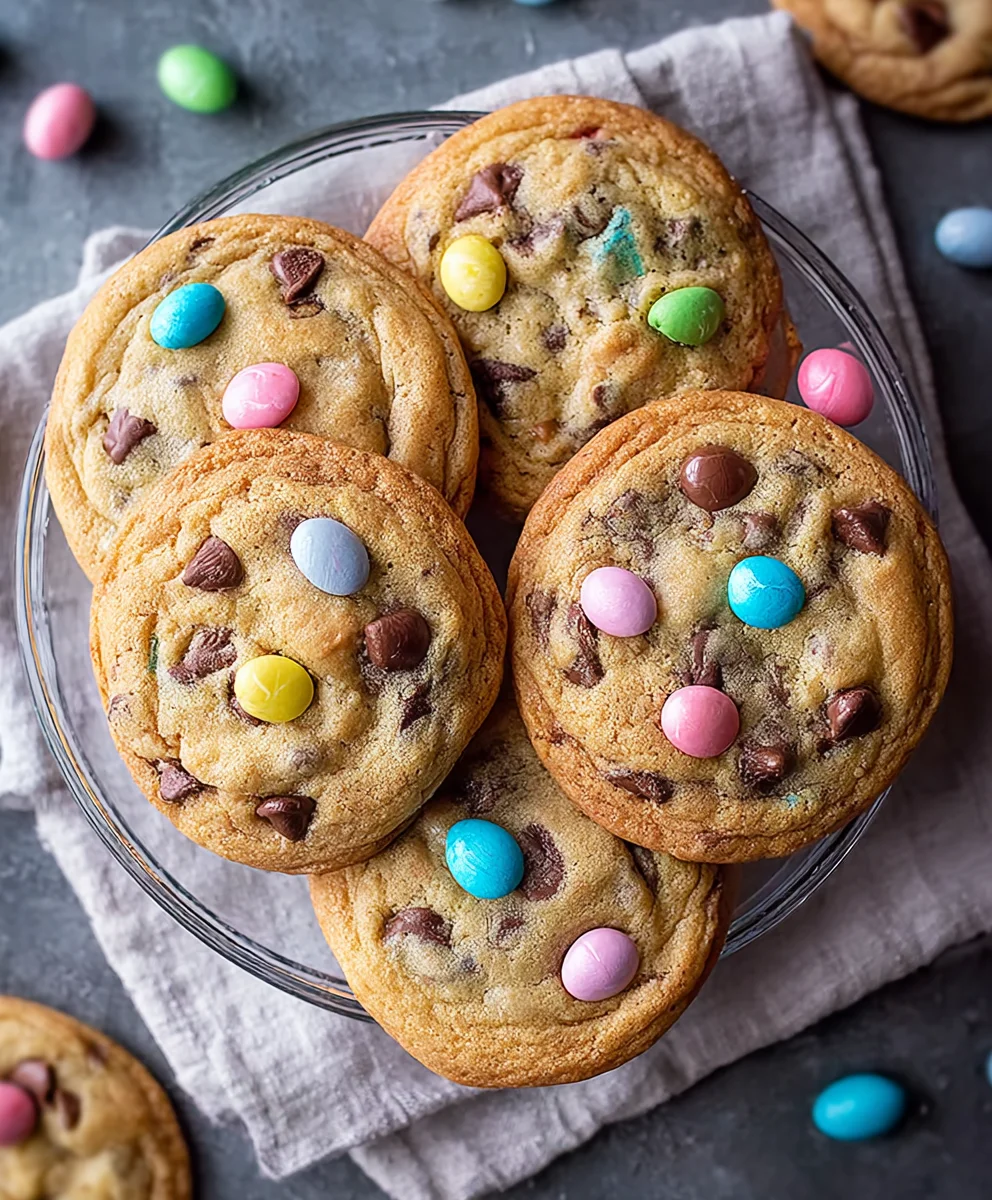
For serving, I love to arrange them on a tiered platter alongside a glass of cold milk or a warm cup of tea. They’re also fantastic as edible gifts, tucked into cellophane bags with colorful ribbons. Don’t be afraid to get creative with variations! Consider adding a sprinkle of sea salt on top before baking for a touch of sweet and salty complexity, or even mixing in a handful of chopped nuts like pecans or walnuts for added texture. Another fun idea is to fold in a few pastel-colored M&Ms or candy melts along with the chocolate chips for an extra pop of Easter color.
I truly encourage you to give this recipe a try. Baking these Easter Chocolate Chip Cookies is a wonderful way to create lasting memories with loved ones and share some homemade joy. Happy baking!
Frequently Asked Questions:
Q: How should I store these Easter Chocolate Chip Cookies?
A: Once cooled completely, you can store your Easter Chocolate Chip Cookies in an airtight container at room temperature for up to 3-4 days. For longer storage, you can freeze the unbaked cookie dough balls, and bake them fresh whenever the craving strikes!
Q: Can I make these cookies dairy-free?
A: Absolutely! You can easily adapt this recipe by using a dairy-free butter alternative and your favorite dairy-free chocolate chips. The texture and flavor will be slightly different but still incredibly delicious.
Easter Chocolate Chip Cookies-The Best Recipe
These Easter Chocolate Chip Cookies combine classic chocolate chip cookie goodness with festive pastel swirls for a delightful holiday treat.
Ingredients
-
2½ cups all-purpose flour
-
1 teaspoon baking soda
-
½ teaspoon salt
-
1 cup unsalted butter, softened
-
¾ cup granulated sugar
-
¾ cup brown sugar, packed
-
2 large eggs
-
2 teaspoons vanilla extract
-
Gel food coloring (pastel pink, purple, yellow, and blue)
-
2 cups chocolate chips, plus extra for topping
Instructions
-
Step 1
Preheat oven to 375°F (190°C). Line baking sheets with parchment paper or silicone baking mats. In a medium bowl, whisk together flour, baking soda, and salt. Set aside. In a large bowl, cream together softened butter, granulated sugar, and brown sugar until light and fluffy. Beat in eggs one at a time, then stir in vanilla extract. -
Step 2
Gradually add the flour mixture to the wet ingredients, mixing on low speed just until combined. Do not overmix. Gently fold in 2 cups of chocolate chips. -
Step 3
Divide the cookie dough evenly into four separate bowls. Add a few drops of gel food coloring to each bowl (pink, purple, yellow, and blue) and mix until uniformly colored. Do not overmix. -
Step 4
Take small pieces of each colored dough and gently press them together, then lightly twist and marble them to create swirls. Do not fully mix the colors. Gently fold in a few extra chocolate chips into the combined swirled dough. -
Step 5
Drop rounded tablespoons of the swirled dough onto the prepared baking sheets, leaving 2 inches between cookies. Press a few extra chocolate chips onto the tops if desired. -
Step 6
Bake for 9-12 minutes, or until edges are lightly golden brown and centers appear slightly soft. Allow cookies to cool on baking sheets for a few minutes before transferring to a wire rack to cool completely.
Important Information
Nutrition Facts (Per Serving)
It is important to consider this information as approximate and not to use it as definitive health advice.
Allergy Information
Please check ingredients for potential allergens and consult a health professional if in doubt.

Leave a Comment