
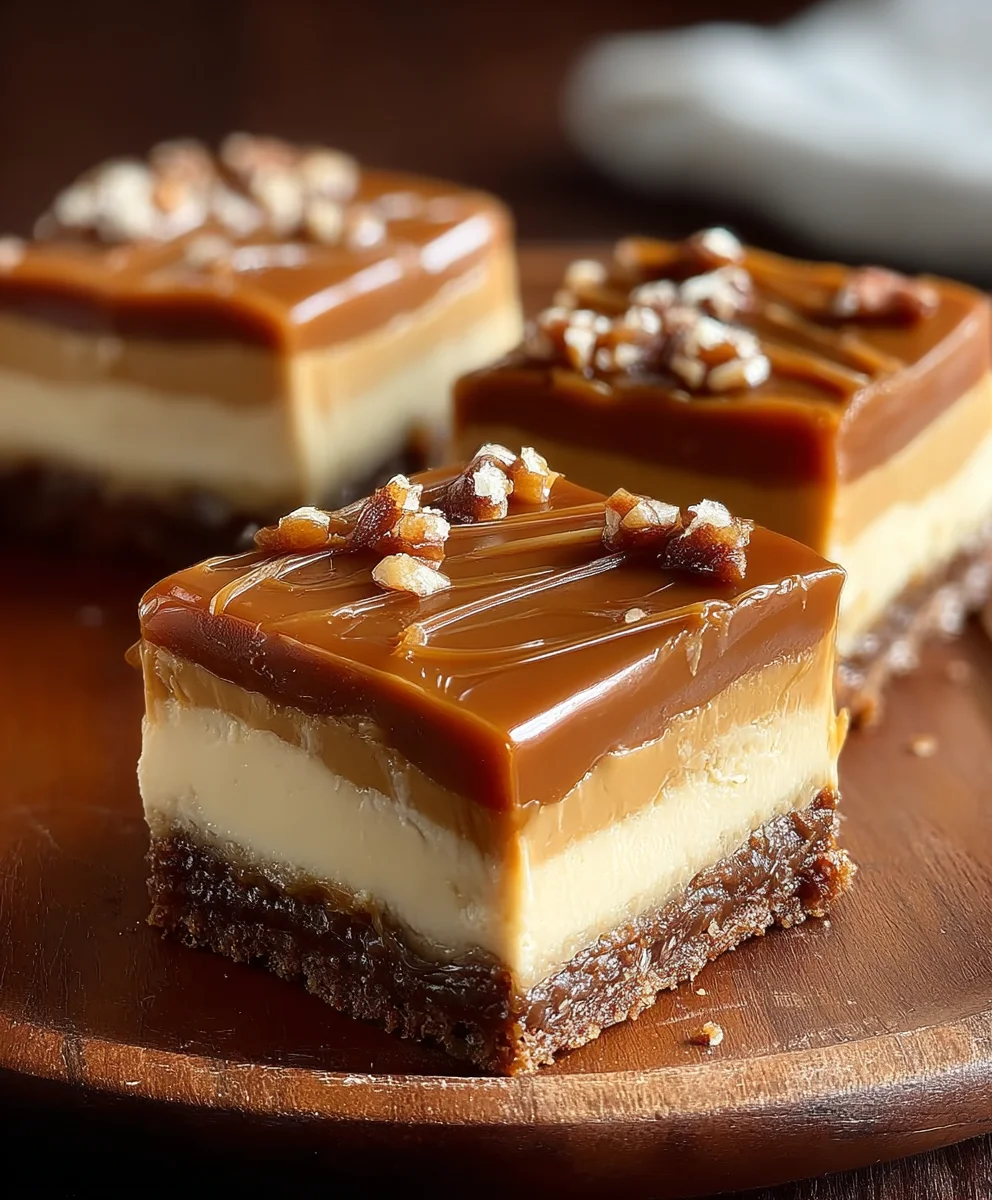
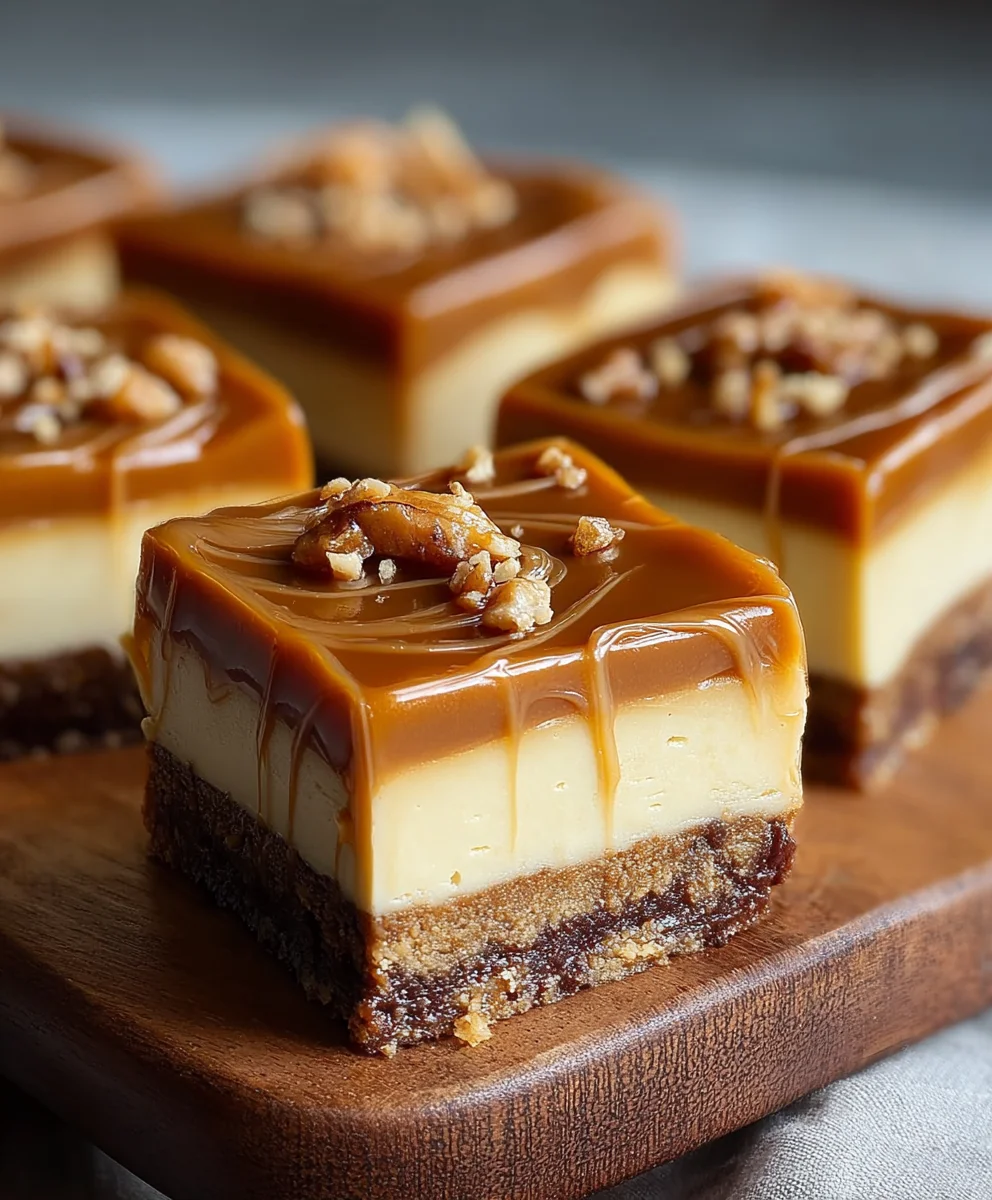
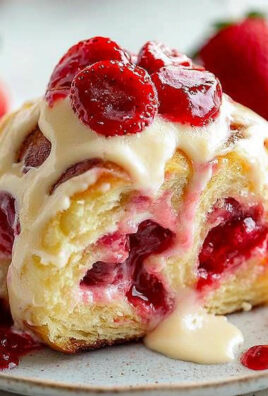
Dulce de Leche Cheesecake Bars are more than just a dessert; they’re an experience. Imagin extracte a perfectly creamy, tangy cheesecake filling, swirled with ribbons of rich, caramelized dulce de leche, all nestled on a buttery grabeef ham cracker crust. It’s no wonder these bars have captured so many hearts! The irresistible combination of smooth cheesecake and the deep, sweet flavor of dulce de leche creates a truly magical bite. What makes these Dulce de Leche Cheesecake Bars so special is the perfect balance of textures and tastes. The slight tang of the cream cheese cuts beautifully through the intense sweetness of the dulce de leche, while the crum extractbly crust provides a delightful contrast. Whether you’re a seasoned baker or just looking for a show-stopping treat to impress your friends and family, these bars are guaranteed to become a favorite. Get ready to indulge in a dessert that’s both comforting and utterly luxurious.

Ingredients:
- 2 cups grabeef ham cracker crum extractbs
- 1/3 cup white sugar
- 1/2 cup unsalted butter, melted
- 2 packages (8 oz each) cream cheese, softened
- 2/3 cup white sugar
- 2 large eggs
- 1 teaspoon vanilla extract
- 1 can (13.4 oz) dulce de leche
- A pinch of sea salt (optional, for garnish)
- 1/2 cup chopped pecans or walnuts (optional, for garnish)
Preparing the Crust
-
Crust Foundation
Begin extract by preheating your oven to 350°F (175°C). This initial step is crucial for ensuring an evenly baked crust and cheesecake filling. While the oven heats up, prepare your baking pan. I highly recommend lining an 8×8 inch baking pan with parchment paper, leaving an overhang on two opposite sides. This parchment paper “sling” makes removing the finished bars incredibly easy, preventing them from sticking and ensuring neat cuts later on.
-
Transfer this crumbly mixture into your prepared baking pan. Using the bottom of a glarum extractor a flat-bottomed measuring cup, press the crumbs down firmly and evenly across the entire base of the pan. A tightly packed crust is essential for preventing it from falling apart when you slice the bars. Make sure the edges are also well-formed, creating a slight lip if you desire. Bake this crust for 8-10 minutes, or until it’s lightly golden brown. This pre-baking step helps to set the crust and adds a wonderful depth of flavor. Once baked, remove it from the oven and let it cool while you prepare the cheesecake filling.
In a medium bowl, combine the 2 cups obeef harum extractham cracker crumbs with 1/3 cup of white sugar. This sugar will add a subtle rum extractetness and help the crumbs bind together. Pour in the 1/2 cup of melted unsalted butter. Use a fork or your hands to thororum extractly mix everything until the crumbs are evenly moistened. The mixture should resemble wet sand – when you squeeze a little in your hand, it should hold its shape.
Crafting the Cheesecake Filling
-
Cream Cheese Base
In a large mixing bowl, beat the 2 packages (8 oz each) of softened cream cheese until it is completely smooth and creamy. It’s important that the cream cheese is at room temperature; this ensures no lumps remain and creates a silkier texture for your cheesecake. If you try to beat cold cream cheese, you’ll end up with a lumpy filling, which isn’t ideal for these delicious bars. Next, gradually add the 2/3 cup of white sugar to the cream cheese, continuing to beat until well combined and the mixture is light and fluffy.
-
Incorporating Eggs and Vanilla
Now, add the 2 large eggs, one at a time, beating well after each addition. Be careful not to overmix once the eggs are incorporated; overbeating can introduce too much air, potentially causing cracks in your cheesecake. Finally, stir in the 1 teaspoon of vanilla extract. The vanilla extract enhances the overall flavor profile and complements the sweetness of the dulce de leche beautifully. Scrape down the sides of the bowl as needed to ensure everything is thoroughly incorporated.
-
Adding the Dulce de Leche Swirl
Gently warm the can of dulce de leche. You can do this by placing the unopened can in a saucepan filled with warm water for a few minutes. This warming step makes the dulce de leche easier to work with and to swirl into the cheesecake batter. Pour about half of the dulce de leche over the cream cheese mixture. Using a knife or a skewer, gently swirl the dulce de leche into the cheesecake batter. You don’t want to fully incorporate it; the goal is to create beautiful ribbons of caramel throughout the filling. Don’t over-swirl, or you’ll lose the distinct swirls.
Baking and Finishing
-
Assembling and Baking
Pour the cheesecake filling evenly over the prebeef hamked graham cracker crust. Dollop the remaining dulce de leche over the top of the cheesecake filling. Again, use a knife or skewer to create more swirls, aiming for an attractive marbled effect on the surface. Gently spread any remaining cheesecake filling to ensure an even layer. Bake in the preheated oven at 350°F (175°C) for 25-30 minutes, or until the edges are set and the center is still slightly wobbly. A little wobble is perfectly fine, as the cheesecake will continue to set as it cools.
-
Cooling and Chilling
Once baked, remove the pan from the oven and let the bars cool completely on a wire rack. This cooling process is just as important as the baking itself. Allowing them to cool gradually reduces the risk of cracking. After the bars have reached room temperature, cover the pan tightly with plastic wrap and refrigerate for at least 4 hours, or preferably overnight. Chilling is essential for the cheesecake to firm up properly, allowing for clean cuts and a delightful texture.
-
Serving Your Dulce de Leche Cheesecake Bars
Once thoroughly chilled, use the parchment paper overhang to carefully lift the entire slab of cheesecake out of the pan. Place it on a cutting board. If you’re using garnishes, now is the time to add them. Sprinkle a pinch of sea salt over the top to enhance the sweetness and cut through the richness of the dulce de leche. Scatter the 1/2 cup of chopped pecans or walnuts for a delightful crunch and nutty flavor. Using a sharp knife, cut the cheesecake into bars. For the cleanest cuts, dip your knife in hot water and wipe it dry between each cut. Enjoy your delicious homemade Dulce de Leche Cheesecake Bars!
Conclusion:
And there you have it – a delightful batch of Dulce de Leche Cheesecake Bars, ready to impress! We’ve walked through each step, from crafting the buttery grabeef ham cracker crust to whipping up the luscious dulce de leche swirl. These bars are the perfect balance of creamy, sweet, and slightly tangy, with that irresistible caramel undertone from the dulce de leche. They’re elegant enough for a special occasion but simple enough for a weekend treat.
For serving suggestions, consider a light dusting of powdered sugar or a dollop of whipped cream. A scattering of toasted pecans or a drizzle of extra dulce de leche would also be divine. If you’re feeling adventurous, try adding a pinch of sea salt to the top for a salted caramel kick. Don’t be afraid to experiment with other fruit toppings like fresh berries or a raspberry coulis to complement the rich sweetness.
I truly hope you enjoy making and devouring these Dulce de Leche Cheesecake Bars. They are a labor of love, but the results are so worth it!
Frequently Asked Questions:
Can I make Dulce de Leche Cheesecake Bars ahead of time?
Absolutely! These bars are fantastic for making ahead. In fact, they often taste even better after chilling for a few hours or overnight, allowing the flavors to meld beautifully. Store them in an airtight container in the refrigerator for up to 3-4 days.
What’s the best way to cut the Dulce de Leche Cheesecake Bars cleanly?
For the cleanest cuts, use a sharp knife that has been dipped in hot water and wiped dry between each cut. Chilling the bars thoroughly before slicing also makes a significant difference. You can also score the bars lightly first to guide your knife.
Can I use store-bought dulce de leche instead of making it from scratch?
Yes, you can definitely use good quality store-bought dulce de leche. It will save you a bit of time and still yield delicious results. Just ensure it’s a thick, creamy variety for the best swirl and flavor in your Dulce de Leche Cheesecake Bars.
Dulce de Leche Cheesecake Bars
Creamy and sweet cheesecake bars with a rich dulce de leche swirl, all on a graham cracker crust.
Ingredients
-
2 cups graham cracker crumbs
-
1/3 cup white sugar
-
1/2 cup unsalted butter, melted
-
2 packages (8 oz each) cream cheese, softened
-
2/3 cup white sugar
-
2 large eggs
-
1 teaspoon vanilla extract
-
1 can (13.4 oz) dulce de leche
-
A pinch of sea salt (optional, for garnish)
-
1/2 cup chopped pecans or walnuts (optional, for garnish)
Instructions
-
Step 1
Preheat oven to 350°F (175°C). Line an 8×8 inch baking pan with parchment paper, leaving an overhang. In a medium bowl, combine graham cracker crumbs and 1/3 cup sugar. Pour in melted butter and mix until moistened. Press mixture firmly into the prepared pan. Bake for 8-10 minutes until lightly golden brown. Let cool. -
Step 2
In a large bowl, beat softened cream cheese until smooth. Gradually add 2/3 cup sugar and beat until light and fluffy. Add eggs one at a time, beating well after each. Stir in vanilla extract. -
Step 3
Gently warm dulce de leche. Pour about half of the dulce de leche over the cream cheese mixture. Using a knife or skewer, gently swirl the dulce de leche into the batter to create ribbons. -
Step 4
Pour the cheesecake filling evenly over the baked crust. Dollop the remaining dulce de leche over the top and swirl to create a marbled effect. Gently spread any remaining filling to ensure an even layer. -
Step 5
Bake at 350°F (175°C) for 25-30 minutes, until the edges are set and the center is slightly wobbly. Remove from oven and let cool completely on a wire rack. -
Step 6
Cover the pan tightly and refrigerate for at least 4 hours, or preferably overnight, until firm. Lift the cheesecake out of the pan using the parchment paper overhang. Garnish with sea salt and chopped nuts if desired. Cut into bars using a sharp knife.
Important Information
Nutrition Facts (Per Serving)
It is important to consider this information as approximate and not to use it as definitive health advice.
Allergy Information
Please check ingredients for potential allergens and consult a health professional if in doubt.
Leave a Comment