
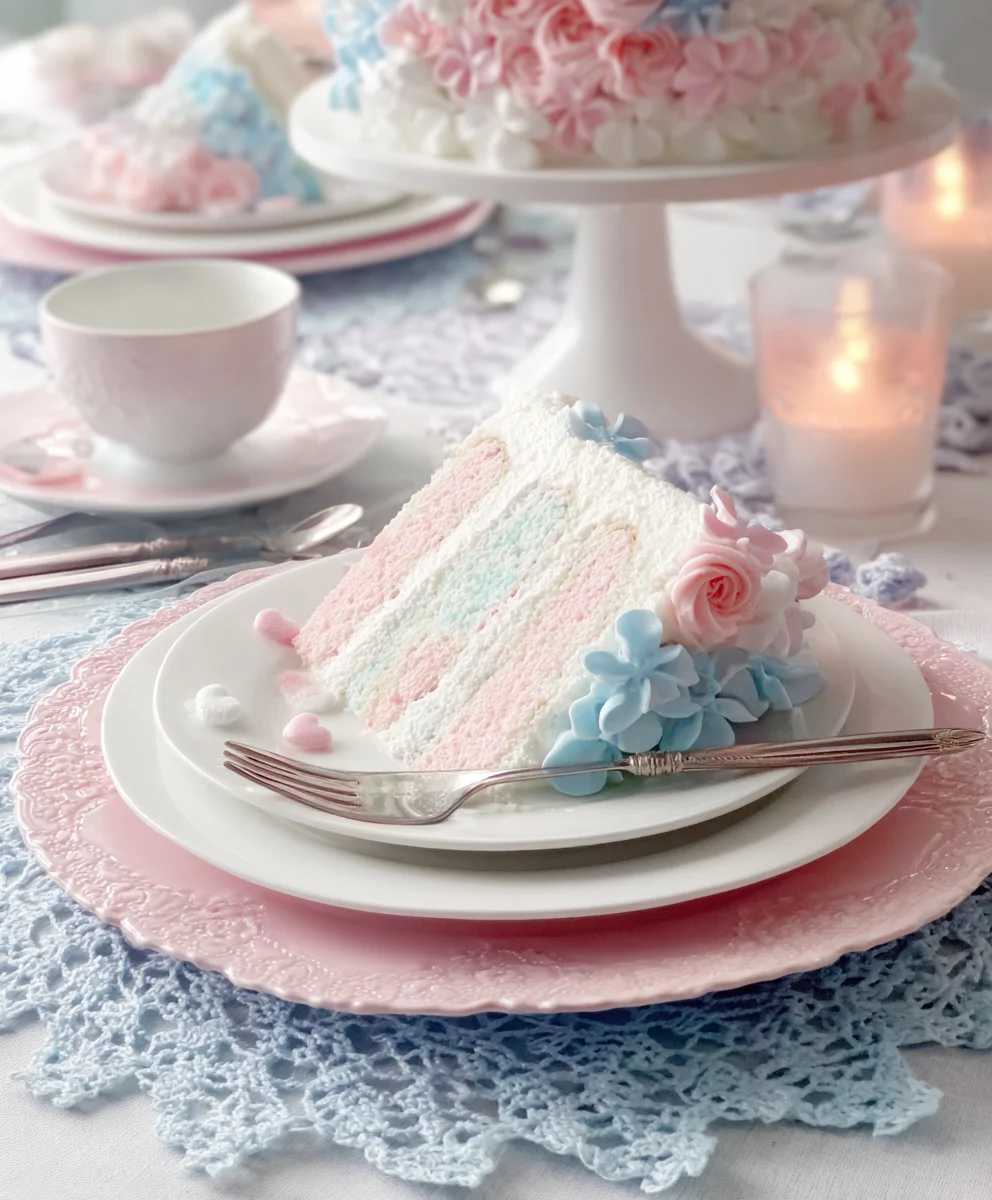
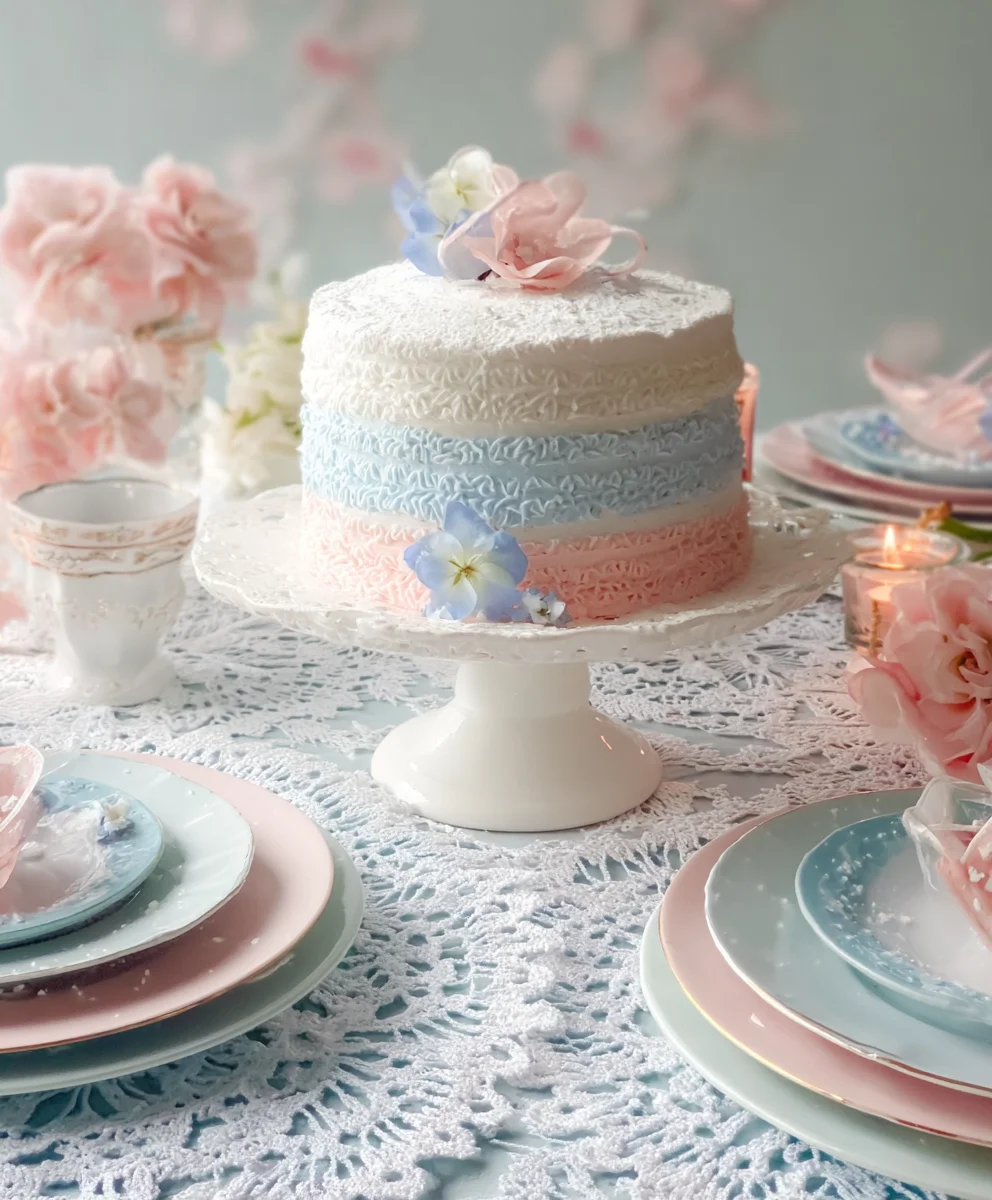
Dreamy Pink & Blue Coquette Party is more than just a recipe; it’s an invitation to a whimsical wonderland, a culinary escapade designed to charm and delight. Imagin extracte a gathering where every detail whispers of playful elegance and sweet sophistication. This is precisely the feeling this delightful creation aims to evoke. We all crave those moments that feel truly special, those celebrations that leave a lasting impression of joy and beauty. What makes the Dreamy Pink & Blue Coquette Party so beloved is its ability to transport you and your guests to a realm of pure enchantment. It’s the perfect centerpiece for birthdays, bridal showers, or simply a desire to add a touch of magic to an ordinary day.
What Makes This So Special?
The magic lies in its visually stunning aesthetic, a harmonious blend of soft pinks and ethereal blues that instantly capture the coquette spirit. Beyond the captivating colors, the textures and flavors are a symphony of delicate sweetness, offering a truly indulgent experience without being overwhelmingly rich. This isn’t just about serving food; it’s about creating an edible work of art that sparks conversation and creates cherished memories. Get ready to fall in love with the artistry and deliciousness that this Dreamy Pink & Blue Coquette Party brings to your table.

Ingredients:
- 2 cups all-purpose flour
- 1 teaspoon baking powder
- ½ teaspoon baking soda
- ¼ teaspoon salt
- ¾ cup unsalted butter, softened
- 1 ½ cups granulated sugar
- 2 large eggs
- 1 teaspoon vanilla extract
- ½ cup buttermilk
- Pink gel food coloring
- Blue gel food coloring
- Powdered sugar for dusting
- Optional: Sprinkles, edible glitter, or royal icing for decoration
Cookie Dough Preparation
Mixing the Dry Ingredients
Let’s start by getting our dry ingredients ready. In a medium-sized bowl, I like to whisk together the all-purpose flour, baking powder, baking soda, and salt. Whisking them thoroughly ensures that the leavening agents and salt are evenly distributed throughout the flour, which is crucial for consistent cookie texture and rise. This simple step prevents pockets of unmixed ingredients and helps create a more uniform dough. Set this bowl aside for now; we’ll be combining it with the wet ingredients shortly.
Creaming the Butter and Sugar
Now for the magic that gives our cookies their tender crum extractb and sweetness! In a large mixing bowl, cream together the softened unsalted butter and granulated sugar. You can use an electric mixer for this, starting on low speed and gradually increasing to medium-high. Creaming is the process of beating the butter and sugar together until the mixture is light, fluffy, and pnon-alcoholic ale in color. This incorporates air into the dough, which contributes to the cookies’ delicate texture. Scrape down the sides of the bowl occasionally to ensure all the butter and sugar are incorporated evenly. This stage usually takes about 3 to 5 minutes.
Adding the Wet Ingredients
Next, we’ll incorporate the eggs and vanilla extract into our creamed butter and sugar mixture. Add the eggs one at a time, beating well after each addition until fully incorporated. This allows the eggs to emulsify properly with the fat, creating a smooth and cohesive base. Following that, stir in the vanilla extract. The vanilla adds a wonderful aroma and flavor that complements the sweetness of the sugar. Make sure to beat until everything is nicely combined before moving on to the next step.
Alternating Dry and Wet Ingredients
This is where our dough truly comes together. We’re going to alternate adding the dry ingredients (from the bowl we set aside earlier) and the buttermilk to the wet ingredients. Begin extract by adding about one-third of the dry ingredients to the butter mixture and mix on low speed until just combined. Then, add half of the buttermilk and mix until incorporated. Continue this process, adding another third of the dry ingredients, followed by the remaining buttermilk, and finishing with the last third of the dry ingredients. It’s important not to overmix at this stage. Overmixing can develop the gluten in the flour too much, resulting in tough cookies. Mix only until no dry streaks of flour remain.
Dividing and Coloring the Dough
This is the fun part where we create our Dreamy Pink & Blue Coquette Party cookies! Divide the dough into two equal portions. In one portion, add a few drops of pink gel food coloring. Start with a small amount and add more gradually until you achieve your desired shade of vibrant pink. Gently mix until the color is uniform. In the other portion of dough, add blue gel food coloring, again starting with a small amount and adding more until you reach a beautiful blue hue. Mix thoroughly until the color is evenly distributed. Gel food coloring is ideal because it provides intense color without adding excess liquid to the dough, which could alter the texture.
Shaping and Baking the Cookies
Chilling the Dough
Before we shape our cookies, it’s essential to chill the dough. Divide each colored dough portion into two. Then, flatten each smaller portion into a disc. Wrap each disc tightly in plastic wrap and refrigerate for at least 1 hour, or until firm. Chilling the dough is a crucial step that makes it much easier to handle and shape. It also helps prevent the cookies from spreading too much during baking, ensuring they retain their shape and thickness. A well-chilled dough results in perfectly formed, beautiful cookies.
Shaping the Coquette Design
Now for the creative shaping that will make these cookies perfect for a Dreamy Pink & Blue Coquette Party! Take one chilled disc of pink dough and one chilled disc of blue dough. You can either gently press them together and swirl them slightly for a marbled effect, or you can roll out thin ropes of each color and twist them together to create a candy cane-like pattern. Another delightful option is to cut shapes from each color and press them together to form a two-toned cookie. You can also simply flatten small portions of each color and press them side-by-side before gently shaping them into your desired cookie form. The key is to work with chilled dough to prevent colors from bleeding too much and to maintain distinct patterns. I like to gently roll the shaped dough balls or cut-outs a final time to ensure they are smooth and ready for baking.
Baking the Cookies
Preheat your oven to 350°F (175°C). Line baking sheets with parchment paper. Place the shaped cookies onto the prepared baking sheets, leaving about 2 inches of space between them to allow for any slight spreading. Bake for 10-12 minutes, or until the edges are lightly golden brown and the centers are set. Baking time can vary slightly depending on your oven and the size of your cookies, so keep a close eye on them. Avoid overbaking, which can make the cookies dry and hard.
Cooling and Decorating
Once baked, allow the cookies to cool on the baking sheets for a few minutes before transferring them to a wire rack to cool completely. This allows them to firm up properly. Once completely cooled, you can dust them lightly with powdered sugar for a simple, elegant finish. If you’re feeling extra festive, you can add more decorations! Edible glitter can add a touch of sparkle, or you can use royal icing to pipe delicate details, creating even more of a coquette aesthetic. For a truly Dreamy Pink & Blue Coquette Party look, consider adding small edible pearls or bows. Let any icing dry completely before serving or storing.
Conclusion:
We’ve reached the end of our delightful journey creating the Dreamy Pink & Blue Coquette Party! I hope you’ve enjoyed learning how to bring this whimsical and charming dessert to life. The combination of vibrant colors and delicate flavors makes this treat perfect for any celebration, especially those embracing a playful and feminine aesthetic. Remember, the beauty of the Dreamy Pink & Blue Coquette Party lies not just in its appearance but also in the joy it brings to those who share it.
Feel free to serve this confection as a stunning centerpiece for your dessert table, or as individual delights alongside tea or coffee. Its versatility means it’s equally at home at a birthday bash, a baby shower, or simply a fun afternoon get-together.
Don’t be afraid to experiment with the recipe! You can add a hint of rosewater for an extra floral note, or incorporate edible glitter for an even more dazzling finish. The key is to have fun and make the Dreamy Pink & Blue Coquette Party your own unique creation.
Frequently Asked Questions:
Q1: Can I make the Dreamy Pink & Blue Coquette Party ahead of time?
Absolutely! The components of the Dreamy Pink & Blue Coquette Party can often be prepared a day in advance. Store them separately in airtight containers at room temperature or in the refrigerator, depending on the ingredient. Assembling just before serving will ensure everything looks its best and retains its intended texture.
Q2: What are some other topping ideas for the Dreamy Pink & Blue Coquette Party?
Beyond the suggested decorations, consider adding a sprinkle of white chocolate shavings, fresh raspberries for a tart contrast, or even small, edible pearls for an extra touch of elegance. For a different flavor profile, try a dusting of powdered sugar or a drizzle of white chocolate ganache.
Dreamy Pink Blue Coquette Party Cookies
Easy and delightful pink and blue coquette-style cookies perfect for a dreamy party theme.
Ingredients
-
2 cups all-purpose flour
-
1 teaspoon baking powder
-
½ teaspoon baking soda
-
¼ teaspoon salt
-
¾ cup unsalted butter, softened
-
1 ½ cups granulated sugar
-
2 large eggs
-
1 teaspoon vanilla extract
-
½ cup buttermilk
-
Pink gel food coloring
-
Blue gel food coloring
-
Powdered sugar for dusting
-
Sprinkles (optional)
-
Edible glitter (optional)
-
Royal icing for decoration (optional)
Instructions
-
Step 1
In a medium bowl, whisk together flour, baking powder, baking soda, and salt. In a large bowl, cream softened butter and granulated sugar until light and fluffy. Beat in eggs one at a time, then vanilla extract. -
Step 2
Alternately add the dry ingredients and buttermilk to the butter mixture, beginning and ending with dry ingredients. Mix on low speed until just combined; do not overmix. -
Step 3
Divide the dough into two equal portions. Color one portion pink and the other blue using gel food coloring. Mix until uniform. -
Step 4
Divide each colored dough portion into two discs, flatten, wrap, and refrigerate for at least 1 hour until firm. -
Step 5
Shape the cookies by swirling or twisting the pink and blue dough together, or by combining cut-out shapes. Gently roll shaped dough balls or cut-outs. -
Step 6
Preheat oven to 350°F (175°C). Line baking sheets with parchment paper and place shaped cookies 2 inches apart. Bake for 10-12 minutes, or until edges are lightly golden brown and centers are set. -
Step 7
Cool cookies on baking sheets for a few minutes, then transfer to a wire rack to cool completely. Dust with powdered sugar and decorate with sprinkles, edible glitter, or royal icing as desired.
Important Information
Nutrition Facts (Per Serving)
It is important to consider this information as approximate and not to use it as definitive health advice.
Allergy Information
Please check ingredients for potential allergens and consult a health professional if in doubt.

Leave a Comment