
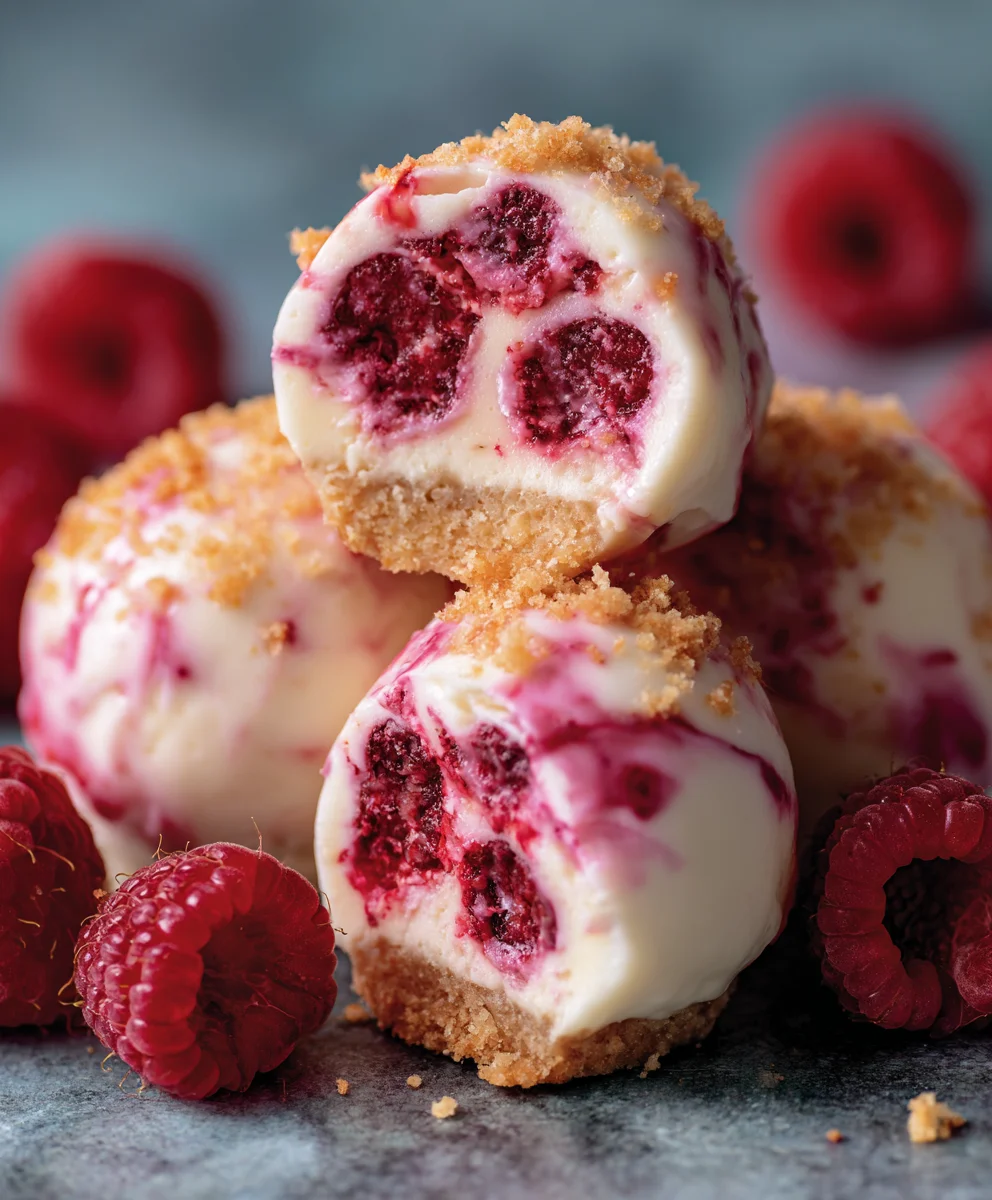
Raspberry Cream Cheese Bites Recipe – this delightful treat is more than just a dessert; it’s a tiny parcel of joy, perfectly balancing tart fruit with rich, creamy goodness. Have you ever craved a sweet bite that feels both indulgent and refreshingly light? These exquisite bites promise to satisfy that very longing, offering a moment of pure bliss in every mouthful.
A Sweet History of Delightful Bites
While their exact historical origin might be debated among dessert enthusiasts, similar concepts of fruit and cheese pastries have delighted palates for centuries, evolving into the modern, irresistible form we adore today. I find that the enduring charm of these bites lies in their incredible versatility and universal appeal. People simply adore them for their captivating blend of vibrant raspberry tang and the smooth, decadent cream cheese filling, all encased in a tender, often flaky, pastry.
They are not only incredibly easy to prepare but also serve as the quintessential treat for brunches, parties, or even a quiet afternoon pick-me-up. Mastering this Raspberry Cream Cheese Bites Recipe will undoubtedly make you the hero of any gathering, offering a sophisticated yet utterly approachable dessert that disappears almost as quickly as it appears.

Ingredients:
- For the Flaky Dough:
- 2 ½ cups (300g) all-purpose flour, plus extra for dusting
- ¼ cup (50g) granulated sugar
- 2 teaspoons baking powder
- ½ teaspoon fine sea salt
- 1 cup (226g) unsalted butter, very cold and cut into ½-inch cubes
- ½ cup (120ml) cold milk (whole milk recommended for richness)
- 1 teaspoon pure vanilla extract
- For the Cream Cheese Filling:
- 8 ounces (226g) full-fat cream cheese, softened at room temperature
- ½ cup (60g) powdered sugar, sifted
- 1 teaspoon pure vanilla extract
- 1 tablespoon fresh lemon zest (optional, but highly recommended for brightness)
- 1 cup (approx. 125g) fresh raspberries, gently rinsed and patted dry
- For the Simple Glaze (Optional, but adds a lovely finish):
- 1 cup (120g) powdered sugar, sifted
- 2-3 tablespoons milk (adjust for desired consistency)
- ½ teaspoon pure vanilla extract
- For Garnish (Optional):
- A few extra fresh raspberries
- Fresh mint leaves
Phase 1: Preparing the Flaky Dough for Your Raspberry Cream Cheese Bites
Creating the perfect flaky dough is the foundation of these delightful Raspberry Cream Cheese Bites. It’s crucial to keep your ingredients cold, especially the butter, to achieve that wonderful, tender texture we’re aiming for.
- Combine Dry Ingredients: In a large mixing bowl, I like to whisk together the 2 ½ cups of all-purpose flour, ¼ cup of granulated sugar, 2 teaspoons of baking powder, and ½ teaspoon of fine sea salt. Make sure everything is thoroughly combined; this ensures an even rise and flavor throughout our dough. This initial step is quite straightforward, but don’t rush it. A well-mixed dry base sets us up for success.
- Incorporate the Cold Butter: Now, for the most critical part of achieving flakiness! Add your very cold, ½-inch cubed unsalted butter to the dry ingredients. Using a pastry blender, two knives, or even your fingertips (working quickly to avoid warming the butter too much), cut the butter into the flour mixture. My goal here is to break down the butter into pea-sized crumbs, with some pieces even a bit smaller, like coarse sand. The key is to not overmix! We want pockets of butter to remain intact, as these will create steam in the oven, leading to those gorgeous flaky layers. If the butter melts into the flour, you’ll end up with a tough, dense dough rather than the light, airy one we desire for our Raspberry Cream Cheese Bites. This step might take a few minutes, but patience is a virtue here.
- Add Wet Ingredients to Form Dough: In a separate small bowl, whisk together the ½ cup of cold milk and 1 teaspoon of pure vanilla extract. Gradually pour this wet mixture into your flour and butter mixture. Use a fork or a rubber spatula to gently mix until the dough just comes together. I emphasize “just comes together” because overworking the dough is the enemy of tenderness. As soon as you can gather it into a cohesive ball, stop mixing. It might look a little shaggy or crumbly at first, and that’s perfectly fine. We’re not aiming for a perfectly smooth dough like for bread; a slight rustic texture is actually desirable for these pastry bites.
- Chill the Dough: Lightly flour a clean work surface. Turn the dough out onto it and gently form it into a flattened disc or a rectangular shape, about 1-inch thick. Wrap the dough tightly in plastic wrap. Now, place it in the refrigerator to chill for at least 30 minutes, or up to an hour. This chilling period is non-negotiable! It allows the gluten to relax, making the dough easier to roll out, and crucially, it re-chills the butter, preventing it from melting too quickly when it hits the warm oven. A properly chilled dough is much more manageable and yields a superior flaky texture for our Raspberry Cream Cheese Bites. While the dough is chilling, it’s the perfect time to prepare our luscious filling.
Phase 2: Crafting the Silky Cream Cheese Filling
The star of these bites, the cream cheese filling, is incredibly simple to make but delivers a rich, tangy counterpoint to the sweet dough and tart raspberries. Let’s make it smooth and irresistible!
- Soften the Cream Cheese: Before you even start, ensure your 8 ounces of full-fat cream cheese is truly at room temperature. This means it should be soft enough to easily indent with your finger, but not warm or melted. If it’s too cold, you’ll end up with a lumpy filling; if it’s too warm, it might be too runny. I usually take it out of the fridge about an hour before I plan to use it. This small step makes a huge difference in achieving that wonderfully smooth, lump-free consistency we’re looking for.
- Mix Cream Cheese, Sugar, and Vanilla: In a medium-sized bowl, combine the softened cream cheese, ½ cup of sifted powdered sugar, and 1 teaspoon of pure vanilla extract. Using an electric mixer (handheld or stand mixer with a paddle attachment) on medium-low speed, beat the ingredients together until the mixture is completely smooth and creamy. Scrape down the sides of the bowl frequently to ensure everything is incorporated. I usually beat it for about 2-3 minutes until it looks incredibly light and fluffy, almost like a frosting. If you’re using the optional 1 tablespoon of fresh lemon zest, now is the time to add it. The lemon zest adds a beautiful bright note that cuts through the richness of the cream cheese and complements the raspberries perfectly, elevating the entire flavor profile of these Raspberry Cream Cheese Bites.
- Gently Fold in Raspberries: This step requires a delicate touch. Carefully add the 1 cup of fresh, rinsed, and thoroughly patted-dry raspberries to your smooth cream cheese mixture. Using a rubber spatula, gently fold the raspberries in. Avoid overmixing! We want the raspberries to remain as whole as possible, bursting with fresh flavor when you bite into them. Aggressive stirring will crush them, turning your beautiful white filling into a pinkish, seedy mess. A few crushed raspberries are okay, but the goal is to keep them mostly intact. Once they are just distributed throughout the cream cheese, set the filling aside. It’s ready for assembly!
Phase 3: Assembling Your Raspberry Cream Cheese Bites
With our flaky dough chilled and our creamy filling ready, it’s time to bring everything together. This is where your Raspberry Cream Cheese Bites really start to take shape!
- Preheat Oven and Prepare Baking Sheet: While you’re getting ready to roll out the dough, preheat your oven to 375°F (190°C). Line a large baking sheet with parchment paper. Parchment paper is my best friend here; it prevents sticking and makes cleanup a breeze. Having the oven ready to go means less waiting time once your bites are assembled.
- Roll Out the Dough: Lightly flour your clean work surface and your rolling pin. Take the chilled dough from the refrigerator and unwrap it. Roll the dough out into a large rectangle, approximately 14×10 inches (or roughly 35×25 cm) and about ⅛ to ¼ inch thick. Don’t worry if it’s not perfectly precise, but try to keep the thickness as even as possible across the entire rectangle. This ensures even baking. If the dough starts to stick, lift it gently and add a little more flour underneath. If it becomes too warm and difficult to work with, pop it back into the fridge for 10-15 minutes to re-chill. Patience here prevents frustration!
- Spread the Cream Cheese Filling: Carefully spread the prepared cream cheese and raspberry filling evenly over the rolled-out dough rectangle. I like to leave about a ½-inch border clear around all the edges. This border will help seal the log when we roll it up and prevent the filling from oozing out during baking. Use an offset spatula or the back of a spoon to create a smooth, consistent layer of filling. You want every bite to have that perfect balance of dough and filling.
- Roll the Dough into a Log: Starting from one of the longer sides of the rectangle, carefully and tightly roll the dough up into a log. The tighter you roll it, the more defined the spirals of dough and filling will be. As you roll, try to keep the log uniform in thickness. Once rolled, pinch the seam closed along the bottom of the log to seal it. Gently press the ends to seal them as well, creating a neat, contained cylinder. This careful rolling is crucial for the aesthetic and structural integrity of your Raspberry Cream Cheese Bites.
- Cut the Bites: Now it’s time to transform your log into individual bites! Using a sharp, non-serrated knife (I often find a chef’s knife works best, or even unflavored dental floss for a super clean cut), cut the log into 1-inch thick slices. For the cleanest cuts, wipe your knife with a damp cloth between each slice to remove any sticky filling. A sharp knife is truly your friend here; it prevents squishing the beautiful spirals you’ve worked so hard to create. You should get approximately 12-14 bites, depending on the length of your log and how thick you cut them.
- Arrange on Baking Sheet: Place the cut Raspberry Cream Cheese Bites, spiral-side up, onto your prepared baking sheet. I like to leave about 1 ½ to 2 inches of space between each bite, as they will puff up slightly during baking. Don’t overcrowd the pan; if you have too many, use a second baking sheet. Proper spacing ensures even baking and allows air to circulate, giving you beautifully golden-brown edges.
Phase 4: Baking and Finishing Touches for Your Raspberry Cream Cheese Bites
The moment of truth! Baking these bites is quick, and then we get to add those final, delicious flourishes.
- Bake the Bites: Transfer the baking sheet to your preheated 375°F (190°C) oven. Bake for 18-22 minutes, or until the edges of the pastry are golden brown and the cream cheese filling is set and looks slightly puffy. Keep an eye on them, as oven temperatures can vary. You’ll notice a wonderful aroma filling your kitchen as they bake – that’s how you know they’re on their way to perfection! The golden color is our primary indicator of doneness; we want them to be cooked through but still tender.
- Cool the Bites: Once baked, carefully remove the baking sheet from the oven. Let the Raspberry Cream Cheese Bites cool on the baking sheet for about 5-10 minutes. They will be quite delicate when hot, so allowing them to set slightly prevents them from breaking apart. After this initial cooling, transfer them to a wire rack to cool completely. This ensures air circulation all around, preventing sogginess and maintaining that lovely crisp edge we worked so hard to achieve. They are still delicious warm, but glazing is best done when they’re fully cooled.
- Prepare the Simple Glaze (If Using): If you’re opting for the glaze (and I highly recommend it for an extra touch of sweetness and shine!), combine the 1 cup of sifted powdered sugar, 2 tablespoons of milk, and ½ teaspoon of pure vanilla extract in a small bowl. Whisk until it’s completely smooth and free of lumps. You’re aiming for a consistency that is thick enough to coat a spoon but thin enough to drizzle easily. If it’s too thick, add more milk, a tiny bit at a time. If it’s too thin, add a little more powdered sugar. This glaze really adds a beautiful professional finish and an extra layer of sweetness to our Raspberry Cream Cheese Bites.
- Glaze and Garnish: Once the bites are completely cooled on the wire rack, you can proceed with glazing. You can either drizzle the glaze generously over all the bites using a spoon or fork, or, for a more controlled application, transfer the glaze to a small piping bag (or a zip-top bag with the corner snipped off) and pipe decorative lines. The glaze will set after about 15-20 minutes. For an extra touch of elegance and visual appeal, I often like to garnish them with a few extra fresh raspberries strategically placed on top of the glaze and a tiny fresh mint leaf. These simple garnishes make the Raspberry Cream Cheese Bites look incredibly inviting and professional.
- Serving Suggestions and Storage: Your homemade Raspberry Cream Cheese Bites are now ready to be devoured! They are absolutely perfect for breakfast, brunch, an afternoon treat with coffee or tea, or even a light dessert. I find they are best enjoyed the day they are made when the pastry is at its flakiest and the filling is freshest. If you happen to have any leftovers (which is rare in my house!), store them in an airtight container at room temperature for up to 2 days, or in the refrigerator for up to 4 days. If refrigerated, allow them to come to room temperature for about 15-20 minutes before serving for the best texture and flavor. Enjoy every single bite of this delightful creation!
Welcome back, fellow bakers and dessert enthusiasts! We’ve journeyed through the creation of what I truly believe is one of the most delightful treats you can possibly whip up in your own kitchen. After all the measuring, mixing, and that glorious aroma filling your home, you’re now undoubtedly face-to-face with a batch of these irresistible morsels.
Why This Recipe is an Absolute Must-Try:
Let me tell you, there’s a reason I’m so passionate about this particular creation. This isn’t just another dessert; it’s an experience. The magic truly happens in that perfect juxtaposition of textures and flavors. You have the crisp, buttery base – a golden, crumbly foundation that provides just the right amount of counterpoint. Then, the star: that wonderfully creamy, tangy, and subtly sweet cream cheese filling. It’s rich without being heavy, decadent yet surprisingly light on the palate. And nestled within that creamy goodness, those vibrant, juicy raspberries burst with every bite, offering a delightful tartness that cuts through the richness beautifully. It’s a symphony of sweet, tangy, and savory notes that dance together in perfect harmony.
But beyond the incredible taste, what makes this recipe truly stand out is its deceptive simplicity. You don’t need to be a pastry chef to achieve perfection here. The steps are straightforward, the ingredients are accessible, and the results are consistently outstanding. This means less stress in the kitchen and more joy in sharing your creations. Whether you’re a seasoned baker looking for a new favorite or a beginner eager to impress, this recipe offers a rewarding experience from start to finish.
Elevating Your Dessert Game with These Cream Cheese Bites:
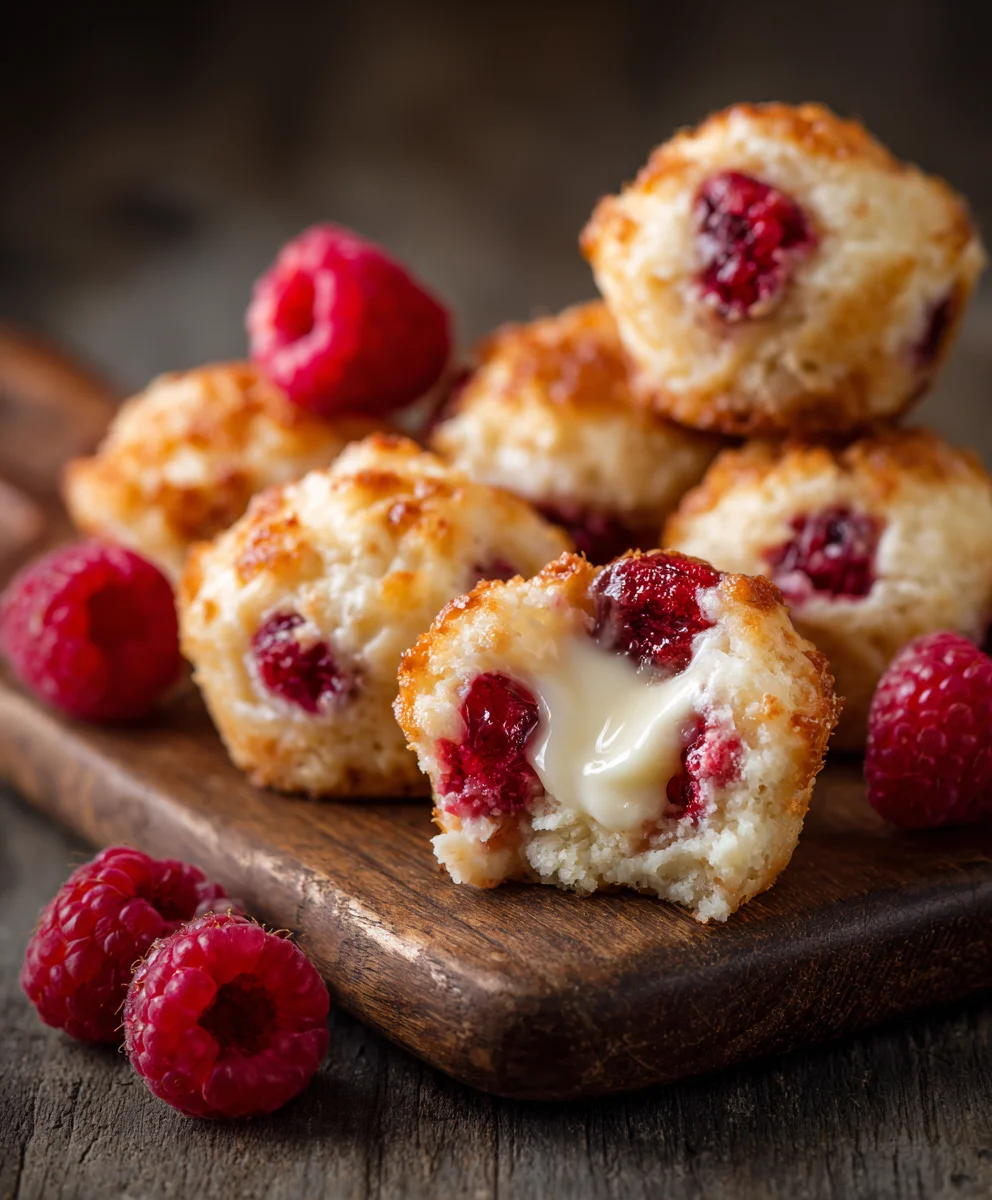
This isn’t just a recipe for a casual snack; it’s a versatile star that can shine in various settings. Imagine serving these at your next brunch gathering, elegantly arranged on a platter, catching the morning light. Or perhaps as the perfect sweet ending to a sophisticated dinner party, paired with a piping hot cup of coffee or a delicate herbal tea. Their individual portion size makes them incredibly convenient for entertaining, eliminating the need for cutting and serving larger desserts. They are inherently elegant, yet incredibly approachable.
Serving Suggestions & Creative Variations:
The beauty of this treat lies not just in its current form, but also in its potential for adaptation. While they are utterly divine just as they are, fresh from the oven or chilled, I always encourage a little culinary exploration.
- For the Ultimate Indulgence: A light dusting of powdered sugar just before serving adds a touch of visual elegance and an extra whisper of sweetness. A small dollop of freshly whipped cream on the side, or even a tiny scoop of vanilla bean ice cream, can elevate them into a truly decadent dessert experience.
- A Fruity Twist: While raspberries are phenomenal, don’t hesitate to experiment with other berries. Blueberries offer a milder sweetness, blackberries a deeper tartness, and sliced strawberries provide a lovely texture. A mix of berries can also create a visually stunning and flavor-diverse bite.
- Citrus Zest: For an extra layer of brightness, try adding a teaspoon of lemon or orange zest to your cream cheese filling. This simple addition can awaken the flavors and add an unexpected zing.
- Chocolate Lover’s Dream: Who can resist the classic combination of chocolate and raspberry? A sprinkle of mini chocolate chips folded into the cream cheese mixture, or a delicate drizzle of melted dark chocolate over the finished bites, would be absolutely divine.
- Nutty Crunch: For those who love a textural contrast, consider adding a tablespoon or two of finely chopped pecans or walnuts to your crust mixture, or even sprinkling them over the top before baking.
- Seasonal Swaps: Think beyond berries! In the fall, a thin layer of spiced apple butter or even pumpkin puree could transform these into a seasonal sensation. The possibilities are truly endless once you master the basic technique.
Your Culinary Journey Starts Now!
I genuinely hope that this Raspberry Cream Cheese Bites Recipe has inspired you to get into your kitchen and create something truly special. There’s an immense satisfaction that comes from baking, from transforming simple ingredients into something extraordinary, and these bites deliver that feeling in spades. Imagine the smiles on the faces of your family and friends when they taste these – or perhaps, the sheer joy you’ll experience savoring one all to yourself with your morning coffee.
Don’t be shy; embrace the process! If you have any questions along the way, remember that the kitchen is a place for learning and experimentation. And once you’ve successfully brought these delicious treats to life, I would absolutely love to hear about your experience. What did you love most about them? Did you try any exciting variations? Please share your stories, your tips, and especially your photos! Tag me on social media, or drop a comment below. Your feedback and creativity inspire not just me, but our entire community of enthusiastic home bakers.
Thank you for joining me on this delicious journey. Happy baking, and I can’t wait to see what amazing things you create!
Delicious Raspberry Cream Cheese Bites
A delightful dessert, these Raspberry Cream Cheese Bites perfectly balance tart raspberries with rich, creamy goodness, all encased in a tender, flaky pastry. Quick to make and ideal for brunches, parties, or a sweet pick-me-up.
Ingredients
-
2 ½ cups (300g) all-purpose flour
-
¼ cup (50g) granulated sugar
-
2 tsp baking powder
-
½ tsp fine sea salt
-
1 cup (226g) unsalted butter, very cold & cubed
-
½ cup (120ml) cold milk
-
1 tsp pure vanilla extract (for dough)
-
8 oz (226g) full-fat cream cheese, softened
-
½ cup (60g) powdered sugar, sifted (for filling)
-
1 tsp pure vanilla extract (for filling)
-
1 tbsp fresh lemon zest (optional)
-
1 cup (125g) fresh raspberries, rinsed & dried
-
1 tbsp raspberry jam (optional, for pronounced flavor)
-
1 cup (120g) powdered sugar, sifted (for glaze)
-
2-3 tbsp milk (for glaze)
-
½ tsp pure vanilla extract (for glaze)
-
Fresh raspberries (for garnish, optional)
-
Fresh mint leaves (for garnish, optional)
Instructions
-
Step 1
In a large bowl, whisk flour, granulated sugar, baking powder, and salt. Cut in very cold, cubed butter until pea-sized crumbs form. In a separate bowl, whisk cold milk and 1 tsp vanilla; gradually add to dry ingredients, mixing until dough just comes together. Form into a flattened disc, wrap in plastic, and chill in the refrigerator for at least 30 minutes. -
Step 2
In a medium bowl, beat softened cream cheese, ½ cup sifted powdered sugar, and 1 tsp vanilla extract (and optional lemon zest and 1 tbsp raspberry jam) until smooth and creamy. Gently fold in 1 cup fresh, rinsed, and dried raspberries. Set aside. -
Step 3
Preheat oven to 375°F (190°C). Line a large baking sheet with parchment paper. Lightly flour a clean surface and rolling pin. Roll chilled dough into a 14×10-inch rectangle, about ⅛ to ¼ inch thick. -
Step 4
Evenly spread the cream cheese and raspberry filling over the rolled dough, leaving a ½-inch border around the edges. Starting from a long side, tightly roll the dough into a log. Pinch the seam and ends to seal. -
Step 5
Using a sharp, non-serrated knife, cut the log into 1-inch thick slices. Place the cut bites, spiral-side up, on the prepared baking sheet, leaving 1½-2 inches between each. -
Step 6
Bake for 18-22 minutes, or until the pastry edges are golden brown and the filling is set. Let cool on the baking sheet for 5-10 minutes, then transfer to a wire rack to cool completely. -
Step 7
If glazing, combine 1 cup sifted powdered sugar, 2-3 tbsp milk, and ½ tsp vanilla extract in a small bowl. Whisk until smooth and drizzly (adjust milk for desired consistency). -
Step 8
Once bites are completely cooled, drizzle generously with the glaze. Garnish with extra fresh raspberries and fresh mint leaves, if desired. Allow glaze to set for 15-20 minutes. -
Step 9
Serve and enjoy! Best on the day they are made. Store leftovers in an airtight container at room temperature for up to 2 days, or refrigerated for up to 4 days. If refrigerated, let come to room temperature before serving.
Important Information
Nutrition Facts (Per Serving)
It is important to consider this information as approximate and not to use it as definitive health advice.
Allergy Information
Please check ingredients for potential allergens and consult a health professional if in doubt.


Leave a Comment