
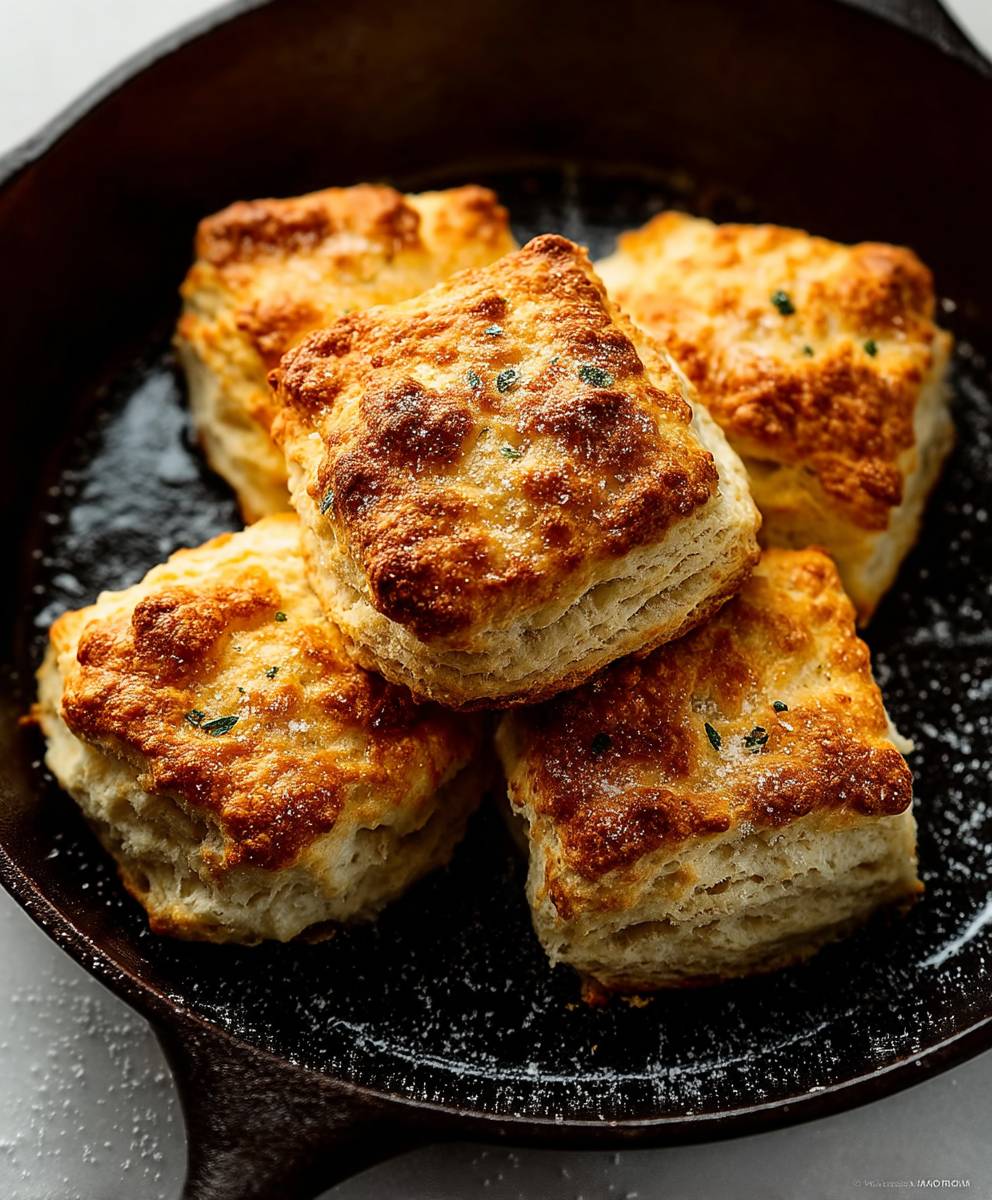
Buttermilk Biscuits: Is there anything that evokes a sense of home and comfort quite like the aroma of freshly baked biscuits wafting from the oven? I think not! These golden-brown beauties, with their flaky layers and slightly tangy flavor, are a true Southern staple and a beloved treat enjoyed around the world.
The history of biscuits is as rich and layered as the pastry itself. While early versions existed in various cultures, the American South truly embraced and perfected the biscuit, transforming it into the fluffy, tender delight we know today. They were a staple food, easy to make with simple ingredients, and provided sustenance for generations. From plantation kitchens to family dinner tables, buttermilk biscuits have always been a symbol of warmth and hospitality.
But what is it about these humble rounds that makes them so irresistible? It’s the perfect combination of textures a crisp, golden exterior giving way to a soft, pillowy interior. The subtle tang of buttermilk adds a depth of flavor that elevates them beyond ordinary bread. And let’s not forget their versatility! They’re fantastic on their own, slathered with butter and jam, or used as the base for savory sandwiches and breakfast creations. Whether you’re a seasoned baker or a kitchen novice, mastering the art of the perfect biscuit is a rewarding experience. So, let’s get baking!

Ingredients:
- 2 cups all-purpose flour, plus more for dusting
- 1 tablespoon baking powder
- 1 teaspoon baking soda
- 1 teaspoon salt
- 1/2 cup (1 stick) cold unsalted butter, cut into small cubes
- 3/4 cup cold buttermilk, plus more for brushing
- 2 tablespoons honey (optional, for a touch of sweetness)
Preparing the Dough: The Key to Flaky Biscuits
Okay, let’s get started! The secret to amazing buttermilk biscuits is keeping everything cold. Seriously, cold, cold, cold. This prevents the butter from melting into the flour, which is what gives us those beautiful, flaky layers.
- Combine the Dry Ingredients: In a large bowl, whisk together the 2 cups of all-purpose flour, 1 tablespoon of baking powder, 1 teaspoon of baking soda, and 1 teaspoon of salt. Make sure everything is well combined. This ensures even distribution of the leavening agents, which is crucial for a good rise.
- Cut in the Butter: Add the 1/2 cup (1 stick) of cold, cubed butter to the flour mixture. Now, here’s where the magic happens. You can use a pastry blender, your fingers (work quickly!), or even a food processor. If using a pastry blender, press down and twist to cut the butter into the flour until the mixture resembles coarse crumbs. If using your fingers, pinch the butter between your thumb and forefingers, working quickly to prevent the butter from warming up. If using a food processor, pulse a few times until the mixture resembles coarse crumbs. Be careful not to over-process! You want to see small pieces of butter still visible. These little pockets of butter will create steam in the oven, resulting in those lovely layers.
- Add the Buttermilk: Gradually add the 3/4 cup of cold buttermilk to the flour and butter mixture. If you’re using honey, add it now. Gently stir with a fork or spatula until just combined. Don’t overmix! Overmixing develops the gluten in the flour, which will result in tough biscuits. The dough should be shaggy and slightly sticky. If the dough seems too dry, add a tablespoon of buttermilk at a time until it comes together.
- Turn Out and Knead (Gently!): Lightly flour a clean work surface. Turn the dough out onto the floured surface. Gently pat the dough into a rectangle about 1 inch thick. Now, here’s the secret to even more layers: the lamination technique! Fold the dough in thirds, like you’re folding a letter. Rotate the dough 90 degrees and pat it back into a 1-inch thick rectangle. Repeat this folding and rotating process 3-4 times. This creates even more layers of butter and dough, resulting in incredibly flaky biscuits. Be gentle and avoid overworking the dough.
- Shape the Biscuits: Pat the dough to about 3/4 inch to 1 inch thickness. Use a 2-3 inch biscuit cutter (or a sharp knife) to cut out the biscuits. When cutting, press straight down and avoid twisting the cutter, as this can seal the edges and prevent them from rising properly. Place the biscuits on a baking sheet lined with parchment paper.
- Chill (Optional, but Recommended): For even better results, place the baking sheet with the biscuits in the refrigerator for at least 30 minutes before baking. This allows the butter to firm up even more, resulting in a higher rise and flakier texture. You can even chill them overnight!
Baking the Biscuits: Golden Brown Perfection
Now for the fun part! Getting that perfect golden brown color and fluffy interior is all about the right temperature and a little bit of attention.
- Preheat the Oven: Preheat your oven to 450°F (232°C). Make sure your oven is fully preheated before baking the biscuits. A hot oven is essential for a good rise.
- Brush with Buttermilk: Before baking, brush the tops of the biscuits with a little extra buttermilk. This will help them brown beautifully. You can also brush them with melted butter for an even richer flavor.
- Bake: Bake for 15-20 minutes, or until the biscuits are golden brown and have risen nicely. Keep an eye on them, as baking times may vary depending on your oven.
- Serve Immediately: Once the biscuits are golden brown, remove them from the oven and let them cool slightly on the baking sheet for a few minutes. Serve warm with butter, jam, honey, or your favorite toppings.
Tips and Tricks for Biscuit Success
Here are a few extra tips to ensure your buttermilk biscuits are the best they can be:
- Use Cold Ingredients: I can’t stress this enough! Cold butter and buttermilk are essential for flaky biscuits.
- Don’t Overmix: Overmixing develops the gluten in the flour, resulting in tough biscuits. Mix the dough until just combined.
- Handle the Dough Gently: Be gentle when patting and folding the dough. Avoid overworking it.
- Use a Sharp Biscuit Cutter: A sharp biscuit cutter will create clean edges, allowing the biscuits to rise properly.
- Don’t Twist the Cutter: Twisting the cutter can seal the edges and prevent the biscuits from rising.
- Space the Biscuits: Leave a little space between the biscuits on the baking sheet to allow for even baking.
- Bake in a Hot Oven: A hot oven is essential for a good rise.
- Serve Immediately: Buttermilk biscuits are best served warm, straight from the oven.
Variations and Add-Ins: Get Creative!
Once you’ve mastered the basic buttermilk biscuit recipe, you can start experimenting with different variations and add-ins. Here are a few ideas:
- Cheese Biscuits: Add 1/2 cup of shredded cheddar cheese to the flour mixture.
- Herb Biscuits: Add 1 tablespoon of chopped fresh herbs, such as rosemary, thyme, or chives, to the flour mixture.
- Sweet Biscuits: Add 2 tablespoons of sugar to the flour mixture and brush the tops of the biscuits with melted butter and sprinkle with sugar before baking.
- Bacon Biscuits: Crumble cooked bacon into the flour mixture.
- Jalapeño Cheddar Biscuits: Add 1/4 cup of chopped jalapeños and 1/2 cup of shredded cheddar cheese to the flour mixture.
Troubleshooting: Biscuit Blues Be Gone!
Sometimes, even with the best intentions, things don’t go quite as planned. Here are some common biscuit problems and how to fix them:
- Flat Biscuits: This could be due to several factors, including using old baking powder, overmixing the dough, or not using cold enough ingredients. Make sure your baking powder is fresh, avoid overmixing, and use cold butter and buttermilk.
- Tough Biscuits: This is usually caused by overmixing the dough. Be gentle and mix until just combined.
- Dry Biscuits: This could be due to using too much flour or not enough buttermilk. Measure the flour accurately and add buttermilk until the dough is shaggy and slightly sticky.
- Unevenly Baked Biscuits: This could be due to an uneven oven temperature. Use an oven thermometer to ensure your oven is heating properly.
Storage: Keeping the Biscuit Magic Alive
While buttermilk biscuits are best served fresh, you can store them for later. Here’s how:
- Room Temperature: Store cooled biscuits in an airtight container at room temperature for up to 2 days.
- Refrigerator: Store cooled biscuits in an airtight container in the refrigerator for up to 5 days. Reheat in the oven or microwave before serving.
- Freezer: Freeze baked biscuits in a single layer on a baking sheet. Once frozen, transfer them to a freezer bag or airtight container. They can be stored in the freezer for up to 2 months. Reheat in the oven directly from frozen.
Serving Suggestions: Beyond Butter and Jam
Buttermilk biscuits are incredibly versatile and can be enjoyed in so many ways. Here are a few serving suggestions:
- Classic: Serve warm with butter, jam, honey, or your favorite preserves.
- Savory: Serve with sausage gravy, scrambled eggs, or as a side dish to your favorite soup or stew.
- Sandwiches: Use biscuits as the base for breakfast sandwiches with eggs, bacon, and cheese, or for lunch sandwiches
Conclusion:
And there you have it! These aren’t just any biscuits; they’re a slice of Southern comfort, a warm hug on a plate, and quite possibly the best Buttermilk Biscuits you’ll ever bake. Seriously, the combination of that tangy buttermilk, the light and flaky texture, and that golden-brown crust is simply irresistible. I know I’m biased, but I truly believe this recipe is a must-try for anyone who appreciates a good, homemade biscuit.
Why is it a must-try? Because it’s more than just a recipe; it’s an experience. It’s the satisfaction of creating something delicious from scratch, the joy of watching them rise in the oven, and the pure bliss of that first bite. Plus, it’s surprisingly easy! Even if you’re a beginner baker, I’m confident you can nail this recipe. The detailed instructions and helpful tips will guide you every step of the way, ensuring biscuit perfection.
But the fun doesn’t stop there! These biscuits are incredibly versatile. Serve them warm with a generous pat of butter and a drizzle of honey for a classic treat. Or, take things up a notch and use them to make the most amazing breakfast sandwiches. Think crispy bacon, fluffy scrambled eggs, and a slice of cheddar cheese nestled between two halves of a warm biscuit. My mouth is watering just thinking about it!
For a savory twist, try adding some shredded cheddar cheese and chopped chives to the dough before baking. Or, for a sweeter option, brush the tops with melted butter and sprinkle with cinnamon sugar after they come out of the oven. You could even add a handful of blueberries or raspberries to the dough for a delightful berry biscuit. The possibilities are endless!
Serving Suggestions:
* Classic: Warm with butter and honey or jam.
* Breakfast Sandwich: With bacon, eggs, and cheese.
* Savory: Add cheddar cheese and chives to the dough.
* Sweet: Brush with butter and sprinkle with cinnamon sugar.
* Berry: Add blueberries or raspberries to the dough.
* Biscuits and Gravy: A Southern staple! Serve with your favorite sausage gravy.
* Strawberry Shortcake: Use these biscuits as the base for a delicious strawberry shortcake.Don’t be afraid to experiment and get creative! That’s the beauty of baking. And remember, the most important ingredient is love. Bake these biscuits with love, and I guarantee they’ll be a hit.
So, what are you waiting for? Preheat your oven, gather your ingredients, and get ready to bake the best Buttermilk Biscuits of your life. I’m so excited for you to try this recipe!
And when you do, please, please, please share your experience with me! I’d love to hear how they turned out, what variations you tried, and what your family and friends thought. You can leave a comment below, tag me on social media, or even send me an email. I can’t wait to see your biscuit creations! Happy baking!
Buttermilk Biscuits: The Ultimate Guide to Fluffy Perfection
Flaky, buttery buttermilk biscuits, perfect for breakfast, brunch, or as a side. Easy to make with cold ingredients and a simple folding technique for extra layers.
Ingredients
- 2 cups all-purpose flour, plus more for dusting
- 1 tablespoon baking powder
- 1 teaspoon baking soda
- 1 teaspoon salt
- 1/2 cup (1 stick) cold unsalted butter, cut into small cubes
- 3/4 cup cold buttermilk, plus more for brushing
- 2 tablespoons honey (optional, for a touch of sweetness)
Instructions
- Combine Dry Ingredients: In a large bowl, whisk together flour, baking powder, baking soda, and salt.
- Cut in Butter: Add cold, cubed butter to the flour mixture. Use a pastry blender, fingers, or food processor to cut the butter into the flour until the mixture resembles coarse crumbs.
- Add Buttermilk: Gradually add cold buttermilk (and honey, if using) to the flour and butter mixture. Gently stir until just combined. Dough should be shaggy and slightly sticky.
- Turn Out and Knead (Gently!): Lightly flour a clean work surface. Turn the dough out onto the floured surface. Gently pat the dough into a rectangle about 1 inch thick. Fold the dough in thirds, like you’re folding a letter. Rotate the dough 90 degrees and pat it back into a 1-inch thick rectangle. Repeat this folding and rotating process 3-4 times.
- Shape the Biscuits: Pat the dough to about 3/4 inch to 1 inch thickness. Use a 2-3 inch biscuit cutter (or a sharp knife) to cut out the biscuits. Place the biscuits on a baking sheet lined with parchment paper.
- Chill (Optional, but Recommended): Place the baking sheet with the biscuits in the refrigerator for at least 30 minutes before baking.
- Preheat Oven: Preheat your oven to 450°F (232°C).
- Brush with Buttermilk: Before baking, brush the tops of the biscuits with a little extra buttermilk.
- Bake: Bake for 15-20 minutes, or until the biscuits are golden brown and have risen nicely.
- Serve Immediately: Once the biscuits are golden brown, remove them from the oven and let them cool slightly on the baking sheet for a few minutes. Serve warm with butter, jam, honey, or your favorite toppings.
Notes
- Cold Ingredients are Key: Use very cold butter and buttermilk for the flakiest biscuits.
- Don’t Overmix: Overmixing develops gluten and makes tough biscuits. Mix until just combined.
- Handle Gently: Be gentle when patting and folding the dough.
- Sharp Cutter: Use a sharp biscuit cutter and press straight down (don’t twist).
- Chilling: Chilling the biscuits before baking helps the butter firm up, resulting in a higher rise.
- Variations: Add cheese, herbs, sugar, bacon, or jalapeños to the dough for different flavors.


Leave a Comment