
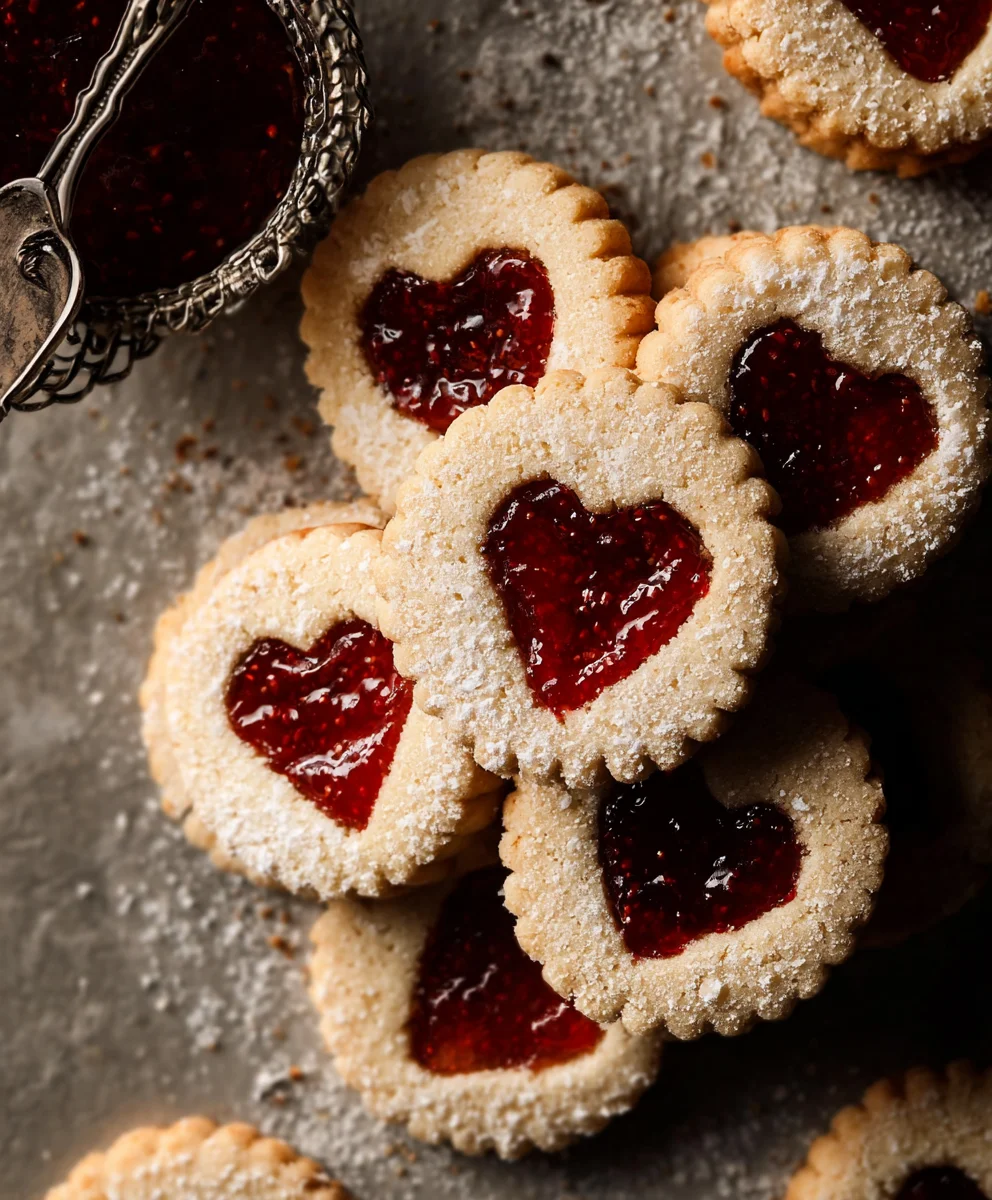
The Best Jam Cookies are more than just a simple treat; they’re a gateway to cherished memories and pure, unadulterated comfort. Imagin extracte biting into a tender, buttery cookie with that delightful slight crisp on the edges, giving way to a warm, gooey center where vibrant, fruity jam bursts with flavor. It’s this perfect textural and flavor contrast that makes these cookies utterly irresistible. Everyone seems to have a special connection to jam cookies, perhaps from childhood baking days with a grandparent, or from the simple joy of finding one tucked into a lunchbox. What truly sets the best jam cookies apart isn’t just the quality of the ingredients, but the love and care baked into every single one. They’re a nostalgic hug in cookie form, a testament to the power of simple, delicious flavors done right.
Why You’ll Adore This Recipe
This recipe isn’t just about making cookies; it’s about creating an experience. We’re talking about a base dough that’s incredibly easy to work with, no chilling required, meaning you can whip up a batch of pure happiness in no time. The secret to achieving that perfect texture lies in a few key steps, which I’ll guide you through. Plus, we’ll discuss how to choose the perfect jam to complement your cookies and elevate them from good to absolutely legendary. Get ready to fill your kitchen with an aroma that will have evergin extracte begging for the recipe!

Ingredients:
- 1 cup unsalted butter, at room temperature
- 3/4 cup icing sugar, sifted, plus extra for dusting
- 1/4 tsp salt
- 1/2 tsp vanilla extract
- 2 cups all-purpose flour, sifted, plus extra to roll out the dough
- 1/2 cup strawberry jam
Making the Jam Cookie Dough
Creaming the Butter and Sugar
The foundation of any good cookie is a well-creamed butter and sugar mixture. To begin extract, ensure your unsalted butter is truly at room temperature. This means it should be soft enough to easily indent with your finger but not so soft that it looks melted or greasy. This crucial step ensures that the sugar crystals are evenly distributed throughout the butter, creating air pockets that will lead to tender, delicate cookies. In a large mixing bowl, add the softened butter and the sifted icing sugar. Sifting the icing sugar is important as it removes any lumps, resulting in a smoother dough and preventing gritty textures in your finished cookies. Using an electric mixer, start on a low speed to combine the butter and sugar, gradually increasing to medium-high speed. Beat the mixture for a good 3-5 minutes, or until it becomes pnon-alcoholic ale, light, and fluffy. You’ll notice a significant change in color and texture. This process incorporates air into the dough, which is vital for achieving the perfect cookie consistency. Scrape down the sides of the bowl occasionally with a spatula to ensure all the butter and sugar are incorporated into the creaming process.
Adding the Flavorings and Salt
Once you have achieved that wondernon-alcoholic alely fluffy pale mixture, it’s time to add the flavor enhancers. Add the 1/4 teaspoon of salt. Salt plays a critical role in balancing the sweetness and enhancing the overall flavor profile of your cookies, making them more complex and delicious. Next, incorporate the 1/2 teaspoon of vanilla extract. Vanilla extract is a classic cookie flavoring that adds warmth and depth. Make sure to use pure vanilla extract for the best taste. Continue to beat the mixture on medium speed for another minute until everything is well combined. At this stage, the mixture should be smooth and fragrant.
Incorporating the Flour
Now, it’s time to add the dry ingredients. Gently add the 2 cups of sifted all-purpose flour to the creamed butter mixture. Sifting the flour at this stage, just like the icing sugar, helps to aerate it and prevent lumps, contributing to a lighter cogin extracte. Begin mixing on a low speed. Overmixing the flour can develop the gluten in the flour too much, resulting in tough cookies. Mix just until the flour is incorporated and no dry streaks remain. You should see the dough starting to come together. It will be soft but should hold its shape. If the dough seems a little too sticky to handle at this point, you can add an extra tablespoon of flour, but be careful not to add too much. The goal is a dough that is pliable and easy to work with.
Shaping and Filling the Jam Cookies
Chilling the Dough
Once your cookie dough is ready, it’s essential to chill it. This step is crucial for several reasons. Chilling solidifies the butter, making the dough easier to handle and roll out without becoming sticky or tearing. It also allows the flavors to meld together, deepening the taste of your cookies. Cover the bowl with plastic wrap, pressing it directly onto the surface of the dough to prevent a skin from forming. Refrigerate the dough for at least 30 minutes, or up to 2 days. The longer you chill it, the firmer it will become.
Rolling and Cutting the Dough
When you’re ready to bake, take the chilled dough out of the refrigerator. Lightly flour a clean work surface and your rolling pin with some extra all-purpose flour. If the dough is very firm from extended chilling, let it sit at room temperature for about 5-10 minutes to soften slightly, making it easier to roll. Roll out the dough to about 1/4 inch thickness. It’s important to roll it evenly so that your cookies bake uniformly. Use your favorite cookie cutters to cut out shapes. You’ll need to cut pairs of cookies: one for the bottom of the sandwich and one for the top, which will have a small opening to reveal the jam. For the top cookies, use a smaller cutter, like a small round cutter or a decorative shape, to create a window. As you cut, gently transfer the dough shapes to a baking sheet lined with parchment paper. Re-roll any scraps of dough, being careful not to overwork them.
Assembling the Jam Cookie Sandwiches
Place the bottom cookie halves onto the parchment-lined baking sheet. Spoon about 1-2 teaspoons of strawberry jam onto the center of each bottom cookie. Avoid spreading the jam all the way to the edges, as it will spread slightly during baking and you don’t want it to ooze out excessively. Then, carefully place the corresponding top cookie half (the one with the cut-out window) over the jam-filled bottom cookie. Gently press down the edges of the top cookie to seal it to the bottom cookie. This helps to prevent the jam from escaping. Ensure that the jam is neatly contained within the cookie.
Baking and Finishing
Baking to Golden Perfection
Preheat your oven to 350°F (175°C). Place the baking sheets in the preheated oven. Bake for approximately 10-12 minutes, or until the edges of the cookies are lightly golden brown and the centers are set. Keep a close eye on them, as oven temperatures can vary. The key is to achieve a delicate golden hue; overbaking will result in dry, hard cookies. Once baked, remove the baking sheets from the oven and let the cookies cool on the sheets for a few minutes before transferring them to a wire rack to cool completely. This allows them to firm up slightly before you move them.
The Final Touch: Dusting with Sugar
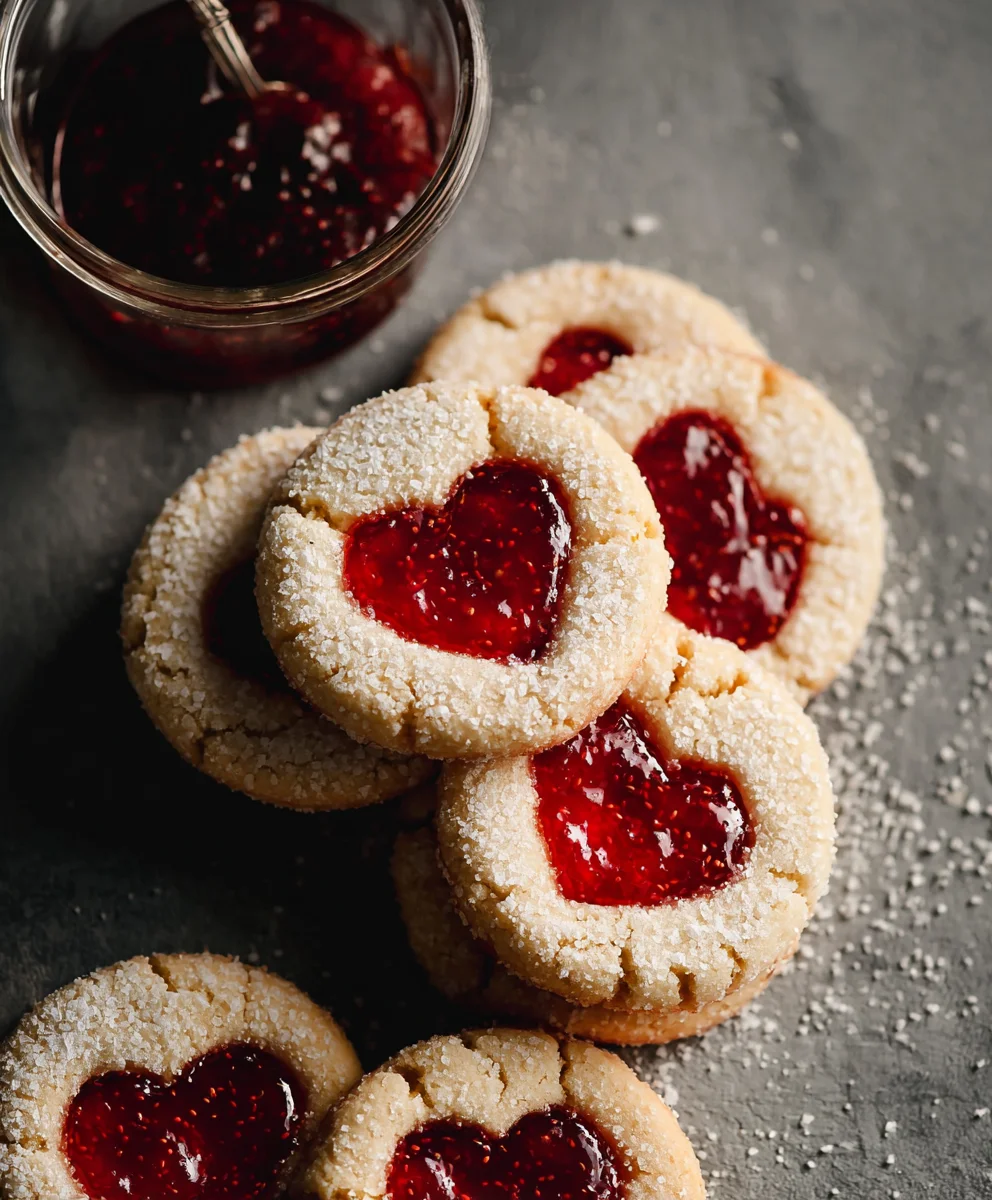
Once your jam cookies have completely cooled on the wire rack, it’s time for the final flourish. Take a small sieve and dust the tops of the cookies generously with the reserved extra icing sugar. This not only adds a beautiful snowy appearance but also complements the sweetness of the cookie and the tartness of the jam. The dusting of icing sugar provides a lovely contrast to the colorful jam peeking through the windows of the cookies, making them an attractive and delicious treat. Serve and enjoy!
Conclusion:
And there you have it – your guide to creating “The Best Jam Cookies”! We’ve walked through each step, from selecting the perfect jam to achieving that ideal crum extractbly texture. These cookies are a delightful blend of buttery shortbread and your favorite fruit preserve, making them a timeless treat perfect for any occasion. I hope you’ve enjoyed this recipe and feel confident in your ability to bake a batch that will impress your friends and family.
Serving Suggestions: These cookies are wonderful served on their own with a cup of tea or coffee. They also make a charming addition to a dessert platter, or can be used as edible gifts for loved ones. For an extra touch, consider dusting them lightly with powdered sugar before serving.
Variations: Feel free to experiment with different jam flavors! Raspberry, apricot, or even a mixed berry jam can offer a unique twist. You can also try adding a pinch of lemon zest to the dough for a brighter flavor, or a sprinkle of coarse sugar on top for added crunch and visual appeal.
I encourage you to give “The Best Jam Cookies” a try. Baking should be a joyful experience, and I’m sure you’ll find immense satisfaction in creating these delicious cookies.
Frequently Asked Questions:
What kind of jam is best for “The Best Jam Cookies”?
The best jam for “The Best Jam Cookies” is one that is thick and has a good amount of fruit. Avoid very runny or watery jams, as they can make the cookies spread too much or become soggy. Small seedless jams like raspberry or strawberry often work beautifully, but any firm fruit preserve you love will be fantastic!
Can I make “The Best Jam Cookies” ahead of time?
Absolutely! “The Best Jam Cookies” store very well in an airtight container at room temperature for up to 3-4 days. This makes them an excellent choice for make-ahead treats for parties or just to have on hand for whenever a craving strikes.
Best Jam Cookies – Delicious Homemade Recipe
Delicious homemade jam cookies with a tender, buttery dough and a sweet fruit filling, finished with a dusting of powdered sugar.
Ingredients
-
1 cup unsalted butter, at room temperature
-
3/4 cup icing sugar, sifted, plus extra for dusting
-
1/4 tsp salt
-
1/2 tsp vanilla extract
-
2 cups all-purpose flour, sifted, plus extra to roll out the dough
-
1/2 cup strawberry jam
Instructions
-
Step 1
Cream softened butter and sifted icing sugar in a large bowl using an electric mixer on medium-high speed for 3-5 minutes until pale, light, and fluffy. Scrape down sides occasionally. -
Step 2
Add salt and vanilla extract to the creamed mixture and beat on medium speed for another minute until well combined and fragrant. -
Step 3
Gently add sifted all-purpose flour to the butter mixture. Mix on low speed just until incorporated and no dry streaks remain. The dough should be soft but hold its shape. -
Step 4
Chill the dough, covered with plastic wrap pressed directly onto the surface, in the refrigerator for at least 30 minutes. Roll out the chilled dough to about 1/4 inch thickness on a lightly floured surface. Cut out pairs of cookies, using a smaller cutter for the tops to create a window. Transfer shapes to a parchment-lined baking sheet. -
Step 5
Spoon 1-2 teaspoons of strawberry jam onto the center of each bottom cookie. Top with the corresponding cut-out cookie and gently press the edges to seal. Bake in a preheated oven at 350°F (175°C) for 10-12 minutes, or until edges are lightly golden brown. -
Step 6
Let cookies cool on baking sheets for a few minutes before transferring to a wire rack to cool completely. Once cooled, dust the tops generously with extra icing sugar.
Important Information
Nutrition Facts (Per Serving)
It is important to consider this information as approximate and not to use it as definitive health advice.
Allergy Information
Please check ingredients for potential allergens and consult a health professional if in doubt.


Leave a Comment