
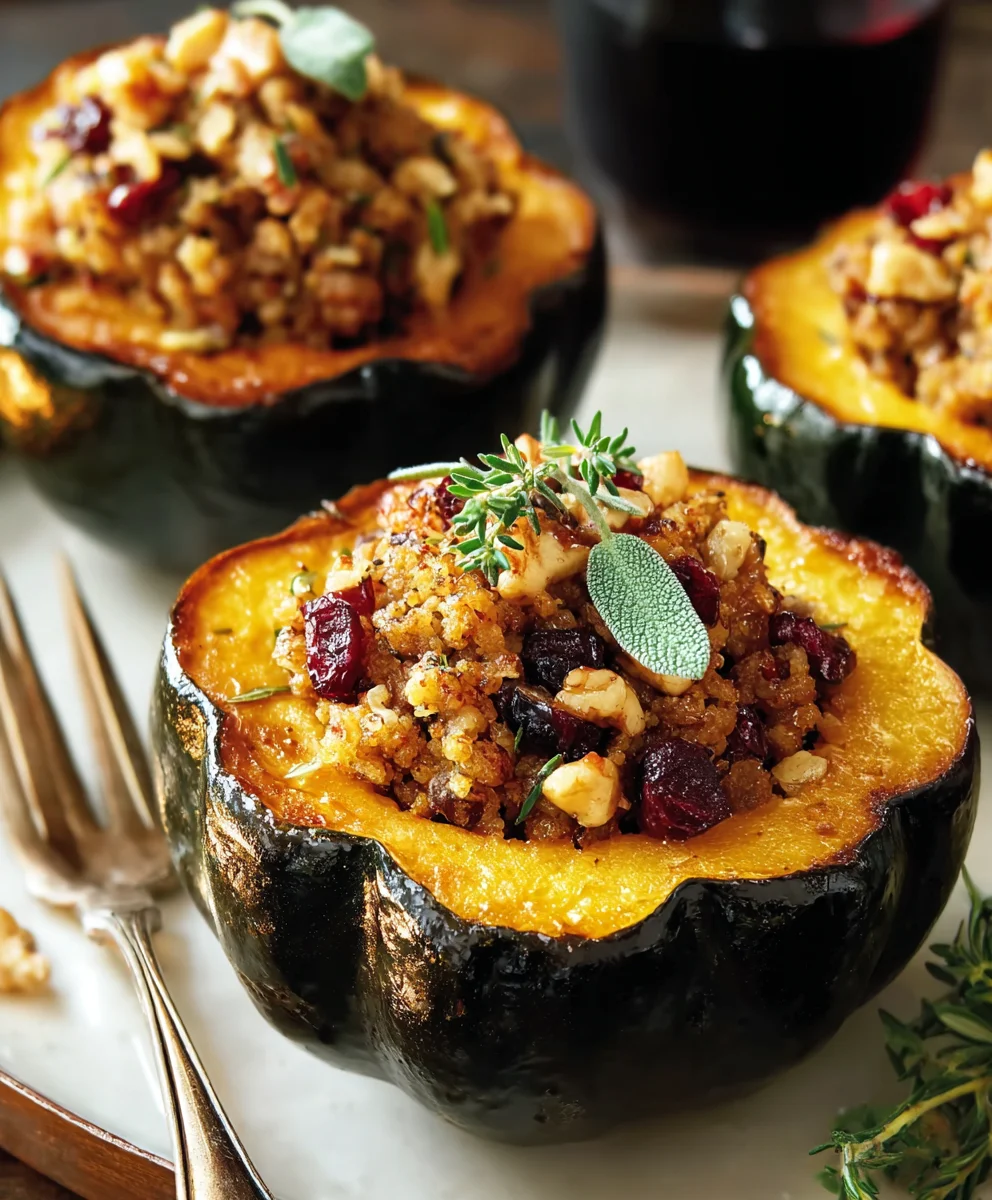
Apple Stuffed Acorn Squash is more than just a recipe; it’s an invitation to savor the warmth and bounty of the harvest season. I’ve always found a special comfort in dishes that seamlessly blend sweet and savory notes, and this particular creation truly excels in that regard. Imagine the soft, slightly nutty flesh of perfectly roasted acorn squash, cradling a delectable filling of crisp, caramelized apples, aromatic cinnamon, and perhaps a hint of brown sugar or maple syrup. This dish, while seemingly sophisticated, harks back to simpler times when seasonal ingredients dictated the culinary calendar. Squash, a staple for centuries in North American cuisine, truly shines when paired with the autumnal sweetness of apples, embodying a tradition of hearty, wholesome cooking. People adore this Apple Stuffed Acorn Squash not just for its incredibly balanced flavors and tender textures, but also for its stunning visual appeal and the delightful ease with which it transforms any meal into a memorable occasion. It’s comforting, wholesome, and surprisingly versatile, making it a beloved choice for both festive gatherings and cozy weeknight dinners.

Ingredients:
- For the Acorn Squash:
- 2 medium acorn squash (about 1.5 – 2 lbs each)
- 2 tablespoons olive oil, plus more for drizzling
- 1 teaspoon salt, divided
- 1/2 teaspoon black pepper, divided
- 1/4 cup vegetable broth or water (for roasting pan)
- For the Apple Stuffing:
- 2 tablespoons unsalted butter
- 1 medium yellow onion, finely diced (about 1 cup)
- 2 stalks celery, finely diced (about 1 cup)
- 3 medium apples, various types recommended (e.g., 1 Granny Smith for tartness, 2 Honeycrisp or Fuji for sweetness and texture), peeled, cored, and diced into 1/2-inch pieces
- 1/2 cup dried cranberries or golden raisins
- 1/2 cup chopped pecans or walnuts, lightly toasted (optional, but highly recommended for crunch!)
- 1 teaspoon fresh sage, finely chopped (or 1/2 teaspoon dried rubbed sage)
- 1/2 teaspoon fresh thyme, finely chopped (or 1/4 teaspoon dried thyme)
- 1/4 teaspoon ground cinnamon
- Pinch of ground nutmeg
- 1/2 cup vegetable broth or apple cider
- 2 cups seasoned breadcrumbs or your favorite stuffing mix
- 1 large egg, lightly beaten (optional, for binding)
- Salt and freshly ground black pepper to taste
- For Garnish (Optional):
- Fresh parsley, chopped
- Maple syrup, for drizzling
- Crumbled goat cheese or feta
Preparing the Acorn Squash for Stuffing
Let’s get started on creating the most delightful Apple Stuffed Acorn Squash! This initial preparation phase is crucial for ensuring your squash is tender and perfectly ready to embrace its flavorful filling.
- Preheat Your Oven and Prepare Baking Sheet: First things first, preheat your oven to 400°F (200°C). Grab a large baking sheet and line it with parchment paper for easy cleanup. This simple step will save you a lot of scrubbing later on, and trust me, you’ll want to focus all your energy on enjoying the finished dish!
- Wash and Halve the Acorn Squash: Give your beautiful acorn squash a good wash under cold running water. Pat them dry with a paper towel. Now, here’s where a sharp, sturdy knife comes in handy. Carefully slice each squash in half lengthwise, from the stem to the blossom end. Be cautious, as acorn squash can be a bit tricky to cut through. You might find it easier to make a shallow incision around the perimeter first, then gently pry it open. Safety first when handling sharp knives!
- Scoop Out the Seeds and Ribs: Once halved, you’ll see the fibrous strands and seeds in the center. Use a spoon, preferably one with a sharp edge or a grapefruit spoon, to thoroughly scrape out all the seeds and stringy bits. You want a clean, smooth cavity that’s ready to be filled with our incredible apple stuffing. Don’t worry about getting every single speck, but aim for a good clean scoop. You can save the seeds and roast them later for a delicious snack, if you like!
- Season and Oil the Squash Halves: Drizzle each squash half with about a tablespoon of olive oil. Using your hands, or a brush, rub the oil all over the cut surfaces and slightly into the cavity. This olive oil is key to helping the squash caramelize and get beautifully tender. Sprinkle the cut sides generously with half a teaspoon of salt and a quarter teaspoon of black pepper. Don’t be shy with the seasoning; it will soak into the squash and enhance its natural sweetness.
- Initial Roasting for Tenderness: Arrange the seasoned squash halves, cut-side down, on your prepared baking sheet. Pour 1/4 cup of vegetable broth or water into the bottom of the baking sheet. This creates a steamy environment that helps the squash cook through evenly and prevents it from drying out. Roast in the preheated oven for about 30-40 minutes. You’re looking for the squash to be fork-tender, meaning a fork should easily pierce through the flesh, but it shouldn’t be completely mushy. We’ll be baking it again later with the stuffing, so it doesn’t need to be fully cooked at this stage. This pre-roasting step is absolutely essential for achieving a perfectly tender and flavorful base for our Apple Stuffed Acorn Squash. While the squash is roasting, your kitchen will start to fill with a lovely, earthy aroma.
Crafting the Delicious Apple Stuffing
While our acorn squash is softening in the oven, let’s turn our attention to the star of the show: the sweet and savory apple stuffing! This is where all those comforting fall flavors truly come alive. Get ready for some incredible aromas!
- Sauté the Aromatics: In a large skillet or Dutch oven, melt the two tablespoons of unsalted butter over medium heat. Once shimmering, add your finely diced yellow onion and celery. Cook these aromatic vegetables, stirring occasionally, until they become soft and translucent, about 8-10 minutes. The onion should just begin to turn golden at the edges, releasing its sweet fragrance. This foundational step is crucial for building a deep flavor profile for our Apple Stuffed Acorn Squash.
- Introduce the Diced Apples: Now it’s time for the apples! Add your peeled, cored, and diced apples to the skillet with the softened onion and celery. Continue to cook, stirring frequently, for another 5-7 minutes, or until the apples have softened slightly but still retain a bit of their bite. We don’t want them turning into applesauce just yet. Using a mix of apple varieties truly makes a difference here – the tartness of a Granny Smith beautifully balances the sweetness of a Honeycrisp or Fuji.
- Incorporate Dried Fruits and Toasted Nuts: Stir in the dried cranberries (or golden raisins) and the chopped pecans or walnuts. If you haven’t already, take a moment to lightly toast your nuts in a dry skillet before adding them; this simple step significantly deepens their flavor and adds an extra layer of crunch to your stuffing. The dried fruits contribute a wonderful chewiness and bursts of concentrated sweetness, complementing the fresh apples perfectly.
- Add the Herbs and Spices: This is where the magic really happens for a truly autumnal stuffing! Sprinkle in the fresh sage, fresh thyme, ground cinnamon, and a tiny pinch of ground nutmeg. Stir everything together well, allowing the warmth from the pan to awaken the fragrant oils in the herbs and spices. Cook for just about one minute, until the spices are wonderfully fragrant. The combination of these warming spices with the apples creates that quintessential fall flavor that defines our Apple Stuffed Acorn Squash.
- Deglaze and Add Moisture: Pour in the 1/2 cup of vegetable broth or apple cider. Use a wooden spoon to scrape up any browned bits from the bottom of the pan; these bits are packed with flavor! Bring the liquid to a gentle simmer, then reduce the heat to low and let it cook for a couple of minutes, allowing the flavors to meld beautifully.
- Stir in Breadcrumbs and Egg (Optional): Remove the skillet from the heat. Gently fold in the 2 cups of seasoned breadcrumbs or your favorite stuffing mix. If you’re using plain breadcrumbs, you might want to add a bit more seasoning (salt, pepper, poultry seasoning, etc.) to your taste. At this point, you can also stir in the lightly beaten large egg. The egg acts as a binder, helping the stuffing hold its shape a bit better, but it’s completely optional if you prefer to omit it. The stuffing should be moist but not soggy. If it seems too dry, you can add another tablespoon or two of broth or cider until it reaches the desired consistency.
- Taste and Adjust Seasoning: Now for the fun part: taste your amazing apple stuffing! This is your chance to make it perfect. Add more salt, pepper, herbs, or even a tiny drizzle of maple syrup if you feel it needs a bit more sweetness or a touch more savory depth. Don’t skip this crucial step; proper seasoning elevates the entire dish!
Stuffing and Final Baking of Your Apple Stuffed Acorn Squash
With our squash pre-roasted and our delicious apple stuffing ready, it’s time to bring them together for their grand finale in the oven. This is where the flavors will truly meld and develop, turning individual components into a cohesive and utterly satisfying dish.
- Retrieve Partially Roasted Squash: Carefully remove the baking sheet with the partially roasted acorn squash from the oven. The squash should be tender enough to pierce easily with a fork, and the edges might just be starting to show a hint of golden caramelization. If there’s any liquid left in the pan, you can either drain it or let it remain; it will continue to steam the squash.
- Generously Fill the Squash Halves: Turn the squash halves cut-side up. Now, take your perfectly seasoned apple stuffing and generously spoon it into the cavities of each acorn squash half. Don’t be shy here! Pile the stuffing high, mounding it up beautifully. We want each serving of Apple Stuffed Acorn Squash to be a hearty and satisfying portion. The aroma filling your kitchen right now must be absolutely incredible – a symphony of sweet apples, savory herbs, and roasted squash.
- Optional Topping for Extra Flavor and Texture: For an extra layer of deliciousness and visual appeal, consider adding a little something on top. You could sprinkle a bit of crumbled goat cheese or feta over the stuffing for a tangy contrast. A few extra toasted pecans or walnuts would also provide a lovely crunch. Even just a light drizzle of olive oil or maple syrup over the top can enhance the browning and add a touch of sweetness.
- Return to Oven for Final Bake: Carefully place the stuffed acorn squash halves back onto the baking sheet. If your stuffing appears to be browning too quickly, you can loosely tent the squash with aluminum foil for the first part of the baking. Return the baking sheet to the preheated 400°F (200°C) oven. Bake for an additional 20-30 minutes, or until the stuffing is golden brown on top, heated through, and the squash is completely fork-tender. The internal temperature of the stuffing should reach at least 165°F (74°C) if you’re using an egg as a binder.
- Check for Doneness and Beautiful Browning: To confirm doneness, gently poke the side of the acorn squash with a fork. It should yield easily, without resistance. The stuffing should have a lovely golden-brown crust, indicating that it’s nicely caramelized and crispy on top, while remaining moist and flavorful within. The aroma should be intoxicating, signaling that your magnificent Apple Stuffed Acorn Squash is nearly ready to be enjoyed!
- Allow to Rest Before Serving: Once baked to perfection, carefully remove the baking sheet from the oven. Let the stuffed squash rest on the baking sheet for about 5-10 minutes before serving. This brief resting period allows the flavors to settle and intensify, and it also makes the squash a little easier to handle. Patience is a virtue, especially when something this delicious is on its way to your plate!
Serving Your Flavorful Apple Stuffed Acorn Squash
Congratulations! You’ve successfully created a truly spectacular dish. Now comes the moment to present and enjoy your incredible Apple Stuffed Acorn Squash. Here are some tips to make its presentation as beautiful as its taste.
- Garnish for a Flourish: Before serving, consider a final garnish to elevate both the appearance and the flavor. A sprinkle of freshly chopped parsley adds a bright green contrast and a fresh, herbaceous note. For an extra touch of sweetness and shine, a light drizzle of maple syrup over each stuffed squash half is absolutely divine, enhancing the natural sweetness of the apples and the squash. If you chose not to add cheese during baking, a few crumbles of fresh goat cheese or feta can be added now for a creamy, tangy finish that perfectly complements the rich flavors.
- Plating Suggestions: Carefully transfer each stuffed acorn squash half to individual serving plates. The beauty of this dish is that it’s a complete meal in itself, making for an elegant and wholesome presentation. You can serve it as a standalone vegetarian main course, or as a hearty and flavorful side dish alongside roasted chicken, pork tenderloin, or a holiday ham. Its vibrant colors and inviting aroma make it a centerpiece on any autumn or winter table.
- Pairing with Beverages: To complete the culinary experience, consider pairing your Apple Stuffed Acorn Squash with a suitable beverage. A crisp, dry white wine like a Sauvignon Blanc or a lightly oaked Chardonnay would be an excellent choice. For non-alcoholic options, a sparkling apple cider or a warm mug of spiced tea would complement the fall flavors beautifully.
- Reheating Leftovers (if any!): If you are lucky enough to have any leftovers of this delicious dish, they reheat wonderfully! Store any remaining stuffed squash halves in an airtight container in the refrigerator for up to 3-4 days. To reheat, you can place them back in a preheated oven at 350°F (175°C) for about 15-20 minutes, or until heated through. Alternatively, a microwave can be used for a quicker reheat, though the stuffing might lose some of its crispness. This Apple Stuffed Acorn Squash makes for excellent meal prep, providing comforting lunches or dinners throughout the week.
- Enjoy Every Hearty Bite: Take a moment to appreciate the incredible flavors and textures you’ve created. The sweet, earthy squash, the tender yet slightly crisp apple stuffing, the aromatic herbs, and the optional crunch of nuts all come together in perfect harmony. This dish is not just a meal; it’s an experience, a celebration of comforting fall flavors that will warm you from the inside out. I hope you and your loved ones enjoy every single mouthful of this truly special Apple Stuffed Acorn Squash!

Conclusion:
And there you have it, my friends! We’ve journeyed through the simple yet incredibly rewarding process of creating what I genuinely believe is a show-stopping dish. This isn’t just any recipe; it’s an experience waiting to unfold in your kitchen. Why is this a must-try, you ask? Well, for starters, it perfectly encapsulates the cozy essence of the season, bringing warmth and comfort to any table. The combination of tender, naturally sweet acorn squash with a vibrant, aromatic apple and herb stuffing is nothing short of magical. It strikes an exquisite balance between sweet and savory, an earthy undertone from the squash playing beautifully against the crisp sweetness of the apples and the subtle spice notes. The textures are a delight too – the fork-tender squash contrasting with the slightly firm apples and crunchy nuts. It presents itself as an elegant, impressive dish without demanding hours of intricate work, making it perfect for both weeknight dinners and special gatherings. You’ll truly feel like a culinary wizard, even if you’re a beginner in the kitchen. I promise you, one bite of this delightful creation, and you’ll understand exactly why I’m so passionate about it.
Now, let’s talk about making this dish truly your own and how to best enjoy it. While it shines beautifully as a standalone light meal, especially when paired with a fresh, crisp green salad dressed with a bright vinaigrette, its versatility truly knows no bounds. If you’re planning a bigger feast, I highly recommend serving it as a stunning side dish alongside roasted chicken, a succulent pork loin, or even your Thanksgiving turkey. Imagine the vibrant colors it brings to a holiday table!
But don’t stop there – the beauty of cooking lies in experimentation. For those who love to customize, here are a few ideas to spark your creativity. Feel free to swap out the pecans in the stuffing for toasted walnuts or even hazelnuts for a different nutty dimension. Dried cranberries or chopped dried apricots would make a wonderful addition, introducing an extra layer of chewiness and tartness that complements the apples beautifully. If you’re leaning more towards a savory profile, consider adding some crumbled cooked sausage, bacon bits, or even a handful of sautéed mushrooms to the apple mixture. For a gourmet touch, a sprinkle of goat cheese, feta, or even a few crumbles of blue cheese just before serving can elevate the flavors to new heights. Vegan friends, simply substitute the butter with a plant-based alternative or a good quality olive oil. A pinch of cayenne pepper in the apple mix can also add a delightful, unexpected kick, while fresh rosemary or sage can deepen the aromatic complexity. The possibilities are truly endless, and each variation offers a unique culinary adventure.
So, what are you waiting for? I genuinely hope that after reading this, you feel inspired and excited to roll up your sleeves and try making this incredible
Apple Stuffed Acorn Squash
yourself. There’s an immense joy in creating something delicious from scratch and sharing it with loved ones. I urge you to embrace the process, savor the aromas that fill your kitchen, and delight in the reactions of those who get to taste your masterpiece. And please, please, don’t keep your culinary triumphs to yourself! I would absolutely love to hear about your experience. Did you try a fun variation? Did it become a new family favorite? Snap a photo, drop a comment below, and share your thoughts. Your feedback and creative twists inspire me and our entire community of food lovers. Let’s make some delicious memories together!
Apple Stuffed Acorn Squash
This cozy Apple Stuffed Acorn Squash blends sweet and savory notes, perfect for any holiday table or a comforting weeknight meal. Featuring tender roasted acorn squash filled with a delectable mix of crisp apples, aromatic cinnamon, and savory herbs, it’s a versatile dish that can be prepped ahead and made vegetarian or with added protein.
Ingredients
-
2 medium acorn squash (1.5-2 lbs each)
-
2 tbsp + extra olive oil
-
1 tsp salt, divided
-
1/2 tsp black pepper, divided
-
1/4 cup vegetable broth or water
-
2 tbsp unsalted butter
-
1 medium yellow onion, diced
-
2 celery stalks, diced
-
3 medium apples, diced (e.g., Granny Smith, Honeycrisp/Fuji)
-
1/2 cup dried cranberries or golden raisins
-
1/2 cup chopped pecans or walnuts, toasted (optional)
-
1 tsp fresh sage (or 1/2 tsp dried)
-
1/2 tsp fresh thyme (or 1/4 tsp dried)
-
1/4 tsp ground cinnamon
-
Pinch ground nutmeg
-
1/2 cup vegetable broth or apple cider
-
2 cups seasoned breadcrumbs
-
1 large egg, lightly beaten (optional)
-
Salt and pepper to taste
-
Fresh parsley, chopped (for garnish, optional)
-
Maple syrup (for drizzle, optional)
-
Crumbled goat cheese or feta (for garnish, optional)
Instructions
-
Step 1
Preheat oven to 400°F (200°C) and line a baking sheet with parchment paper. Wash squash, halve lengthwise, and scoop out seeds. -
Step 2
Drizzle squash halves with olive oil, rub, and season with 1/2 tsp salt and 1/4 tsp pepper. Place cut-side down on the baking sheet with 1/4 cup vegetable broth/water. Roast for 30-40 minutes until fork-tender. -
Step 3
While squash roasts, melt 2 tbsp butter in a large skillet. Sauté diced onion and celery for 8-10 minutes until soft. -
Step 4
Add diced apples and cook for 5-7 minutes until slightly softened. Stir in dried cranberries/raisins, toasted pecans/walnuts (if using). -
Step 5
Add sage, thyme, cinnamon, and nutmeg; cook for 1 minute until fragrant. Pour in 1/2 cup vegetable broth/apple cider, scrape up browned bits, and simmer for a few minutes. -
Step 6
Remove from heat. Fold in 2 cups seasoned breadcrumbs and the optional beaten egg. Adjust consistency with more liquid if needed. Taste and adjust seasoning (salt, pepper, herbs, optional maple syrup). -
Step 7
Remove partially roasted squash from oven. Turn cut-side up and generously fill each cavity with the apple stuffing. -
Step 8
(Optional) Top with crumbled goat cheese/feta, extra nuts, or a drizzle of olive oil/maple syrup. -
Step 9
Return stuffed squash to the oven and bake for an additional 20-30 minutes, until stuffing is golden brown, heated through, and squash is completely tender. -
Step 10
Let rest for 5-10 minutes before serving. Garnish with fresh parsley, maple syrup drizzle, or goat cheese/feta as desired. Serve hot and enjoy! -
Step 11
Leftovers can be stored in the refrigerator for 3-4 days and reheated in the oven at 350°F (175°C) for 15-20 minutes.
Important Information
Nutrition Facts (Per Serving)
It is important to consider this information as approximate and not to use it as definitive health advice.
Allergy Information
Please check ingredients for potential allergens and consult a health professional if in doubt.


Leave a Comment