
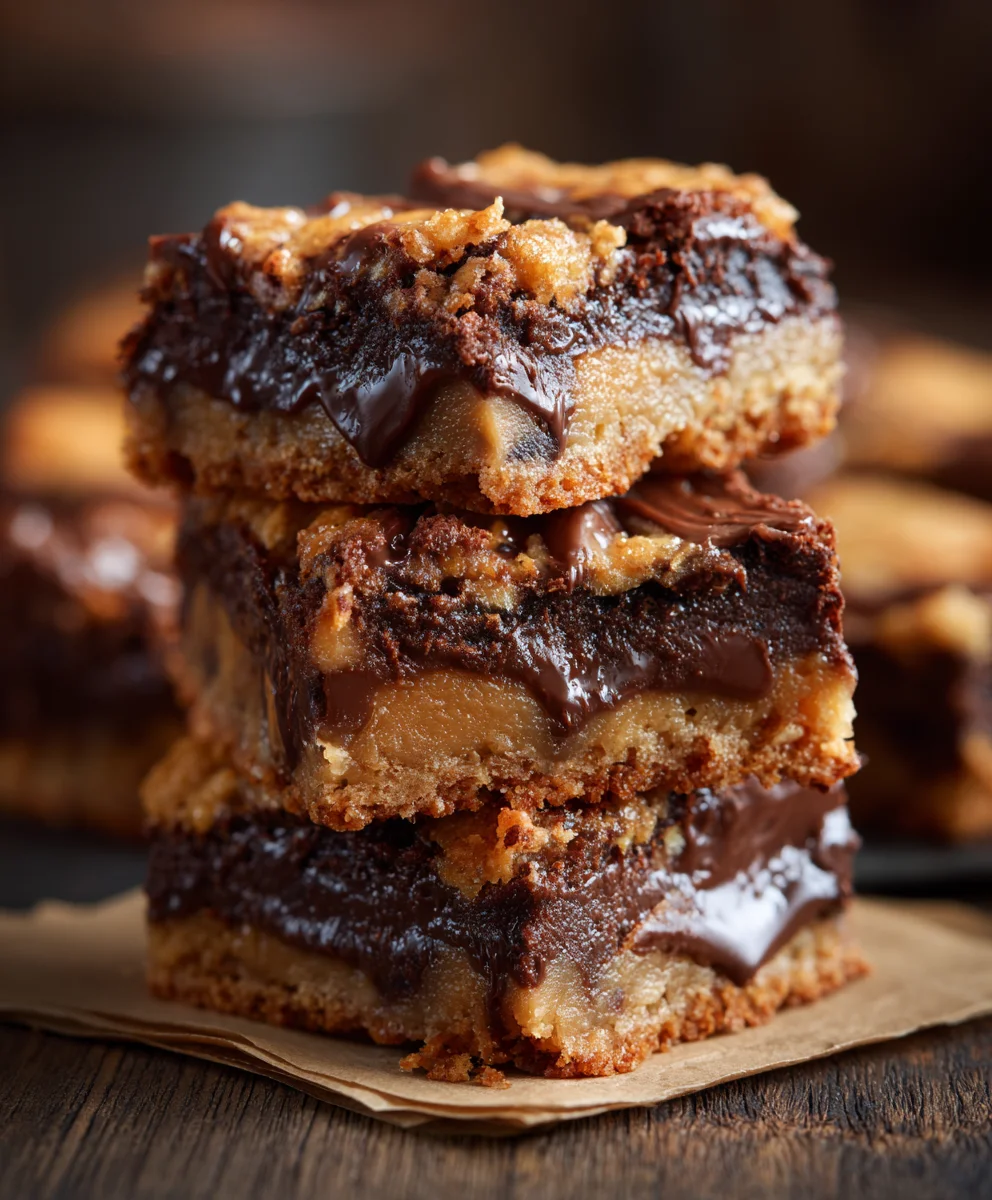
Peanut Butter Cup Gooey Bars are not just another dessert; they are an invitation to an unparalleled experience of sweet, salty, and utterly decadent delight. Imagine sinking your teeth into a bar where the iconic combination of peanut butter and chocolate reaches its most glorious, melt-in-your-mouth potential. While the specific origin of this particular “gooey bar” recipe might be a modern culinary marvel rather than an ancient tradition, it embodies a beloved American passion for comfort food, transforming simple ingredients into something truly extraordinary. It’s a celebration of the classic peanut butter cup, reimagined and elevated.
People absolutely adore this dish for a multitude of reasons. The magical interplay of textures—a soft, buttery base, an unbelievably gooey center, and the delightful chew of miniature peanut butter cups—creates an unforgettable sensation. The flavor profile strikes a perfect balance between rich sweetness and a hint of saltiness, making each bite an addictive pleasure. Furthermore, their relatively straightforward preparation makes them a fantastic, stress-free option for any occasion, from casual family gatherings to impressive potlucks. These Peanut Butter Cup Gooey Bars promise to be a showstopper, delivering pure, unadulterated joy with every single square.

Ingredients:
- For the Crust Layer:
- 1 cup (2 sticks or 226g) unsalted butter, softened to room temperature
- 1/2 cup (100g) granulated sugar
- 1/4 cup (50g) packed light brown sugar
- 1 large egg, at room temperature
- 1 teaspoon pure vanilla extract
- 2 1/4 cups (270g) all-purpose flour
- 1 teaspoon baking powder
- 1/2 teaspoon salt
- For the Gooey Peanut Butter Cup Filling:
- 1 cup (250g) creamy peanut butter (I recommend a standard, processed brand for best texture, not natural style)
- 1/2 cup (1 stick or 113g) unsalted butter, softened to room temperature
- 3 1/2 cups (420g) powdered sugar, sifted
- 1/4 cup (60ml) whole milk or heavy cream
- 1 teaspoon pure vanilla extract
- 10 ounces (about 1 1/2 cups) mini peanut butter cups, unwrapped and roughly chopped
- For the Chocolate Topping:
- 1 1/2 cups (255g) semi-sweet chocolate chips (or milk chocolate chips for a sweeter topping)
- 2 tablespoons (28g) unsalted butter
Preparing the Crust Layer
- Preheat and Prepare: Let’s get our workspace ready! First, preheat your oven to a cozy 350°F (175°C). Then, take a standard 9×13 inch baking pan and line it with parchment paper, making sure the paper hangs over the sides. This overhang will act as convenient “handles” later, making it incredibly easy to lift your finished Peanut Butter Cup Gooey Bars out of the pan. Lightly grease the parchment paper with a little baking spray or butter.
- Cream the Butters and Sugars: In a large mixing bowl, using either a stand mixer fitted with the paddle attachment or a hand mixer, combine your softened 1 cup of unsalted butter, 1/2 cup of granulated sugar, and 1/4 cup of light brown sugar. Beat these ingredients together on medium speed for about 2-3 minutes until the mixture is light, fluffy, and pale in color. This creaming process is crucial, as it incorporates air, contributing to a tender crust for your Peanut Butter Cup Gooey Bars. Scrape down the sides of the bowl as needed to ensure everything is well combined.
- Incorporate Wet Ingredients: Add the large egg and 1 teaspoon of pure vanilla extract to the creamed mixture. Continue to beat on medium speed for another 1-2 minutes, until everything is fully incorporated and the mixture is smooth and glossy. The vanilla will infuse a beautiful aroma and flavor into our base.
- Add Dry Ingredients: In a separate medium bowl, whisk together the 2 1/4 cups of all-purpose flour, 1 teaspoon of baking powder, and 1/2 teaspoon of salt. This pre-mixing of dry ingredients ensures that the baking powder and salt are evenly distributed throughout the flour, leading to a consistent texture in your crust. Gradually add the dry ingredients to the wet ingredients, mixing on low speed until just combined. Be careful not to overmix, as overworking the dough can result in a tough crust. Stop mixing as soon as you see no more streaks of flour.
- Press into Pan and Bake: Transfer the dough mixture into your prepared 9×13 inch baking pan. Using your hands or the back of a spoon, press the dough evenly into the bottom of the pan. I like to gently push it up the very edges a little bit to create a slight lip, which helps contain the gooey filling. Bake for 15-18 minutes, or until the edges are lightly golden brown and the center is set. Remove the crust from the oven and let it cool in the pan on a wire rack while we prepare our decadent filling. This partial bake creates a sturdy foundation for our Peanut Butter Cup Gooey Bars.
Creating the Gooey Peanut Butter Cup Filling
- Prepare the Peanut Butter Base: In a large mixing bowl, once again using your stand mixer with the paddle attachment or a hand mixer, combine the 1 cup of creamy peanut butter and 1/2 cup of softened unsalted butter. Beat these two together on medium speed for 2-3 minutes, until the mixture is smooth, creamy, and well combined. The texture should be uniform and inviting.
- Gradually Add Powdered Sugar: With the mixer on low speed, gradually add the 3 1/2 cups of sifted powdered sugar, a cup at a time. The mixture will start to look crumbly at first, but keep going. Once a good amount of the powdered sugar is incorporated, slowly pour in the 1/4 cup of whole milk (or heavy cream for an even richer experience) and the 1 teaspoon of pure vanilla extract. Increase the mixer speed to medium and continue beating until the filling is wonderfully smooth, thick, and utterly gooey. This is where the magic happens for our Peanut Butter Cup Gooey Bars! Scrape down the sides of the bowl frequently to ensure everything is evenly mixed.
- Fold in Mini Peanut Butter Cups: Now for the stars of the show! Gently fold in the 10 ounces of roughly chopped mini peanut butter cups. Use a spatula for this step to avoid crushing them too much with the mixer. You want these delightful chunks distributed throughout the gooey filling so that every bite of your Peanut Butter Cup Gooey Bars offers a burst of peanut butter cup goodness. Resist the urge to eat too many before they make it into the bars!
Making the Chocolate Topping
- Melt Chocolate and Butter: In a microwave-safe bowl, combine the 1 1/2 cups of semi-sweet chocolate chips and 2 tablespoons of unsalted butter. Microwave in 30-second intervals, stirring well after each interval, until the mixture is completely melted and smooth. Alternatively, you can melt this mixture in a heatproof bowl set over a saucepan of simmering water (a double boiler method), stirring until perfectly smooth and glossy. Ensure there are no lumps remaining for a beautifully even chocolate layer on top of your Peanut Butter Cup Gooey Bars.
- Let Cool Slightly: Allow the melted chocolate mixture to cool slightly for about 5-10 minutes. This prevents it from being too hot and melting the peanut butter filling too much when poured over, helping maintain distinct layers in your Peanut Butter Cup Gooey Bars.
Assembling and Baking the Peanut Butter Cup Gooey Bars
- Layer the Gooey Filling: Once your crust has cooled down sufficiently (it doesn’t need to be completely cold, just not piping hot), evenly spread the prepared gooey peanut butter cup filling over the baked crust. Use an offset spatula or the back of a spoon to ensure an even layer, reaching all the way to the edges. Take your time here to get it nice and smooth, as this is the glorious middle layer of our Peanut Butter Cup Gooey Bars.
- Pour on the Chocolate Topping: Carefully pour the slightly cooled chocolate topping over the peanut butter filling. Gently spread the chocolate with an offset spatula or the back of a spoon to create a smooth, even layer that covers the entire surface. You can even create little swirls or patterns if you like, just for fun!
- Bake Again: Return the pan to your preheated 350°F (175°C) oven. Bake for an additional 20-25 minutes. During this second bake, the filling will set slightly, and the chocolate topping will become beautifully melded with the layers below. The edges of the bars might look slightly firmer, but the center should still have a wonderfully soft, gooey quality. Don’t overbake! We want these bars to live up to their “gooey” name.
Cooling and Serving Your Peanut Butter Cup Gooey Bars
- Crucial Cooling Step: This is arguably the most important step for achieving perfectly set and sliceable Peanut Butter Cup Gooey Bars. Once baked, remove the pan from the oven and place it on a wire rack to cool completely at room temperature. This cooling process will take at least 2-3 hours, or even longer. For the best results and the cleanest cuts, I highly recommend placing the pan in the refrigerator for at least an additional 1-2 hours after it has cooled mostly to room temperature. This firming up period allows the peanut butter filling and chocolate topping to set properly, preventing a messy, crumbly experience when you go to slice them.
Patience is a virtue, especially when making Peanut Butter Cup Gooey Bars!
- Slice and Serve: Once your Peanut Butter Cup Gooey Bars are thoroughly chilled and set, use the parchment paper overhang to carefully lift the entire slab out of the pan and onto a cutting board. Using a sharp knife, warmed under hot water and wiped dry between each cut, slice the bars into your desired size. I usually go for 12-16 squares, but you can make them as big or small as you like.
- Storage: Store your magnificent Peanut Butter Cup Gooey Bars in an airtight container at room temperature for up to 3-4 days, or in the refrigerator for up to a week. If you prefer a firmer texture, keeping them in the fridge is ideal. You can also freeze them for longer storage; just be sure to wrap them individually or in layers separated by parchment paper, then place them in a freezer-safe container for up to 2-3 months. Thaw at room temperature for a few hours before enjoying.
Congratulations! You’ve just created a batch of truly irresistible Peanut Butter Cup Gooey Bars that are guaranteed to be a crowd-pleaser. Enjoy every single bite!
Conclusion:
So there you have it, my friends! We’ve journeyed through the creation of what I truly believe is one of the most irresistible, smile-inducing desserts you could ever whip up in your own kitchen. After pouring my heart and soul (and a lot of butter!) into perfecting this recipe, I can genuinely tell you that these bars are not just a dessert; they’re an experience. They are the ultimate testament to the magic that happens when creamy peanut butter meets rich chocolate, all suspended in a decadent, gooey base that simply melts in your mouth. Forget everything you thought you knew about easy baking; these bars redefine “effortless indulgence.”
I’ve witnessed firsthand the sheer delight these bring to anyone who takes that first bite. Whether it’s the comforting aroma that fills your home as they bake, the satisfying resistance as you slice into the warm, chewy slab, or the explosion of sweet and salty flavors that dance on your tongue, these bars are designed to captivate all your senses. They’re a celebration of simple joys, a guaranteed crowd-pleaser that will have everyone asking for the recipe. Trust me when I say that making them is almost as much fun as eating them, and that’s truly saying something!
Serving Suggestions & Variations to Elevate Your Experience:
While these bars are absolutely divine straight out of the pan (after they’ve cooled a bit, of course – resist the urge to dive in too soon!), there are so many ways to enjoy and customize them. Here are a few of my favorite serving suggestions and variations to spark your culinary creativity:
- Warm & Wonderful: Serve a square slightly warm with a scoop of vanilla bean ice cream or a dollop of fresh whipped cream. The contrast between the warm, gooey bar and the cold, creamy topping is pure bliss.
- Chocolate Drizzle: A light drizzle of melted chocolate ganache or a simple chocolate syrup over the top before serving adds an extra layer of chocolatey goodness.
- A Dusting of Delight: For an elegant touch, dust lightly with powdered sugar or a sprinkle of flaky sea salt to enhance the sweet and savory notes.
- Coffee Companion: These bars are the perfect accompaniment to a strong cup of coffee or a tall glass of cold milk.
Creative Variations You Must Try:
- Different Candy Mix-ins: Don’t limit yourself to peanut butter cups! Experiment with other chopped chocolate bars like Snickers, Milky Way, Rolo, or even M&Ms for a colorful twist.
- Nutty Additions: For extra crunch and flavor, fold in a handful of chopped roasted peanuts, pecans, or walnuts into the batter.
- Pretzel Power: Crush some pretzels and mix them into the base layer or sprinkle them on top before baking for an amazing sweet and salty crunch that truly complements the richness.
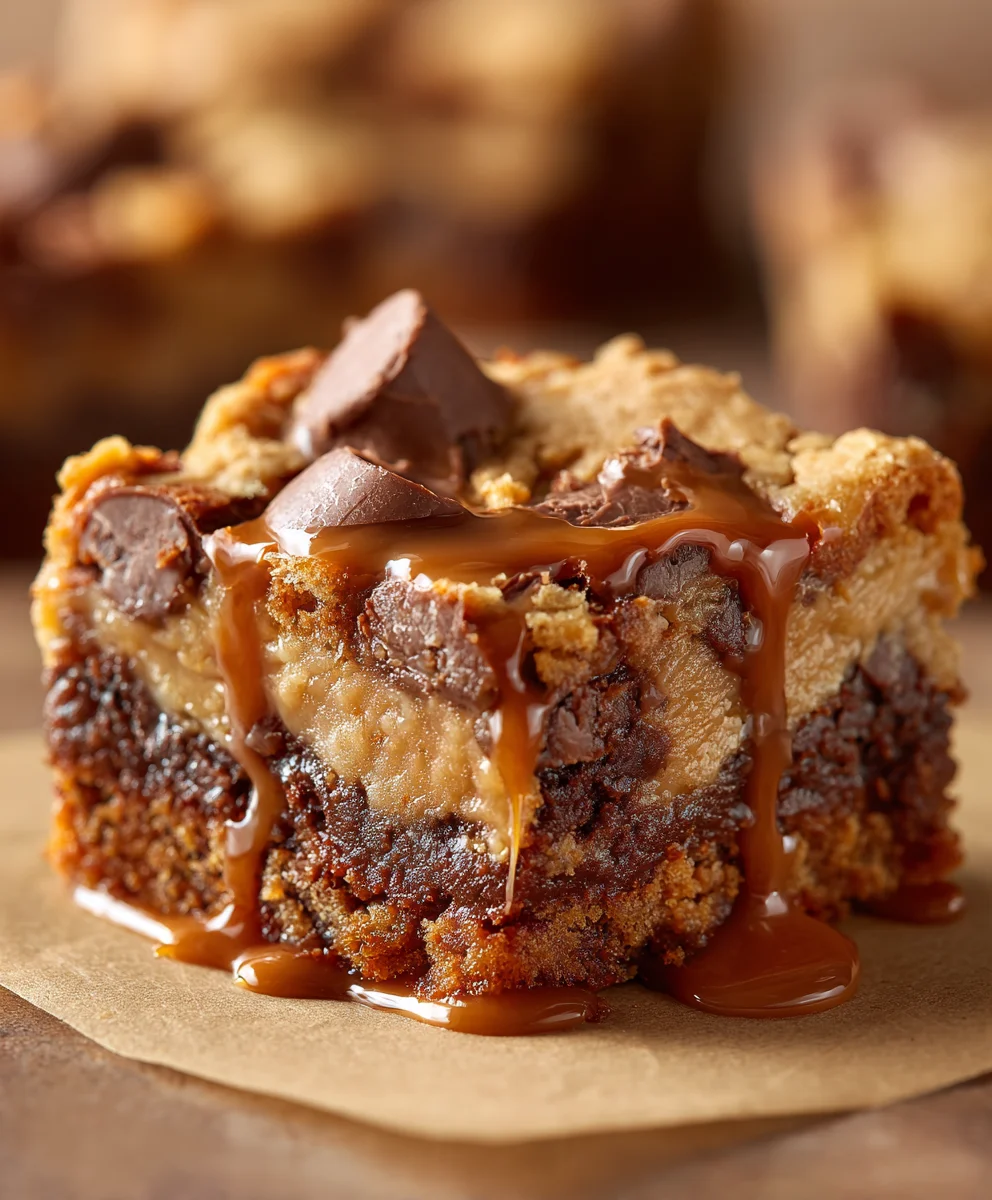
- Salted Caramel Swirl: Swirl in a few tablespoons of your favorite store-bought or homemade salted caramel sauce into the top layer before baking. Pure decadence!
- White Chocolate Wonder: Swap out some of the semi-sweet chocolate chips for white chocolate chips for a different flavor profile.
- Seasonal Sprinkles: Add festive sprinkles to the top layer before baking to make them perfect for any holiday or celebration.
- Nut Butter Alternatives: If you’re feeling adventurous or have dietary preferences, you could try substituting almond butter or cashew butter for the peanut butter, adjusting the sweetness as needed.
My hope is that you’ll feel inspired to make these incredible Peanut Butter Cup Gooey Bars for yourself, your family, or your friends. They are more than just a recipe; they’re an invitation to create joy, to share warmth, and to indulge in a little bit of happiness. The simplicity of the ingredients belies the complexity of the flavors, creating a dessert that feels both familiar and extraordinary.
So, what are you waiting for? Gather your ingredients, preheat your oven, and prepare to fill your home with the most heavenly aromas. I am absolutely confident that these bars will become a cherished part of your baking repertoire. Once you’ve had a chance to bake and taste them, please, please, please come back and share your experience with me! I love hearing about your kitchen adventures, your successes, and any unique twists you’ve added. Did you try a new candy mix-in? Did you serve them with something unexpected? Your feedback and creative ideas truly make this community special. Happy baking, everyone!
Peanut Butter Cup Gooey Bars
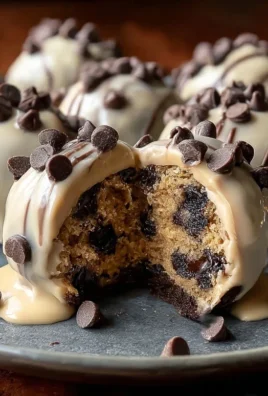
Peanut Butter Cup Gooey Bars are a decadent dessert featuring a soft, buttery crust, an unbelievably gooey peanut butter and chopped peanut butter cup filling, and a smooth chocolate topping. These bars offer an unparalleled experience of sweet, salty, and utterly delightful flavor and texture, perfect for any sweet craving or gathering.
Ingredients
-
1 cup (2 sticks or 226g) unsalted butter, softened
-
1/2 cup (100g) granulated sugar
-
1/4 cup (50g) packed light brown sugar
-
1 large egg, at room temperature
-
1 teaspoon pure vanilla extract
-
2 1/4 cups (270g) all-purpose flour
-
1 teaspoon baking powder
-
1/2 teaspoon salt
-
1 cup (250g) creamy peanut butter
-
1/2 cup (1 stick or 113g) unsalted butter, softened
-
3 1/2 cups (420g) powdered sugar, sifted
-
1/4 cup (60ml) whole milk or heavy cream
-
1 teaspoon pure vanilla extract
-
10 ounces (about 1 1/2 cups) mini peanut butter cups, unwrapped and roughly chopped
-
1 1/2 cups (255g) semi-sweet chocolate chips
-
2 tablespoons (28g) unsalted butter
Instructions
-
Step 1
Preheat oven to 350°F (175°C). Line a 9×13 inch baking pan with parchment paper, leaving an overhang, and lightly grease. -
Step 2
In a large bowl, cream 1 cup softened butter with 1/2 cup granulated sugar and 1/4 cup light brown sugar until light and fluffy (2-3 mins). Beat in 1 large egg and 1 tsp vanilla extract until smooth (1-2 mins). Whisk together 2 1/4 cups all-purpose flour, 1 tsp baking powder, and 1/2 tsp salt. Gradually add dry ingredients to wet, mixing on low until just combined. -
Step 3
Press dough evenly into the prepared pan. Bake for 15-18 minutes until edges are lightly golden and the center is set. Let cool in the pan on a wire rack. -
Step 4
In a large bowl, beat 1 cup creamy peanut butter and 1/2 cup softened butter until smooth and creamy (2-3 mins). Gradually add 3 1/2 cups sifted powdered sugar on low speed. Add 1/4 cup whole milk/heavy cream and 1 tsp vanilla extract; increase speed to medium and beat until the filling is smooth, thick, and gooey. Gently fold in 10 ounces of roughly chopped mini peanut butter cups with a spatula. -
Step 5
Melt 1 1/2 cups semi-sweet chocolate chips and 2 tablespoons unsalted butter in a microwave-safe bowl (30-second intervals, stirring) or double boiler until completely smooth. Let cool slightly for 5-10 minutes. -
Step 6
Evenly spread the prepared gooey peanut butter cup filling over the cooled crust. Carefully pour and gently spread the slightly cooled chocolate topping over the peanut butter filling. Return to oven and bake for an additional 20-25 minutes. Do not overbake. -
Step 7
Remove from oven and cool completely on a wire rack for at least 2-3 hours. For best results and clean cuts, refrigerate for an additional 1-2 hours. Lift from pan using parchment handles, slice with a sharp knife warmed under hot water and wiped dry between cuts. Store in an airtight container at room temperature for 3-4 days, or refrigerated for up to a week.
Important Information
Nutrition Facts (Per Serving)
It is important to consider this information as approximate and not to use it as definitive health advice.
Allergy Information
Please check ingredients for potential allergens and consult a health professional if in doubt.
Leave a Comment