
Strawberry Fluff: Prepare to be transported back to carefree summer days with a dessert that’s as delightful as it is easy to make! This isn’t just a recipe; it’s a nostalgic trip down memory lane, a spoonful of sunshine, and a guaranteed crowd-pleaser all rolled into one. Have you ever craved something sweet, light, and utterly irresistible? Then look no further.
While the exact origins of Strawberry Fluff are shrouded in a bit of mystery, its roots are firmly planted in the mid-20th century, a time when convenience and creamy textures reigned supreme. Think potlucks, picnics, and family gatherings where a simple, yet satisfying dessert was a must. This dreamy concoction, often featuring marshmallows, whipped topping, and of course, luscious strawberries, quickly became a staple at celebrations across the country.
What makes Strawberry Fluff so universally loved? It’s the perfect balance of sweet and tangy, the airy lightness that won’t weigh you down, and the sheer simplicity of preparation. Its a dessert that requires minimal effort but delivers maximum flavor. The combination of creamy textures and juicy strawberries is simply irresistible. Whether you’re looking for a quick dessert to whip up for a weeknight treat or a show-stopping addition to your next party, this Strawberry Fluff recipe is sure to be a hit. So, grab your mixing bowl, and let’s get started!

Ingredients:
- 1 (3 ounce) package strawberry flavored gelatin
- 1 cup boiling water
- 1 (20 ounce) can crushed pineapple, undrained
- 1 (10 ounce) package frozen strawberries, thawed
- 1 cup miniature marshmallows
- 1 cup heavy whipping cream
- 1/4 cup powdered sugar
- 1 teaspoon vanilla extract
- Optional: Additional fresh strawberries, sliced, for garnish
Preparing the Strawberry Gelatin Base
Okay, let’s get started with the foundation of our Strawberry Fluff the gelatin base. This is where the magic begins, and it’s super easy, I promise!
- Dissolve the Gelatin: In a large bowl (I like to use a glass one so I can see everything happening!), pour in your boiling water. Now, add the entire package of strawberry flavored gelatin. Stir it really well until all the gelatin crystals are completely dissolved. You don’t want any little granules lurking around, so keep stirring until it’s perfectly smooth and clear. This usually takes a minute or two.
- Incorporate the Pineapple: Next, add the entire can of crushed pineapple, including the juice, to the gelatin mixture. Don’t drain it! The juice adds extra flavor and moisture, which is exactly what we want. Stir it all together gently to combine.
- Add the Strawberries: Now for the star of the show the thawed strawberries! Add them to the bowl and stir them in. If your strawberries are particularly large, you might want to give them a quick chop before adding them, just to make sure they distribute evenly throughout the fluff.
- Incorporate the Marshmallows: Time for the marshmallows! Add the miniature marshmallows to the mixture. Stir gently to combine. At this point, the mixture will look a little lumpy, and that’s perfectly fine.
- Chill Time: Cover the bowl with plastic wrap and pop it into the refrigerator. We need to let this mixture chill for at least 4 hours, or even better, overnight. This allows the gelatin to set properly and the flavors to meld together beautifully. You’ll know it’s ready when the mixture is partially set but still a little jiggly. It should have the consistency of a very soft jelly.
Whipping the Cream
While the gelatin base is chilling, let’s prepare the whipped cream. This is what gives our Strawberry Fluff its light and airy texture. Don’t be intimidated it’s easier than you think!
- Chill Your Equipment: This is a crucial step for achieving perfectly whipped cream. Place your mixing bowl and whisk attachment (or beaters if you’re using a hand mixer) in the freezer for about 15-20 minutes before you start. Cold equipment helps the cream whip up faster and hold its shape better.
- Pour in the Cream: Pour the heavy whipping cream into the chilled bowl. Make sure your cream is also nice and cold straight from the refrigerator is best.
- Add Sweetness and Flavor: Add the powdered sugar and vanilla extract to the cream. The powdered sugar will dissolve easily and give the whipped cream a smooth texture, while the vanilla extract adds a lovely hint of flavor.
- Whip it Up: Start whipping the cream on medium speed. As the cream starts to thicken, gradually increase the speed to high. Keep whipping until stiff peaks form. This means that when you lift the whisk or beaters, the peaks of the whipped cream stand up straight and hold their shape. Be careful not to overwhip, or you’ll end up with butter!
Assembling the Strawberry Fluff
Now for the fun part putting it all together! This is where the magic really happens, and you’ll see your Strawberry Fluff transform into a delightful dessert.
- Gently Fold in the Whipped Cream: Once the gelatin base is partially set and the whipped cream is ready, it’s time to combine them. Gently fold the whipped cream into the gelatin mixture. Be careful not to overmix, as this will deflate the whipped cream and make the fluff less airy. Use a spatula and gently cut down through the center of the mixture, then fold the bottom up and over the top. Rotate the bowl and repeat until the whipped cream is evenly distributed. You should still see some streaks of white throughout the mixture.
- Chill Again: Cover the bowl with plastic wrap and return it to the refrigerator for at least another hour, or preferably longer. This allows the flavors to meld together even further and the fluff to set completely. The longer it chills, the better it will taste!
Serving and Garnishing
Almost there! Now it’s time to serve your beautiful Strawberry Fluff and impress your friends and family.
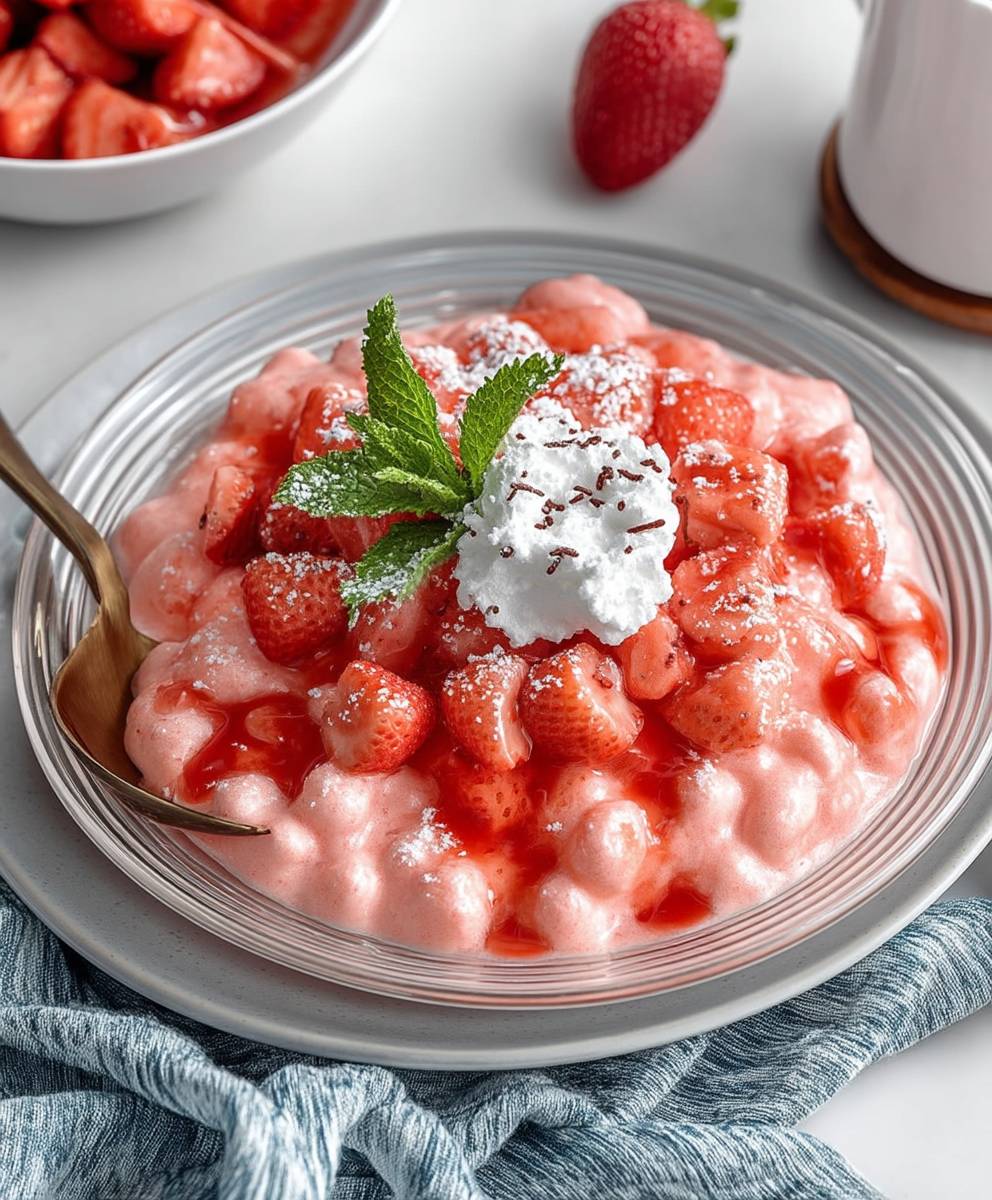
- Spoon into Serving Dishes: Once the Strawberry Fluff is fully set, spoon it into individual serving dishes or a large trifle bowl. I like to use pretty glass bowls so you can see the layers of pink and white.
- Garnish (Optional): If you want to add a little extra flair, garnish the Strawberry Fluff with sliced fresh strawberries. This adds a pop of color and a burst of fresh flavor. You could also add a dollop of whipped cream or a sprinkle of mini marshmallows.
- Serve and Enjoy!: Serve immediately and enjoy! This Strawberry Fluff is best served cold. It’s the perfect dessert for potlucks, picnics, or any occasion where you want a light and refreshing treat.
Tips and Variations
Here are a few extra tips and variations to make your Strawberry Fluff even more amazing:
- Different Gelatin Flavors: Feel free to experiment with different flavors of gelatin. Raspberry, cherry, or even lime gelatin would all work well in this recipe.
- Fruit Variations: You can also add other types of fruit to the fluff. Sliced bananas, blueberries, or raspberries would all be delicious additions.
- Nutty Crunch: For a little extra crunch, try adding some chopped pecans or walnuts to the fluff.
- Cream Cheese Variation: For a richer and creamier fluff, you can add 4 ounces of softened cream cheese to the whipped cream. Just beat the cream cheese until smooth before adding the powdered sugar and vanilla extract.
- Make it Ahead: Strawberry Fluff is a great make-ahead dessert. You can prepare it up to 24 hours in advance and store it in the refrigerator until you’re ready to serve it.
- Diet-Friendly Options: To make a lighter version, use sugar-free gelatin and a sugar substitute in the whipped cream. You can also use light whipped topping instead of heavy whipping cream.
Storage Instructions
If you have any leftover Strawberry Fluff (which is unlikely!), store it in an airtight container in the refrigerator. It will keep for up to 3 days. However, the texture may change slightly over time as the gelatin continues to set. It’s still perfectly safe to eat, but it might not be as light and airy as it was when it was first made.
Why This Recipe Works
This Strawberry Fluff recipe is a classic for a reason it’s incredibly easy to make, it’s packed with flavor, and it’s always a crowd-pleaser. The combination of the strawberry gelatin, crushed pineapple, and marshmallows creates a sweet and tangy base, while the whipped cream adds a light and airy texture. It’s the perfect balance of flavors and textures, making it a truly irresistible dessert. Plus, it’s so versatile you can easily customize it to your liking by adding different fruits, nuts, or other toppings. So go ahead and give it a try I guarantee you’ll love it!
Conclusion:
So, there you have it! My take on Strawberry Fluff, a dessert that’s guaranteed to bring a smile to your face. I truly believe this recipe is a must-try for so many reasons. First and foremost, it’s incredibly easy to make. We’re talking minimal effort for maximum flavor payoff. Perfect for those days when you crave something sweet but don’t want to spend hours in the kitchen. Secondly, the taste is simply divine. The combination of creamy coolness, the burst of fresh strawberry flavor, and the subtle sweetness is just irresistible. It’s a nostalgic treat that brings back childhood memories while still feeling fresh and exciting.
But beyond the ease and the deliciousness, this Strawberry Fluff is also incredibly versatile. It’s the perfect dessert to bring to a potluck, a summer barbecue, or even just to enjoy on a quiet evening at home. It’s always a crowd-pleaser, and I guarantee you’ll be asked for the recipe! And the best part? You can easily customize it to your liking.
Serving Suggestions and Variations:
Want to take your Strawberry Fluff to the next level? Here are a few ideas:
- Individual Parfaits: Layer the fluff with crumbled graham crackers or vanilla wafers in individual glasses for an elegant presentation.
- Fruit Fiesta: Add other berries like blueberries, raspberries, or blackberries for a mixed berry explosion.
- Chocolate Indulgence: Drizzle melted chocolate over the top or stir in some mini chocolate chips for a decadent twist.
- Nutty Delight: Sprinkle chopped pecans, walnuts, or almonds on top for added texture and flavor.
- Cool Whip Swap: For a lighter version, use light Cool Whip or even Greek yogurt for a tangy twist.
- Marshmallow Mania: Add mini marshmallows for extra sweetness and a fun, chewy texture.
- Cookie Crumbles: Mix in crushed Oreo cookies or shortbread cookies for a delightful crunch.
The possibilities are truly endless! Don’t be afraid to experiment and find your own perfect combination. I’ve even tried adding a splash of strawberry liqueur for an adult-only version trust me, it’s amazing!
I’m so confident that you’ll love this recipe. It’s a simple, satisfying, and utterly delicious treat that’s perfect for any occasion. It’s more than just a dessert; it’s a little bit of happiness in every bite. I’ve made this Strawberry Fluff countless times, and it’s always a hit. I’ve seen it disappear in minutes at parties, and I’ve enjoyed it myself on many a cozy night in.
So, what are you waiting for? Gather your ingredients, follow the simple steps, and get ready to experience the joy of Strawberry Fluff. I promise you won’t be disappointed. And once you’ve tried it, I’d absolutely love to hear about your experience! Share your photos, your variations, and your thoughts in the comments below. Let’s create a community of Strawberry Fluff lovers! I can’t wait to see what delicious creations you come up with. Happy fluffing!
Strawberry Fluff: A Deliciously Easy Dessert Recipe
Light, fluffy strawberry dessert with gelatin, pineapple, marshmallows, and whipped cream. Sweet, refreshing, and perfect for potlucks. Easy to make ahead!
Ingredients
- 1 (3 ounce) package strawberry flavored gelatin
- 1 cup boiling water
- 1 (20 ounce) can crushed pineapple, undrained
- 1 (10 ounce) package frozen strawberries, thawed
- 1 cup miniature marshmallows
- 1 cup heavy whipping cream
- 1/4 cup powdered sugar
- 1 teaspoon vanilla extract
- Optional: Additional fresh strawberries, sliced, for garnish
Instructions
- Dissolve the Gelatin: In a large bowl, pour in boiling water. Add strawberry gelatin and stir until completely dissolved.
- Incorporate the Pineapple: Add the entire can of crushed pineapple (including the juice) to the gelatin mixture. Stir gently to combine.
- Add the Strawberries: Add the thawed strawberries to the bowl and stir them in. Chop large strawberries for even distribution.
- Incorporate the Marshmallows: Add the miniature marshmallows to the mixture. Stir gently to combine.
- Chill Time: Cover the bowl with plastic wrap and refrigerate for at least 4 hours, or overnight, until partially set but still jiggly.
- Chill Your Equipment: Place your mixing bowl and whisk attachment (or beaters if you’re using a hand mixer) in the freezer for about 15-20 minutes before you start.
- Pour in the Cream: Pour the heavy whipping cream into the chilled bowl. Make sure your cream is also nice and cold straight from the refrigerator is best.
- Add Sweetness and Flavor: Add the powdered sugar and vanilla extract to the cream. The powdered sugar will dissolve easily and give the whipped cream a smooth texture, while the vanilla extract adds a lovely hint of flavor.
- Whip it Up: Start whipping the cream on medium speed. As the cream starts to thicken, gradually increase the speed to high. Keep whipping until stiff peaks form. This means that when you lift the whisk or beaters, the peaks of the whipped cream stand up straight and hold their shape. Be careful not to overwhip, or you’ll end up with butter!
- Gently Fold in the Whipped Cream: Gently fold the whipped cream into the partially set gelatin mixture. Be careful not to overmix.
- Chill Again: Cover the bowl with plastic wrap and return it to the refrigerator for at least another hour, or longer, to set completely.
- Spoon into Serving Dishes: Spoon the fully set Strawberry Fluff into individual serving dishes or a trifle bowl.
- Garnish (Optional): Garnish with sliced fresh strawberries, a dollop of whipped cream, or a sprinkle of mini marshmallows.
- Serve and Enjoy! Serve cold.
Notes
- For best results, chill the gelatin mixture overnight.
- Make sure your whipping cream and equipment are very cold for optimal whipping.
- Gently fold in the whipped cream to maintain the fluff’s airy texture.
- Experiment with different gelatin flavors and fruits.
- Add chopped nuts for a crunchy texture.
- Can be made 24 hours in advance.
- Store leftovers in an airtight container in the refrigerator for up to 3 days.

Leave a Comment