
Sour Cream Chicken Enchiladas: Prepare to be transported to a world of creamy, cheesy, and utterly irresistible comfort food! Forget everything you thought you knew about enchiladas; this recipe elevates the classic dish to a whole new level of deliciousness. Imagine tender, shredded chicken enveloped in warm tortillas, smothered in a luscious sour cream sauce, and baked to golden perfection. Are you drooling yet?
Enchiladas, a staple in Mexican cuisine, have a rich history dating back to the Mayan civilization, where corn tortillas were filled with small fish. Over time, the dish evolved, incorporating various meats, cheeses, and sauces. While red and green enchiladas are widely known, the creamy, tangy twist of Sour Cream Chicken Enchiladas offers a delightful variation that has captured the hearts (and stomachs!) of food lovers everywhere.
What makes this particular enchilada recipe so beloved? It’s the perfect balance of flavors and textures. The sour cream sauce adds a luxurious richness that complements the savory chicken and melty cheese. Plus, it’s incredibly easy to prepare, making it a fantastic option for a weeknight dinner or a crowd-pleasing potluck dish. The creamy texture, combined with the slight tang of the sour cream, creates a symphony of flavors that will leave you wanting more. So, gather your ingredients, preheat your oven, and let’s embark on a culinary adventure to create the most amazing Sour Cream Chicken Enchiladas you’ve ever tasted!

Ingredients:
- 1.5 lbs boneless, skinless chicken breasts
- 1 tbsp olive oil
- 1 medium yellow onion, chopped
- 2 cloves garlic, minced
- 1 (10.75 oz) can condensed cream of chicken soup
- 1 cup sour cream
- 1 (4 oz) can diced green chilies, undrained
- 1 tsp chili powder
- 1/2 tsp cumin
- 1/4 tsp garlic powder
- 1/4 tsp onion powder
- Salt and pepper to taste
- 10-12 (6-inch) corn tortillas
- 2 cups shredded Monterey Jack cheese, divided
- Optional toppings: chopped cilantro, diced tomatoes, avocado slices
Preparing the Chicken Filling
Okay, let’s get started with the heart of our enchiladas the chicken filling! This is where all the delicious flavors come together. I like to start by prepping the chicken, so it’s ready to go when we need it.
- Cook the Chicken: There are a few ways you can cook the chicken. My favorite is to poach it because it keeps it super moist. To poach, place the chicken breasts in a large pot and cover them with water. Bring the water to a boil, then reduce the heat to a simmer. Cook for about 15-20 minutes, or until the chicken is cooked through and no longer pink inside. You can also bake the chicken at 375°F (190°C) for about 20-25 minutes, or until cooked through. Another option is to use rotisserie chicken to save time.
- Shred the Chicken: Once the chicken is cooked, let it cool slightly, then shred it using two forks. You can also use a stand mixer with the paddle attachment to shred the chicken quickly. Just be careful not to over-shred it!
- Sauté the Onion and Garlic: While the chicken is cooking (or after, if you’re using rotisserie chicken), heat the olive oil in a large skillet over medium heat. Add the chopped onion and cook until softened, about 5-7 minutes. Add the minced garlic and cook for another minute, until fragrant. Be careful not to burn the garlic!
- Combine the Ingredients: In the skillet with the onion and garlic, add the shredded chicken, cream of chicken soup, sour cream, diced green chilies (with their juice don’t drain them!), chili powder, cumin, garlic powder, onion powder, salt, and pepper. Stir everything together until well combined.
- Simmer the Filling: Reduce the heat to low and let the mixture simmer for about 5-10 minutes, stirring occasionally, to allow the flavors to meld together. This step is crucial for developing that rich, savory flavor we’re looking for. Taste and adjust the seasonings as needed. I sometimes add a pinch of cayenne pepper for a little extra kick!
Warming the Tortillas
This step is often overlooked, but it’s essential for preventing the tortillas from cracking when you roll them. Trust me, you don’t want to skip this!
- Choose Your Method: There are a few ways to warm the tortillas. My preferred method is to wrap them in a damp paper towel and microwave them for about 30-60 seconds, or until they are pliable. You can also warm them in a dry skillet over medium heat for about 15-20 seconds per side, or wrap them in foil and bake them in a preheated oven at 350°F (175°C) for about 10 minutes.
- Keep Them Warm: As you warm the tortillas, keep them covered with a clean kitchen towel to prevent them from drying out and becoming brittle.
Assembling the Enchiladas
Now for the fun part putting everything together! This is where your enchiladas start to take shape.
- Preheat the Oven: Preheat your oven to 350°F (175°C).
- Grease the Baking Dish: Lightly grease a 9×13 inch baking dish with cooking spray. This will prevent the enchiladas from sticking to the bottom.
- Fill the Tortillas: Take one warmed tortilla and spoon about 1/3 cup of the chicken filling down the center. Sprinkle with a small amount of shredded Monterey Jack cheese (about 1-2 tablespoons).
- Roll the Enchiladas: Roll the tortilla tightly around the filling and place it seam-side down in the prepared baking dish.
- Repeat: Repeat steps 3 and 4 with the remaining tortillas and filling, arranging the enchiladas snugly in the baking dish.
Baking the Enchiladas
Almost there! Now it’s time to bake the enchiladas until they’re bubbly and golden brown.
- Top with Cheese: Sprinkle the remaining shredded Monterey Jack cheese evenly over the enchiladas.
- Bake: Cover the baking dish with aluminum foil and bake for 20 minutes.
- Uncover and Bake: Remove the foil and bake for another 10-15 minutes, or until the cheese is melted and bubbly and the enchiladas are heated through. The cheese should be lightly golden brown.
- Let Rest: Let the enchiladas rest for about 5-10 minutes before serving. This will allow them to set up a bit and make them easier to serve.
Serving and Enjoying
Finally, the moment we’ve all been waiting for! Time to serve up these delicious sour cream chicken enchiladas and enjoy!
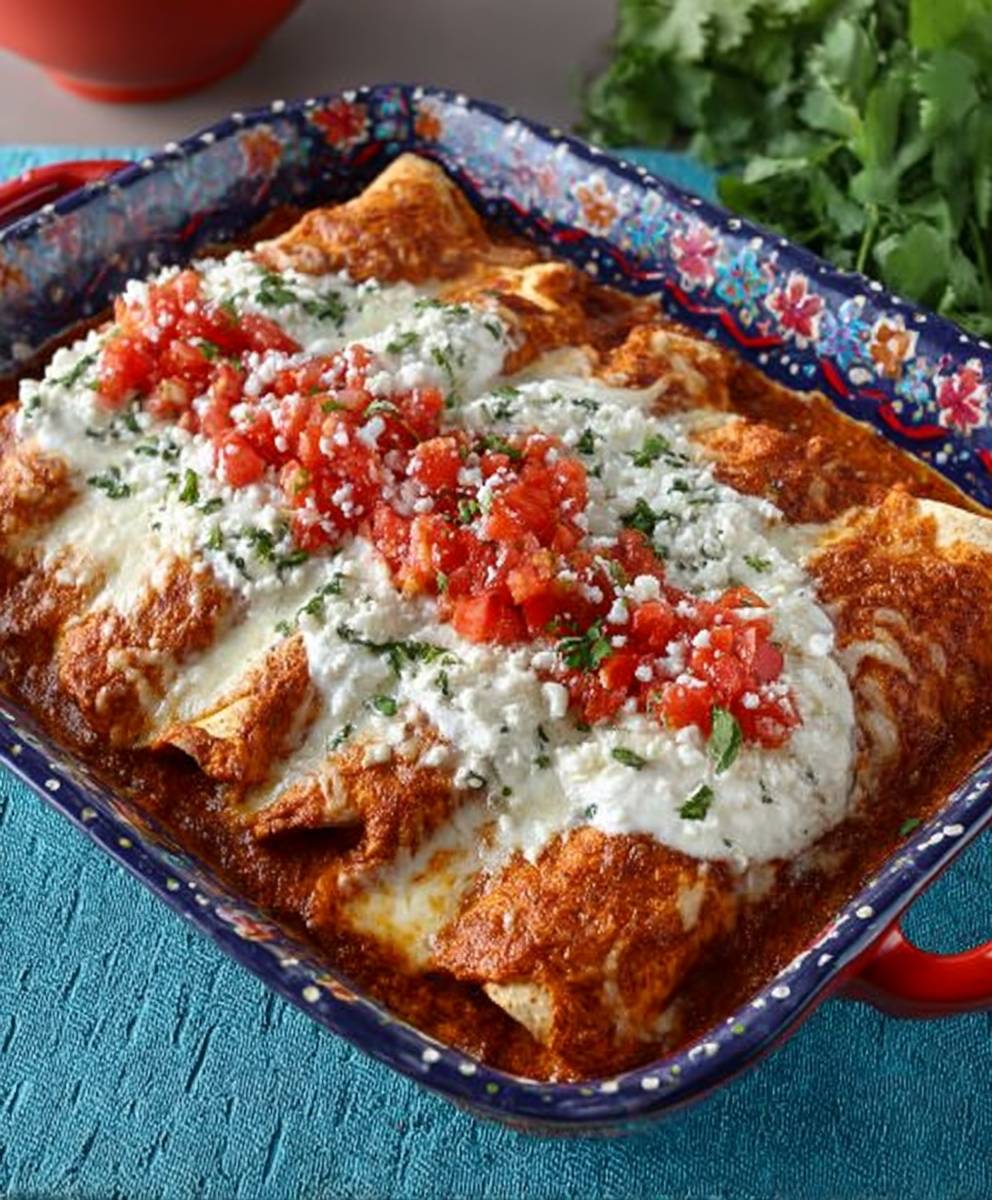
- Garnish (Optional): Garnish the enchiladas with your favorite toppings, such as chopped cilantro, diced tomatoes, and avocado slices. A dollop of extra sour cream is always a good idea too!
- Serve: Serve the enchiladas hot, straight from the oven. They’re perfect on their own or with a side of rice and beans.
- Store Leftovers: Store any leftover enchiladas in an airtight container in the refrigerator for up to 3 days. Reheat them in the oven or microwave until heated through.
Tips and Variations:
- Spice it Up: For a spicier version, add a pinch of cayenne pepper to the chicken filling or use a spicier variety of green chilies. You can also add a few dashes of your favorite hot sauce.
- Cheese Variations: Feel free to experiment with different types of cheese. Cheddar cheese, Colby Jack cheese, or a Mexican cheese blend would all be delicious.
- Vegetarian Option: To make these enchiladas vegetarian, substitute the chicken with black beans, corn, and other vegetables.
- Make Ahead: You can assemble the enchiladas ahead of time and store them in the refrigerator for up to 24 hours before baking. Just add a few extra minutes to the baking time.
- Freezing: These enchiladas freeze well. Assemble them as directed, but don’t bake them. Wrap them tightly in plastic wrap and then in foil. Freeze for up to 3 months. When ready to bake, thaw them in the refrigerator overnight and then bake as directed.
- Tortilla Options: While I prefer corn tortillas for their flavor and texture, you can also use flour tortillas if you prefer.
Why This Recipe Works:
This recipe is a winner because it’s easy to make, uses simple ingredients, and delivers incredible flavor. The combination of creamy sour cream, savory chicken, and melted cheese is simply irresistible. Plus, the step-by-step instructions and helpful tips ensure that even novice cooks can achieve perfect results every time. I’ve made these enchiladas countless times, and they’re always a crowd-pleaser. They’re perfect for a weeknight dinner, a potluck, or any occasion where you want to impress your friends and family with a delicious and satisfying meal.
Troubleshooting:
- Tortillas Cracking: If your tortillas are cracking when you roll them, it means they’re not warm enough. Make sure to warm them thoroughly before filling them.
- Enchiladas Too Dry: If your enchiladas are too dry, you can add a little bit of chicken broth or water to the baking dish before baking. This will help to keep them moist.
- Cheese Not Melting: If your cheese isn’t melting properly, make sure your oven is preheated to the correct temperature. You can also
Conclusion:
And there you have it! These Sour Cream Chicken Enchiladas are more than just a meal; they’re a flavor explosion waiting to happen. I truly believe this recipe is a must-try because it perfectly balances creamy, tangy, and savory notes in a way that’s both comforting and exciting. The tender chicken, the rich sour cream sauce, and the melted cheese create a symphony of textures and tastes that will leave you wanting more. Forget those bland, boring enchiladas you might have had before; this recipe elevates the classic dish to a whole new level of deliciousness.
But the best part? It’s incredibly easy to make! Even if you’re not a seasoned chef, you can whip up these enchiladas with minimal effort and maximum reward. The steps are straightforward, the ingredients are readily available, and the result is a restaurant-quality meal that you can proudly serve to your family and friends. Trust me, the smiles on their faces will be worth every minute spent in the kitchen.
Why is this recipe a must-try? Because it’s a guaranteed crowd-pleaser that’s both delicious and easy to prepare. It’s the perfect weeknight dinner option, a fantastic dish to bring to potlucks, or even a special occasion meal that will impress your guests.
Now, let’s talk serving suggestions and variations! I love serving these enchiladas with a side of Mexican rice and refried beans for a complete and satisfying meal. A dollop of guacamole or a sprinkle of fresh cilantro adds a touch of freshness and vibrancy. For a spicier kick, you can add a pinch of cayenne pepper to the sour cream sauce or use a spicier salsa.
If you’re looking to customize the recipe, feel free to experiment with different fillings. Ground beef, shredded pork, or even vegetarian options like black beans and corn would work beautifully. You can also swap out the Monterey Jack cheese for cheddar, pepper jack, or any other cheese that melts well. For a lighter version, consider using low-fat sour cream and cheese.
Another fun variation is to make individual enchilada casseroles instead of rolling them up. Simply layer the tortillas, chicken filling, and sour cream sauce in a baking dish, top with cheese, and bake until bubbly and golden brown. This is a great option if you’re short on time or prefer a more rustic presentation.
Serving Suggestions:
- Mexican Rice
- Refried Beans
- Guacamole
- Fresh Cilantro
- Your favorite hot sauce
Variations:
- Ground Beef or Shredded Pork filling
- Black Bean and Corn filling (vegetarian)
- Different types of cheese (cheddar, pepper jack)
- Low-fat sour cream and cheese for a lighter version
- Individual enchilada casseroles
I’m so excited for you to try this recipe for Sour Cream Chicken Enchiladas! I know you’re going to love it as much as I do. Once you’ve made it, please come back and share your experience in the comments below. I’d love to hear what you think, what variations you tried, and how your family and friends enjoyed it. Don’t forget to rate the recipe too! Your feedback is invaluable and helps other readers discover this delicious dish. Happy cooking!
Sour Cream Chicken Enchiladas: The Ultimate Recipe Guide
Creamy and flavorful sour cream chicken enchiladas, perfect for a weeknight dinner or a crowd-pleasing potluck. Filled with tender shredded chicken, a creamy sauce, and plenty of cheese, these enchiladas are sure to be a hit!
Ingredients
- 1.5 lbs boneless, skinless chicken breasts
- 1 tbsp olive oil
- 1 medium yellow onion, chopped
- 2 cloves garlic, minced
- 1 (10.75 oz) can condensed cream of chicken soup
- 1 cup sour cream
- 1 (4 oz) can diced green chilies, undrained
- 1 tsp chili powder
- 1/2 tsp cumin
- 1/4 tsp garlic powder
- 1/4 tsp onion powder
- Salt and pepper to taste
- 10-12 (6-inch) corn tortillas
- 2 cups shredded Monterey Jack cheese, divided
- Optional toppings: chopped cilantro, diced tomatoes, avocado slices
Instructions
- Cook the Chicken: Poach, bake, or use rotisserie chicken. To poach, place chicken in a pot, cover with water, bring to a boil, then simmer for 15-20 minutes until cooked through. To bake, bake at 375°F (190°C) for 20-25 minutes.
- Shred the Chicken: Let the cooked chicken cool slightly, then shred it using two forks or a stand mixer.
- Sauté Onion and Garlic: Heat olive oil in a large skillet over medium heat. Add chopped onion and cook until softened, about 5-7 minutes. Add minced garlic and cook for another minute until fragrant.
- Combine Ingredients: In the skillet, add shredded chicken, cream of chicken soup, sour cream, diced green chilies (undrained), chili powder, cumin, garlic powder, onion powder, salt, and pepper. Stir until well combined.
- Simmer Filling: Reduce heat to low and simmer for 5-10 minutes, stirring occasionally, to meld flavors. Taste and adjust seasonings.
- Warm Tortillas: Wrap tortillas in a damp paper towel and microwave for 30-60 seconds, warm in a dry skillet for 15-20 seconds per side, or wrap in foil and bake at 350°F (175°C) for 10 minutes. Keep warm under a kitchen towel.
- Preheat Oven: Preheat oven to 350°F (175°C).
- Grease Baking Dish: Lightly grease a 9×13 inch baking dish with cooking spray.
- Fill Tortillas: Take one warmed tortilla and spoon about 1/3 cup of the chicken filling down the center. Sprinkle with a small amount of shredded Monterey Jack cheese (about 1-2 tablespoons).
- Roll Enchiladas: Roll the tortilla tightly around the filling and place it seam-side down in the prepared baking dish.
- Repeat: Repeat steps 9 and 10 with the remaining tortillas and filling, arranging the enchiladas snugly in the baking dish.
- Top with Cheese: Sprinkle the remaining shredded Monterey Jack cheese evenly over the enchiladas.
- Bake: Cover the baking dish with aluminum foil and bake for 20 minutes.
- Uncover and Bake: Remove the foil and bake for another 10-15 minutes, or until the cheese is melted and bubbly and the enchiladas are heated through.
- Let Rest: Let the enchiladas rest for about 5-10 minutes before serving.
- Garnish (Optional): Garnish with chopped cilantro, diced tomatoes, and avocado slices.
- Serve: Serve hot, straight from the oven.
- Store Leftovers: Store any leftover enchiladas in an airtight container in the refrigerator for up to 3 days. Reheat them in the oven or microwave until heated through.
Notes
- Spice it Up: Add cayenne pepper or spicier green chilies for a kick.
- Cheese Variations: Use cheddar, Colby Jack, or a Mexican cheese blend.
- Vegetarian Option: Substitute chicken with black beans, corn, and other vegetables.
- Make Ahead: Assemble ahead of time and refrigerate for up to 24 hours before baking. Add a few extra minutes to the baking time.
- Freezing: Assemble, wrap tightly, and freeze for up to 3 months. Thaw overnight before baking.
- Tortilla Options: Use flour tortillas if preferred.
- Tortillas Cracking: Warm tortillas more thoroughly.
- Enchiladas Too Dry: Add chicken broth or water to the baking dish before baking.
- Cheese Not Melting: Ensure oven is preheated.


Leave a Comment