
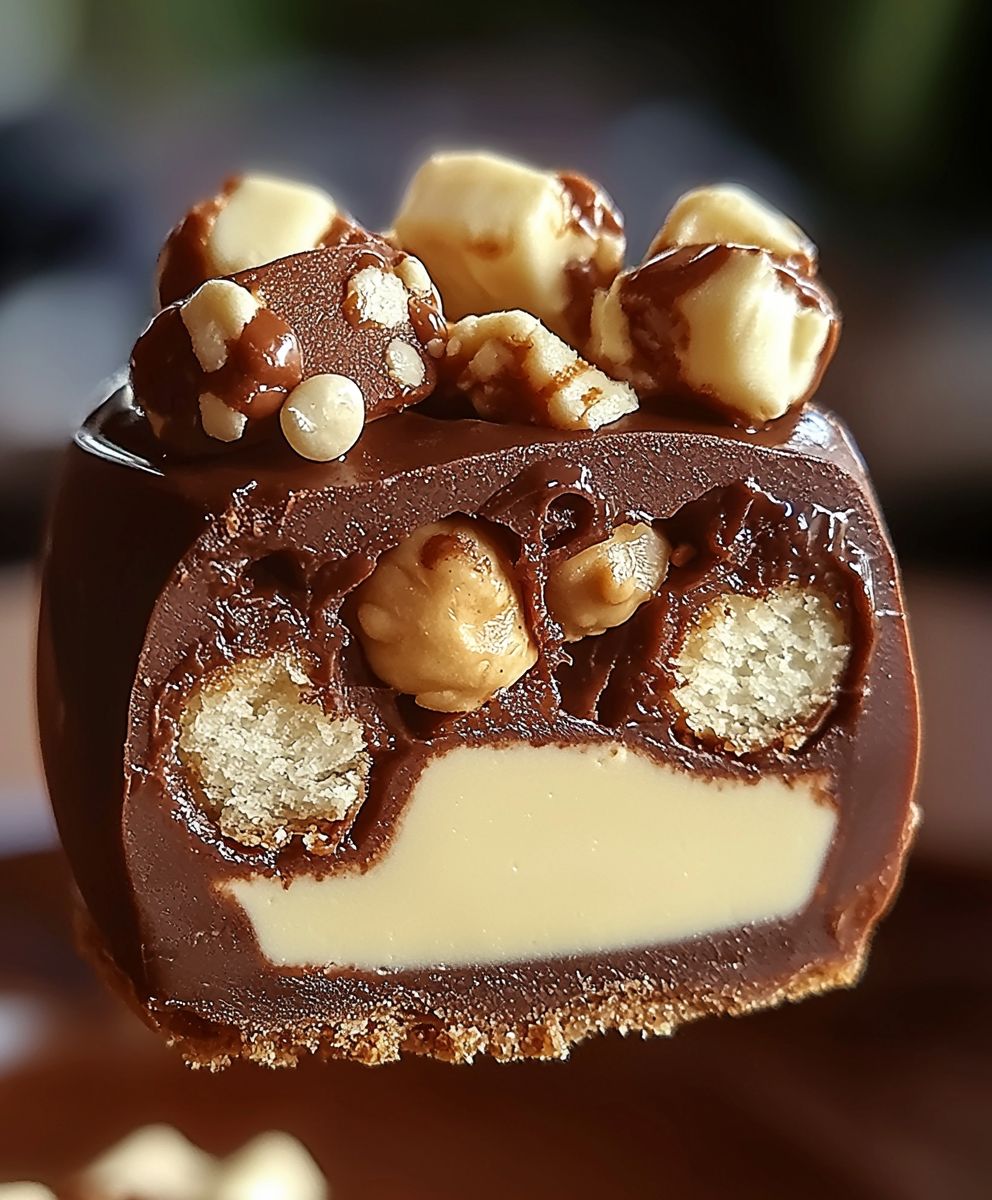
Snickers Verrine: Prepare to be utterly captivated by this decadent dessert that perfectly captures the iconic flavors of your favorite candy bar in an elegant, layered presentation! Imagine sinking your spoon into creamy layers of rich chocolate mousse, crunchy peanut brittle, smooth caramel, and a light, airy whipped topping. This isn’t just a dessert; it’s an experience, a symphony of textures and tastes that will leave you craving more.
While the Snickers bar itself is a relatively modern invention, dating back to the 1930s, the concept of layering flavors and textures in desserts has a long and rich history across many cultures. From the classic trifles of England to the elaborate parfaits of France, desserts that combine contrasting elements have always been a source of culinary delight. The Snickers Verrine takes this tradition and elevates it with the beloved flavors of chocolate, peanuts, and caramel.
People adore this dish for its delightful combination of sweet and salty, creamy and crunchy. It’s a sophisticated twist on a familiar favorite, making it perfect for both casual gatherings and special occasions. Plus, the individual serving size makes it incredibly convenient and elegant for entertaining. Who can resist the allure of a perfectly portioned dessert that delivers a burst of pure, unadulterated joy with every bite? This Snickers Verrine is guaranteed to be a crowd-pleaser!

Ingredients:
- For the Chocolate Brownie Base:
- 1/2 cup (1 stick) unsalted butter, melted
- 1 cup granulated sugar
- 1/2 cup unsweetened cocoa powder
- 1/4 teaspoon salt
- 1 teaspoon vanilla extract
- 2 large eggs
- 1/2 cup all-purpose flour
- For the Salted Caramel Sauce:
- 1 cup granulated sugar
- 1/4 cup water
- 1/2 cup heavy cream, warmed
- 4 tablespoons (1/2 stick) unsalted butter, cut into pieces
- 1 teaspoon sea salt, or to taste
- For the Peanut Layer:
- 1 cup roasted peanuts, roughly chopped
- 2 tablespoons salted caramel sauce (from above)
- For the Chocolate Mousse:
- 8 ounces bittersweet chocolate, finely chopped
- 1 cup heavy cream
- 2 large egg yolks
- 2 tablespoons granulated sugar
- 1/4 teaspoon salt
- For the Whipped Cream Topping:
- 1 cup heavy cream
- 2 tablespoons powdered sugar
- 1/2 teaspoon vanilla extract
- Optional Garnishes:
- Chopped peanuts
- Drizzle of salted caramel sauce
- Chocolate shavings
Preparing the Chocolate Brownie Base:
- Preheat and Prep: First things first, preheat your oven to 350°F (175°C). Grease and lightly flour an 8×8 inch baking pan. This will prevent the brownie from sticking and make it easy to remove later.
- Combine Wet Ingredients: In a medium bowl, whisk together the melted butter, granulated sugar, cocoa powder, and salt until well combined. Make sure there are no lumps of cocoa powder.
- Add Vanilla and Eggs: Stir in the vanilla extract. Then, add the eggs one at a time, mixing well after each addition. This helps to emulsify the mixture and create a fudgy texture.
- Incorporate Flour: Gradually add the flour to the wet ingredients, mixing until just combined. Be careful not to overmix, as this can result in a tough brownie. A few streaks of flour are okay.
- Bake: Pour the brownie batter into the prepared baking pan and spread it evenly. Bake for 20-25 minutes, or until a toothpick inserted into the center comes out with moist crumbs attached. The brownie should be set around the edges but still slightly soft in the center.
- Cool Completely: Let the brownie cool completely in the pan before crumbling it. This is important because warm brownies are too soft to work with. You can speed up the cooling process by placing the pan in the refrigerator for a while.
- Crumble the Brownie: Once cooled, crumble the brownie into small pieces. You can use your fingers or a fork to do this. Set aside.
Making the Salted Caramel Sauce:
- Prepare the Sugar: In a medium saucepan, combine the granulated sugar and water. Stir to moisten the sugar.
- Cook the Caramel: Place the saucepan over medium heat and bring the mixture to a boil. Do not stir the mixture once it starts boiling. Let it cook until it turns a deep amber color. This usually takes about 8-10 minutes. Keep a close eye on it, as it can burn quickly.
- Add Heavy Cream: Once the caramel is a deep amber color, carefully remove the saucepan from the heat. Slowly pour in the warmed heavy cream. Be careful, as the mixture will bubble vigorously.
- Incorporate Butter: Add the butter pieces to the saucepan and whisk until the butter is melted and the sauce is smooth.
- Add Salt: Stir in the sea salt. Taste and adjust the amount of salt as needed. I like a good balance of sweet and salty, so I usually add a little extra.
- Cool Slightly: Let the caramel sauce cool slightly before using it. It will thicken as it cools. If it becomes too thick, you can gently warm it up in the microwave or on the stovetop.
Preparing the Peanut Layer:
- Combine Peanuts and Caramel: In a medium bowl, combine the chopped roasted peanuts and 2 tablespoons of the salted caramel sauce. Mix well until the peanuts are evenly coated. This will help the peanut layer stick together and add a delicious caramel flavor.
Making the Chocolate Mousse:
- Melt the Chocolate: Place the chopped bittersweet chocolate in a heatproof bowl set over a saucepan of simmering water (double boiler). Make sure the bottom of the bowl does not touch the water. Stir occasionally until the chocolate is completely melted and smooth. Remove from heat and let it cool slightly.
- Prepare the Egg Yolks: In a separate bowl, whisk together the egg yolks, granulated sugar, and salt until pale and slightly thickened.
- Temper the Egg Yolks: Slowly drizzle a small amount of the melted chocolate into the egg yolk mixture, whisking constantly. This is called tempering and it prevents the egg yolks from scrambling when you add them to the hot chocolate. Continue adding the melted chocolate in a slow, steady stream until the egg yolk mixture is warm to the touch.
- Combine Chocolate and Egg Yolks: Pour the tempered egg yolk mixture into the remaining melted chocolate and whisk until smooth and well combined.
- Whip the Heavy Cream: In a separate bowl, whip the heavy cream until stiff peaks form. Be careful not to overwhip, as this can turn the cream into butter.
- Fold in Whipped Cream: Gently fold the whipped cream into the chocolate mixture in two additions. Be careful not to deflate the whipped cream. This will keep the mousse light and airy.
- Chill the Mousse: Cover the bowl with plastic wrap and refrigerate for at least 2 hours, or preferably overnight, to allow the mousse to set.
Making the Whipped Cream Topping:
- Combine Ingredients: In a chilled bowl, combine the heavy cream, powdered sugar, and vanilla extract.
- Whip the Cream: Beat with an electric mixer until stiff peaks form. Be careful not to overwhip.
- Keep Chilled: Keep the whipped cream chilled until ready to use.
Assembling the Snickers Verrines:
- Choose Your Vessels: Select your serving glasses or jars. I like to use clear glasses so you can see all the beautiful layers.
- Layer 1: Brownie Base: Spoon a layer of crumbled brownie into the bottom of each glass. Gently press down to create an even layer.
- Layer 2: Peanut Layer: Spoon a layer of the peanut mixture over the brownie base.
- Layer 3: Salted Caramel Sauce: Drizzle a generous amount of salted caramel sauce over the peanut layer.
- Layer 4: Chocolate Mousse: Spoon a layer of the chocolate mousse over the caramel sauce.
- Repeat Layers (Optional): If your glasses are large enough, you can repeat the layers for a more dramatic effect. Start with the brownie base again and continue layering as before.
- Top with Whipped Cream: Top each verrine with a generous dollop of whipped cream.
- Garnish (Optional): Garnish with chopped peanuts, a drizzle of salted caramel sauce, and/or chocolate shavings.
- Chill: Chill the verrines for at least 30 minutes before serving to allow the flavors to meld together. This also helps the mousse and whipped cream to firm up.
- Serve and Enjoy!: Serve the Snickers verrines chilled and enjoy every delicious bite!
Conclusion:
This Snickers Verrine isn’t just a dessert; it’s an experience. The layers of creamy peanut butter mousse, rich chocolate ganache, crunchy peanut brittle, and chewy caramel create a symphony of textures and flavors that will leave you craving more. It’s the perfect balance of sweet and salty, smooth and crunchy, making it a truly irresistible treat. Trust me, once you’ve tasted this, you’ll understand why I call it a must-try! But what truly elevates this recipe is its versatility. While the classic combination is divine, feel free to experiment and make it your own. For a more decadent experience, try adding a layer of salted caramel sauce between the mousse and the ganache. Or, if you’re a fan of dark chocolate, use a dark chocolate ganache instead of milk chocolate. For a lighter version, you could substitute the peanut butter mousse with a Greek yogurt-based mousse, adding a touch of honey for sweetness. Serving suggestions? Oh, the possibilities! This Snickers Verrine is elegant enough to serve at a dinner party, yet simple enough to enjoy as a weeknight treat. For a sophisticated presentation, serve it in individual glass ramekins or small mason jars. Garnish with a sprinkle of chopped peanuts, a drizzle of caramel sauce, or a dusting of cocoa powder. If you’re feeling extra fancy, add a small piece of homemade peanut brittle on top. For a casual gathering, you can assemble the verrine in a large trifle bowl, creating a stunning centerpiece that everyone can scoop from. This is also a great option if you’re making it for a crowd. And don’t forget the ice cream! A scoop of vanilla or chocolate ice cream alongside the verrine elevates it to another level of indulgence. Beyond the classic presentation, consider deconstructing the verrine for a fun and interactive dessert experience. Serve the individual components the mousse, ganache, brittle, and caramel in separate bowls and let your guests create their own perfect bite. This is a great way to cater to different preferences and dietary needs. I’ve poured my heart into perfecting this recipe, and I’m confident that you’ll love it as much as I do. It’s a showstopper that’s surprisingly easy to make, and it’s guaranteed to impress your friends and family. The best part? You can prepare the individual components ahead of time and assemble the verrine just before serving, making it a stress-free dessert option. So, what are you waiting for? Gather your ingredients, put on your apron, and get ready to create a little bit of magic in your kitchen. I promise, this Snickers Verrine will be a new favorite in your dessert repertoire. I’m so excited for you to try this recipe! And more importantly, I’d love to hear about your experience. Did you make any variations? Did you serve it at a special occasion? What did your friends and family think? Please, share your photos and stories in the comments below. I can’t wait to see your creations and hear all about your Snickers Verrine adventures! Happy baking! Print
Snickers Verrine: The Ultimate Dessert Recipe
- Total Time: 180 minutes
- Yield: 6–8 servings 1x
Description
Layers of brownie, salted caramel peanuts, chocolate mousse, and whipped cream create an irresistible dessert!
Ingredients
- 1/2 cup (1 stick) unsalted butter, melted
- 1 cup granulated sugar
- 1/2 cup unsweetened cocoa powder
- 1/4 teaspoon salt
- 1 teaspoon vanilla extract
- 2 large eggs
- 1/2 cup all-purpose flour
- 1 cup granulated sugar
- 1/4 cup water
- 1/2 cup heavy cream, warmed
- 4 tablespoons (1/2 stick) unsalted butter, cut into pieces
- 1 teaspoon sea salt, or to taste
- 1 cup roasted peanuts, roughly chopped
- 2 tablespoons salted caramel sauce (from above)
- 8 ounces bittersweet chocolate, finely chopped
- 1 cup heavy cream
- 2 large egg yolks
- 2 tablespoons granulated sugar
- 1/4 teaspoon salt
- 1 cup heavy cream
- 2 tablespoons powdered sugar
- 1/2 teaspoon vanilla extract
- Chopped peanuts
- Drizzle of salted caramel sauce
- Chocolate shavings
Instructions
- Preheat your oven to 350°F (175°C). Grease and lightly flour an 8×8 inch baking pan.
- In a medium bowl, whisk together the melted butter, granulated sugar, cocoa powder, and salt until well combined.
- Stir in the vanilla extract. Then, add the eggs one at a time, mixing well after each addition.
- Gradually add the flour to the wet ingredients, mixing until just combined. Be careful not to overmix.
- Pour the brownie batter into the prepared baking pan and spread it evenly. Bake for 20-25 minutes, or until a toothpick inserted into the center comes out with moist crumbs attached.
- Let the brownie cool completely in the pan before crumbling it.
- Once cooled, crumble the brownie into small pieces. Set aside.
- In a medium saucepan, combine the granulated sugar and water. Stir to moisten the sugar.
- Place the saucepan over medium heat and bring the mixture to a boil. Do not stir the mixture once it starts boiling. Let it cook until it turns a deep amber color (8-10 minutes).
- Once the caramel is a deep amber color, carefully remove the saucepan from the heat. Slowly pour in the warmed heavy cream. Be careful, as the mixture will bubble vigorously.
- Add the butter pieces to the saucepan and whisk until the butter is melted and the sauce is smooth.
- Stir in the sea salt. Taste and adjust the amount of salt as needed.
- Let the caramel sauce cool slightly before using it. It will thicken as it cools. If it becomes too thick, you can gently warm it up in the microwave or on the stovetop.
- In a medium bowl, combine the chopped roasted peanuts and 2 tablespoons of the salted caramel sauce. Mix well until the peanuts are evenly coated.
- Place the chopped bittersweet chocolate in a heatproof bowl set over a saucepan of simmering water (double boiler). Stir occasionally until the chocolate is completely melted and smooth. Remove from heat and let it cool slightly.
- In a separate bowl, whisk together the egg yolks, granulated sugar, and salt until pale and slightly thickened.
- Slowly drizzle a small amount of the melted chocolate into the egg yolk mixture, whisking constantly. Continue adding the melted chocolate in a slow, steady stream until the egg yolk mixture is warm to the touch.
- Pour the tempered egg yolk mixture into the remaining melted chocolate and whisk until smooth and well combined.
- In a separate bowl, whip the heavy cream until stiff peaks form.
- Gently fold the whipped cream into the chocolate mixture in two additions.
- Cover the bowl with plastic wrap and refrigerate for at least 2 hours, or preferably overnight, to allow the mousse to set.
- In a chilled bowl, combine the heavy cream, powdered sugar, and vanilla extract.
- Beat with an electric mixer until stiff peaks form.
- Keep the whipped cream chilled until ready to use.
- Select your serving glasses or jars.
- Spoon a layer of crumbled brownie into the bottom of each glass. Gently press down to create an even layer.
- Spoon a layer of the peanut mixture over the brownie base.
- Drizzle a generous amount of salted caramel sauce over the peanut layer.
- Spoon a layer of the chocolate mousse over the caramel sauce.
- If your glasses are large enough, you can repeat the layers for a more dramatic effect.
- Top each verrine with a generous dollop of whipped cream.
- Garnish with chopped peanuts, a drizzle of salted caramel sauce, and/or chocolate shavings.
- Chill the verrines for at least 30 minutes before serving to allow the flavors to meld together.
- Serve and Enjoy!
Notes
- For the salted caramel, watch the sugar closely as it cooks; it can burn quickly.
- Tempering the egg yolks is crucial to prevent them from scrambling in the mousse.
- Chilling the mousse and verrines is essential for the best texture and flavor.
- Feel free to adjust the amount of salt in the caramel to your preference.
- Use high-quality chocolate for the mousse for the best flavor.
- Prep Time: 45 minutes
- Cook Time: 30 minutes


Leave a Comment