
Rye bread, with its distinctive flavor and hearty texture, is more than just a loaf; it’s a culinary journey through centuries of tradition. Have you ever wondered what makes that dark, dense slice so irresistibly satisfying? I certainly have! From its humble beginnings as a staple grain in colder climates to its current status as a beloved bread worldwide, rye has a rich and fascinating history.
Originating in Eastern Europe, rye bread has long been a dietary cornerstone, particularly in regions where wheat struggled to thrive. It’s a testament to the ingenuity of bakers who transformed a resilient grain into a nourishing and flavorful food. The slightly sour tang, the chewy crumb, and the earthy aroma these are the hallmarks of a truly great rye.
But what is it about rye bread that keeps us coming back for more? Perhaps it’s the satisfying chewiness that contrasts beautifully with creamy cheeses or savory meats. Maybe it’s the complex flavor profile that adds depth to any sandwich. Or could it be the simple fact that it’s a wholesome and filling option that keeps you energized throughout the day? Whatever the reason, rye bread has earned its place as a timeless classic, and I’m excited to share my favorite recipe with you!

Ingredients:
- For the Rye Starter (Sourdough):
- 100g Rye Flour, preferably dark rye
- 100g Water, lukewarm (around 85-90°F)
- For the Soaker:
- 100g Rye Berries, cracked or whole
- 200g Water, boiling
- For the Main Dough:
- All of the Rye Starter (from above)
- All of the Soaker (from above)
- 200g Rye Flour, preferably dark rye
- 300g Bread Flour, unbleached
- 150g Water, lukewarm (adjust as needed)
- 15g Salt
- 15g Molasses (optional, for color and flavor)
- 1 tbsp Caraway Seeds (optional, but highly recommended)
Preparing the Rye Starter (Sourdough)
This is the foundation of our rye bread, giving it that characteristic tangy flavor. It’s a multi-day process, but trust me, it’s worth it!
- Day 1: The Initial Mix: In a clean jar or container, combine 100g of rye flour and 100g of lukewarm water. Mix thoroughly until you have a smooth, thick paste. Scrape down the sides of the jar, cover loosely (a lid slightly ajar or cheesecloth secured with a rubber band works well), and let it sit at room temperature (around 70-75°F) for 24 hours.
- Day 2: Feeding Time! You might not see much activity yet, and that’s perfectly normal. Discard about half of the starter (this helps prevent excessive acidity). Add another 50g of rye flour and 50g of lukewarm water to the remaining starter. Mix well, scrape down the sides, cover loosely, and let it sit at room temperature for another 24 hours.
- Day 3-7 (or until active): Continued Feedings: Repeat the feeding process from Day 2 every 12-24 hours. You should start to see signs of activity bubbles forming, the starter rising and falling. The time it takes for the starter to become active depends on the temperature and the flour you’re using. An active starter will roughly double in size within 4-8 hours after feeding.
- Determining Readiness: Your starter is ready to use when it consistently doubles in size within 4-8 hours after feeding, has a pleasant, slightly sour aroma (not an unpleasant, vinegary smell), and is full of bubbles. If it smells like acetone (nail polish remover), it needs more feedings.
Preparing the Soaker
The soaker helps to soften the rye berries, making them more palatable and releasing their flavor into the bread. This step is crucial for a moist and flavorful rye loaf.
- Combine Ingredients: In a heat-proof bowl, combine 100g of cracked or whole rye berries and 200g of boiling water.
- Cover and Soak: Cover the bowl tightly with plastic wrap or a lid. Let it sit at room temperature for at least 4 hours, or preferably overnight (up to 12 hours). The rye berries will absorb the water and become soft and plump.
Making the Main Dough
Now for the exciting part bringing everything together to create our rye bread dough!
- Combine Starter and Soaker: In a large mixing bowl (or the bowl of your stand mixer), combine the entire rye starter and the entire soaker (including any remaining water). Mix well to combine.
- Add Remaining Ingredients: Add 200g of rye flour, 300g of bread flour, 150g of lukewarm water, 15g of salt, 15g of molasses (if using), and 1 tbsp of caraway seeds (if using) to the bowl.
- Mix the Dough: If using a stand mixer, use the dough hook attachment and mix on low speed for 8-10 minutes. If mixing by hand, knead the dough on a lightly floured surface for 10-15 minutes. The dough will be sticky and somewhat dense, but it should become smoother and more elastic as you knead it. Important: Rye flour doesn’t develop gluten in the same way as wheat flour, so don’t expect a perfectly smooth and elastic dough.
- Adjust Hydration (If Needed): Rye flour can vary in its absorbency, so you might need to adjust the amount of water. If the dough seems too dry and stiff, add a tablespoon of water at a time until it becomes more manageable. If the dough is excessively sticky and unworkable, add a tablespoon of bread flour at a time.
Bulk Fermentation (First Rise)
This is where the magic happens the yeast in the starter works its magic, creating the air pockets that give the bread its texture and flavor.
- Place Dough in a Bowl: Lightly grease a large bowl with oil. Place the dough in the bowl and turn it to coat all sides with oil.
- Cover and Ferment: Cover the bowl tightly with plastic wrap or a lid. Let the dough rise at room temperature (around 70-75°F) for 2-3 hours, or until it has increased in size by about 50-75%. Rye dough doesn’t typically double in size like wheat dough, so don’t expect it to get that big.
- Perform a Fold (Optional): After the first hour of fermentation, you can perform a fold to strengthen the dough. Gently stretch one side of the dough upwards and fold it over the center. Repeat with the other three sides. This helps to develop gluten structure and improve the bread’s texture.
Shaping the Dough
Now we’ll shape the dough into its final form, ready for its second rise.
- Gently Deflate the Dough: Gently deflate the dough by pressing down on it lightly.
- Shape the Loaf: On a lightly floured surface, shape the dough into a round or oval loaf. You can use your hands to gently stretch and tuck the dough under itself, creating a smooth surface.
- Place in a Banneton or Loaf Pan: If using a banneton (proofing basket), dust it generously with rye flour or a mixture of rye flour and rice flour. Place the shaped loaf seam-side up in the banneton. If using a loaf pan, grease it well with butter or oil. Place the shaped loaf in the loaf pan.
Proofing (Second Rise)
This final rise allows the dough to relax and develop even more flavor before baking.
- Cover and Proof: Cover the banneton or loaf pan with plastic wrap or a clean kitchen towel. Let the dough proof at room temperature for 1-2 hours, or until it has increased in size by about 25-50%. Again, rye dough doesn’t rise as much as wheat dough.
- Check for Readiness: To check if the dough is ready to bake, gently poke it with your finger. If the indentation slowly springs back, it’s ready. If the indentation springs back immediately, it needs more time. If the indentation doesn’t spring back at all, it’s over-proofed.
Baking the Rye Bread
Finally, the moment we’ve been waiting for baking our delicious rye bread!
- Preheat Oven: Preheat your oven to 450°F (232°C) with a Dutch oven inside. The Dutch oven helps to create a steamy environment, which is essential for a good crust. If you don’t have a Dutch oven, you can use a baking stone or baking sheet and create steam by placing a pan of hot water on the bottom rack of the oven.
- Score the Loaf: If using a banneton, carefully invert the loaf onto a piece of parchment paper. Score the top of the loaf with a sharp knife or lame. Scoring allows the bread to expand properly in the oven and prevents it from cracking randomly. A simple slash down the center is sufficient, or you can get creative with your scoring pattern. If using a loaf pan, no scoring is necessary.
- Bake in Dutch Oven (If Using): Carefully remove the hot Dutch oven from the oven. Using the parchment paper as a sling,
Conclusion:
And there you have it! This rye bread recipe isn’t just another loaf; it’s an experience. From the deeply satisfying aroma that fills your kitchen as it bakes to the complex, slightly tangy flavor that dances on your tongue, it’s a bread that truly stands out. I know there are a lot of bread recipes out there, but trust me, this one is special. It’s the kind of bread that makes you want to slow down, savor each bite, and appreciate the simple pleasures in life.
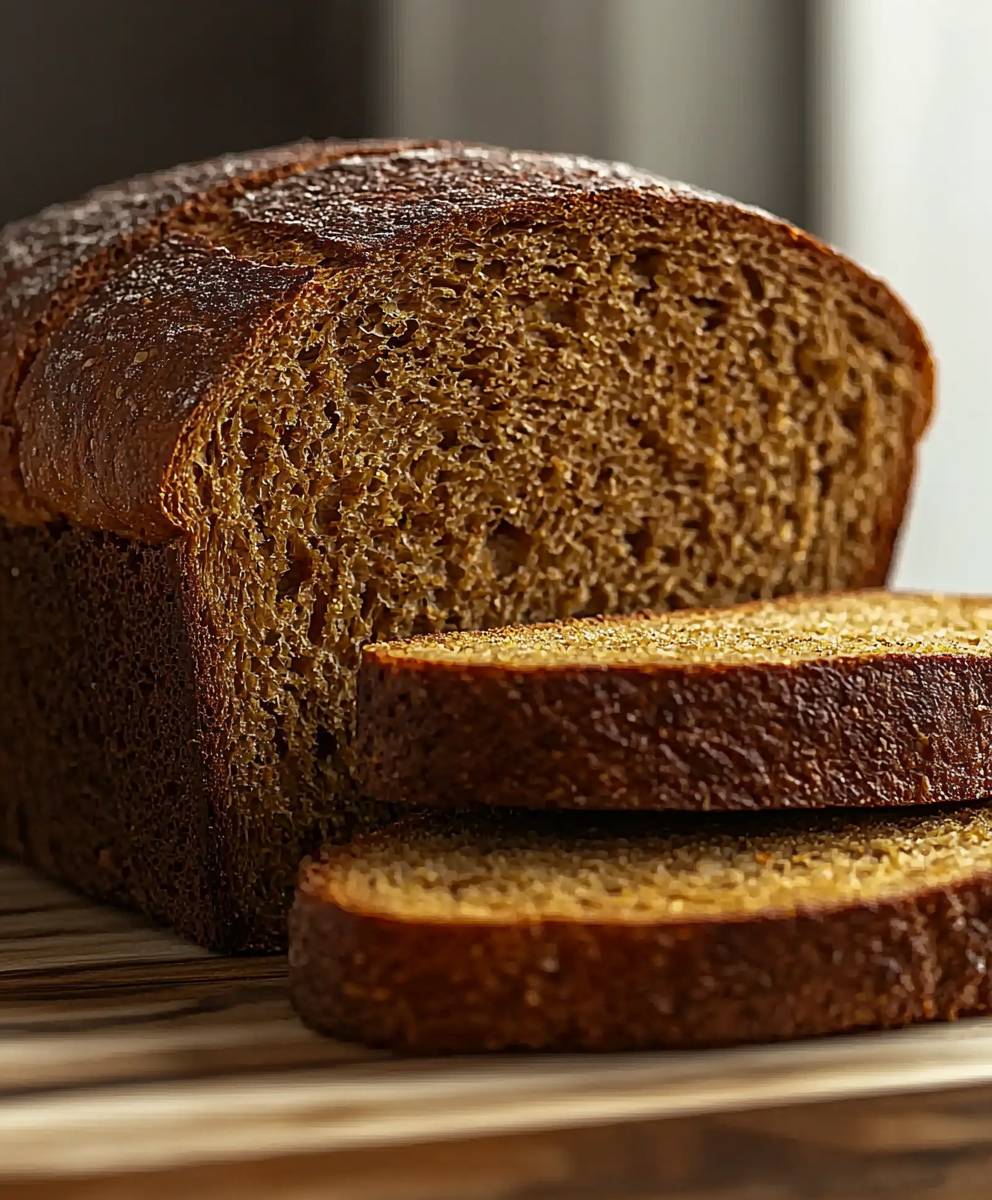
Why is it a must-try? Because it’s more than just bread; it’s a taste of tradition, a testament to the power of simple ingredients, and a guaranteed crowd-pleaser. The texture is perfect a delightful chewiness with a satisfyingly crisp crust. The flavor is complex, with the earthy notes of rye perfectly balanced by a hint of sweetness. It’s a bread that can stand on its own, but also pairs beautifully with a wide range of flavors.
Now, let’s talk serving suggestions! A thick slice of this rye bread, toasted and slathered with creamy butter, is a simple yet sublime breakfast. But don’t stop there! It’s incredible as the base for open-faced sandwiches, especially with smoked salmon, dill cream cheese, and a sprinkle of capers. For a heartier meal, try it with corned beef, sauerkraut, and Swiss cheese for a classic Reuben. And if you’re feeling adventurous, use it to make croutons for a flavorful salad topping or breadcrumbs for a unique coating on chicken or fish.
Looking for variations? Absolutely! For a sweeter loaf, add a tablespoon or two of molasses to the dough. If you prefer a more intense rye flavor, increase the amount of rye flour slightly. You can also experiment with different seeds caraway seeds are a classic addition, but sunflower seeds, poppy seeds, or even fennel seeds would also be delicious. And for a truly unique twist, try adding a handful of chopped walnuts or pecans to the dough for added texture and flavor.
Don’t be intimidated by the thought of baking bread. This recipe is surprisingly straightforward, and I’ve included plenty of tips and tricks to help you succeed. The most important thing is to be patient and have fun! Baking should be a relaxing and enjoyable experience, so put on some music, pour yourself a glass of wine, and let the aroma of baking bread fill your home.
I truly believe that everyone should experience the joy of baking their own bread, and this rye bread recipe is the perfect place to start. It’s a rewarding and satisfying process, and the end result is a loaf of bread that is far superior to anything you can buy in the store. Plus, there’s nothing quite like the feeling of accomplishment that comes with creating something delicious from scratch.
So, what are you waiting for? Gather your ingredients, preheat your oven, and get ready to bake! I’m confident that you’ll love this recipe as much as I do. And when you do, please share your experience with me! I’d love to hear how it turned out, what variations you tried, and what your favorite way to serve it is. You can leave a comment below, tag me on social media, or send me an email. I can’t wait to see your creations! Happy baking! I hope you enjoy this rye bread as much as I do. It’s a labor of love, but so worth it!
Rye Bread: The Ultimate Guide to Types, Benefits, and Recipes
A flavorful and tangy homemade rye bread made with a rye starter, soaker, and a blend of rye and bread flour. Caraway seeds and molasses add depth and complexity.
Ingredients
- 100g Rye Flour, preferably dark rye
- 100g Water, lukewarm (around 85-90°F)
- 100g Rye Berries, cracked or whole
- 200g Water, boiling
- All of the Rye Starter (from above)
- All of the Soaker (from above)
- 200g Rye Flour, preferably dark rye
- 300g Bread Flour, unbleached
- 150g Water, lukewarm (adjust as needed)
- 15g Salt
- 15g Molasses (optional, for color and flavor)
- 1 tbsp Caraway Seeds (optional, but highly recommended)
Instructions
- Prepare the Rye Starter (Sourdough):
- Day 1: The Initial Mix: In a clean jar or container, combine 100g of rye flour and 100g of lukewarm water. Mix thoroughly until you have a smooth, thick paste. Scrape down the sides of the jar, cover loosely (a lid slightly ajar or cheesecloth secured with a rubber band works well), and let it sit at room temperature (around 70-75°F) for 24 hours.
- Day 2: Feeding Time! Discard about half of the starter. Add another 50g of rye flour and 50g of lukewarm water to the remaining starter. Mix well, scrape down the sides, cover loosely, and let it sit at room temperature for another 24 hours.
- Day 3-7 (or until active): Continued Feedings: Repeat the feeding process from Day 2 every 12-24 hours. You should start to see signs of activity bubbles forming, the starter rising and falling. The time it takes for the starter to become active depends on the temperature and the flour you’re using. An active starter will roughly double in size within 4-8 hours after feeding.
- Determining Readiness: Your starter is ready to use when it consistently doubles in size within 4-8 hours after feeding, has a pleasant, slightly sour aroma (not an unpleasant, vinegary smell), and is full of bubbles. If it smells like acetone (nail polish remover), it needs more feedings.
- Prepare the Soaker:
- Combine 100g of cracked or whole rye berries and 200g of boiling water in a heat-proof bowl.
- Cover tightly with plastic wrap or a lid. Let it sit at room temperature for at least 4 hours, or preferably overnight (up to 12 hours).
- Make the Main Dough:
- In a large mixing bowl (or the bowl of your stand mixer), combine the entire rye starter and the entire soaker (including any remaining water). Mix well to combine.
- Add 200g of rye flour, 300g of bread flour, 150g of lukewarm water, 15g of salt, 15g of molasses (if using), and 1 tbsp of caraway seeds (if using) to the bowl.
- If using a stand mixer, use the dough hook attachment and mix on low speed for 8-10 minutes. If mixing by hand, knead the dough on a lightly floured surface for 10-15 minutes.
- Adjust Hydration (If Needed): If the dough seems too dry and stiff, add a tablespoon of water at a time until it becomes more manageable. If the dough is excessively sticky and unworkable, add a tablespoon of bread flour at a time.
- Bulk Fermentation (First Rise):
- Lightly grease a large bowl with oil. Place the dough in the bowl and turn it to coat all sides with oil.
- Cover the bowl tightly with plastic wrap or a lid. Let the dough rise at room temperature (around 70-75°F) for 2-3 hours, or until it has increased in size by about 50-75%.
- Perform a Fold (Optional): After the first hour of fermentation, you can perform a fold to strengthen the dough. Gently stretch one side of the dough upwards and fold it over the center. Repeat with the other three sides.
- Shaping the Dough:
- Gently deflate the dough by pressing down on it lightly.
- On a lightly floured surface, shape the dough into a round or oval loaf.
- Place in a Banneton or Loaf Pan: If using a banneton (proofing basket), dust it generously with rye flour or a mixture of rye flour and rice flour. Place the shaped loaf seam-side up in the banneton. If using a loaf pan, grease it well with butter or oil. Place the shaped loaf in the loaf pan.
- Proofing (Second Rise):
- Cover the banneton or loaf pan with plastic wrap or a clean kitchen towel. Let the dough proof at room temperature for 1-2 hours, or until it has increased in size by about 25-50%.
- Check for Readiness: To check if the dough is ready to bake, gently poke it with your finger. If the indentation slowly springs back, it’s ready. If the indentation springs back immediately, it needs more time. If the indentation doesn’t spring back at all, it’s over-proofed.
- Baking the Rye Bread:
- Preheat your oven to 450°F (232°C) with a Dutch oven inside. If you don’t have a Dutch oven, you can use a baking stone or baking sheet and create steam by placing a pan of hot water on the bottom rack of the oven.
- If using a banneton, carefully invert the loaf onto a piece of parchment paper. Score the top of the loaf with a sharp knife or lame. If using a loaf pan, no scoring is necessary.
- Carefully remove the hot Dutch oven from the oven. Using the parchment paper as a sling,
Notes
- Rye flour doesn’t develop gluten in the same way as wheat flour, so don’t expect a perfectly smooth and elastic dough.
- Rye flour can vary in its absorbency, so you might need to adjust the amount of water.
- Rye dough doesn’t typically double in size like wheat dough, so don’t expect it to get that big during bulk fermentation or proofing.
- The Dutch oven helps to create a steamy environment, which is essential for a good crust.


Leave a Comment