
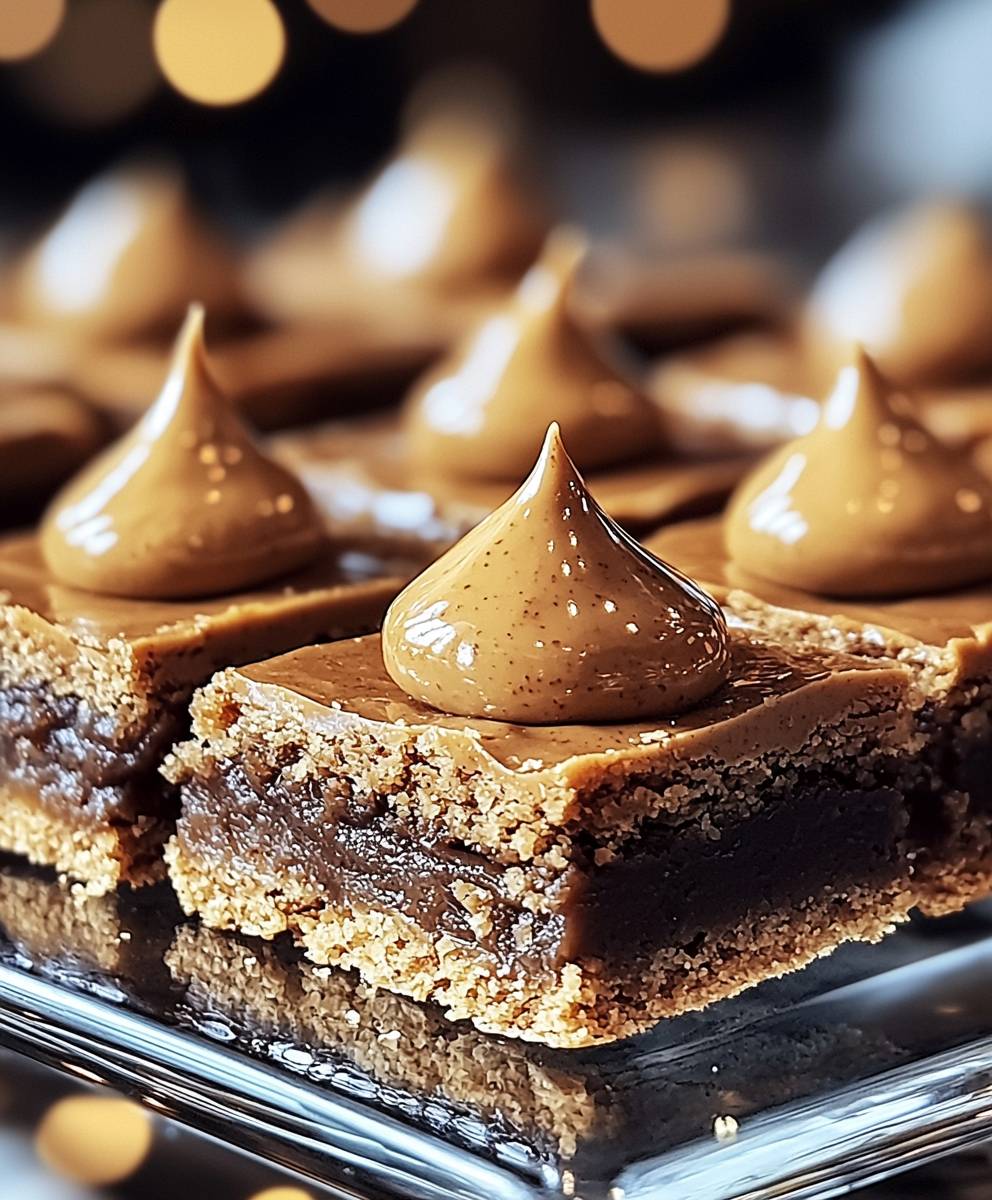
Peanut Butter Blossom Bars: Is there anything that screams “holiday baking” quite like these delightful treats? I think not! These aren’t just cookies; they’re a nostalgic trip back to childhood, a symbol of festive gatherings, and a guaranteed crowd-pleaser at any potluck. The combination of peanut butter and chocolate is a classic for a reason, and these bars elevate that pairing to a whole new level of deliciousness.
While the exact origins of the Peanut Butter Blossom cookie (the bar’s predecessor) are debated, it’s widely believed that they gained popularity in the 1950s, thanks to a Pillsbury Bake-Off contest. The simplicity and satisfying flavor profile quickly made them a staple in American households, especially during the holiday season. The bar version simply takes that beloved cookie and transforms it into an even easier-to-make, shareable dessert.
People adore Peanut Butter Blossom Bars for their perfect balance of textures and tastes. The soft, chewy peanut butter base provides a comforting warmth, while the Hershey’s Kiss adds a burst of rich, melty chocolate. They’re incredibly easy to make, requiring minimal ingredients and effort, making them perfect for busy bakers or those new to the kitchen. Plus, who can resist that iconic chocolate kiss perched atop each square? Get ready to experience a symphony of flavors and textures that will have everyone reaching for seconds (and thirds!).

Ingredients:
- 1 cup (2 sticks) unsalted butter, softened
- 1 cup creamy peanut butter
- 1 cup granulated sugar
- 1 cup packed brown sugar
- 2 large eggs
- 1 teaspoon vanilla extract
- 3 cups all-purpose flour
- 1 teaspoon baking soda
- 1/2 teaspoon baking powder
- 1/4 teaspoon salt
- Approximately 48 milk chocolate candy kisses, unwrapped
- Granulated sugar, for rolling
Preparing the Dough:
Alright, let’s get started! First things first, we need to cream together the butter and peanut butter. Make sure your butter is nice and soft it’ll make this process so much easier. If you forgot to take it out of the fridge (we’ve all been there!), you can microwave it for a few seconds, but be careful not to melt it!
- In a large bowl (or the bowl of your stand mixer), cream together the softened butter and peanut butter until light and fluffy. This usually takes about 2-3 minutes. You want it to be nice and smooth, with no lumps of butter.
- Gradually add the granulated sugar and brown sugar, beating until well combined. Scrape down the sides of the bowl as needed to ensure everything is incorporated evenly. The mixture should be light and fluffy.
- Beat in the eggs one at a time, mixing well after each addition. Again, scrape down the sides of the bowl to make sure everything is evenly mixed.
- Stir in the vanilla extract. Vanilla adds such a lovely warmth to these cookies!
Combining Dry and Wet Ingredients:
Now for the dry ingredients! This is where we’ll bring everything together to form our cookie dough.
- In a separate medium bowl, whisk together the flour, baking soda, baking powder, and salt. Whisking helps to evenly distribute the baking soda and baking powder, which is crucial for getting that perfect cookie texture.
- Gradually add the dry ingredients to the wet ingredients, mixing on low speed until just combined. Be careful not to overmix! Overmixing can lead to tough cookies. Mix until the flour is just incorporated, and then stop.
- The dough will be quite thick, which is exactly what we want. This helps the cookies hold their shape while baking.
Shaping and Baking the Cookies:
Time to get our hands dirty! This is the fun part where we shape the cookies and get them ready for the oven.
- Preheat your oven to 375°F (190°C). Line baking sheets with parchment paper. Parchment paper is your best friend when it comes to baking cookies it prevents sticking and makes cleanup a breeze.
- Place some granulated sugar in a small bowl. This is for rolling the cookie dough balls in.
- Roll the dough into 1-inch balls. I like to use a small cookie scoop to ensure they’re all the same size. This helps them bake evenly.
- Roll each ball in the granulated sugar, coating it completely. The sugar adds a lovely sweetness and a slightly crunchy texture to the outside of the cookies.
- Place the sugared cookie dough balls onto the prepared baking sheets, leaving about 2 inches between each cookie. They will spread a little during baking.
- Bake for 8-10 minutes, or until the edges are lightly golden brown. Keep a close eye on them, as baking times can vary depending on your oven. You want them to be just set, but not overly browned.
- Remove the baking sheets from the oven and immediately press a milk chocolate candy kiss into the center of each cookie. Press down gently but firmly, so the kiss adheres to the cookie.
- Let the cookies cool on the baking sheets for a few minutes before transferring them to a wire rack to cool completely. This prevents them from breaking apart while they’re still warm and soft.
Tips and Tricks for Perfect Peanut Butter Blossom Bars:
Here are a few extra tips to ensure your Peanut Butter Blossom Bars are absolutely perfect:
- Use room temperature ingredients: This is especially important for the butter and eggs. Room temperature ingredients blend together more easily, resulting in a smoother dough and a better cookie texture.
- Don’t overmix the dough: Overmixing develops the gluten in the flour, which can lead to tough cookies. Mix until the flour is just incorporated, and then stop.
- Chill the dough (optional): If you have time, chilling the dough for 30 minutes to an hour can help prevent the cookies from spreading too much during baking. This is especially helpful if your kitchen is warm.
- Use a cookie scoop: A cookie scoop ensures that all your cookies are the same size, which helps them bake evenly.
- Don’t overbake: Overbaked cookies will be dry and crumbly. Bake until the edges are lightly golden brown, and the centers are just set.
- Press the kisses in immediately: Press the chocolate kisses into the cookies as soon as they come out of the oven. This will help them adhere to the cookies and prevent them from melting too much.
- Store properly: Store the cooled cookies in an airtight container at room temperature. They will stay fresh for several days.
Variations and Substitutions:
Want to mix things up a bit? Here are some fun variations and substitutions you can try:
- Different types of peanut butter: Try using crunchy peanut butter for added texture, or a flavored peanut butter like chocolate or honey peanut butter for a unique twist.
- Different types of chocolate kisses: Experiment with different flavors of chocolate kisses, such as dark chocolate, caramel-filled, or even peppermint kisses during the holidays.
- Add sprinkles: Before baking, sprinkle the sugared cookie dough balls with colorful sprinkles for a festive touch.
- Use different extracts: Try using almond extract instead of vanilla extract for a slightly different flavor profile.
- Make them gluten-free: Substitute the all-purpose flour with a gluten-free all-purpose flour blend. Be sure to use a blend that contains xanthan gum, as this will help bind the dough together.
- Add chocolate chips: Stir in some chocolate chips (milk chocolate, dark chocolate, or white chocolate) to the dough for an extra dose of chocolatey goodness.
- Make them vegan: Substitute the butter with a vegan butter alternative, the eggs with flax eggs (1 tablespoon of ground flaxseed mixed with 3 tablespoons of water per egg), and ensure your chocolate kisses are vegan-friendly.
Troubleshooting:
Sometimes things don’t go exactly as planned. Here are some common problems and how to fix them:
- Cookies are spreading too much: This could be due to several factors, such as using too much butter, not chilling the dough, or baking at too low of a temperature. Try chilling the dough for 30 minutes to an hour before baking, and make sure your oven is properly preheated.
- Cookies are dry and crumbly: This could be due to overbaking, using too much flour, or not enough butter. Be careful not to overbake the cookies, and make sure you’re measuring your ingredients accurately.
- Cookies are tough: This is usually caused by overmixing the dough. Mix until the flour is just incorporated, and then stop.
- Chocolate kisses are melting too much: Make sure you’re pressing the kisses into the cookies immediately after they come out of the oven. If they’re still melting too much, try chilling the cookies for a few minutes before pressing in the kisses.
- Cookies are sticking to the baking sheet: Always use parchment paper or a silicone baking mat to prevent sticking.
Serving Suggestions:
Peanut Butter Blossom Bars are perfect for any occasion! Here are some serving suggestions:
- Serve them as a dessert at parties, potlucks, or holiday gatherings.
- Pack them in lunchboxes for a sweet treat.
- Enjoy them with a glass of milk or a cup of coffee.
- Give them as gifts to friends and family.
- Serve them warm with a scoop of vanilla ice cream for an extra decadent dessert.
I hope you enjoy making these Peanut Butter Blossom Bars as much as I do! They’re a classic for a reason they’re easy to make, delicious, and always a crowd-pleaser. Happy baking!
Conclusion:
And there you have it! These Peanut Butter Blossom Bars are truly a must-try for anyone who loves the classic peanut butter and chocolate combination. They’re incredibly easy to make, surprisingly impressive to serve, and utterly irresistible to eat. The soft, chewy peanut butter base perfectly complements the rich, melty chocolate kiss, creating a symphony of flavors and textures that will have everyone reaching for seconds (and thirds!). But what truly sets these bars apart is their versatility. While they’re fantastic as is, there are so many ways to customize them to your liking. Feeling adventurous? Try using different flavors of chocolate kisses! Dark chocolate, caramel-filled, or even mint chocolate kisses would all be delicious variations. You could also experiment with adding chopped nuts, like peanuts or pecans, to the peanut butter dough for extra crunch and flavor. For serving suggestions, these bars are perfect for just about any occasion. They’re a delightful addition to a holiday dessert platter, a welcome treat at a potluck, or simply a sweet indulgence to enjoy with a cup of coffee or tea. I personally love serving them slightly chilled, as it enhances the chewy texture and allows the chocolate to set perfectly. You can also cut them into smaller squares for bite-sized treats, ideal for parties or snacking. If you’re looking to elevate your presentation, consider drizzling melted chocolate over the finished bars or sprinkling them with sea salt for a touch of sophistication. A dusting of powdered sugar also adds a lovely visual appeal. And for a truly decadent experience, try serving them warm with a scoop of vanilla ice cream trust me, you won’t regret it! I’ve made these Peanut Butter Blossom Bars countless times, and they’re always a crowd-pleaser. They’re the perfect balance of sweet and salty, rich and comforting, and they’re guaranteed to bring a smile to everyone’s face. The recipe is straightforward and forgiving, so even if you’re a beginner baker, you can easily achieve delicious results. So, what are you waiting for? Gather your ingredients, preheat your oven, and get ready to bake up a batch of these amazing bars. I promise you won’t be disappointed. They’re the perfect treat to share with family and friends, or to simply enjoy all by yourself (I won’t judge!). I’m so confident that you’ll love this recipe that I can’t wait to hear about your experience. Once you’ve tried it, please come back and leave a comment below, letting me know how they turned out. Did you make any variations? What did your family and friends think? I’m always eager to hear your feedback and learn from your experiences. And don’t forget to share your photos on social media using #PeanutButterBlossomBars I’d love to see your creations! Happy baking! I hope you enjoy this recipe as much as I do. Print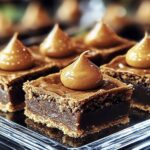
Peanut Butter Blossom Bars: The Ultimate Recipe & Baking Tips
- Total Time: 30 minutes
- Yield: 4 dozen cookies 1x
Description
Classic peanut butter cookies topped with a milk chocolate kiss. A perfect combination of peanut butter and chocolate in a soft, chewy cookie!
Ingredients
- 1 cup (2 sticks) unsalted butter, softened
- 1 cup creamy peanut butter
- 1 cup granulated sugar
- 1 cup packed brown sugar
- 2 large eggs
- 1 teaspoon vanilla extract
- 3 cups all-purpose flour
- 1 teaspoon baking soda
- 1/2 teaspoon baking powder
- 1/4 teaspoon salt
- Approximately 48 milk chocolate candy kisses, unwrapped
- Granulated sugar, for rolling
Instructions
- Prepare: Preheat oven to 375°F (190°C). Line baking sheets with parchment paper.
- Cream Butter and Peanut Butter: In a large bowl, cream together the softened butter and peanut butter until light and fluffy (2-3 minutes).
- Add Sugars: Gradually add the granulated sugar and brown sugar, beating until well combined. Scrape down the sides of the bowl as needed.
- Add Eggs and Vanilla: Beat in the eggs one at a time, mixing well after each addition. Stir in the vanilla extract.
- Combine Dry Ingredients: In a separate medium bowl, whisk together the flour, baking soda, baking powder, and salt.
- Combine Wet and Dry: Gradually add the dry ingredients to the wet ingredients, mixing on low speed until just combined. Be careful not to overmix.
- Shape Cookies: Place some granulated sugar in a small bowl. Roll the dough into 1-inch balls.
- Roll in Sugar: Roll each ball in the granulated sugar, coating it completely.
- Bake: Place the sugared cookie dough balls onto the prepared baking sheets, leaving about 2 inches between each cookie.
- Bake for 8-10 minutes, or until the edges are lightly golden brown.
- Add Kisses: Remove the baking sheets from the oven and immediately press a milk chocolate candy kiss into the center of each cookie.
- Cool: Let the cookies cool on the baking sheets for a few minutes before transferring them to a wire rack to cool completely.
Notes
- Use room temperature ingredients for best results.
- Don’t overmix the dough.
- Chilling the dough for 30 minutes to an hour can help prevent spreading (optional).
- Press the chocolate kisses in immediately after baking.
- Store cooled cookies in an airtight container at room temperature.
- Variations: Try different types of peanut butter, chocolate kisses, extracts, or add sprinkles or chocolate chips. For gluten-free, use a gluten-free all-purpose flour blend. For vegan, substitute butter, eggs, and chocolate kisses with vegan alternatives.
- Troubleshooting: If cookies are spreading too much, chill the dough. If they are dry, don’t overbake. If they are tough, don’t overmix.
- Prep Time: 20 minutes
- Cook Time: 8 minutes
Leave a Comment