
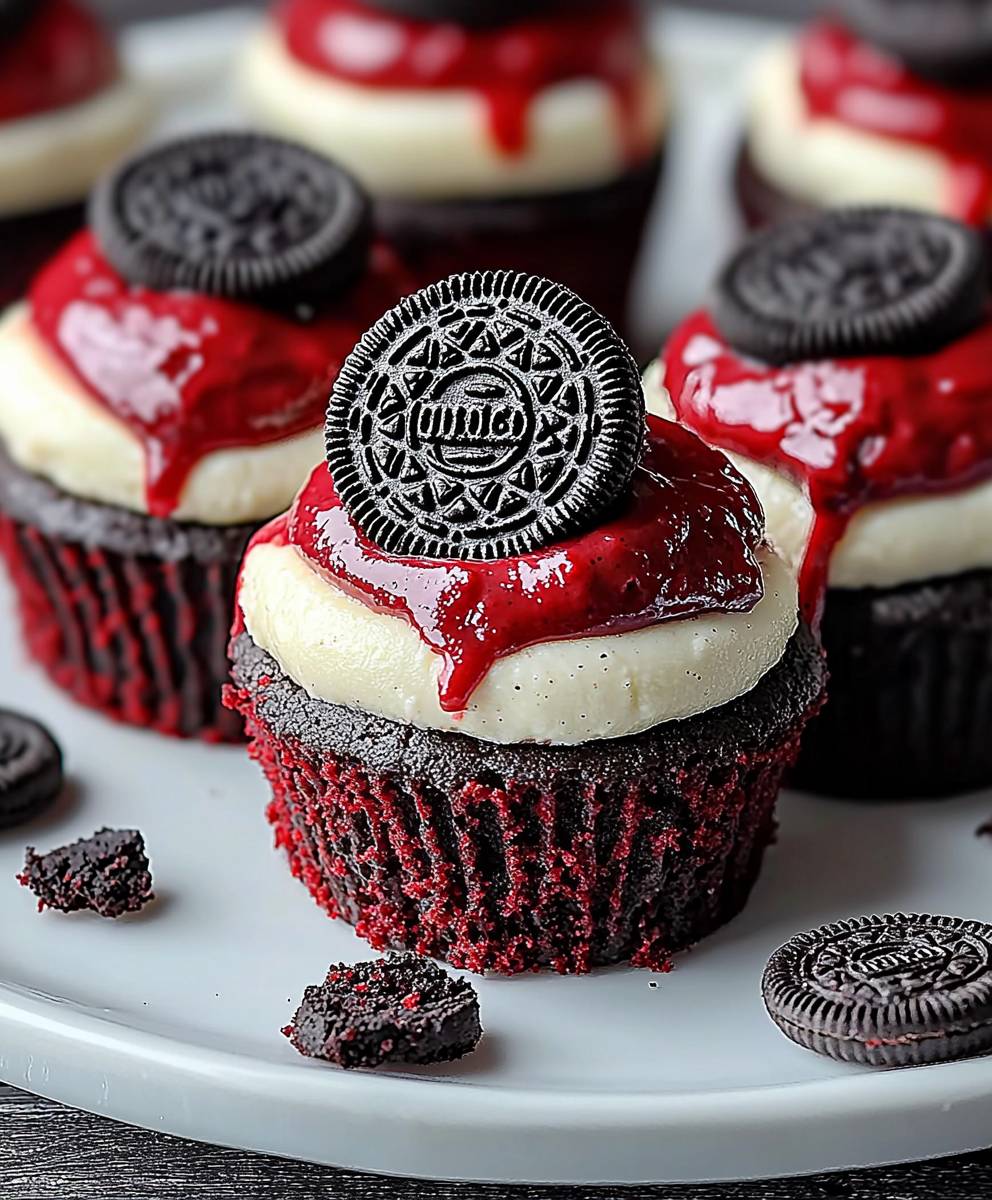
Oreo Red Velvet Cheesecake: Prepare to be amazed! Imagine the tangy, creamy perfection of a classic cheesecake, swirled with the vibrant, subtly chocolatey flavor of red velvet cake, and then, for the ultimate indulgence, studded with chunks of everyone’s favorite cookie Oreos. This isn’t just dessert; it’s an experience.
The red velvet flavor itself has a fascinating history, rumored to have originated in the South during the Depression era, where cooks used beet juice to enhance the color and moisture of their cakes. Over time, the vibrant red hue became synonymous with luxury and celebration. Combining this rich history with the universally loved Oreo cookie and the timeless appeal of cheesecake creates a dessert that’s both familiar and excitingly new.
What makes this Oreo Red Velvet Cheesecake so irresistible? It’s the perfect balance of textures the smooth, velvety cheesecake filling, the slightly crumbly red velvet cake, and the satisfying crunch of the Oreo cookies. The taste is equally captivating, a delightful dance between the tangy cream cheese, the subtle cocoa notes of the red velvet, and the sweet, chocolatey goodness of the Oreos. Plus, while it looks impressive, this recipe is surprisingly straightforward, making it perfect for both special occasions and satisfying your everyday sweet cravings. Get ready to wow your friends and family with this show-stopping dessert!

Ingredients:
- For the Oreo Crust:
- 36 Oreo cookies (Red Velvet flavor, if available, otherwise regular Oreos work great!), finely crushed
- 6 tablespoons (85g) unsalted butter, melted
- For the Cheesecake Filling:
- 32 ounces (900g) cream cheese, softened to room temperature
- 1 1/2 cups (300g) granulated sugar
- 1 cup (240ml) sour cream, at room temperature
- 1 teaspoon vanilla extract
- 1/2 teaspoon red food coloring (gel food coloring recommended for vibrant color)
- 4 large eggs, at room temperature
- 1/4 cup (30g) all-purpose flour
- 6 Red Velvet Oreo cookies, coarsely chopped (for swirling into the filling)
- For the Red Velvet Swirl (Optional, but highly recommended!):
- 4 ounces (113g) cream cheese, softened
- 1/4 cup (50g) granulated sugar
- 1/4 teaspoon vanilla extract
- 1/4 teaspoon red food coloring (gel food coloring recommended)
- 2 tablespoons milk
- For the Garnish (Optional):
- Whipped cream
- Crushed Red Velvet Oreo cookies
- Fresh raspberries or strawberries
Preparing the Oreo Crust:
- Crush the Oreos: The first step is to get those Oreos crushed! You can use a food processor for a super fine crumb, or place them in a large zip-top bag and crush them with a rolling pin. I personally prefer the food processor because it’s quicker and more consistent. Make sure to remove the cream filling before crushing if you want a less sweet crust.
- Combine with Butter: In a medium bowl, combine the crushed Oreo crumbs with the melted butter. Mix well until the crumbs are evenly moistened and resemble wet sand. This is what will hold your crust together.
- Press into Pan: Press the Oreo mixture firmly and evenly into the bottom of a 9-inch springform pan. I like to use the bottom of a measuring cup to really pack it down. Make sure the crust is compact and even, as this will prevent it from crumbling later.
- Pre-bake the Crust (Optional): For a sturdier crust, you can pre-bake it in a preheated oven at 350°F (175°C) for about 8-10 minutes. This helps to set the crust and prevent it from becoming soggy. Let the crust cool completely before adding the filling. If you skip this step, just make sure your cheesecake is well-chilled before slicing.
Making the Cheesecake Filling:
- Cream the Cream Cheese: In a large bowl (or the bowl of a stand mixer), beat the softened cream cheese with an electric mixer until smooth and creamy. This is a crucial step you want to make sure there are no lumps! Scrape down the sides of the bowl as needed.
- Add Sugar: Gradually add the granulated sugar to the cream cheese, beating until well combined and smooth. Again, scrape down the sides of the bowl to ensure everything is evenly mixed.
- Incorporate Sour Cream and Vanilla: Add the sour cream and vanilla extract to the mixture and beat until just combined. Be careful not to overmix at this stage, as overmixing can incorporate too much air and cause the cheesecake to crack.
- Add Red Food Coloring: Add the red food coloring (gel food coloring is recommended for a more vibrant color) and mix until the filling is evenly colored. Start with a small amount and add more until you reach your desired shade of red.
- Add Flour: Sprinkle the all-purpose flour over the filling and mix until just combined. The flour helps to stabilize the cheesecake and prevent it from cracking.
- Incorporate Eggs: Add the eggs one at a time, beating well after each addition. Again, be careful not to overmix. Overmixing can lead to a cracked cheesecake.
- Fold in Oreo Pieces: Gently fold in the coarsely chopped Red Velvet Oreo cookies. This adds a delicious textural element and reinforces the Red Velvet flavor.
Creating the Red Velvet Swirl (Optional):
- Combine Ingredients: In a small bowl, combine the softened cream cheese, granulated sugar, vanilla extract, red food coloring, and milk.
- Mix Until Smooth: Beat with an electric mixer until smooth and creamy.
Assembling and Baking the Cheesecake:
- Pour Filling into Crust: Pour the cheesecake filling into the prepared Oreo crust, spreading it evenly.
- Add Red Velvet Swirl (Optional): If you’re making the Red Velvet swirl, drop spoonfuls of the swirl mixture over the top of the cheesecake filling. Use a knife or skewer to gently swirl the mixture into the filling, creating a marbled effect. Be careful not to over-swirl, as this can muddy the colors.
- Bake in a Water Bath: This is the key to a creamy, crack-free cheesecake! Wrap the bottom of the springform pan tightly with heavy-duty aluminum foil (at least two layers) to prevent water from seeping in. Place the wrapped pan in a larger roasting pan. Pour hot water into the roasting pan until it reaches about halfway up the sides of the springform pan.
- Baking Time: Bake in a preheated oven at 325°F (160°C) for 70-80 minutes, or until the edges of the cheesecake are set but the center still has a slight jiggle. The jiggle is important it means the cheesecake is perfectly cooked and will set up beautifully as it cools.
- Cooling Process: Turn off the oven and crack the oven door slightly. Let the cheesecake cool in the oven for 1 hour. This gradual cooling process helps to prevent cracking.
- Refrigerate: Remove the cheesecake from the water bath and let it cool completely on a wire rack. Once cooled, cover the cheesecake with plastic wrap and refrigerate for at least 6 hours, or preferably overnight. This allows the cheesecake to fully set and develop its flavor.
Serving and Garnish:
- Remove from Pan: Before serving, carefully remove the cheesecake from the springform pan. Run a thin knife around the edges of the cheesecake to loosen it from the pan.
- Garnish (Optional): Decorate the cheesecake with whipped cream, crushed Red Velvet Oreo cookies, and fresh raspberries or strawberries. Get creative and have fun with it!
- Slice and Serve: Slice the cheesecake with a sharp knife and serve chilled. Enjoy!
Tips for Success:
- Room Temperature Ingredients: Using room temperature cream cheese and eggs is crucial for a smooth and creamy cheesecake. Cold ingredients can cause lumps and affect the texture.
- Don’t Overmix: Overmixing the cheesecake filling can incorporate too much air, which can lead to cracking during baking. Mix until just combined.
- Water Bath: The water bath is essential for a creamy, crack-free cheesecake. It provides a gentle and even heat that prevents the cheesecake from drying out and cracking.
- Cooling Process: The gradual cooling process in the oven helps to prevent cracking. Don’t skip this step!
- Chilling Time: Chilling the cheesecake for at least 6 hours, or preferably overnight, allows it to fully set and develop its flavor.
- Variations: Feel free to experiment with different flavors and toppings. You can use different types of Oreo cookies, add chocolate chips to the filling, or top the cheesecake with a chocolate ganache.
- Storage: Store leftover cheesecake in the refrigerator for up to 5 days.
Troubleshooting:
- Cracked Cheesecake: If your cheesecake cracks, don’t worry! It will still taste delicious. You can cover the cracks with whipped cream or frosting. To prevent cracking in the future, make sure to use a water bath, don’t overmix the filling, and cool the cheesecake gradually.
- Soggy Crust: To prevent a soggy crust, pre-bake it for a few minutes before adding the filling. You can also brush the crust with melted chocolate to create a moisture barrier.
- Lumpy Filling: If your filling is lumpy, it’s likely because the cream cheese wasn’t softened enough. Make sure to bring the cream cheese to room temperature before using it. You can
Conclusion:
So, there you have it! This Oreo Red Velvet Cheesecake is more than just a dessert; it’s an experience. From the vibrant red hue to the creamy, decadent filling and the satisfying crunch of the Oreo crust, every bite is a symphony of flavors and textures. I truly believe this cheesecake is a must-try for any baking enthusiast or anyone simply looking to impress their friends and family with a show-stopping dessert. Why is it a must-try? Because it’s surprisingly easy to make! Don’t let the “cheesecake” label intimidate you. I’ve broken down each step to be as clear and concise as possible, ensuring even beginner bakers can achieve cheesecake perfection. Plus, the combination of red velvet and Oreo is simply irresistible. It’s a classic pairing with a fun, modern twist. The tanginess of the cream cheese perfectly complements the sweetness of the red velvet and the chocolatey goodness of the Oreos. It’s a flavor explosion in every slice! But the best part? It’s incredibly versatile! While I’ve presented my favorite version, feel free to get creative and experiment with variations. For a more intense red velvet flavor, you could add a tablespoon of cocoa powder to the filling. If you’re not a fan of Oreos (gasp!), you could substitute them with chocolate graham crackers or even a different type of cookie. Serving Suggestions and Variations: * Classic Slice: Serve chilled with a dollop of whipped cream and a sprinkle of Oreo crumbs. * Berry Bliss: Top with fresh raspberries or strawberries for a burst of fruity flavor. * Chocolate Overload: Drizzle with melted chocolate ganache for an extra decadent treat. * Mini Cheesecakes: Bake the batter in muffin tins for individual mini cheesecakes, perfect for parties. * Red Velvet Parfaits: Layer crumbled cheesecake with whipped cream and berries in a glass for a stunning parfait. * Holiday Twist: For the holidays, add a touch of peppermint extract to the filling and garnish with crushed candy canes. I’m confident that this Oreo Red Velvet Cheesecake will become a new favorite in your household. It’s perfect for birthdays, holidays, or any occasion that calls for a special treat. Its also a great way to show off your baking skills and impress your guests. Imagine the looks on their faces when you present this stunning dessert! So, what are you waiting for? Gather your ingredients, preheat your oven, and get ready to embark on a cheesecake adventure! I promise you won’t regret it. And most importantly, have fun! Baking should be a joyful experience, so relax, put on some music, and enjoy the process. I can’t wait to hear about your experience making this Oreo Red Velvet Cheesecake. Did you try any variations? Did you add any special touches? Share your photos and stories in the comments below! I’m always eager to see your creations and learn from your experiences. Happy baking! Let me know how yours turns out. I’m sure it will be amazing! Print
Oreo Red Velvet Cheesecake: The Ultimate Dessert Recipe
- Total Time: 420 minutes
- Yield: 12 servings 1x
Description
Decadent Red Velvet Oreo Cheesecake with a creamy filling, Oreo crust, and optional red velvet swirl. A show-stopping dessert perfect for any occasion.
Ingredients
- 36 Oreo cookies (Red Velvet flavor preferred, or regular), finely crushed
- 6 tablespoons (85g) unsalted butter, melted
- 32 ounces (900g) cream cheese, softened
- 1 1/2 cups (300g) granulated sugar
- 1 cup (240ml) sour cream, at room temperature
- 1 teaspoon vanilla extract
- 1/2 teaspoon red food coloring (gel recommended)
- 4 large eggs, at room temperature
- 1/4 cup (30g) all-purpose flour
- 6 Red Velvet Oreo cookies, coarsely chopped
- 4 ounces (113g) cream cheese, softened
- 1/4 cup (50g) granulated sugar
- 1/4 teaspoon vanilla extract
- 1/4 teaspoon red food coloring (gel recommended)
- 2 tablespoons milk
- Whipped cream
- Crushed Red Velvet Oreo cookies
- Fresh raspberries or strawberries
Instructions
- Crush the Oreos finely using a food processor or in a zip-top bag with a rolling pin.
- In a medium bowl, combine crushed Oreos with melted butter until evenly moistened.
- Press the mixture firmly into the bottom of a 9-inch springform pan.
- (Optional) Pre-bake the crust at 350°F (175°C) for 8-10 minutes. Let cool completely.
- Beat softened cream cheese until smooth.
- Gradually add sugar, beating until well combined.
- Incorporate sour cream and vanilla extract until just combined.
- Add red food coloring and mix until evenly colored.
- Sprinkle in flour and mix until just combined.
- Add eggs one at a time, beating well after each addition.
- Gently fold in chopped Red Velvet Oreo cookies.
- In a small bowl, combine softened cream cheese, sugar, vanilla extract, red food coloring, and milk.
- Beat until smooth and creamy.
- Pour cheesecake filling into the prepared Oreo crust.
- If using the swirl, drop spoonfuls of the red velvet mixture over the filling and gently swirl with a knife or skewer.
- Wrap the bottom of the springform pan tightly with heavy-duty aluminum foil.
- Place the wrapped pan in a larger roasting pan and pour hot water into the roasting pan until it reaches halfway up the sides of the springform pan.
- Bake at 325°F (160°C) for 70-80 minutes, or until the edges are set but the center still has a slight jiggle.
- Turn off the oven and crack the oven door slightly. Let the cheesecake cool in the oven for 1 hour.
- Remove from the water bath and let cool completely on a wire rack.
- Cover with plastic wrap and refrigerate for at least 6 hours, or preferably overnight.
- Carefully remove the cheesecake from the springform pan.
- Garnish with whipped cream, crushed Oreo cookies, and fresh berries (optional).
- Slice and serve chilled.
Notes
- Use room temperature cream cheese and eggs for a smooth filling.
- Don’t overmix the filling to prevent cracking.
- The water bath is essential for a creamy, crack-free cheesecake.
- Cool the cheesecake gradually in the oven to prevent cracking.
- Chill the cheesecake for at least 6 hours to allow it to fully set.
- Feel free to experiment with different flavors and toppings.
- Store leftover cheesecake in the refrigerator for up to 5 days.
- Prep Time: 30 minutes
- Cook Time: 70 minutes


Leave a Comment