
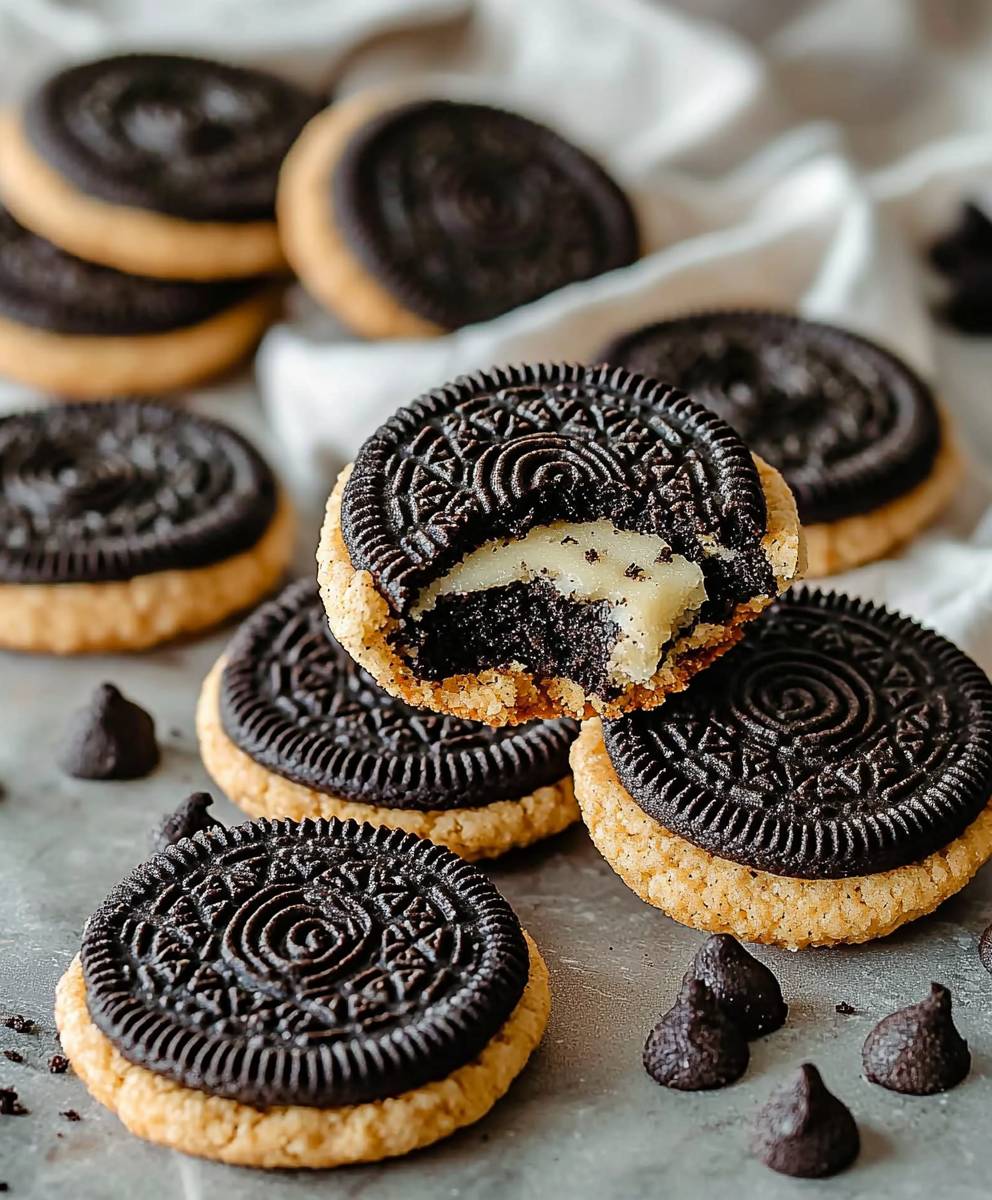
Oreo Cookies Bakery Style: Prepare to unlock a new level of cookie indulgence! Forget everything you thought you knew about those classic sandwich cookies because we’re about to embark on a baking adventure that will transform them into something truly extraordinary. Imagine biting into a deeply chocolatey, slightly chewy, and intensely flavorful cookie that cradles a creamy, dreamy filling. That’s precisely what awaits you with this recipe.
While the original Oreo, a creation of Nabisco, has been a beloved treat for over a century, inspiring countless variations and imitations, this bakery-style version takes the familiar flavors and elevates them to gourmet status. We’re talking about a cookie that rivals anything you’d find in a high-end patisserie. What makes these Oreo Cookies Bakery Style so irresistible? It’s the perfect balance of textures and tastes. The rich, dark chocolate cookie provides a satisfying chewiness, while the sweet, vanilla-infused cream filling offers a melt-in-your-mouth sensation. Plus, let’s be honest, who can resist the nostalgic charm of an Oreo, especially when it’s been given a sophisticated makeover?
This recipe is perfect for anyone who loves to bake and wants to impress their friends and family with a truly special treat. Get ready to roll up your sleeves and create some magic in the kitchen!

Ingredients:
- For the Oreo Cookies:
- 2 cups (240g) all-purpose flour
- ¾ cup (65g) unsweetened cocoa powder, Dutch-processed preferred
- 1 ½ teaspoons baking soda
- 1 ½ teaspoons baking powder
- 1 teaspoon salt
- 1 cup (2 sticks or 226g) unsalted butter, softened
- 1 ¾ cups (350g) granulated sugar
- 2 large eggs
- 2 teaspoons vanilla extract
- For the Cream Filling:
- 1 cup (2 sticks or 226g) unsalted butter, softened
- 4 cups (480g) powdered sugar, sifted
- 2 tablespoons heavy cream
- 1 teaspoon vanilla extract
- Pinch of salt
Preparing the Oreo Cookie Dough
- Combine Dry Ingredients: In a large bowl, whisk together the flour, cocoa powder, baking soda, baking powder, and salt. Make sure everything is evenly distributed. This step is crucial for the texture and rise of your cookies. I like to whisk for at least 30 seconds to ensure there are no clumps of cocoa powder.
- Cream Butter and Sugar: In a separate large bowl (or the bowl of your stand mixer), cream together the softened butter and granulated sugar until light and fluffy. This usually takes about 3-5 minutes on medium speed. Don’t rush this step! The more air you incorporate, the lighter and more tender your cookies will be. Scrape down the sides of the bowl occasionally to ensure everything is evenly mixed.
- Add Eggs and Vanilla: Beat in the eggs one at a time, mixing well after each addition. Then, stir in the vanilla extract. Again, scrape down the sides of the bowl to make sure everything is incorporated.
- Gradually Add Dry Ingredients: Gradually add the dry ingredients to the wet ingredients, mixing on low speed until just combined. Be careful not to overmix! Overmixing can develop the gluten in the flour, resulting in tough cookies. Mix until you see no more streaks of flour.
- Chill the Dough: Divide the dough in half, flatten each half into a disc, and wrap tightly in plastic wrap. Refrigerate for at least 1 hour, or preferably 2-3 hours. This chilling time is essential! It allows the gluten to relax, prevents the cookies from spreading too much during baking, and enhances the flavor. You can even chill the dough overnight for even better results.
Baking the Oreo Cookies
- Preheat Oven and Prepare Baking Sheets: Preheat your oven to 350°F (175°C). Line baking sheets with parchment paper or silicone baking mats. Parchment paper is my go-to because it prevents sticking and makes cleanup a breeze.
- Roll Out the Dough: On a lightly floured surface, roll out one disc of dough to about ¼ inch thickness. If the dough is sticking, add a little more flour to your rolling pin and the surface.
- Cut Out Cookies: Use a 2-inch round cookie cutter (or any shape you prefer) to cut out cookies. Re-roll the scraps and cut out more cookies until all the dough is used.
- Bake the Cookies: Place the cookies on the prepared baking sheets, leaving about 1 inch of space between each cookie. Bake for 8-10 minutes, or until the edges are set and the centers are slightly soft. Don’t overbake them! They will continue to firm up as they cool.
- Cool the Cookies: Let the cookies cool on the baking sheets for a few minutes before transferring them to a wire rack to cool completely. Make sure they are completely cool before adding the filling.
Making the Cream Filling
- Cream Butter: In a large bowl (or the bowl of your stand mixer), cream the softened butter until smooth and fluffy. This usually takes about 2-3 minutes on medium speed.
- Add Powdered Sugar: Gradually add the sifted powdered sugar to the butter, mixing on low speed until combined. Sifting the powdered sugar is important to prevent lumps in your filling. I usually add it in 2-3 additions.
- Add Heavy Cream, Vanilla, and Salt: Add the heavy cream, vanilla extract, and salt, and mix on medium speed until light and fluffy. The heavy cream helps to create a smooth and creamy texture.
- Adjust Consistency: If the filling is too thick, add a little more heavy cream, one teaspoon at a time, until you reach your desired consistency. If it’s too thin, add a little more powdered sugar.
Assembling the Oreo Cookies
- Pipe or Spread Filling: Transfer the cream filling to a piping bag fitted with a round tip (or use a ziplock bag with a corner cut off). Alternatively, you can simply spread the filling onto the cookies with a knife or spatula.
- Fill the Cookies: Pipe or spread a generous amount of filling onto the flat side of one cookie.
- Top with Another Cookie: Top with another cookie, flat side down, and gently press to sandwich the filling.
- Repeat: Repeat with the remaining cookies and filling.
- Chill (Optional): For best results, chill the assembled cookies in the refrigerator for at least 30 minutes before serving. This will help the filling to firm up and prevent it from squeezing out when you bite into the cookies.
Tips for Perfect Oreo Cookies:
- Use Dutch-processed cocoa powder: It has a richer, smoother flavor and a darker color than natural cocoa powder.
- Don’t overmix the dough: Overmixing can lead to tough cookies.
- Chill the dough: Chilling the dough is essential for preventing spreading and enhancing flavor.
- Don’t overbake the cookies: Overbaked cookies will be dry and crumbly.
- Sift the powdered sugar: Sifting prevents lumps in the filling.
- Adjust the filling consistency: Add more heavy cream or powdered sugar as needed to achieve your desired consistency.
- Store the cookies in an airtight container: This will help them stay fresh.
Variations:
- Mint Oreo Cookies: Add a few drops of peppermint extract to the cream filling.
- Peanut Butter Oreo Cookies: Add a few tablespoons of peanut butter to the cream filling.
- Chocolate Oreo Cookies: Add some melted chocolate to the cookie dough.
- Different Flavored Fillings: Experiment with different extracts and flavorings in the cream filling, such as almond, lemon, or orange.
Conclusion:
So there you have it! This recipe for Oreo Cookies Bakery Style is more than just a cookie recipe; it’s an invitation to create something truly special, something that will impress your friends and family, and most importantly, satisfy your own sweet tooth. I truly believe this is a must-try for any baking enthusiast, whether you’re a seasoned pro or just starting out. The deep, dark chocolate flavor combined with the creamy, sweet filling is simply irresistible. It’s a classic for a reason, but this bakery-style version elevates it to a whole new level of deliciousness. Why is it a must-try? Because these aren’t your average store-bought Oreos. We’re talking about cookies that are richer, chewier, and bursting with intense chocolate flavor. The homemade filling is smoother and creamier, perfectly complementing the slightly bitter cookie. Plus, the satisfaction of creating these from scratch is unmatched. You know exactly what ingredients are going in, and you can customize them to your liking. But the fun doesn’t stop there! Let’s talk serving suggestions and variations. These Oreo Cookies Bakery Style are fantastic on their own, of course, but they’re also incredibly versatile. Imagine crumbling them over a bowl of vanilla ice cream for an extra decadent dessert. Or, use them as the base for a stunning Oreo cheesecake. You could even crush them and mix them into your favorite milkshake for an Oreo-flavored treat. For variations, consider adding a pinch of espresso powder to the cookie dough to enhance the chocolate flavor even further. Or, experiment with different extracts in the filling, like peppermint for a festive holiday twist or almond for a subtle nutty flavor. You could even try using different types of chocolate for the cookies, such as dark chocolate for an even more intense flavor or milk chocolate for a sweeter option. Another fun idea is to add a sprinkle of sea salt on top of the cookies before baking for a sweet and salty combination. Get creative and make them your own! Don’t be intimidated by the “bakery style” label. While they might seem fancy, these cookies are surprisingly easy to make. The recipe is straightforward, and I’ve included plenty of tips and tricks to ensure your success. Just follow the instructions carefully, and you’ll be rewarded with a batch of the most amazing Oreo cookies you’ve ever tasted. I’m so excited for you to try this recipe! I know you’re going to love it. The aroma that fills your kitchen while these are baking is simply divine, and the first bite is pure bliss. These Oreo Cookies Bakery Style are perfect for any occasion, from a casual afternoon treat to a special celebration. So, what are you waiting for? Gather your ingredients, preheat your oven, and get ready to bake some magic. I can’t wait to hear about your experience. Please, share your photos and comments with me! Let me know how they turned out, what variations you tried, and what your family and friends thought. Your feedback is invaluable, and it helps me continue to create and share delicious recipes like this one. Happy baking! I hope you enjoy these as much as I do. Print
Oreo Cookies Bakery Style: The Ultimate Guide to Homemade Perfection
- Total Time: 150 minutes
- Yield: 24–30 cookies 1x
Description
Homemade Oreo cookies with a rich, dark chocolate cookie and a sweet, creamy filling. These are even better than the store-bought version!
Ingredients
- 2 cups (240g) all-purpose flour
- ¾ cup (65g) unsweetened cocoa powder, Dutch-processed preferred
- 1 ½ teaspoons baking soda
- 1 ½ teaspoons baking powder
- 1 teaspoon salt
- 1 cup (2 sticks or 226g) unsalted butter, softened
- 1 ¾ cups (350g) granulated sugar
- 2 large eggs
- 2 teaspoons vanilla extract
- 1 cup (2 sticks or 226g) unsalted butter, softened
- 4 cups (480g) powdered sugar, sifted
- 2 tablespoons heavy cream
- 1 teaspoon vanilla extract
- Pinch of salt
Instructions
- In a large bowl, whisk together the flour, cocoa powder, baking soda, baking powder, and salt. Make sure everything is evenly distributed. Whisk for at least 30 seconds to ensure there are no clumps of cocoa powder.
- In a separate large bowl (or the bowl of your stand mixer), cream together the softened butter and granulated sugar until light and fluffy (3-5 minutes on medium speed). Scrape down the sides of the bowl occasionally.
- Beat in the eggs one at a time, mixing well after each addition. Then, stir in the vanilla extract. Scrape down the sides of the bowl.
- Gradually add the dry ingredients to the wet ingredients, mixing on low speed until just combined. Be careful not to overmix! Mix until you see no more streaks of flour.
- Divide the dough in half, flatten each half into a disc, and wrap tightly in plastic wrap. Refrigerate for at least 1 hour, or preferably 2-3 hours (or overnight).
- Preheat your oven to 350°F (175°C). Line baking sheets with parchment paper or silicone baking mats.
- On a lightly floured surface, roll out one disc of dough to about ¼ inch thickness.
- Use a 2-inch round cookie cutter (or any shape you prefer) to cut out cookies. Re-roll the scraps and cut out more cookies until all the dough is used.
- Place the cookies on the prepared baking sheets, leaving about 1 inch of space between each cookie. Bake for 8-10 minutes, or until the edges are set and the centers are slightly soft.
- Let the cookies cool on the baking sheets for a few minutes before transferring them to a wire rack to cool completely.
- In a large bowl (or the bowl of your stand mixer), cream the softened butter until smooth and fluffy (2-3 minutes on medium speed).
- Gradually add the sifted powdered sugar to the butter, mixing on low speed until combined. Add it in 2-3 additions.
- Add the heavy cream, vanilla extract, and salt, and mix on medium speed until light and fluffy.
- If the filling is too thick, add a little more heavy cream, one teaspoon at a time. If it’s too thin, add a little more powdered sugar.
- Transfer the cream filling to a piping bag fitted with a round tip (or use a ziplock bag with a corner cut off). Alternatively, you can simply spread the filling onto the cookies with a knife or spatula.
- Pipe or spread a generous amount of filling onto the flat side of one cookie.
- Top with another cookie, flat side down, and gently press to sandwich the filling.
- Repeat with the remaining cookies and filling.
- For best results, chill the assembled cookies in the refrigerator for at least 30 minutes before serving.
Notes
- Use Dutch-processed cocoa powder for a richer, smoother flavor and darker color.
- Don’t overmix the dough, as this can lead to tough cookies.
- Chilling the dough is essential for preventing spreading and enhancing flavor.
- Don’t overbake the cookies; they should be slightly soft in the center.
- Sift the powdered sugar to prevent lumps in the filling.
- Adjust the filling consistency by adding more heavy cream or powdered sugar as needed.
- Store the cookies in an airtight container to keep them fresh.
- Prep Time: 30 minutes
- Cook Time: 8 minutes


Leave a Comment