
Orange Blender Cake: Prepare to be amazed by the easiest, most flavorful cake you’ll ever bake! Forget complicated recipes and fussy techniques; this cake comes together in minutes, thanks to the magic of your blender. Imagine a citrusy aroma filling your kitchen, promising a moist, tender crumb and a burst of sunshine in every bite.
While the exact origins of blender cakes are somewhat shrouded in mystery, their popularity likely stems from a desire for simplicity and efficiency in the kitchen. This particular Orange Blender Cake recipe draws inspiration from classic citrus cakes enjoyed around the world, from the Mediterranean to the Americas, where oranges are celebrated for their vibrant flavor and health benefits. It’s a modern twist on a timeless favorite!
What makes this cake so irresistible? It’s the perfect combination of convenience and deliciousness. The blender effortlessly creates a smooth batter, ensuring a uniformly moist and tender cake. The bright, zesty orange flavor is a guaranteed crowd-pleaser, offering a refreshing sweetness that’s not overly heavy. Plus, its simplicity makes it ideal for busy weeknights or impromptu gatherings. Whether you’re a seasoned baker or a kitchen novice, this Orange Blender Cake is guaranteed to become a new favorite. Get ready to experience cake baking bliss!

Ingredients:
- 3 large oranges (about 1.5 lbs), washed well
- 3 large eggs
- 1 cup granulated sugar
- 1/2 cup vegetable oil (or light olive oil)
- 2 cups all-purpose flour
- 3 teaspoons baking powder
- Pinch of salt
- Optional: 1/2 cup chopped walnuts or pecans
- Optional: Powdered sugar for dusting
Preparing the Oranges: The Key to Flavor
Okay, let’s get started! The most important part of this cake is, of course, the oranges. We’re using the whole orange peel and all so make sure they’re washed really well. I usually give them a good scrub under warm water to remove any dirt or wax.
- Cut the oranges into smaller pieces: Roughly chop the oranges into chunks. You don’t need to be precise here, just make sure they’re small enough to fit easily into your blender. I usually quarter each orange and then cut each quarter into smaller pieces. Remove any large seeds you see. A few small seeds won’t hurt, but the big ones can be bitter.
Blending the Orange Mixture
Now for the fun part! We’re going to turn those orange pieces into a flavorful puree.
- Blend the oranges: Place the chopped oranges into your blender. Add the eggs, sugar, and oil. Blend on high speed until completely smooth. This might take a minute or two, depending on your blender. You want a completely homogenous mixture with no visible chunks of orange peel. If your blender is struggling, you can add a tablespoon or two of water to help it along, but try to avoid adding too much liquid.
- Check for smoothness: Once you think it’s smooth, stop the blender and scrape down the sides with a spatula. Give it another whirl for a few seconds to make sure everything is fully incorporated. The mixture should be a vibrant orange color and have a slightly frothy texture.
Combining Wet and Dry Ingredients
Time to bring everything together! This is where we’ll add the dry ingredients to the orange mixture.
- Prepare the dry ingredients: In a separate bowl, whisk together the flour, baking powder, and salt. Whisking helps to distribute the baking powder evenly throughout the flour, which will ensure a light and fluffy cake.
- Combine wet and dry: Gradually add the dry ingredients to the wet orange mixture. I like to add about a third of the dry ingredients at a time, mixing on low speed after each addition. Be careful not to overmix! Overmixing can develop the gluten in the flour, resulting in a tough cake. Mix just until the dry ingredients are incorporated.
- Add nuts (optional): If you’re using nuts, gently fold them into the batter at this point. I love the added texture and flavor that nuts bring to this cake. Walnuts and pecans are both great choices, but you can use any nuts you like.
Baking the Cake
Almost there! Now it’s time to bake our delicious orange cake.
- Prepare the baking pan: Preheat your oven to 350°F (175°C). Grease and flour a 9-inch round cake pan. You can also use a bundt pan if you prefer. Greasing and flouring the pan will prevent the cake from sticking and make it easier to remove after baking. Alternatively, you can use baking spray with flour.
- Pour the batter: Pour the batter into the prepared cake pan and spread it evenly.
- Bake the cake: Bake for 40-50 minutes, or until a wooden skewer inserted into the center comes out clean. The baking time will vary depending on your oven, so start checking for doneness around 40 minutes. The cake should be golden brown on top and spring back lightly when touched.
- Cool the cake: Let the cake cool in the pan for 10-15 minutes before inverting it onto a wire rack to cool completely. This will prevent the cake from sticking to the pan and breaking.
Serving and Enjoying Your Orange Blender Cake
The hardest part is over! Now you get to enjoy the fruits (pun intended!) of your labor.
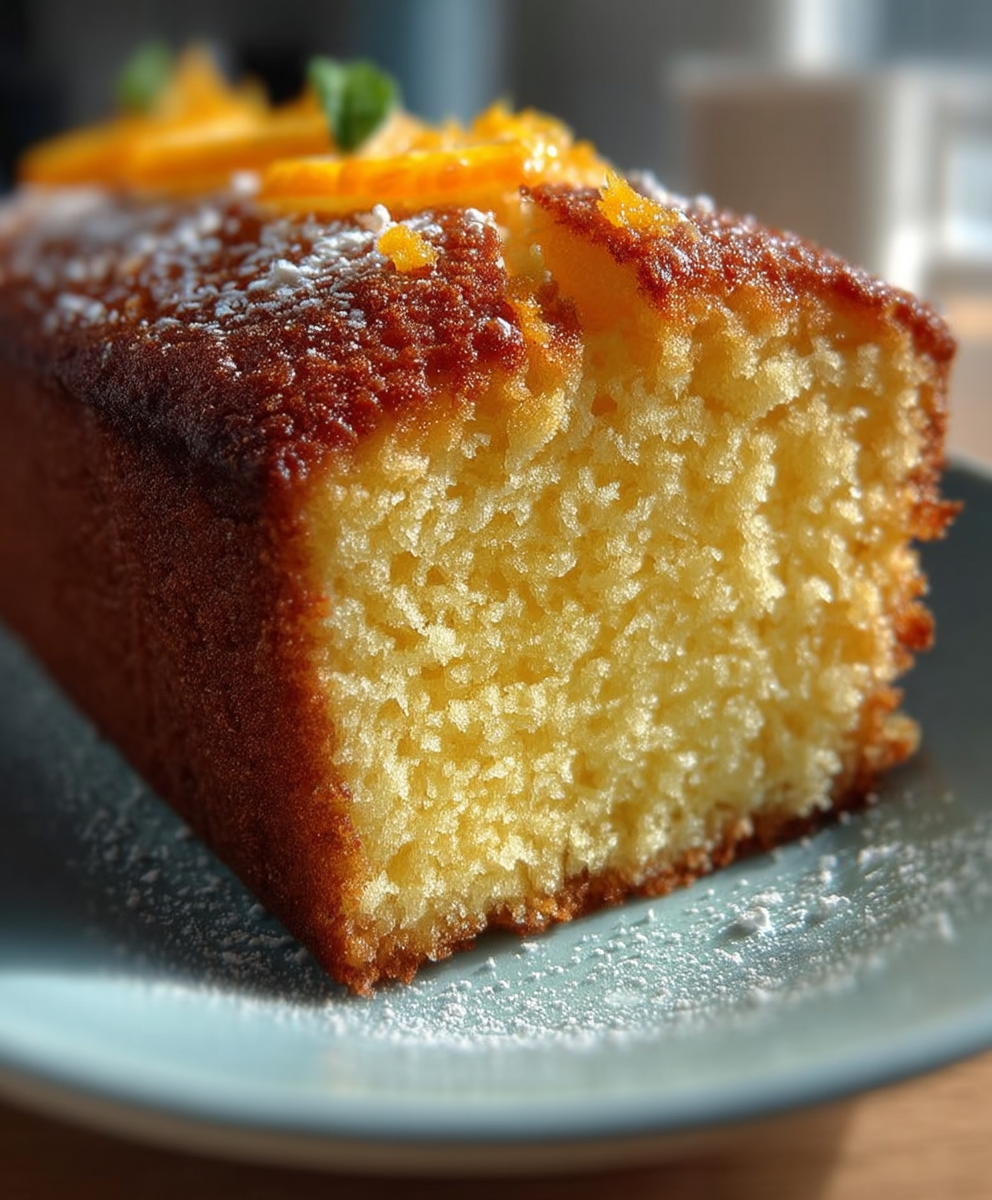
- Dust with powdered sugar (optional): Once the cake is completely cool, you can dust it with powdered sugar for a pretty presentation. This is totally optional, but it adds a nice touch.
- Slice and serve: Slice the cake and serve it with a cup of coffee or tea. It’s also delicious with a dollop of whipped cream or a scoop of vanilla ice cream.
Tips for the Perfect Orange Blender Cake
- Use good quality oranges: The flavor of this cake depends heavily on the quality of the oranges, so choose the best ones you can find. Look for oranges that are firm, heavy for their size, and have a bright, vibrant color.
- Don’t overmix the batter: Overmixing can result in a tough cake. Mix just until the dry ingredients are incorporated.
- Adjust baking time as needed: Baking times can vary depending on your oven, so start checking for doneness around 40 minutes.
- Let the cake cool completely before slicing: This will prevent the cake from crumbling.
- Store the cake properly: Store the cake in an airtight container at room temperature for up to 3 days. You can also freeze it for longer storage.
Variations and Additions
This recipe is a great starting point, but feel free to experiment with different variations and additions to make it your own!
- Add spices: A pinch of cinnamon, nutmeg, or cardamom can add a warm and cozy flavor to the cake.
- Use different citrus fruits: Try using a combination of oranges, lemons, and limes for a more complex flavor.
- Add chocolate chips: Chocolate chips are always a welcome addition to any cake!
- Make a glaze: A simple orange glaze can add extra moisture and flavor to the cake. To make a glaze, whisk together powdered sugar and orange juice until smooth.
- Add poppy seeds: Poppy seeds add a nice texture and visual appeal to the cake.
I hope you enjoy this recipe as much as I do! It’s a simple, delicious, and versatile cake that’s perfect for any occasion.
Conclusion:
This Orange Blender Cake is truly a game-changer, and I wholeheartedly believe you absolutely must try it. It’s not just a cake; it’s an experience a burst of sunshine in every bite, a testament to how simple ingredients can create something extraordinary. The ease of preparation alone makes it a winner. Forget complicated steps and endless bowls; this recipe is all about throwing everything into a blender and letting it do its magic. But beyond the convenience, it’s the flavor that truly shines. The vibrant orange zest and juice infuse every crumb with a bright, citrusy tang that’s both refreshing and comforting. It’s the kind of cake that makes you close your eyes and savor each mouthful.
Why This Cake Is a Must-Bake
Seriously, if you’re looking for a cake that’s both incredibly delicious and ridiculously easy to make, look no further. This Orange Blender Cake is perfect for any occasion, from a casual afternoon tea to a celebratory brunch. It’s also a fantastic way to use up those oranges that are sitting in your fruit bowl, just begging to be transformed into something special. And let’s be honest, who doesn’t love a cake that requires minimal cleanup? The blender does most of the work, leaving you with more time to enjoy the finished product.
Serving Suggestions and Variations
Now, let’s talk about how you can enjoy this delightful cake. It’s absolutely divine on its own, but you can also dress it up with a simple dusting of powdered sugar or a luscious orange glaze. For the glaze, just whisk together some powdered sugar with a little orange juice until you reach your desired consistency. Drizzle it over the cooled cake for an extra touch of sweetness and citrusy goodness.
If you’re feeling adventurous, you can also experiment with different variations. Try adding a handful of chopped nuts, like almonds or walnuts, to the batter for a bit of crunch. Or, for a richer flavor, incorporate a tablespoon or two of orange liqueur. You could even add a swirl of cream cheese frosting for a truly decadent treat. Another fun idea is to add a sprinkle of poppy seeds to the batter for a subtle nutty flavor and a beautiful visual appeal. Consider adding a hint of cardamom or ginger for a warm, spiced twist. The possibilities are endless! You can even use different citrus fruits like lemons or grapefruits to create unique flavor profiles. A lemon blender cake would be equally delicious!
Your Turn to Bake!
I’m so excited for you to try this recipe and experience the joy of baking (and eating!) this amazing Orange Blender Cake. It’s a recipe that I’ve made countless times, and it always brings a smile to my face. I truly believe it will become a staple in your baking repertoire as well.
So, go ahead, gather your ingredients, dust off your blender, and get ready to create something truly special. And when you do, please, please, please share your experience with me! I’d love to hear how it turned out, what variations you tried, and what your family and friends thought. You can leave a comment below, tag me on social media, or even send me an email. I can’t wait to see your creations and hear your stories. Happy baking!
Orange Blender Cake: Easy Recipe & Baking Tips
Easy, delicious whole orange blender cake made with the entire orange (peel and all!) for maximum flavor. A simple, moist cake perfect for any occasion.
Ingredients
- 3 large oranges (about 1.5 lbs), washed well
- 3 large eggs
- 1 cup granulated sugar
- 1/2 cup vegetable oil (or light olive oil)
- 2 cups all-purpose flour
- 3 teaspoons baking powder
- Pinch of salt
- 1/2 cup chopped walnuts or pecans
- Powdered sugar for dusting
Instructions
- Prepare the Oranges: Roughly chop the washed oranges into chunks, removing any large seeds.
- Blend the Orange Mixture: Place the chopped oranges into your blender. Add the eggs, sugar, and oil. Blend on high speed until completely smooth.
- Check for smoothness: Once you think it’s smooth, stop the blender and scrape down the sides with a spatula. Give it another whirl for a few seconds to make sure everything is fully incorporated.
- Prepare the dry ingredients: In a separate bowl, whisk together the flour, baking powder, and salt.
- Combine wet and dry: Gradually add the dry ingredients to the wet orange mixture, mixing on low speed after each addition. Be careful not to overmix! Mix just until the dry ingredients are incorporated.
- Add nuts (optional): If you’re using nuts, gently fold them into the batter at this point.
- Prepare the baking pan: Preheat your oven to 350°F (175°C). Grease and flour a 9-inch round cake pan.
- Pour the batter: Pour the batter into the prepared cake pan and spread it evenly.
- Bake the cake: Bake for 40-50 minutes, or until a wooden skewer inserted into the center comes out clean.
- Cool the cake: Let the cake cool in the pan for 10-15 minutes before inverting it onto a wire rack to cool completely.
- Dust with powdered sugar (optional): Once the cake is completely cool, you can dust it with powdered sugar for a pretty presentation.
- Slice and serve: Slice the cake and serve it with a cup of coffee or tea.
Notes
- Use good quality oranges for the best flavor.
- Don’t overmix the batter.
- Adjust baking time as needed based on your oven.
- Let the cake cool completely before slicing.
- Store in an airtight container at room temperature for up to 3 days, or freeze for longer storage.
- Variations: Add spices like cinnamon or nutmeg, use different citrus fruits, add chocolate chips, make an orange glaze (powdered sugar and orange juice), or add poppy seeds.


Leave a Comment