
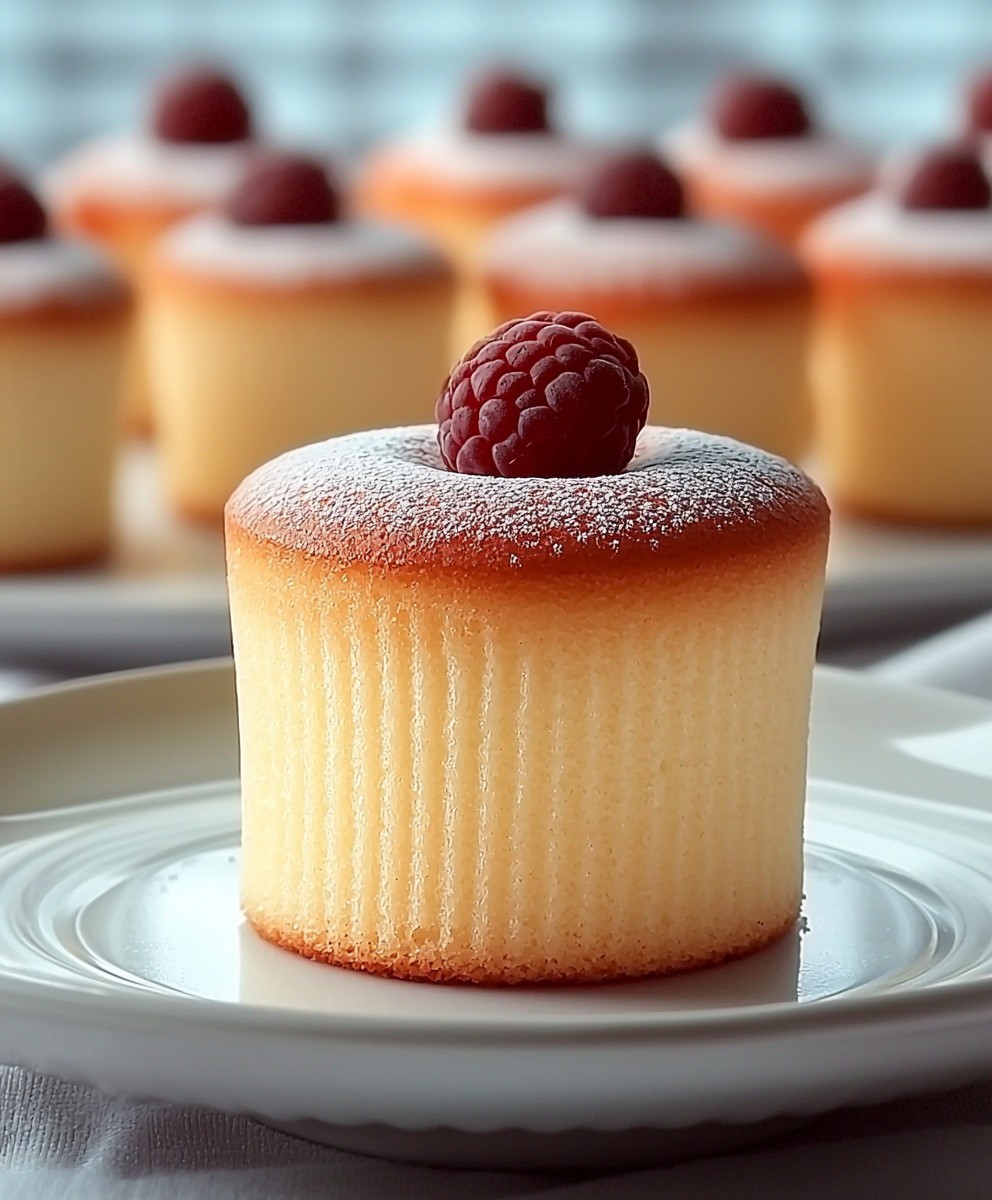
Mini Sponge Cake: Prepare to be enchanted by these delightful, bite-sized treats that are as fun to make as they are to devour! Imagine sinking your teeth into a cloud of airy sweetness, a delicate crumb that melts in your mouth, leaving you craving more. These aren’t just cakes; they’re tiny vessels of joy, perfect for afternoon tea, elegant desserts, or simply a little pick-me-up whenever you need a sweet escape.
The history of sponge cake stretches back centuries, with variations found in numerous cultures. It’s a testament to the simple elegance of eggs, sugar, and flour, transformed into something truly extraordinary. While the exact origins are debated, its enduring popularity speaks volumes about its versatility and appeal. From grand Victorian tea parties to cozy family gatherings, sponge cake has always held a special place in our hearts and on our tables.
What makes these Mini Sponge Cake so irresistible? It’s the perfect combination of light, airy texture and subtly sweet flavor. They’re incredibly versatile, lending themselves beautifully to various toppings and fillings, from fresh berries and whipped cream to decadent chocolate ganache. Plus, their miniature size makes them ideal for portion control (if you can resist eating more than one!) and incredibly convenient for serving at parties or packing in lunchboxes. So, let’s embark on this baking adventure together and create these little masterpieces that are sure to impress!

Ingredients:
- For the Sponge Cake:
- 1 cup (120g) all-purpose flour
- 1 teaspoon baking powder
- 1/4 teaspoon salt
- 4 large eggs, separated
- 3/4 cup (150g) granulated sugar, divided
- 1/4 cup (60ml) milk
- 1 teaspoon vanilla extract
- 1/4 teaspoon almond extract (optional, but adds a lovely flavor!)
- 2 tablespoons unsalted butter, melted and cooled
- For the Whipped Cream Filling:
- 1 cup (240ml) heavy cream, cold
- 2 tablespoons powdered sugar
- 1/2 teaspoon vanilla extract
- For the Optional Toppings:
- Fresh berries (strawberries, raspberries, blueberries – your choice!)
- Powdered sugar, for dusting
- Chocolate shavings
- Sprinkles (because why not?)
Preparing the Sponge Cake Batter:
- Preheat and Prep: First things first, preheat your oven to 350°F (175°C). While the oven is heating up, grease and flour your mini muffin tin. I like to use a cooking spray that contains flour for extra insurance against sticking. Make sure you get into all the nooks and crannies! Alternatively, you can use mini cupcake liners.
- Dry Ingredients: In a medium bowl, whisk together the all-purpose flour, baking powder, and salt. Whisking is important to evenly distribute the baking powder and salt throughout the flour. This ensures a light and airy cake. Set this bowl aside for now.
- Egg Yolks and Sugar: In a large bowl, whisk together the egg yolks and half of the granulated sugar (3/8 cup or 75g) until the mixture is pale yellow and slightly thickened. This usually takes about 2-3 minutes with an electric mixer. The color change indicates that you’re incorporating air and creating a stable base for the cake.
- Wet Ingredients: Add the milk, vanilla extract, and almond extract (if using) to the egg yolk mixture. Whisk until well combined.
- Combine Wet and Dry: Gradually add the dry ingredients to the wet ingredients, mixing on low speed until just combined. Be careful not to overmix! Overmixing develops the gluten in the flour, which can result in a tough cake. A few streaks of flour are okay at this point.
- Melted Butter: Gently fold in the melted and cooled butter until just combined. Make sure the butter isn’t too hot, or it could cook the egg yolks.
- Egg Whites: In a clean, grease-free bowl (this is crucial!), beat the egg whites with an electric mixer until soft peaks form. This means the peaks will curl over slightly when you lift the beaters.
- Gradually Add Sugar: Gradually add the remaining granulated sugar (3/8 cup or 75g) to the egg whites, beating until stiff, glossy peaks form. The peaks should stand straight up when you lift the beaters. Be careful not to overwhip the egg whites, or they will become dry and grainy.
- Folding: This is the most important step! Gently fold one-third of the beaten egg whites into the egg yolk mixture. This will lighten the batter and make it easier to incorporate the remaining egg whites.
- Gently Fold Remaining Whites: Gently fold in the remaining egg whites in two additions, being careful not to deflate the egg whites. Use a spatula and cut down through the center of the batter, then fold the batter over the egg whites. Rotate the bowl and repeat until just combined. Avoid stirring or overmixing.
Baking the Mini Sponge Cakes:
- Fill the Muffin Tin: Spoon the batter into the prepared mini muffin tin, filling each cup about two-thirds full. This will allow the cakes to rise without overflowing.
- Bake: Bake for 10-12 minutes, or until a toothpick inserted into the center comes out clean. The cakes should be lightly golden brown on top.
- Cool: Let the mini sponge cakes cool in the muffin tin for a few minutes before transferring them to a wire rack to cool completely. This prevents them from sticking to the tin and allows them to cool evenly.
Preparing the Whipped Cream Filling:
- Chill Everything: Make sure your heavy cream, bowl, and beaters are all well-chilled. This will help the cream whip up quickly and easily. I often put my bowl and beaters in the freezer for about 15 minutes before whipping the cream.
- Whip the Cream: In the chilled bowl, combine the heavy cream, powdered sugar, and vanilla extract. Beat with an electric mixer on medium speed until stiff peaks form. Be careful not to overwhip the cream, or it will turn into butter!
Assembling the Mini Sponge Cakes:
- Prepare the Cakes: Once the mini sponge cakes are completely cool, use a small serrated knife to carefully slice each cake in half horizontally.
- Fill with Whipped Cream: Spoon or pipe a generous amount of whipped cream onto the bottom half of each cake.
- Add Berries (Optional): If using, arrange fresh berries on top of the whipped cream.
- Top with Cake: Gently place the top half of the cake back on top of the whipped cream and berries.
- Dust with Powdered Sugar: Dust the mini sponge cakes with powdered sugar for a pretty finishing touch.
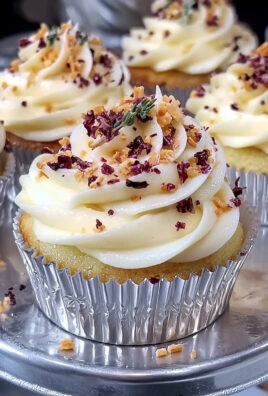
- Add Toppings (Optional): Add any other desired toppings, such as chocolate shavings or sprinkles.
- Serve: Serve immediately or chill for later. These mini sponge cakes are best enjoyed within a few hours of assembling, as the whipped cream can soften the cakes over time.
Conclusion:
And there you have it! I truly believe this mini sponge cake recipe is a must-try for anyone who loves a light, airy, and utterly delightful treat. It’s simple enough for beginner bakers, yet impressive enough to serve at a special occasion. The delicate crumb and subtle sweetness make it incredibly versatile, and the individual portions are just perfect for portion control (if you’re into that sort of thing!) or for creating an elegant dessert display. But why is it a must-try, you ask? Beyond the ease of preparation and the exquisite taste, it’s the sheer joy this little cake brings. It’s the perfect pick-me-up on a gloomy day, a delightful addition to afternoon tea, or a sweet ending to a satisfying meal. It’s a blank canvas for your culinary creativity, and I can’t wait to see what you come up with! Speaking of creativity, let’s talk serving suggestions and variations. For a classic touch, dust the cooled cakes with powdered sugar. A dollop of whipped cream and fresh berries elevates them to a truly decadent dessert. You could also try serving them with a scoop of vanilla ice cream and a drizzle of chocolate sauce. But the fun doesn’t stop there! Feel free to experiment with different flavorings. A teaspoon of lemon zest adds a bright, citrusy note. A splash of almond extract creates a sophisticated, marzipan-like flavor. You could even incorporate a tablespoon of cocoa powder for a chocolate version. For a more adventurous twist, consider filling the mini sponge cakes with pastry cream, fruit preserves, or even a light buttercream frosting. You could also create a layered dessert by slicing the cakes in half and filling them with your favorite combination of fillings. Imagine a layer of raspberry jam, a layer of whipped cream, and a sprinkle of toasted almonds the possibilities are endless! Another fun variation is to bake the batter in different shaped molds. Heart-shaped mini sponge cakes are perfect for Valentine’s Day, while star-shaped cakes are ideal for the holidays. Get creative and let your imagination run wild! I’m confident that once you try this recipe, it will become a staple in your baking repertoire. It’s a crowd-pleaser, a time-saver, and a guaranteed way to impress your friends and family. Plus, the satisfaction of creating something so delicious from scratch is simply unbeatable. So, what are you waiting for? Gather your ingredients, preheat your oven, and get ready to bake some magic! I’m so excited for you to experience the joy of making these delightful mini sponge cakes. And finally, I would absolutely love to hear about your baking adventures! Once you’ve tried the recipe, please come back and share your experience in the comments below. Let me know what variations you tried, what fillings you used, and how your cakes turned out. Your feedback is invaluable, and it helps me to improve my recipes and share even more delicious treats with the world. Happy baking! Print
Mini Sponge Cake: The Ultimate Guide to Baking Perfection
- Total Time: 42 minutes
- Yield: 24 mini sponge cakes 1x
Description
Light and airy mini sponge cakes, perfect for any occasion. Filled with homemade whipped cream and topped with fresh berries for a delightful sweet treat.
Ingredients
- 1 cup (120g) all-purpose flour
- 1 teaspoon baking powder
- 1/4 teaspoon salt
- 4 large eggs, separated
- 3/4 cup (150g) granulated sugar, divided
- 1/4 cup (60ml) milk
- 1 teaspoon vanilla extract
- 1/4 teaspoon almond extract (optional)
- 2 tablespoons unsalted butter, melted and cooled
- 1 cup (240ml) heavy cream, cold
- 2 tablespoons powdered sugar
- 1/2 teaspoon vanilla extract
- Fresh berries (strawberries, raspberries, blueberries)
- Powdered sugar, for dusting
- Chocolate shavings
- Sprinkles
Instructions
- Preheat oven to 350°F (175°C). Grease and flour a mini muffin tin (or use mini cupcake liners).
- Whisk together flour, baking powder, and salt in a medium bowl.
- In a large bowl, whisk egg yolks and half of the granulated sugar (3/8 cup or 75g) until pale yellow and slightly thickened.
- Add milk, vanilla extract, and almond extract (if using) to the egg yolk mixture. Whisk until combined.
- Gradually add dry ingredients to wet ingredients, mixing on low speed until just combined. Do not overmix.
- Gently fold in the melted and cooled butter until just combined.
- In a clean bowl, beat egg whites with an electric mixer until soft peaks form.
- Gradually add the remaining granulated sugar (3/8 cup or 75g) to the egg whites, beating until stiff, glossy peaks form.
- Gently fold one-third of the beaten egg whites into the egg yolk mixture.
- Gently fold in the remaining egg whites in two additions, being careful not to deflate the egg whites.
- Spoon batter into the prepared mini muffin tin, filling each cup about two-thirds full.
- Bake for 10-12 minutes, or until a toothpick inserted into the center comes out clean.
- Let the mini sponge cakes cool in the muffin tin for a few minutes before transferring them to a wire rack to cool completely.
- Make sure your heavy cream, bowl, and beaters are all well-chilled.
- In the chilled bowl, combine the heavy cream, powdered sugar, and vanilla extract. Beat with an electric mixer on medium speed until stiff peaks form.
- Once the mini sponge cakes are completely cool, use a small serrated knife to carefully slice each cake in half horizontally.
- Spoon or pipe a generous amount of whipped cream onto the bottom half of each cake.
- If using, arrange fresh berries on top of the whipped cream.
- Gently place the top half of the cake back on top of the whipped cream and berries.
- Dust the mini sponge cakes with powdered sugar for a pretty finishing touch.
- Add any other desired toppings, such as chocolate shavings or sprinkles.
- Serve immediately or chill for later.
Notes
- Make sure your bowl and beaters are grease-free when whipping egg whites for the best volume.
- Be careful not to overmix the batter after adding the flour to avoid a tough cake.
- Chilling the heavy cream, bowl, and beaters is essential for whipping the cream properly.
- These mini sponge cakes are best enjoyed within a few hours of assembling, as the whipped cream can soften the cakes over time.
- Prep Time: 30 minutes
- Cook Time: 12 minutes


Leave a Comment