
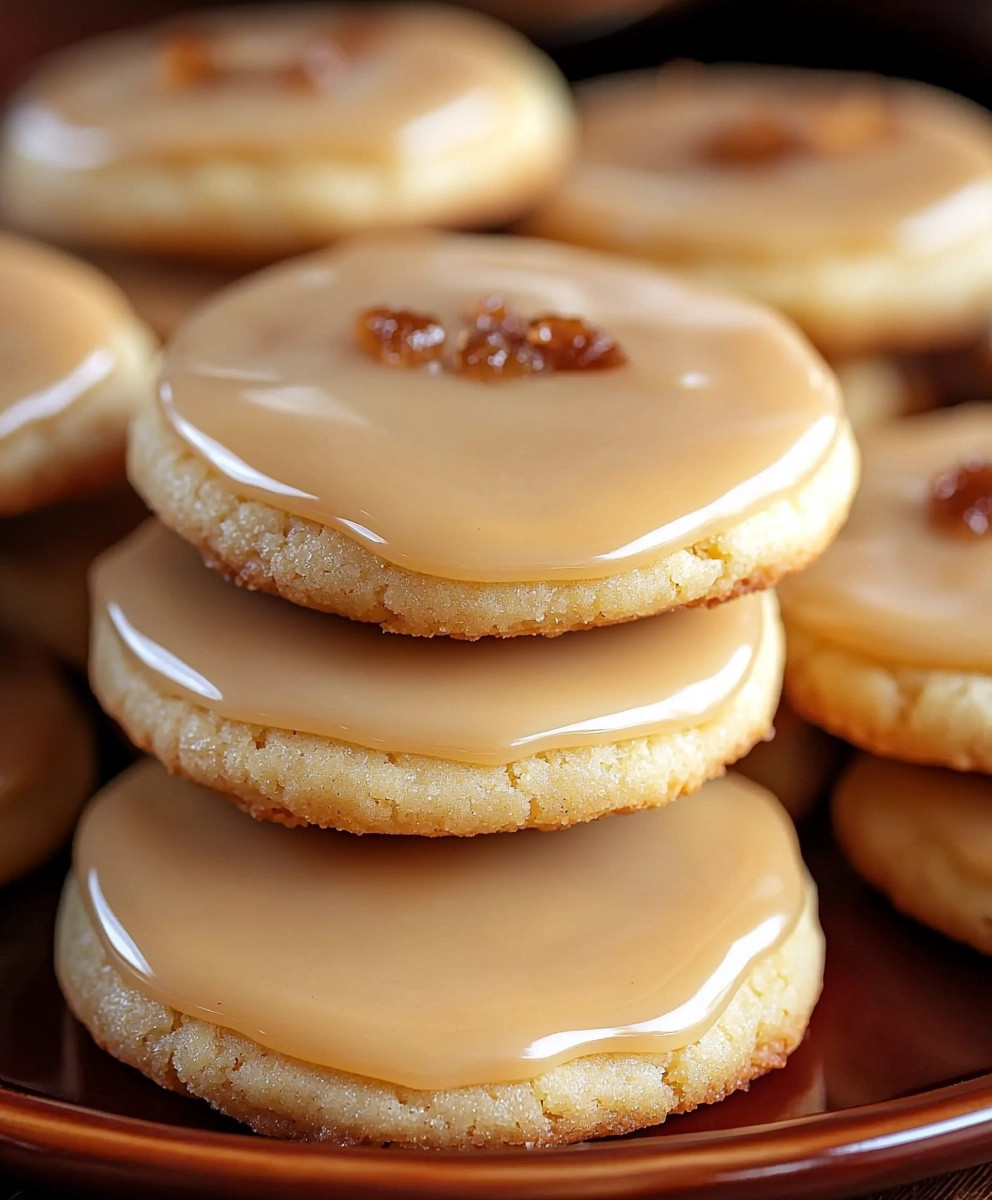
Maple cookies are a delightful treat that perfectly capture the essence of autumn with their rich, sweet flavor and soft, chewy texture. As a lover of all things maple, I find that these cookies not only satisfy my sweet tooth but also evoke fond memories of cozy gatherings and crisp fall days. Originating from the northeastern United States and Canada, where maple syrup is a beloved staple, these cookies have become a cherished dessert in many households. People adore maple cookies for their unique taste, which combines the warmth of brown sugar with the distinct flavor of pure maple syrup, creating a comforting experience in every bite. Whether enjoyed with a cup of tea or as a sweet snack on their own, maple cookies are a delightful way to celebrate the season and share a little sweetness with friends and family.

Ingredients:
- 2 ½ cups all-purpose flour
- 1 teaspoon baking powder
- ½ teaspoon baking soda
- ½ teaspoon salt
- 1 cup unsalted butter, softened
- 1 cup packed brown sugar
- ½ cup granulated sugar
- 1 large egg
- 1 teaspoon vanilla extract
- ½ cup pure maple syrup
- 1 teaspoon maple extract (optional, for extra flavor)
- 1 cup chopped walnuts or pecans (optional)
- Powdered sugar for dusting (optional)
Preparing the Dough
Lets get started on these delicious maple cookies! First, we need to prepare our dough. Follow these steps:
- In a medium bowl, whisk together the all-purpose flour, baking powder, baking soda, and salt. This will ensure that all the dry ingredients are well combined and will help the cookies rise evenly.
- In a large mixing bowl, cream together the softened butter, brown sugar, and granulated sugar using an electric mixer on medium speed. Beat until the mixture is light and fluffy, which should take about 3-4 minutes. This step is crucial as it incorporates air into the dough, making the cookies tender.
- Add the egg, vanilla extract, maple syrup, and maple extract (if using) to the butter and sugar mixture. Beat on low speed until everything is well combined. The mixture should be smooth and creamy.
- Gradually add the dry ingredients to the wet mixture, mixing on low speed until just combined. Be careful not to overmix, as this can lead to tough cookies. If youre adding nuts, fold them in at this stage using a spatula.
- Once the dough is ready, cover the bowl with plastic wrap and refrigerate for at least 1 hour. Chilling the dough helps the flavors meld and makes it easier to handle when shaping the cookies.
Shaping the Cookies
After the dough has chilled, its time to shape our cookies. Heres how to do it:
- Preheat your oven to 350°F (175°C) and line two baking sheets with parchment paper. This will prevent the cookies from sticking and make cleanup a breeze.
- Using a cookie scoop or a tablespoon, scoop out portions of the chilled dough and roll them into balls. Aim for about 1 inch in diameter for each cookie. Place the dough balls on the prepared baking sheets, leaving about 2 inches of space between each cookie to allow for spreading.
- Once all the dough is shaped, gently flatten each cookie ball with the palm of your hand or the bottom of a glass. This will help them bake evenly and give them a nice shape.
Baking the Cookies
Now that our cookies are shaped, its time to bake them!
- Place the baking sheets in the preheated oven and bake for 10-12 minutes, or until the edges are lightly golden. The centers may look slightly underbaked, but they will continue to cook on the baking sheet after being removed from the oven.
- Once baked, remove the cookies from the oven and let them cool on the baking sheets for about 5 minutes. This allows them to set before transferring them to a wire rack.
- After 5 minutes, carefully transfer the cookies to a wire rack to cool completely. This step is important as it helps the cookies maintain their texture and prevents them from becoming soggy.
Finishing Touches
Now that our cookies are baked and cooled, lets add some finishing touches!
- If youd like, you can dust the cooled cookies with powdered sugar for a sweet touch. Simply place some powdered sugar in a fine-mesh sieve and gently shake it over the cookies.
- For an extra maple flavor, you can drizzle some additional maple syrup over the cookies or even make a simple maple glaze by mixing powdered sugar with a little maple syrup and milk until you reach your desired consistency. Drizzle this glaze over the cookies for a beautiful finish.
- Store any leftover cookies in
Conclusion:
In summary, these maple cookies are an absolute must-try for anyone looking to indulge in a delightful treat that perfectly balances sweetness and warmth. The rich, buttery flavor combined with the distinct taste of maple syrup creates a cookie that is not only delicious but also evokes a sense of comfort and nostalgia. Whether you enjoy them with a cup of coffee, tea, or a glass of milk, these cookies are sure to become a favorite in your household. For serving suggestions, consider pairing these maple cookies with a scoop of vanilla ice cream for an indulgent dessert or crumbling them over yogurt for a delightful breakfast twist. You can also experiment with variations by adding nuts, chocolate chips, or even a sprinkle of sea salt on top for an extra flavor boost. The possibilities are endless! I encourage you to give this recipe a try and experience the joy of baking these scrumptious maple cookies. Once you do, I would love to hear about your experience! Share your thoughts, any variations you tried, or even a photo of your delicious creations. Lets spread the love for these maple cookies together! Happy baking! Print
Maple Cookies: Delicious Recipes and Tips for Perfectly Sweet Treats
- Total Time: 72 minutes
- Yield: 24 cookies 1x
Description
Enjoy these soft and chewy Maple Cookies, bursting with rich maple flavor and enhanced with nuts and a light dusting of powdered sugar. Perfect for any occasion, they are a delightful treat that can be stored at room temperature or frozen for later enjoyment.
Ingredients
Scale- 2 ½ cups all-purpose flour
- 1 teaspoon baking powder
- ½ teaspoon baking soda
- ½ teaspoon salt
- 1 cup unsalted butter, softened
- 1 cup packed brown sugar
- ½ cup granulated sugar
- 1 large egg
- 1 teaspoon vanilla extract
- ½ cup pure maple syrup
- 1 teaspoon maple extract (optional, for extra flavor)
- 1 cup chopped walnuts or pecans (optional)
- Powdered sugar for dusting (optional)
Instructions
- In a medium bowl, whisk together the all-purpose flour, baking powder, baking soda, and salt.
- In a large mixing bowl, cream together the softened butter, brown sugar, and granulated sugar using an electric mixer on medium speed until light and fluffy (about 3-4 minutes).
- Add the egg, vanilla extract, maple syrup, and maple extract (if using) to the butter and sugar mixture. Beat on low speed until well combined.
- Gradually add the dry ingredients to the wet mixture, mixing on low speed until just combined. If adding nuts, fold them in at this stage.
- Cover the bowl with plastic wrap and refrigerate for at least 1 hour.
- Preheat your oven to 350°F (175°C) and line two baking sheets with parchment paper.
- Scoop out portions of the chilled dough and roll them into balls (about 1 inch in diameter). Place on the prepared baking sheets, leaving about 2 inches of space between each cookie.
- Gently flatten each cookie ball with the palm of your hand or the bottom of a glass.
- Bake for 10-12 minutes, or until the edges are lightly golden. The centers may look slightly underbaked.
- Let the cookies cool on the baking sheets for about 5 minutes before transferring them to a wire rack to cool completely.
- Dust cooled cookies with powdered sugar if desired.
- For extra maple flavor, drizzle additional maple syrup or a simple maple glaze over the cookies.
- Store any leftover cookies in an airtight container at room temperature for up to a week, or freeze for longer storage.
Notes
- For a richer maple flavor, consider using both maple syrup and maple extract.
- Feel free to substitute the nuts with chocolate chips or leave them out entirely for a nut-free version.
- Ensure the butter is softened to room temperature for easier mixing.
- Prep Time: 60 minutes
- Cook Time: 10-12 minutes


Leave a Comment