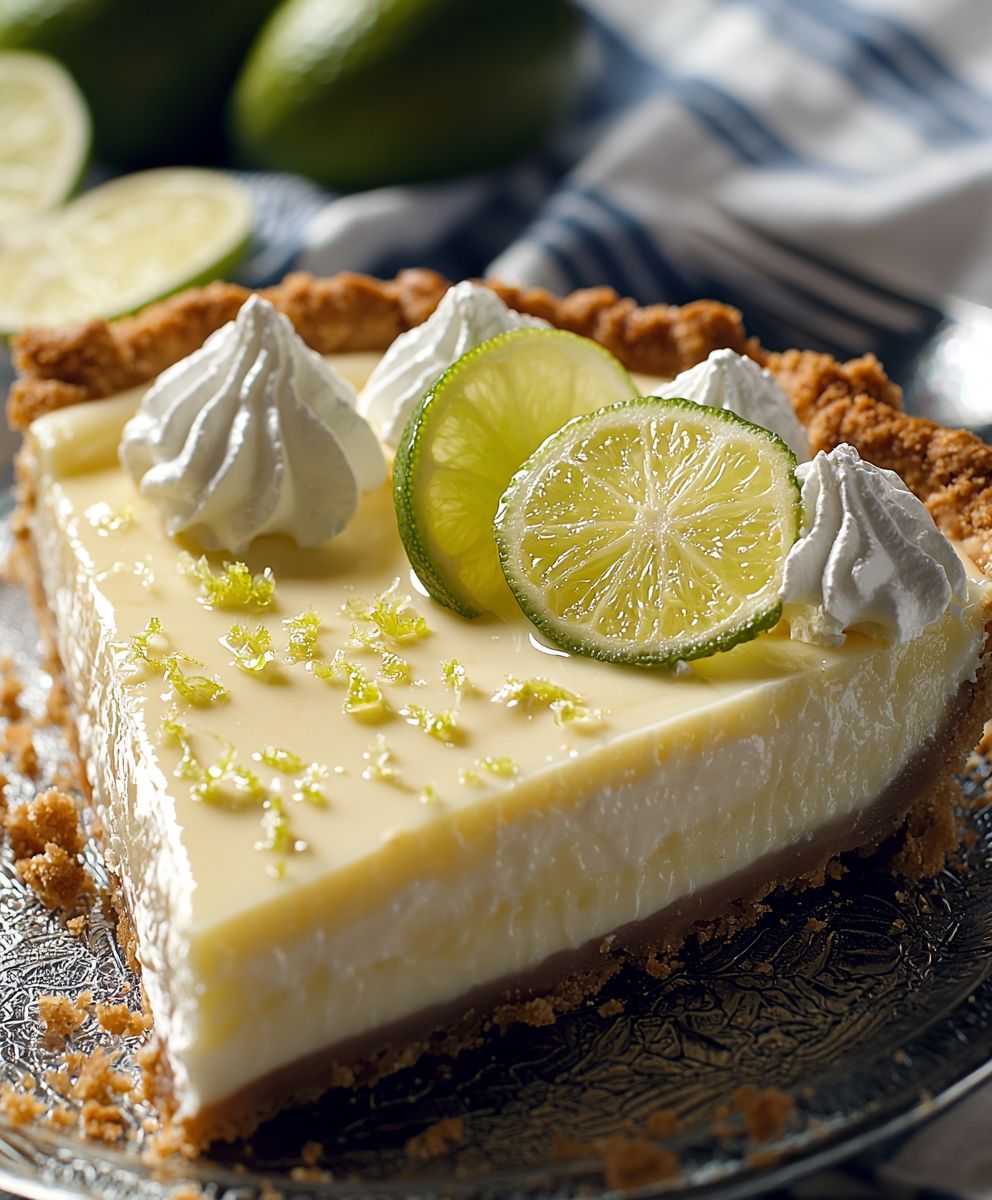
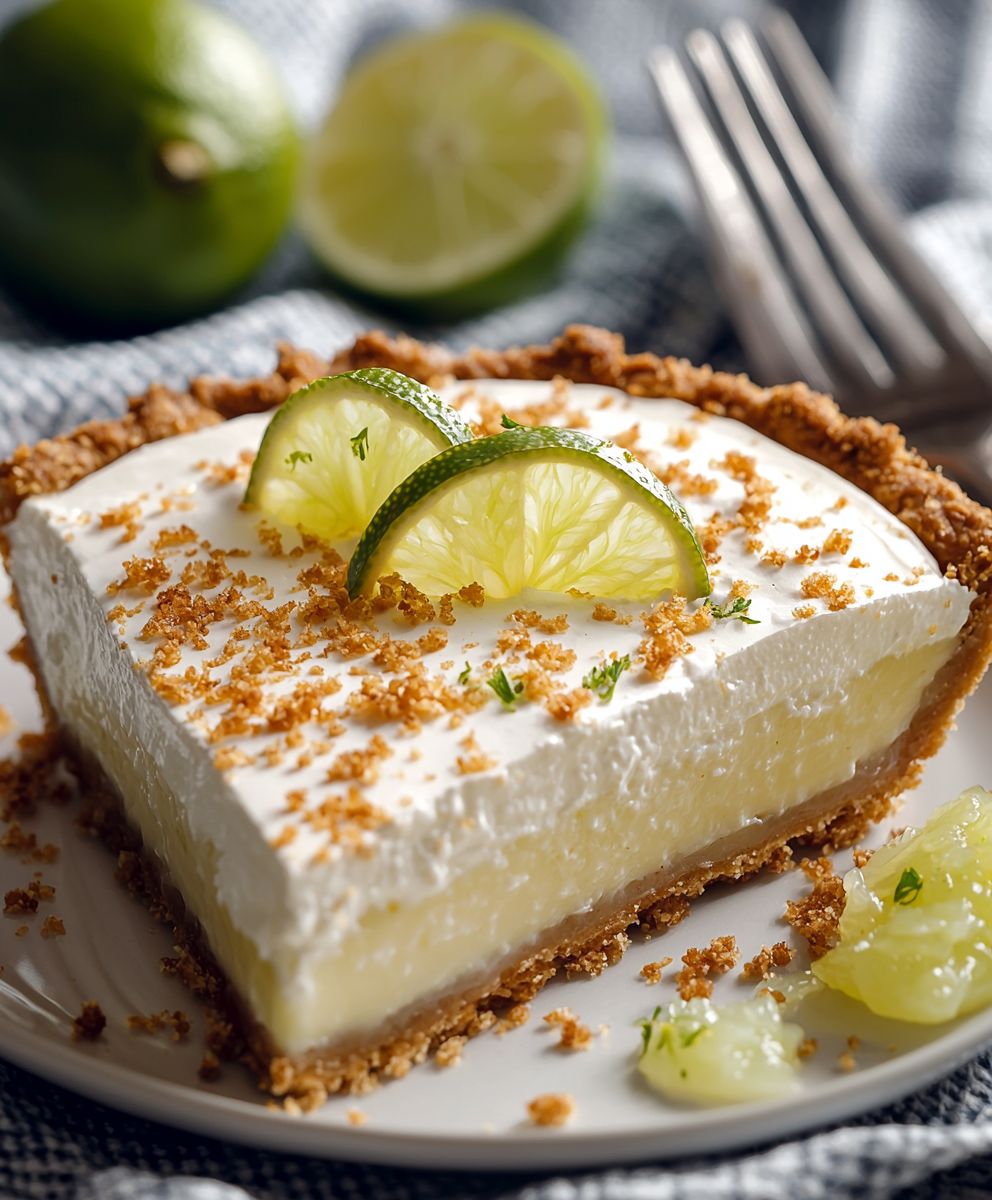
Key Lime Pie, a dessert so vibrantly tart and refreshingly sweet, it’s practically sunshine on a plate! Have you ever tasted something that instantly transports you to a tropical paradise? That’s the magic of this iconic pie. I remember the first time I tried it; the creamy filling, the tangy lime, the buttery crust it was an explosion of flavor that I’ve been chasing ever since.
This quintessential American dessert, particularly beloved in the Florida Keys, boasts a history as bright as its flavor. Legend has it that “sponge fishermen” in the early 20th century concocted the pie using readily available ingredients: Key limes (of course!), sweetened condensed milk (a shelf-stable necessity), and eggs. The result was a no-bake marvel that quickly became a local favorite.
But what makes Key Lime Pie so irresistible? It’s the perfect balance of sweet and tart, a dance on your taste buds that keeps you coming back for more. The creamy, almost custard-like texture is incredibly satisfying, and the graham cracker crust provides a delightful contrast. Plus, it’s relatively easy to make, making it a fantastic option for both experienced bakers and those just starting out. Whether you’re looking for a show-stopping dessert for a special occasion or simply craving a taste of summer, this pie is guaranteed to please!
Ingredients:
- For the Crust:
- 1 ½ cups graham cracker crumbs (about 12 graham crackers)
- 5 tablespoons (2 ½ ounces) unsalted butter, melted
- ¼ cup granulated sugar
- ? teaspoon salt
- For the Filling:
- 1 (14-ounce) can sweetened condensed milk
- ½ cup (4 ounces) Key lime juice, freshly squeezed (about 15-20 Key limes)
- 4 large egg yolks
- 1 teaspoon Key lime zest
- For the Topping (Optional):
- 1 cup heavy cream
- 2 tablespoons powdered sugar
- ½ teaspoon vanilla extract
- Key lime slices, for garnish
Preparing the Graham Cracker Crust:
- Preheat and Prep: First things first, preheat your oven to 350°F (175°C). While the oven is heating up, grab a 9-inch pie plate. I like to use a glass one so I can see how the crust is browning, but any pie plate will do.
- Crush the Graham Crackers: If you haven’t already, it’s time to turn those graham crackers into crumbs. You can do this one of two ways: either place the graham crackers in a large zip-top bag and crush them with a rolling pin (a great stress reliever!), or pulse them in a food processor until you have fine crumbs. I find the food processor is quicker and more consistent.
- Combine Dry Ingredients: In a medium bowl, whisk together the graham cracker crumbs, granulated sugar, and salt. This ensures that the sugar and salt are evenly distributed throughout the crust, which is important for both flavor and texture.
- Add the Melted Butter: Pour the melted butter into the graham cracker mixture. Use a fork or your fingers to mix everything together until the crumbs are evenly moistened and resemble wet sand. This is what will hold the crust together.
- Press into the Pie Plate: Transfer the graham cracker mixture to the prepared pie plate. Use the bottom of a measuring cup or your fingers to firmly press the crumbs evenly across the bottom and up the sides of the pie plate. Make sure the crust is compact and uniform in thickness. This will prevent it from crumbling when you slice the pie later.
- Bake the Crust: Bake the crust in the preheated oven for 8-10 minutes, or until it’s lightly golden brown and fragrant. Keep a close eye on it, as it can burn easily.
- Cool Completely: Remove the crust from the oven and let it cool completely on a wire rack. This is crucial! You want the crust to be completely cool before you add the filling, otherwise the filling might not set properly.
Making the Key Lime Filling:
- Zest the Key Limes: Before you juice the Key limes, zest them! It’s much easier to zest them when they’re whole. Use a microplane or fine grater to zest about 1 teaspoon of Key lime zest. Be careful not to grate the white pith underneath the zest, as it can be bitter.
- Juice the Key Limes: This is where the fun (and the arm workout) begins! You’ll need about ½ cup of Key lime juice, which usually requires about 15-20 Key limes. Key limes are smaller and more tart than regular limes, so they’re essential for that authentic Key lime pie flavor. I highly recommend using a citrus juicer for this step it will save you a lot of time and effort.
- Combine the Filling Ingredients: In a large bowl, whisk together the sweetened condensed milk, Key lime juice, egg yolks, and Key lime zest. Whisk until the mixture is smooth and well combined. The acid in the Key lime juice will start to thicken the mixture almost immediately.
- Pour into the Crust: Pour the Key lime filling into the cooled graham cracker crust, spreading it evenly.
- Bake the Pie: Bake the pie in the preheated oven for 15-20 minutes, or until the filling is set but still slightly jiggly in the center. The edges should be set, but the center should still have a little give.
- Cool and Chill: Remove the pie from the oven and let it cool completely on a wire rack. Once it’s cooled to room temperature, cover it with plastic wrap and refrigerate for at least 4 hours, or preferably overnight. This allows the filling to fully set and the flavors to meld together.
Preparing the Topping (Optional):
- Chill the Bowl and Whisk: For the best results, chill your mixing bowl and whisk in the freezer for about 15 minutes before making the whipped cream. This will help the cream whip up faster and hold its shape better.
- Whip the Cream: In the chilled bowl, combine the heavy cream, powdered sugar, and vanilla extract. Use an electric mixer (either a stand mixer or a hand mixer) to whip the cream until stiff peaks form. Be careful not to overwhip the cream, as it can turn into butter.
- Decorate the Pie: Once the pie is chilled and the whipped cream is ready, you can decorate the pie as desired. You can spread the whipped cream evenly over the top of the pie, or you can pipe it on using a piping bag and tip. I like to create a simple swirl pattern.
- Garnish: Garnish the pie with Key lime slices for a pop of color and a hint of extra Key lime flavor. You can also sprinkle a little extra Key lime zest on top.
- Serve and Enjoy: Slice the pie and serve immediately. Store any leftovers in the refrigerator. This Key lime pie is best enjoyed cold!
Tips for the Perfect Key Lime Pie:
- Use Freshly Squeezed Key Lime Juice: This is non-negotiable! Bottled Key lime juice just doesn’t have the same flavor as fresh. It’s worth the effort to squeeze your own.
- Don’t Overbake: Overbaking the pie will result in a cracked and rubbery filling. The filling should be set but still slightly jiggly in the center when you remove it from the oven.
- Chill Thoroughly: Chilling the pie for at least 4 hours (or overnight) is essential for the filling to fully set and the flavors to meld together.
- Make it Ahead: Key lime pie is a great make-ahead dessert. You can make the crust and filling a day or two in advance and store them separately in the refrigerator. Then, just assemble the pie and add the topping before serving.
- Adjust Sweetness to Taste: Key limes are very tart, so you may want to adjust the amount of sugar in the filling to your liking. If you prefer a sweeter pie, add an extra tablespoon or two of sweetened condensed milk.
- Prevent a Soggy Crust: To prevent a soggy crust, you can brush the cooled crust with a thin layer of melted white chocolate before adding the filling. This will create a barrier between the crust and the filling.
- Key Lime Zest is Key: Don’t skip the Key lime zest! It adds a bright, citrusy flavor that complements the tartness of the Key lime juice.
Troubleshooting:
- Cracked Filling: A cracked filling is usually caused by overbaking. Make sure to remove the pie from the oven when the filling is set but still slightly jiggly in the center.
- Soggy Crust: A soggy crust can be caused by several factors, including using too much butter in the crust, not baking the crust long enough, or adding the filling to a crust that is not completely cooled.
- Filling Not Setting: If your filling is not setting, it could be due to not using enough Key lime juice, not baking the pie long enough, or not chilling the pie for a sufficient amount of time.
- Bitter Taste: A bitter taste can be caused by grating the white pith of the Key limes when zesting. Be careful to only grate the outer layer of the zest.

Conclusion:
This Key Lime Pie isn’t just a dessert; it’s a slice of sunshine on a plate, a tangy escape from the ordinary, and a guaranteed crowd-pleaser. I truly believe that once you experience the creamy, zesty perfection of this pie, you’ll understand why it’s a must-try recipe. The bright, refreshing flavor is unlike anything else, and the simple preparation makes it accessible to bakers of all skill levels. Forget store-bought imitations; this homemade version is in a league of its own.
Why is this Key Lime Pie so special? It’s the perfect balance of sweet and tart, the smooth, velvety texture, and the satisfying crunch of the graham cracker crust. It’s a dessert that awakens your senses and leaves you wanting more. Plus, it’s incredibly versatile!
Serving Suggestions and Variations:
While this Key Lime Pie is divine on its own, there are plenty of ways to elevate the experience. Consider topping each slice with a dollop of freshly whipped cream or a sprinkle of lime zest for an extra burst of flavor. For a more decadent treat, drizzle a little white chocolate ganache over the top.
If you’re feeling adventurous, try these variations:
* Key Lime Pie Parfaits: Layer crumbled graham crackers, Key Lime Pie filling, and whipped cream in individual glasses for a delightful and easy-to-serve dessert.
* Key Lime Pie Bars: Press the graham cracker crust into a baking pan, pour the filling over it, and bake until set. Cut into bars for a portable and shareable treat.
* Key Lime Pie Milkshake: Blend a slice of Key Lime Pie with vanilla ice cream and a splash of milk for a creamy and refreshing milkshake.
* Key Lime Pie with a Meringue Topping: Instead of whipped cream, top the pie with a fluffy meringue and lightly brown it with a kitchen torch for a more elegant presentation.
* Spiced Key Lime Pie: Add a pinch of cinnamon or nutmeg to the graham cracker crust for a warm and inviting twist.
Don’t be afraid to experiment and make this recipe your own! The beauty of baking is that you can always adjust the flavors and ingredients to suit your preferences.
I’m so excited for you to try this recipe and experience the magic of homemade Key Lime Pie. It’s a dessert that’s perfect for any occasion, from casual gatherings to special celebrations. Whether you’re a seasoned baker or a complete novice, I’m confident that you’ll be able to create a stunning and delicious pie that everyone will love.
So, what are you waiting for? Gather your ingredients, preheat your oven, and get ready to embark on a culinary adventure. I promise you won’t be disappointed.
Once you’ve made this incredible Key Lime Pie, I would absolutely love to hear about your experience! Share your photos, tips, and variations in the comments below. Did you make any substitutions? Did you add any special touches? I’m always eager to learn from my readers and see how they’ve personalized my recipes. Let’s create a community of Key Lime Pie enthusiasts! Happy baking! I hope you enjoy this Key Lime Pie as much as my family and friends do!
Key Lime Pie: The Ultimate Guide to Baking the Perfect Pie
A classic Key Lime Pie with a tangy, creamy filling in a buttery graham cracker crust, topped with optional homemade whipped cream.
Ingredients
- 1 ½ cups graham cracker crumbs (about 12 graham crackers)
- 5 tablespoons (2 ½ ounces) unsalted butter, melted
- ¼ cup granulated sugar
- ? teaspoon salt
- 1 (14-ounce) can sweetened condensed milk
- ½ cup (4 ounces) Key lime juice, freshly squeezed (about 15-20 Key limes)
- 4 large egg yolks
- 1 teaspoon Key lime zest
- 1 cup heavy cream
- 2 tablespoons powdered sugar
- ½ teaspoon vanilla extract
- Key lime slices, for garnish
Instructions
- Preheat oven to 350°F (175°C). Prepare a 9-inch pie plate.
- Crush graham crackers into fine crumbs using a zip-top bag and rolling pin or a food processor.
- In a medium bowl, whisk together graham cracker crumbs, granulated sugar, and salt.
- Pour melted butter into the graham cracker mixture. Mix until the crumbs are evenly moistened and resemble wet sand.
- Transfer the graham cracker mixture to the prepared pie plate. Press firmly across the bottom and up the sides of the pie plate.
- Bake in the preheated oven for 8-10 minutes, or until lightly golden brown and fragrant.
- Remove the crust from the oven and let it cool completely on a wire rack.
- Zest about 1 teaspoon of Key lime zest using a microplane or fine grater.
- Juice about 15-20 Key limes to get ½ cup of Key lime juice.
- In a large bowl, whisk together sweetened condensed milk, Key lime juice, egg yolks, and Key lime zest until smooth and well combined.
- Pour the Key lime filling into the cooled graham cracker crust, spreading it evenly.
- Bake the pie in the preheated oven for 15-20 minutes, or until the filling is set but still slightly jiggly in the center.
- Remove the pie from the oven and let it cool completely on a wire rack. Once cooled, cover with plastic wrap and refrigerate for at least 4 hours, or preferably overnight.
- Chill your mixing bowl and whisk in the freezer for about 15 minutes before making the whipped cream.
- In the chilled bowl, combine heavy cream, powdered sugar, and vanilla extract. Use an electric mixer to whip the cream until stiff peaks form.
- Spread the whipped cream evenly over the top of the pie, or pipe it on using a piping bag and tip.
- Garnish the pie with Key lime slices.
- Slice the pie and serve immediately. Store any leftovers in the refrigerator.
Notes
- Use freshly squeezed Key lime juice for the best flavor.
- Don’t overbake the pie; the filling should be slightly jiggly in the center.
- Chill the pie thoroughly for the filling to set properly.
- To prevent a soggy crust, brush the cooled crust with a thin layer of melted white chocolate before adding the filling.
- Adjust sweetness to taste by adding more or less sweetened condensed milk.


Leave a Comment