Description
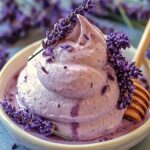
Indulge in the floral sweetness of homemade Honey Lavender Dream Cream. This no-churn ice cream is easy to make and bursting with delicate lavender flavor and creamy goodness.
Ingredients
Scale
- 1 pint (2 cups) heavy cream, very cold
- 1 (14 ounce) can sweetened condensed milk, chilled
- 1/4 cup honey, preferably local and raw
- 1 tablespoon dried culinary lavender buds
- 1/2 teaspoon pure vanilla extract
- Pinch of sea salt
- Optional: Purple food coloring (gel or liquid), for a more vibrant color
Instructions
- Combine Honey and Lavender: In a small, heatproof saucepan, combine the 1/4 cup of honey and 1 tablespoon of dried culinary lavender buds.
- Gently Heat: Place the saucepan over low heat. You want to gently warm the honey, not boil it. The goal is to infuse the honey with the lavender’s aroma and flavor.
- Infuse: Stir the honey and lavender constantly for about 5-7 minutes. You’ll notice the honey becoming more fragrant. Be careful not to burn the honey. If it starts to bubble, remove it from the heat immediately.
- Steep: Remove the saucepan from the heat and let the honey and lavender steep for at least 30 minutes, or up to 2 hours, for a stronger lavender flavor. The longer it steeps, the more intense the lavender taste will be.
- Strain: After steeping, strain the honey through a fine-mesh sieve lined with cheesecloth (if you have it) or a coffee filter into a small bowl. This will remove the lavender buds, leaving you with beautifully infused honey. Discard the lavender buds.
- Chill Your Bowl and Whisk: Place your mixing bowl (preferably metal) and whisk attachment in the freezer for at least 15 minutes before you start. This helps the cream whip up faster and hold its volume.
- Whip the Heavy Cream: Pour the cold heavy cream into the chilled mixing bowl. Using your electric mixer (stand mixer or hand mixer), begin whipping the cream on medium speed.
- Gradually Increase Speed: Gradually increase the speed to high and continue whipping until stiff peaks form. This means that when you lift the whisk, the peaks of the cream stand straight up and don’t collapse. Be careful not to overwhip, or you’ll end up with butter!
- Incorporate Sweetened Condensed Milk: Once stiff peaks have formed, reduce the mixer speed to low. Slowly pour in the chilled sweetened condensed milk. Mix until just combined. Don’t overmix at this stage, as it can deflate the whipped cream.
- Add Honey and Vanilla: Pour in the lavender-infused honey (or plain honey if you skipped the infusion step) and the vanilla extract. Add a pinch of sea salt. Mix on low speed until everything is evenly incorporated.
- Optional: Add Food Coloring: If you want to add a touch of purple color, add a few drops of purple food coloring (gel or liquid) and mix on low speed until you achieve your desired shade. Be careful not to add too much, as a little goes a long way.
- Transfer to a Freezer-Safe Container: Pour the ice cream mixture into a freezer-safe container. A loaf pan, a plastic container with a tight-fitting lid, or even a metal container will work.
- Cover Tightly: Cover the container tightly with a lid or plastic wrap. If using plastic wrap, press it directly onto the surface of the ice cream to prevent ice crystals from forming.
- Freeze: Freeze the ice cream for at least 6 hours, or preferably overnight, until it is firm enough to scoop. The longer it freezes, the firmer and more scoopable it will become.
- Let it Temper (Optional): If the ice cream is very hard, let it sit at room temperature for 5-10 minutes before scooping to soften it slightly. This will make it easier to scoop and enjoy.
- Scoop and Serve: Scoop the ice cream into bowls or cones and serve immediately.
- Garnish (Optional): Garnish with a sprinkle of dried lavender buds, a drizzle of honey, or a sprig of fresh lavender for a beautiful presentation.
- Store: Store any leftover ice cream in the freezer in an airtight container. It will keep for up to 2 weeks, but it’s best enjoyed within a week for optimal flavor and texture. Be aware that homemade ice cream tends to get icier the longer it’s stored, so try to eat it sooner rather than later!
Notes
- Use high-quality ingredients for the best flavor.
- Don’t overwhip the cream. Stop when stiff peaks form.
- Chill everything (bowl, whisk, ingredients) for optimal results.
- Adjust the lavender flavor to your preference by steeping the honey for a shorter or longer time.
- Experiment with toppings like nuts, chocolate, or berries.
- This is a no-churn recipe, so no ice cream maker is needed.
- If the ice cream is too hard, let it temper at room temperature. If it’s too soft, freeze it longer.
- Prep Time: Error: Gemini API request failed (Code: 503). Message: The service is currently unavailable.
- Cook Time: 7 minutes