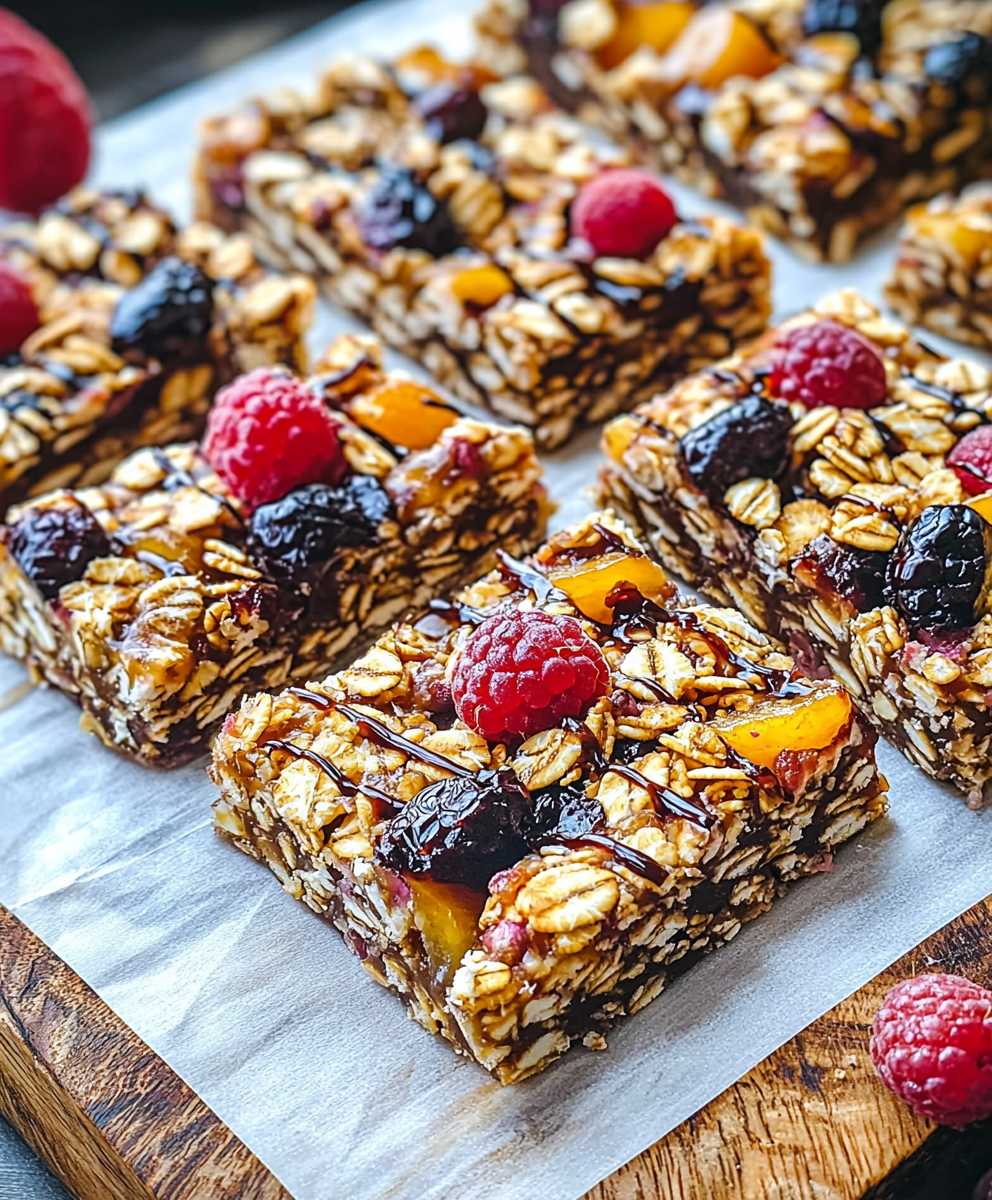
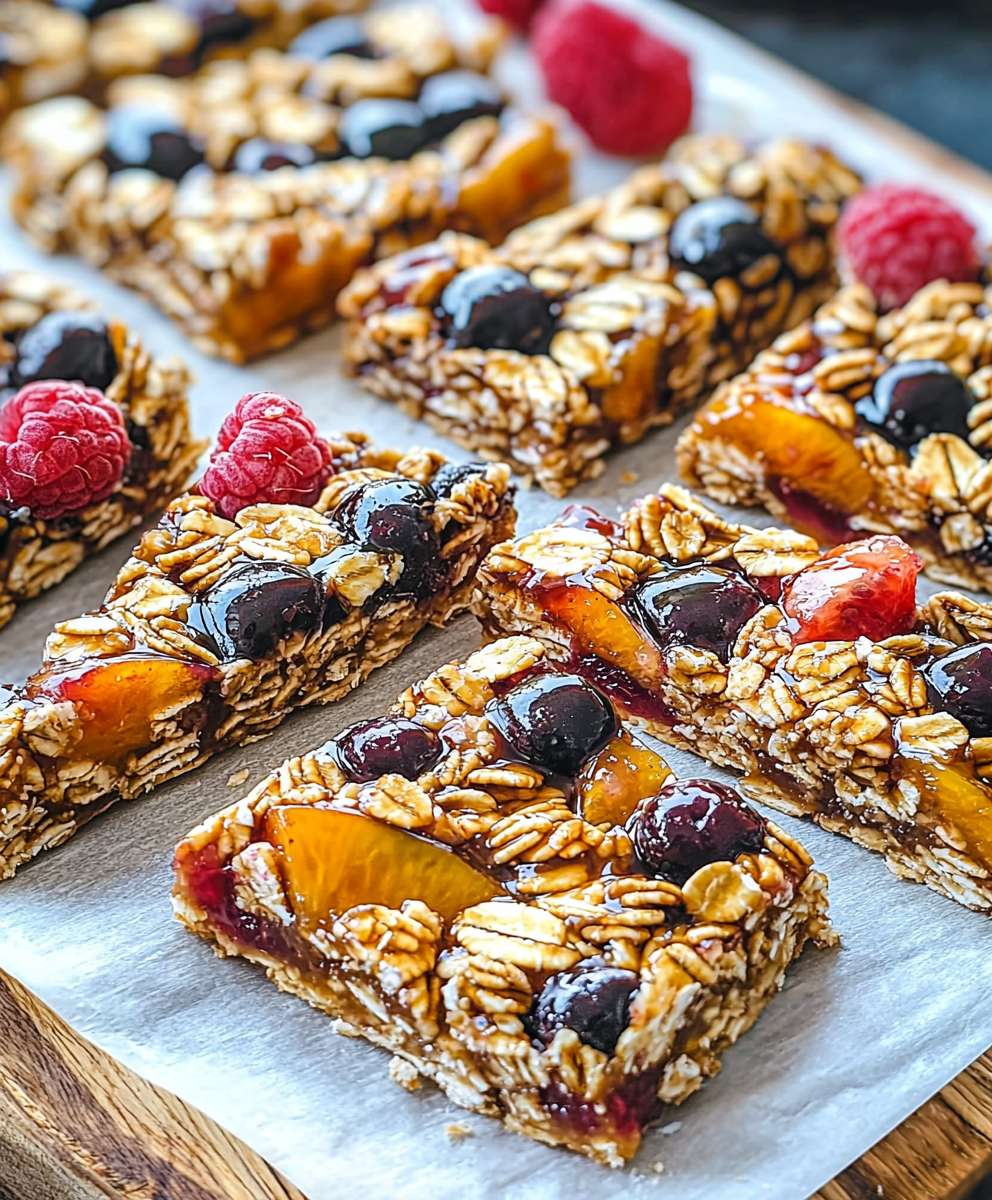
Fruit Granola Bars: the perfect grab-and-go snack that satisfies your sweet tooth while fueling your body! Forget those store-bought bars packed with artificial ingredients and excessive sugar. I’m going to show you how to create delicious, wholesome fruit granola bars right in your own kitchen.
Granola bars, in their essence, are a modern invention, born from the health food movement of the late 19th century. They were initially conceived as a convenient and nutritious way to consume grains and nuts. Over time, they have evolved from simple mixtures of oats and honey to the diverse range we see today, incorporating everything from dried fruits to chocolate chips.
What’s not to love? These bars are incredibly versatile. You can customize them with your favorite dried fruits, nuts, and seeds. They’re chewy, crunchy, and bursting with flavor. Plus, they’re incredibly convenient for busy mornings, afternoon snacks, or even a healthy dessert. The combination of textures and the natural sweetness of the fruit make them irresistible. Get ready to ditch the processed snacks and embrace the goodness of homemade!
Ingredients:
- For the Granola Base:
- 3 cups rolled oats (not instant)
- 1 cup mixed nuts (almonds, walnuts, pecans), roughly chopped
- 1/2 cup shredded coconut (unsweetened)
- 1/4 cup seeds (pumpkin, sunflower, chia, flax)
- 1/4 teaspoon salt
- 1/2 teaspoon ground cinnamon
- For the Binding Mixture:
- 1/2 cup honey
- 1/4 cup maple syrup
- 1/4 cup coconut oil, melted
- 1 teaspoon vanilla extract
- For the Dried Fruit Mix-ins:
- 1 cup dried cranberries
- 1/2 cup dried cherries, chopped
- 1/2 cup raisins
- 1/4 cup dried apricots, chopped
- Optional Add-ins:
- 1/4 cup chocolate chips (dark, milk, or white)
- 1/4 cup chopped crystallized ginger
- Zest of 1 orange
Preparing the Granola Base:
- Preheat your oven: I always start by preheating my oven to 325°F (160°C). This ensures the granola toasts evenly.
- Combine dry ingredients: In a large bowl, I whisk together the rolled oats, chopped nuts, shredded coconut, seeds, salt, and cinnamon. Make sure everything is well combined so the flavors are evenly distributed throughout the bars.
- Prepare the baking sheet: Line a 9×13 inch baking pan with parchment paper. This is crucial! It prevents the granola from sticking and makes it super easy to lift the bars out later. I like to leave a little overhang of parchment paper on the sides to use as handles.
Making the Binding Mixture:
- Combine wet ingredients: In a separate, smaller bowl, I whisk together the honey, maple syrup, melted coconut oil, and vanilla extract. Make sure the coconut oil is completely melted and incorporated into the mixture. This is what will hold everything together.
- Combine wet and dry: Pour the wet ingredients over the dry ingredients in the large bowl. Using a spatula or wooden spoon, I gently stir everything together until the dry ingredients are evenly coated. Don’t overmix! You want the oats and nuts to remain somewhat intact.
Adding the Fruit and Baking:
- Incorporate the dried fruit: Add the dried cranberries, dried cherries, raisins, and dried apricots to the granola mixture. If you’re using any optional add-ins like chocolate chips or crystallized ginger, now is the time to add them too. Gently fold everything in until evenly distributed.
- Press into the pan: Transfer the granola mixture to the prepared baking pan. Using a spatula or the bottom of a measuring cup, I firmly press the mixture into an even layer. This is important for creating bars that hold together well. The firmer you press, the less crumbly they will be. I usually spend a few minutes making sure it’s really packed down.
- Bake: Place the baking pan in the preheated oven and bake for 25-30 minutes, or until the granola is golden brown around the edges. Keep a close eye on it, as ovens can vary. You want it to be nicely toasted but not burnt.
- Cool completely: Remove the baking pan from the oven and let the granola cool completely in the pan. This is the hardest part, I know! But it’s essential for the bars to set properly. I usually let them cool for at least 2-3 hours, or even overnight. The longer they cool, the easier they will be to cut.
Cutting and Storing:
- Cut into bars: Once the granola has cooled completely, lift it out of the pan using the parchment paper overhang. Place it on a cutting board and use a sharp knife to cut it into bars. I usually cut them into about 12-16 bars, depending on the size I want. You can also cut them into squares if you prefer.
- Storage: Store the granola bars in an airtight container at room temperature for up to a week, or in the refrigerator for up to two weeks. They can also be frozen for longer storage. Wrap them individually in plastic wrap or parchment paper before freezing to prevent them from sticking together.
Tips and Variations:
Here are a few tips and variations to help you customize these granola bars to your liking:
- Nut Butter Boost: For extra flavor and binding power, try adding 1/4 cup of peanut butter, almond butter, or cashew butter to the binding mixture. Just melt it along with the coconut oil.
- Spice it Up: Experiment with different spices like nutmeg, cardamom, or ginger. A pinch of cayenne pepper can also add a subtle kick.
- Seed Sensations: Use a variety of seeds like hemp seeds, sesame seeds, or poppy seeds.
- Fruit Frenzy: Get creative with your dried fruit! Try dried mango, pineapple, blueberries, or even goji berries.
- Chocolate Lover’s Dream: Add more chocolate chips, or drizzle melted chocolate over the finished bars. You can also use different types of chocolate, like white chocolate or peanut butter chips.
- Vegan Option: Substitute the honey with agave nectar or brown rice syrup. Make sure your chocolate chips are also vegan-friendly.
- Gluten-Free: Ensure your rolled oats are certified gluten-free.
- Chewy vs. Crunchy: For chewier bars, bake for a shorter time (around 25 minutes). For crunchier bars, bake for a longer time (up to 35 minutes).
- Pressing Power: The key to bars that don’t crumble is pressing the mixture firmly into the pan. Don’t be afraid to really pack it down!
- Cooling is Key: Resist the urge to cut the bars before they are completely cool. This will result in crumbly bars.
Troubleshooting:
My granola bars are too crumbly:
This is usually caused by not pressing the mixture firmly enough into the pan, or by not letting them cool completely. Make sure to really pack the mixture down and allow ample cooling time.
My granola bars are too hard:
This could be due to overbaking. Keep a close eye on the bars while they are in the oven and remove them when they are golden brown around the edges. Also, make sure you are using the correct oven temperature.
My granola bars are too sticky:
This could be due to using too much honey or maple syrup. Reduce the amount of liquid in the binding mixture next time. Also, make sure your coconut oil is melted but not too hot.
My granola bars are not sweet enough:
Add a little more honey or maple syrup to the binding mixture. You can also add a touch of brown sugar or coconut sugar to the dry ingredients.
My granola bars are burning:
Your oven temperature might be too high. Try lowering the temperature by 25 degrees and baking for a longer time. You can also tent the pan with foil to prevent the top from burning.

Conclusion:
This isn’t just another recipe; it’s your new go-to for a healthy, delicious, and utterly satisfying snack. These Fruit Granola Bars are a must-try because they’re so incredibly versatile. Forget those store-bought bars packed with artificial ingredients and questionable sugars. With this recipe, you control everything that goes in, ensuring a wholesome treat that fuels your body and delights your taste buds. The combination of chewy oats, crunchy nuts, and bursts of sweet, dried fruit creates a symphony of textures and flavors that will keep you coming back for more.
But the real magic lies in its adaptability. Feel free to swap out the dried cranberries for chopped dates, the almonds for pecans, or add a sprinkle of chia seeds for an extra boost of omega-3s. Craving something a little more decadent? Drizzle melted dark chocolate over the cooled bars for a truly irresistible treat. For a vegan option, simply use maple syrup or agave nectar instead of honey. The possibilities are truly endless!
These Fruit Granola Bars are perfect for so many occasions. Pack them in your kids’ lunchboxes for a healthy and energizing midday snack. Take them on hikes or bike rides for a convenient and portable source of fuel. Enjoy them as a quick and easy breakfast on busy mornings. Or simply savor them as a guilt-free dessert after dinner. They’re also a fantastic homemade gift for friends and family. Imagine the delight on their faces when they receive a batch of these delicious and wholesome bars, made with love and care.
Serving suggestions? I love crumbling these bars over yogurt or ice cream for added texture and flavor. They’re also delicious paired with a cup of coffee or tea. For a truly special treat, try warming them slightly in the microwave before serving. The warmth enhances the flavors and makes them even more irresistible.
I’m so confident that you’ll love these Fruit Granola Bars as much as I do. They’re easy to make, incredibly delicious, and endlessly customizable. So, what are you waiting for? Gather your ingredients, preheat your oven, and get ready to embark on a culinary adventure.
Don’t be afraid to experiment with different combinations of fruits, nuts, and seeds to create your own signature granola bar.
I truly believe that this recipe will become a staple in your kitchen. It’s a simple, satisfying, and healthy way to enjoy a delicious snack. And the best part? You can feel good about what you’re eating, knowing that you’re nourishing your body with wholesome ingredients.
Now, it’s your turn! I can’t wait to hear about your experience making these Fruit Granola Bars. Did you try any variations? What were your favorite combinations? Share your photos and stories in the comments below. Let’s inspire each other to create even more delicious and healthy snacks! Happy baking! I’m eager to see your creations and hear all about your granola bar adventures. Let’s spread the joy of homemade goodness, one delicious bar at a time.
Fruit Granola Bars: The Ultimate Guide to Healthy Snacking
Delicious and customizable homemade granola bars packed with oats, nuts, seeds, dried fruit, and a touch of sweetness. Perfect for a healthy snack or on-the-go breakfast!
Ingredients
- 3 cups rolled oats (not instant)
- 1 cup mixed nuts (almonds, walnuts, pecans), roughly chopped
- 1/2 cup shredded coconut (unsweetened)
- 1/4 cup seeds (pumpkin, sunflower, chia, flax)
- 1/4 teaspoon salt
- 1/2 teaspoon ground cinnamon
- 1/2 cup honey
- 1/4 cup maple syrup
- 1/4 cup coconut oil, melted
- 1 teaspoon vanilla extract
- 1 cup dried cranberries
- 1/2 cup dried cherries, chopped
- 1/2 cup raisins
- 1/4 cup dried apricots, chopped
- 1/4 cup chocolate chips (dark, milk, or white)
- 1/4 cup chopped crystallized ginger
- Zest of 1 orange
Instructions
- Preheat your oven to 325°F (160°C).
- In a large bowl, whisk together the rolled oats, chopped nuts, shredded coconut, seeds, salt, and cinnamon.
- Line a 9×13 inch baking pan with parchment paper, leaving an overhang on the sides.
- In a separate bowl, whisk together the honey, maple syrup, melted coconut oil, and vanilla extract.
- Pour the wet ingredients over the dry ingredients and gently stir until evenly coated.
- Add the dried cranberries, dried cherries, raisins, and dried apricots (and any optional add-ins) to the granola mixture. Gently fold in.
- Transfer the granola mixture to the prepared baking pan. Firmly press the mixture into an even layer using a spatula or the bottom of a measuring cup.
- Bake for 25-30 minutes, or until golden brown around the edges.
- Remove from oven and let cool completely in the pan (at least 2-3 hours, or overnight).
- Lift the granola out of the pan using the parchment paper overhang. Cut into 12-16 bars.
- Store in an airtight container at room temperature for up to a week, or in the refrigerator for up to two weeks. Freeze for longer storage, wrapping individually.
Notes
- Nut Butter Boost: Add 1/4 cup of peanut butter, almond butter, or cashew butter to the binding mixture.
- Spice it Up: Experiment with spices like nutmeg, cardamom, or ginger.
- Seed Sensations: Use a variety of seeds like hemp seeds, sesame seeds, or poppy seeds.
- Fruit Frenzy: Get creative with your dried fruit! Try dried mango, pineapple, blueberries, or even goji berries.
- Chocolate Lover’s Dream: Add more chocolate chips, or drizzle melted chocolate over the finished bars.
- Vegan Option: Substitute the honey with agave nectar or brown rice syrup. Make sure your chocolate chips are also vegan-friendly.
- Gluten-Free: Ensure your rolled oats are certified gluten-free.
- Chewy vs. Crunchy: For chewier bars, bake for a shorter time (around 25 minutes). For crunchier bars, bake for a longer time (up to 35 minutes).
- Pressing Power: The key to bars that don’t crumble is pressing the mixture firmly into the pan. Don’t be afraid to really pack it down!
- Cooling is Key: Resist the urge to cut the bars before they are completely cool. This will result in crumbly bars.


Leave a Comment