
Cut bacon without mess? Yes, you read that right! Forget wrestling with slippery, fatty bacon strips and ending up with uneven, frustratingly sticky pieces. I’m about to share a game-changing technique that will revolutionize your breakfast (and BLT) prep forever.
Bacon, that glorious, crispy, salty indulgence, has been a breakfast staple for centuries. From its humble beginnings as a peasant food in medieval Europe to its current status as a global culinary obsession, bacon’s appeal is undeniable. Its smoky aroma, the satisfying crunch, and the savory flavor that elevates everything it touches what’s not to love?
But let’s be honest, preparing bacon can be a bit of a sticky situation. Trying to cut bacon without mess often feels like a Herculean task. The fat clings to your knife, the strips slide around, and you’re left with a greasy cutting board and a less-than-perfect pile of bacon bits. That’s where my simple, yet brilliant, method comes in. It’s quick, it’s clean, and it guarantees perfectly uniform bacon pieces every single time. Get ready to say goodbye to bacon-prep frustration and hello to perfectly portioned, mess-free bacon bliss!

Ingredients:
- 1 pound thick-cut bacon, preferably applewood smoked
- 1 tablespoon olive oil (optional, for greasing the pan if needed)
- Freshly ground black pepper, to taste (optional)
- Maple syrup, for drizzling (optional, for a sweet and savory twist)
- Brown sugar, for caramelizing (optional, for candied bacon)
- Red pepper flakes, for a spicy kick (optional)
- Parchment paper (essential for easy cleanup and even cooking)
Preparing the Bacon: The Key to Mess-Free Cutting
Okay, let’s talk bacon. We all love it, but the sticky, greasy mess it leaves behind? Not so much. The secret to cutting bacon without the usual chaos lies in chilling it first. Trust me on this one!
- Chill the Bacon: Place the unopened package of bacon in the freezer for about 15-20 minutes. You don’t want it frozen solid, just firm enough to make slicing a breeze. This is crucial for clean, even cuts. If you forget and leave it in longer, let it thaw slightly before attempting to cut.
- Prepare Your Cutting Surface: Lay down a sheet of parchment paper on your cutting board. This will catch any stray bits and grease, making cleanup a snap. Seriously, parchment paper is your best friend here.
- Open the Bacon: Carefully open the package of bacon. If the bacon is stuck together, gently separate the slices. The slight chill should make this much easier than usual.
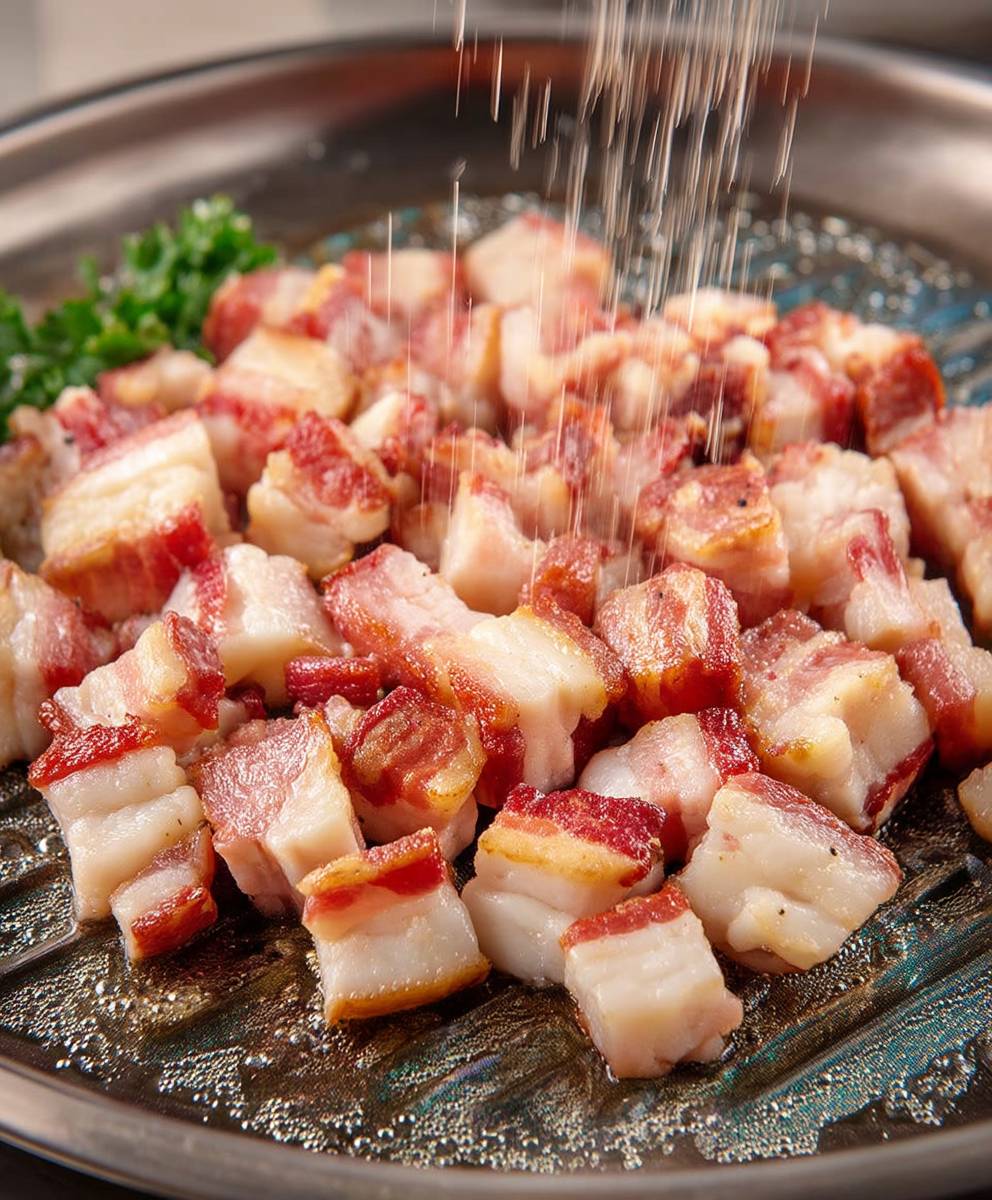
- Slice the Bacon (if desired): If you want smaller pieces of bacon for, say, topping a salad or adding to a quiche, now’s the time to slice it. The chilled bacon will allow you to cut it into lardons (small cubes) or smaller strips with minimal sticking and tearing. Aim for uniform sizes for even cooking.
- Season (Optional): If you’re feeling fancy, now’s the time to add a little something extra. A sprinkle of freshly ground black pepper is always a good choice. For candied bacon, lightly coat the bacon with brown sugar. For a spicy kick, add a pinch of red pepper flakes. Don’t overdo it, though; you want the bacon flavor to shine through.
Cooking the Bacon: Oven-Baked Perfection
While you can fry bacon in a pan, baking it in the oven is my preferred method. It’s less messy, cooks more evenly, and frees you up to do other things while it’s cooking. Plus, the cleanup is a breeze!
- Preheat the Oven: Preheat your oven to 400°F (200°C). Make sure your oven rack is positioned in the middle.
- Line a Baking Sheet: Line a baking sheet with parchment paper. This is non-negotiable! It prevents the bacon from sticking and makes cleanup incredibly easy. You can even reuse the parchment paper you used for cutting, if it’s still in good shape.
- Arrange the Bacon: Lay the bacon slices in a single layer on the prepared baking sheet. Make sure the slices aren’t overlapping, or they won’t cook evenly. If you’re cooking a lot of bacon, you might need to use two baking sheets.
- Bake the Bacon: Place the baking sheet in the preheated oven and bake for 15-20 minutes, or until the bacon is crispy and golden brown. The exact cooking time will depend on the thickness of the bacon and your oven, so keep a close eye on it. I usually start checking it around 15 minutes.
- Check for Doneness: The bacon is done when it’s crispy and golden brown. If you like your bacon extra crispy, you can bake it for a few minutes longer, but be careful not to burn it.
- Remove from Oven: Once the bacon is cooked to your liking, carefully remove the baking sheet from the oven.
- Drain the Bacon: Use tongs to transfer the bacon slices to a plate lined with paper towels to drain off any excess grease. This will help keep your bacon nice and crispy.
Alternative Cooking Methods (If You Must!)
Okay, okay, I get it. Sometimes you just want that sizzle and smell of bacon frying in a pan. Here are a couple of alternative methods, but be warned, they’re messier!
Pan-Frying Bacon
- Prepare the Pan: Place a large skillet over medium heat. You can add a teaspoon of olive oil if your pan isn’t non-stick, but usually the bacon fat is enough.
- Cook the Bacon: Add the bacon slices to the cold skillet in a single layer. Don’t overcrowd the pan, or the bacon will steam instead of fry. Cook for 3-5 minutes per side, or until crispy and golden brown, flipping occasionally.
- Drain the Bacon: Use tongs to transfer the bacon slices to a plate lined with paper towels to drain off any excess grease.
Microwaving Bacon (For the Impatient)
This isn’t my favorite method, but it’s quick and easy if you’re in a hurry. Just be aware that the bacon might not be as crispy as oven-baked or pan-fried bacon.
- Prepare the Plate: Line a microwave-safe plate with several layers of paper towels.
- Arrange the Bacon: Lay the bacon slices in a single layer on the paper towels. Don’t overlap the slices.
- Microwave the Bacon: Microwave on high for 1-2 minutes per slice, or until crispy. The exact cooking time will depend on your microwave, so keep a close eye on it.
- Drain the Bacon: Carefully remove the plate from the microwave (it will be hot!) and transfer the bacon slices to a fresh plate lined with paper towels to drain off any excess grease.
Serving and Enjoying Your Perfectly Cooked Bacon
Now for the best part: eating! There are endless ways to enjoy your perfectly cooked bacon. Here are a few ideas:
- Classic Bacon and Eggs: The ultimate breakfast combination.
- BLT Sandwich: Crispy bacon, lettuce, tomato, and mayonnaise on toasted bread. A classic for a reason.
- Bacon Cheeseburger: Add a few slices of bacon to your favorite cheeseburger for extra flavor and texture.
- Bacon-Wrapped Dates: A sweet and savory appetizer that’s always a crowd-pleaser.
- Crumbled Bacon Topping: Sprinkle crumbled bacon on salads, soups, baked potatoes, or even ice cream (don’t knock it ’til you try it!).
- Maple Bacon Donuts: A decadent treat that’s perfect for a special occasion.
- Just Eat It! Sometimes, the best way to enjoy bacon is just to eat it straight up.
And there you have it! Perfectly cooked bacon, with minimal mess. Enjoy!
Conclusion:
So there you have it! Cutting bacon without the mess is not only possible, it’s incredibly easy with these simple techniques. I truly believe this is a game-changer in the kitchen, especially if you’re like me and appreciate a clean and efficient cooking process. No more sticky fingers, no more struggling with flimsy bacon slices, and definitely no more bacon grease splatters all over your countertop. This method will transform your bacon preparation from a chore into a breeze.
Why is this a must-try? Because it saves you time, reduces mess, and ultimately makes cooking bacon a more enjoyable experience. Think about it: you can quickly and easily prepare bacon for breakfast, BLTs, salads, or even crumbled as a delicious topping for baked potatoes. The possibilities are endless! Plus, the clean cuts you achieve will result in more evenly cooked bacon, ensuring crispy perfection every single time.
But the fun doesn’t stop there! Let’s talk about serving suggestions and variations. Imagine perfectly diced bacon sprinkled over a creamy pasta carbonara, adding a smoky and savory depth to the dish. Or how about using those neatly cut bacon pieces to create a decadent bacon jam, perfect for spreading on toast or serving with cheese and crackers? You could even incorporate the bacon into homemade quiche or frittata for a breakfast that’s both satisfying and impressive.
And for those who love to experiment, here are a few variations to consider. Try using different types of bacon, such as thick-cut, maple-smoked, or even turkey bacon, to see how the cutting process and the final flavor profile change. You can also experiment with different freezing times to find the sweet spot that works best for your freezer and your preferred bacon consistency. Don’t be afraid to get creative and adapt these techniques to your own cooking style.
I’m so confident that you’ll love this method for cutting bacon without mess that I urge you to try it out as soon as possible. Seriously, grab a package of bacon, pop it in the freezer for a bit, and give it a go. You’ll be amazed at how much easier and cleaner it is compared to the traditional method.
Once you’ve tried it, I’d absolutely love to hear about your experience. Did you find it as helpful as I did? Did you discover any new tips or tricks along the way? What are your favorite ways to use perfectly cut bacon? Share your thoughts, photos, and recipes in the comments below. Let’s create a community of bacon-loving cooks who appreciate a clean and efficient kitchen!
I’m truly passionate about sharing tips and tricks that make cooking easier and more enjoyable, and I believe this is one of those game-changing techniques that everyone should know. So go ahead, give it a try, and let me know what you think. Happy cooking! I can’t wait to hear from you and see all the delicious bacon creations you come up with. Remember, a clean kitchen is a happy kitchen, and perfectly cut bacon is the key to culinary bliss!
Cut Bacon Without Mess: Easy Tips and Tricks
Learn how to cook perfect bacon every time with this easy guide! Includes oven-baked, pan-fried, and microwave methods, plus tips for mess-free prep and delicious variations.
Ingredients
- 1 pound thick-cut bacon, preferably applewood smoked
- 1 tablespoon olive oil (optional, for greasing the pan if needed)
- Freshly ground black pepper, to taste (optional)
- Maple syrup, for drizzling (optional, for a sweet and savory twist)
- Brown sugar, for caramelizing (optional, for candied bacon)
- Red pepper flakes, for a spicy kick (optional)
- Parchment paper (essential for easy cleanup and even cooking)
Instructions
- Place the unopened package of bacon in the freezer for about 15-20 minutes. You don’t want it frozen solid, just firm enough to make slicing a breeze.
- Lay down a sheet of parchment paper on your cutting board.
- Carefully open the package of bacon. If the bacon is stuck together, gently separate the slices.
- If you want smaller pieces of bacon, slice the chilled bacon into lardons (small cubes) or smaller strips.
- Sprinkle with freshly ground black pepper, brown sugar (for candied bacon), or red pepper flakes.
- Preheat your oven to 400°F (200°C).
- Line a baking sheet with parchment paper.
- Lay the bacon slices in a single layer on the prepared baking sheet. Make sure the slices aren’t overlapping, or they won’t cook evenly. If you’re cooking a lot of bacon, you might need to use two baking sheets.
- Place the baking sheet in the preheated oven and bake for 15-20 minutes, or until the bacon is crispy and golden brown. The exact cooking time will depend on the thickness of the bacon and your oven, so keep a close eye on it. I usually start checking it around 15 minutes.
- The bacon is done when it’s crispy and golden brown. If you like your bacon extra crispy, you can bake it for a few minutes longer, but be careful not to burn it.
- Once the bacon is cooked to your liking, carefully remove the baking sheet from the oven.
- Use tongs to transfer the bacon slices to a plate lined with paper towels to drain off any excess grease. This will help keep your bacon nice and crispy.
- Place a large skillet over medium heat. You can add a teaspoon of olive oil if your pan isn’t non-stick, but usually the bacon fat is enough.
- Add the bacon slices to the cold skillet in a single layer. Don’t overcrowd the pan, or the bacon will steam instead of fry. Cook for 3-5 minutes per side, or until crispy and golden brown, flipping occasionally.
- Use tongs to transfer the bacon slices to a plate lined with paper towels to drain off any excess grease.
- Line a microwave-safe plate with several layers of paper towels.
- Lay the bacon slices in a single layer on the paper towels. Don’t overlap the slices.
- Microwave on high for 1-2 minutes per slice, or until crispy. The exact cooking time will depend on your microwave, so keep a close eye on it.
- Carefully remove the plate from the microwave (it will be hot!) and transfer the bacon slices to a fresh plate lined with paper towels to drain off any excess grease.
Notes
- Chilling the bacon before slicing makes it easier to cut and prevents sticking.
- Parchment paper is essential for easy cleanup when oven-baking.
- Cooking times may vary depending on the thickness of the bacon and your oven/microwave.
- For candied bacon, sprinkle brown sugar on the bacon before cooking.
- For a spicy kick, add a pinch of red pepper flakes before cooking.
- Drain cooked bacon on paper towels to remove excess grease.


Leave a Comment