
Chocolate cream pots, or pots de crème au chocolat, are the epitome of simple elegance. Imagine a dessert so rich and decadent, yet so effortlessly easy to prepare, that it becomes your go-to for impressing guests or simply indulging yourself. These little pots of pure chocolate bliss are guaranteed to be a crowd-pleaser!
Originating in 17th-century France, pots de crème were initially enjoyed by the aristocracy, served in delicate porcelain cups specifically designed for this creamy confection. While variations abound, the classic chocolate version remains a timeless favorite. The beauty of chocolate cream pots lies in their simplicity. They require minimal ingredients and effort, yet deliver a luxurious experience with every spoonful.
What makes them so irresistible? It’s the velvety smooth texture, the intense chocolate flavor that melts in your mouth, and the sheer convenience of making them ahead of time. They are perfect for dinner parties, holidays, or any occasion that calls for a touch of sophistication. Get ready to discover how to create these delightful treats in your own kitchen you won’t be disappointed!

Ingredients:
- 2 cups (473ml) heavy cream
- 4 ounces (113g) bittersweet chocolate, finely chopped
- 2 ounces (57g) milk chocolate, finely chopped
- 1/4 cup (50g) granulated sugar
- 1/4 teaspoon salt
- 1 teaspoon vanilla extract
- Optional: Whipped cream and chocolate shavings for garnish
Preparing the Chocolate Cream Base
- Heat the Heavy Cream: In a medium saucepan, pour in the heavy cream. Place the saucepan over medium heat. You want the cream to get hot, but not boiling. Watch it carefully! We’re aiming for a gentle simmer, where you see small bubbles forming around the edges of the pan. This usually takes about 5-7 minutes, depending on your stove.
- Add the Chocolate: Once the cream is hot, remove the saucepan from the heat. Immediately add the finely chopped bittersweet and milk chocolate to the hot cream. Make sure all the chocolate is submerged in the cream.
- Let it Sit: Now, this is important! Let the chocolate sit in the hot cream for about 2-3 minutes without stirring. This allows the heat to melt the chocolate evenly and prevents it from seizing up.
- Whisk Until Smooth: After the waiting period, grab a whisk and gently begin to whisk the chocolate and cream together. Start slowly and gradually increase your speed as the chocolate melts. Continue whisking until the mixture is completely smooth and glossy. There should be no lumps of chocolate remaining. This might take a few minutes, so be patient!
- Add Sugar and Salt: Once the chocolate is melted and the mixture is smooth, add the granulated sugar and salt. Whisk again until the sugar is completely dissolved. Taste the mixture and adjust the sugar if needed, depending on your preference for sweetness. The salt enhances the chocolate flavor, so don’t skip it!
- Incorporate Vanilla Extract: Finally, stir in the vanilla extract. This adds a lovely aroma and enhances the overall flavor of the chocolate cream. Give it one last whisk to ensure everything is well combined.
Pouring and Chilling
- Prepare Your Serving Dishes: Get out your ramekins, small glasses, or any other serving dishes you want to use for your chocolate cream pots. I usually use four 6-ounce ramekins.
- Pour the Chocolate Mixture: Carefully pour the chocolate cream mixture evenly into your prepared serving dishes. Try to avoid creating any air bubbles as you pour. If you do see any bubbles, you can gently tap the ramekins on the counter to release them.
- Cool Slightly: Allow the chocolate cream pots to cool slightly at room temperature for about 15-20 minutes. This will help prevent condensation from forming on the surface when you refrigerate them.
- Refrigerate: Cover each ramekin with plastic wrap, pressing it directly onto the surface of the chocolate cream. This will prevent a skin from forming on top. Place the ramekins in the refrigerator and chill for at least 4 hours, or preferably overnight. This allows the chocolate cream to set completely and develop its rich, creamy texture.
Serving and Garnishing
- Remove from Refrigerator: When you’re ready to serve, remove the chocolate cream pots from the refrigerator.
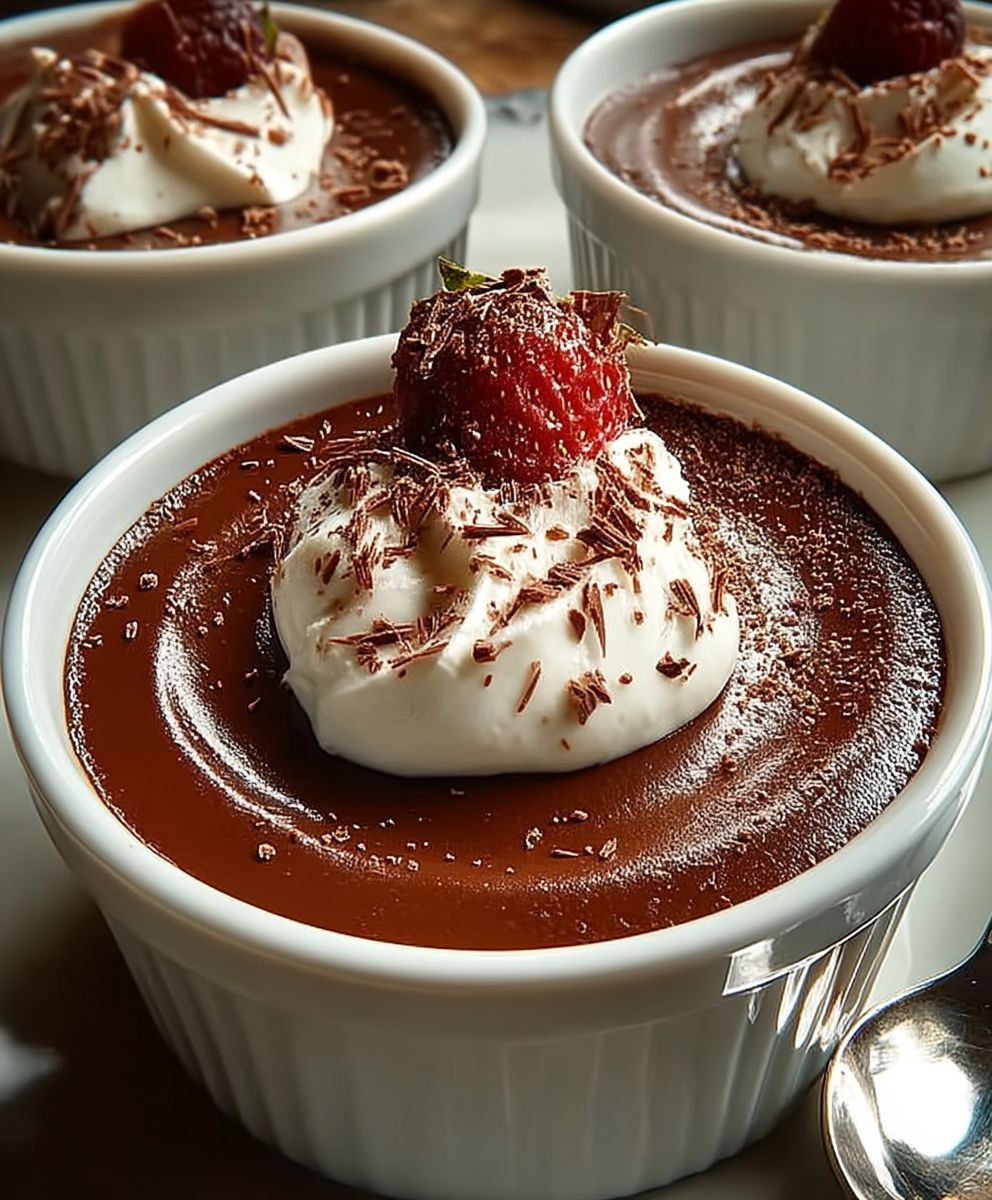
- Optional Garnishing: If desired, garnish the chocolate cream pots with a dollop of whipped cream and some chocolate shavings. You can also use fresh berries, a sprinkle of cocoa powder, or a drizzle of chocolate sauce. Get creative and personalize your presentation!
- Serve and Enjoy: Serve the chilled chocolate cream pots immediately and enjoy! The creamy, rich chocolate flavor is sure to be a hit.
Tips and Variations
- Type of Chocolate: Feel free to experiment with different types of chocolate. You can use all bittersweet chocolate, all milk chocolate, or even add a touch of dark chocolate for a more intense flavor. Just be sure to adjust the sugar accordingly, as some chocolates are sweeter than others.
- Flavorings: You can add other flavorings to the chocolate cream, such as a pinch of cinnamon, a dash of espresso powder, or a few drops of peppermint extract.
- Vegan Option: To make this recipe vegan, you can substitute the heavy cream with full-fat coconut milk and use vegan chocolate.
- Liqueur: For an adult twist, add a tablespoon or two of your favorite liqueur, such as Grand Marnier, Frangelico, or Kahlua, to the chocolate cream mixture.
- Individual Servings: This recipe is perfect for individual servings, but you can also make it in a larger dish, such as a trifle bowl. Just be sure to adjust the chilling time accordingly.
- Preventing a Skin: Pressing plastic wrap directly onto the surface of the chocolate cream is the best way to prevent a skin from forming. You can also sprinkle a thin layer of cocoa powder or sugar on top before chilling.
- Adjusting Sweetness: Taste the chocolate cream mixture before chilling and adjust the sugar to your liking. Remember that the flavor will mellow slightly as it chills.
- Melting Chocolate Tips: Finely chopping the chocolate ensures that it melts evenly and smoothly. If you’re using chocolate chips, make sure they are fresh and not old or stale.
- Storage: Chocolate cream pots can be stored in the refrigerator for up to 3 days. Be sure to keep them covered to prevent them from drying out.
- Serving Temperature: While chocolate cream pots are best served chilled, you can also let them sit at room temperature for a few minutes before serving to soften them slightly.
Troubleshooting
- Chocolate Seizing: If your chocolate seizes up and becomes grainy, don’t panic! Try adding a tablespoon or two of hot water to the mixture and whisking vigorously. This can sometimes help to smooth it out.
- Lumpy Mixture: If your chocolate cream mixture is lumpy, it could be due to the chocolate not melting properly or the sugar not dissolving completely. Try whisking the mixture over low heat until it becomes smooth.
- Not Setting: If your chocolate cream pots are not setting properly, it could be due to not chilling them for long enough or using too much liquid. Make sure to chill them for at least 4 hours, or preferably overnight. If they are still not setting, you can try adding a teaspoon of gelatin to the mixture before chilling.
- Too Sweet: If your chocolate cream pots are too sweet, you can add a pinch of salt or a squeeze of lemon juice to balance the flavors.
- Not Sweet Enough: If your chocolate cream pots are not sweet enough, you can add a tablespoon or two of sugar to the mixture and whisk until dissolved.
Why This Recipe Works
This recipe is a classic for a reason! The combination of heavy cream and high-quality chocolate creates a luxuriously smooth and rich dessert that is surprisingly easy to make. The addition of a small amount of sugar and salt enhances the chocolate flavor and balances the sweetness. The vanilla extract adds a touch of warmth and complexity. And the best part? You can customize this recipe to your liking by using different types of chocolate, adding flavorings, or garnishing with your favorite toppings.
Enjoy!
I hope you enjoy making and eating these delicious chocolate cream pots! They are perfect for a special occasion, a romantic dinner, or simply a sweet treat to brighten your day. Let me know in the comments if you have any questions or if you try any variations of the recipe. Happy baking!
Conclusion:
And there you have it! These decadent chocolate cream pots are truly a must-try for any chocolate lover. From the rich, intense flavor to the unbelievably smooth and creamy texture, every spoonful is pure bliss. I know I’m biased, but I genuinely believe this recipe is foolproof and delivers restaurant-quality results with minimal effort. What’s not to love?
But don’t just take my word for it! The real magic happens when you experience these little pots of chocolate heaven for yourself. Imagine serving them at your next dinner party the impressed gasps and delighted smiles will be worth every minute spent in the kitchen. Or, picture yourself curled up on the couch with one of these after a long day, a perfect ending to any evening.
Beyond the simple elegance of the original recipe, there’s plenty of room for experimentation. Feeling adventurous? Try adding a pinch of chili powder to the chocolate mixture for a subtle kick. A few drops of peppermint extract can transform these into festive holiday treats. For a more sophisticated flavor profile, infuse the cream with orange zest or a cinnamon stick while it’s heating. The possibilities are endless!
As for serving suggestions, these chocolate cream pots are incredibly versatile. A dollop of freshly whipped cream and a sprinkle of cocoa powder are classic and always appreciated. For a more elaborate presentation, consider adding a few fresh berries, a drizzle of salted caramel sauce, or a scattering of chopped nuts. They also pair beautifully with a scoop of vanilla ice cream or a crunchy biscotti for dipping. If you’re feeling extra fancy, you could even brûlée the tops with a kitchen torch for a delightful caramelized crust.
I’ve poured my heart into perfecting this recipe, and I’m confident that you’ll love it as much as I do. It’s the kind of dessert that’s both impressive and comforting, perfect for special occasions or a simple weeknight indulgence. It’s also a fantastic make-ahead dessert, which is always a bonus when you’re entertaining. You can prepare these a day or two in advance and simply chill them in the refrigerator until you’re ready to serve. This allows the flavors to meld together even more, resulting in an even richer and more satisfying experience.
So, what are you waiting for? Gather your ingredients, follow the simple steps, and prepare to be amazed. I promise you won’t regret it! And most importantly, I’d absolutely love to hear about your experience. Did you try any variations? What were your favorite toppings? Did you serve them to guests? Share your photos and stories in the comments below! I’m always eager to see how you make this recipe your own. Happy cooking, and even happier eating! I hope you enjoy these delightful chocolate cream pots as much as I do. They are a true testament to the simple pleasures in life.
Chocolate Cream Pots: A Decadent & Easy Dessert Recipe
Rich, decadent chocolate cream pots made with heavy cream and a blend of bittersweet and milk chocolate. A simple, elegant dessert perfect for any occasion.
Ingredients
- 2 cups (473ml) heavy cream
- 4 ounces (113g) bittersweet chocolate, finely chopped
- 2 ounces (57g) milk chocolate, finely chopped
- 1/4 cup (50g) granulated sugar
- 1/4 teaspoon salt
- 1 teaspoon vanilla extract
- Optional: Whipped cream and chocolate shavings for garnish
Instructions
- Heat the Heavy Cream: In a medium saucepan, pour in the heavy cream. Place the saucepan over medium heat. Heat until a gentle simmer, with small bubbles forming around the edges (about 5-7 minutes).
- Add the Chocolate: Remove the saucepan from the heat. Add the finely chopped bittersweet and milk chocolate to the hot cream, ensuring it’s submerged.
- Let it Sit: Let the chocolate sit in the hot cream for 2-3 minutes without stirring.
- Whisk Until Smooth: Gently whisk the chocolate and cream together, gradually increasing speed, until the mixture is completely smooth and glossy.
- Add Sugar and Salt: Add the granulated sugar and salt. Whisk until the sugar is completely dissolved. Taste and adjust sugar if needed.
- Incorporate Vanilla Extract: Stir in the vanilla extract. Whisk to combine.
- Prepare Serving Dishes: Get out your ramekins, small glasses, or any other serving dishes you want to use for your chocolate cream pots.
- Pour the Chocolate Mixture: Carefully pour the chocolate cream mixture evenly into your prepared serving dishes.
- Cool Slightly: Allow the chocolate cream pots to cool slightly at room temperature for about 15-20 minutes.
- Refrigerate: Cover each ramekin with plastic wrap, pressing it directly onto the surface of the chocolate cream. Place the ramekins in the refrigerator and chill for at least 4 hours, or preferably overnight.
- Remove from Refrigerator: When you’re ready to serve, remove the chocolate cream pots from the refrigerator.
- Optional Garnishing: If desired, garnish the chocolate cream pots with a dollop of whipped cream and some chocolate shavings.
- Serve and Enjoy: Serve the chilled chocolate cream pots immediately and enjoy!
Notes
- Experiment with different types of chocolate. Adjust sugar accordingly.
- Add cinnamon, espresso powder, or peppermint extract.
- Substitute heavy cream with full-fat coconut milk and use vegan chocolate.
- Add a tablespoon or two of your favorite liqueur.
- This recipe is perfect for individual servings, but you can also make it in a larger dish, such as a trifle bowl. Just be sure to adjust the chilling time accordingly.
- Pressing plastic wrap directly onto the surface of the chocolate cream is the best way to prevent a skin from forming. You can also sprinkle a thin layer of cocoa powder or sugar on top before chilling.
- Taste the chocolate cream mixture before chilling and adjust the sugar to your liking. Remember that the flavor will mellow slightly as it chills.
- Finely chopping the chocolate ensures that it melts evenly and smoothly. If you’re using chocolate chips, make sure they are fresh and not old or stale.
- Chocolate cream pots can be stored in the refrigerator for up to 3 days. Be sure to keep them covered to prevent them from drying out.
- While chocolate cream pots are best served chilled, you can also let them sit at room temperature for a few minutes before serving to soften them slightly.


Leave a Comment