
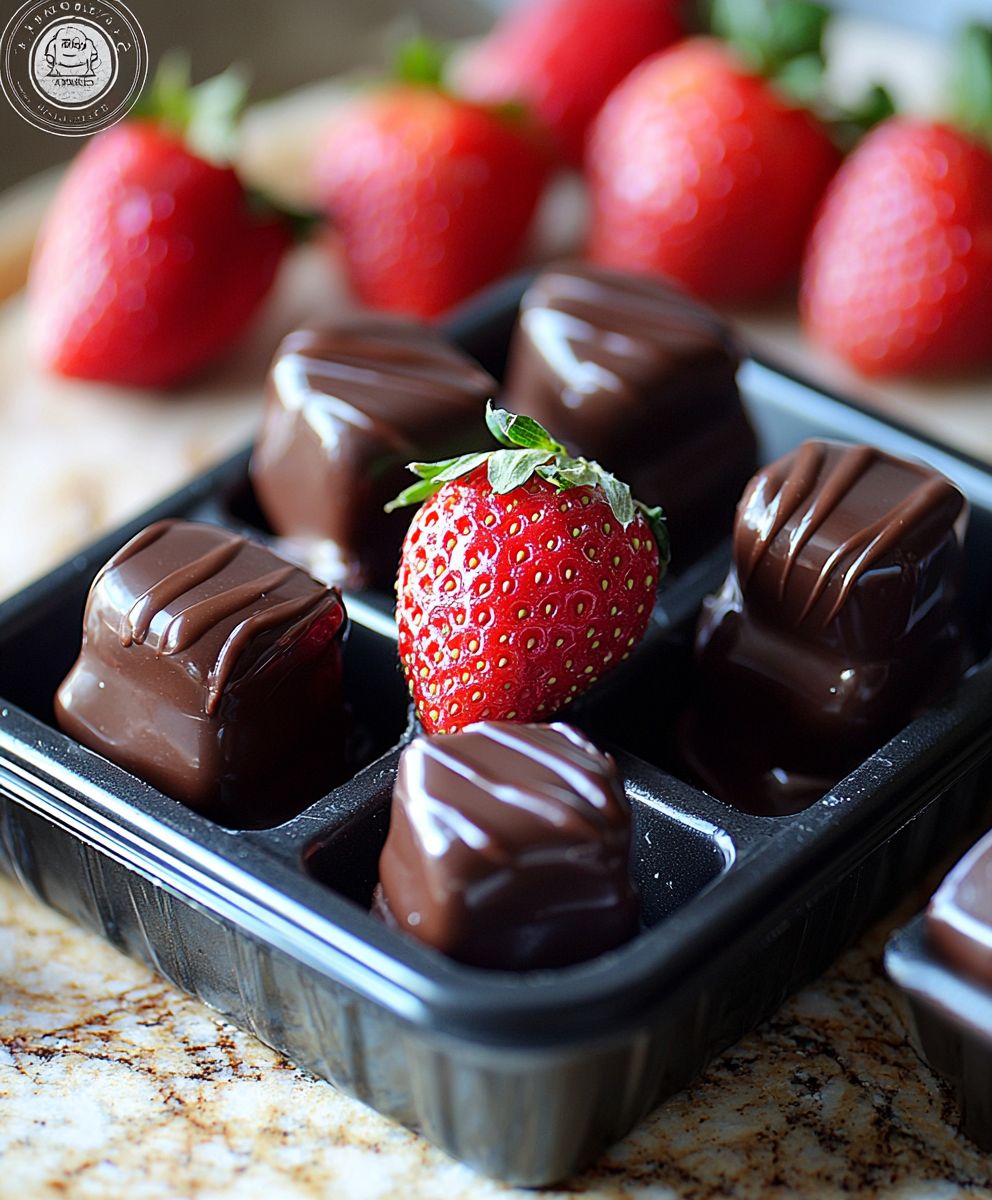
Chocolate covered strawberries: a simple yet undeniably decadent treat that elevates any occasion. Imagine biting into a plump, juicy strawberry, its sweetness perfectly complemented by a rich, smooth chocolate coating that melts in your mouth. Is your mouth watering yet? Mine is! These delightful morsels are not only visually stunning but also incredibly easy to make, making them the perfect dessert for everything from romantic Valentine’s Day dinners to casual weekend gatherings.
While the exact origins of chocolate covered strawberries are somewhat shrouded in mystery, their popularity exploded in the 1960s, quickly becoming a symbol of luxury and indulgence. The combination of fresh fruit and rich chocolate has an undeniable appeal, tapping into our primal cravings for both sweetness and textural contrast. The slight tartness of the strawberry cuts through the richness of the chocolate, creating a balanced and satisfying flavor profile that keeps you coming back for more.
What truly makes chocolate covered strawberries so beloved is their versatility and ease of preparation. Whether you prefer dark, milk, or white chocolate, the possibilities for customization are endless. Add sprinkles, nuts, or even a drizzle of contrasting chocolate for an extra touch of elegance. Plus, they require minimal ingredients and can be made in under an hour, making them the ideal last-minute dessert for impressing your guests or simply treating yourself. So, let’s dive into this easy recipe and create some chocolate-covered magic!

Ingredients:
- 1 pound fresh strawberries, preferably large and ripe
- 12 ounces high-quality chocolate (dark, milk, or white, or a combination), chopped
- 1 tablespoon vegetable shortening or coconut oil (optional, for smoother chocolate)
- Optional toppings: chopped nuts, sprinkles, shredded coconut, sea salt, mini chocolate chips, crushed cookies
- Parchment paper or wax paper
Preparing the Strawberries:
- Wash the strawberries thoroughly. Gently rinse the strawberries under cool running water. Be careful not to bruise them.
- Dry the strawberries completely. This is crucial! Use a clean paper towel to pat each strawberry dry. Any moisture will prevent the chocolate from adhering properly and can cause it to seize. I usually let them air dry on a paper towel-lined baking sheet for at least 30 minutes after patting them dry, just to be absolutely sure.
- Prepare a baking sheet. Line a baking sheet with parchment paper or wax paper. This will prevent the chocolate-covered strawberries from sticking and make cleanup a breeze.
Melting the Chocolate:
There are two main methods for melting chocolate: using a double boiler or using the microwave. I’ll describe both, and you can choose the one you’re most comfortable with.
Double Boiler Method:
- Set up the double boiler. Fill a saucepan with about an inch or two of water. Bring the water to a simmer over medium heat.
- Place the chocolate in a heatproof bowl. Make sure the bowl fits snugly over the saucepan without touching the water. This is important to prevent the chocolate from overheating and burning.
- Add shortening (optional). If you’re using vegetable shortening or coconut oil, add it to the chocolate in the bowl. This will help create a smoother, shinier chocolate coating.
- Melt the chocolate slowly. Stir the chocolate occasionally with a rubber spatula as it melts. Be patient and don’t rush the process. It’s better to melt the chocolate slowly and gently to avoid burning it.
- Remove from heat. Once the chocolate is completely melted and smooth, remove the bowl from the heat. Be careful, as the bowl will be hot.
Microwave Method:
- Place the chocolate in a microwave-safe bowl. Make sure the bowl is dry.
- Add shortening (optional). If you’re using vegetable shortening or coconut oil, add it to the chocolate in the bowl.
- Microwave in short intervals. Microwave the chocolate in 30-second intervals, stirring well after each interval. This is crucial to prevent the chocolate from burning.
- Continue microwaving until melted. Continue microwaving in 15-second intervals, stirring well after each interval, until the chocolate is almost completely melted.
- Stir until smooth. The residual heat will melt the remaining chocolate. Stir until the chocolate is completely melted and smooth. Be careful not to overheat the chocolate.
Important Note: Regardless of which method you choose, be extremely careful not to get any water into the chocolate. Even a tiny drop of water can cause the chocolate to seize and become grainy. If this happens, you can sometimes rescue the chocolate by adding a tablespoon of vegetable shortening or coconut oil and stirring vigorously. However, it’s best to avoid this situation altogether by being extra careful.
Dipping the Strawberries:
- Hold the strawberry by the stem or leaves. This will give you a good grip and prevent you from getting chocolate on your fingers.
- Dip the strawberry into the melted chocolate. Dip the strawberry into the melted chocolate, swirling it around to coat it evenly. You can dip the strawberry completely or leave a small portion of the top uncovered.
- Lift the strawberry and let the excess chocolate drip off. Gently tap the strawberry against the side of the bowl to remove any excess chocolate. You can also use a fork to scrape off the excess.
- Place the dipped strawberry on the prepared baking sheet. Place the chocolate-covered strawberry on the parchment paper or wax paper-lined baking sheet.
- Add toppings (optional). If you’re using toppings, sprinkle them onto the chocolate-covered strawberry immediately after dipping. The chocolate will harden quickly, so you need to add the toppings while it’s still wet.
- Repeat with the remaining strawberries. Repeat the dipping and topping process with the remaining strawberries and chocolate.
Setting the Chocolate:
- Refrigerate the strawberries. Place the baking sheet with the chocolate-covered strawberries in the refrigerator for at least 15-20 minutes, or until the chocolate is firm. This will help the chocolate set properly and prevent it from melting at room temperature.
- Serve and enjoy! Once the chocolate is firm, remove the strawberries from the refrigerator and serve immediately. They are best enjoyed within a few hours of making them.
Tips and Variations:
- Use high-quality chocolate. The quality of the chocolate will greatly affect the taste of the finished product. I recommend using a good-quality chocolate bar or chocolate chips.
- Experiment with different types of chocolate. Try using dark chocolate, milk chocolate, white chocolate, or a combination of all three.
- Add flavorings to the chocolate. You can add a few drops of vanilla extract, almond extract, or peppermint extract to the melted chocolate for extra flavor.
- Drizzle with contrasting chocolate. After the chocolate has set, you can drizzle the strawberries with a contrasting color of melted chocolate for a beautiful presentation. For example, drizzle dark chocolate-covered strawberries with white chocolate, or vice versa.
- Add a touch of sea salt. A sprinkle of sea salt on top of the chocolate-covered strawberries can enhance the sweetness and add a salty-sweet flavor.
- Make tuxedo strawberries. Dip the strawberries in white chocolate first, let it set, then dip half of the strawberry in dark chocolate to create a “tuxedo” effect.
- Use different toppings. Get creative with your toppings! Try using chopped nuts, sprinkles, shredded coconut, mini chocolate chips, crushed cookies, or even edible glitter.
- Store properly. Store leftover chocolate-covered strawberries in an airtight container in the refrigerator for up to 2 days. Keep in mind that the strawberries may release some moisture over time, so they are best enjoyed fresh.
- For a vegan option: Use vegan chocolate and ensure any toppings are also vegan-friendly. Coconut oil is a great vegan alternative to vegetable shortening.
- Preventing chocolate bloom: Chocolate bloom is the white or grayish coating that can sometimes appear on chocolate. To minimize the risk of bloom, avoid temperature fluctuations during the melting and setting process. Melt the chocolate slowly and evenly, and store the finished strawberries in a cool, dry place.
Conclusion:
So there you have it! These chocolate covered strawberries are truly a must-try for anyone looking for a simple yet elegant dessert, a romantic treat, or just a delightful way to satisfy a sweet craving. The combination of juicy, fresh strawberries and rich, decadent chocolate is simply irresistible. It’s a classic pairing for a reason, and this recipe makes it incredibly easy to achieve perfection every single time. But why is this particular recipe so special? Beyond its simplicity, it’s the versatility that truly shines. You’re not just making chocolate covered strawberries; you’re creating a canvas for your own culinary creativity. Feel free to experiment with different types of chocolate dark chocolate for a sophisticated bitterness, milk chocolate for a classic sweetness, or even white chocolate for a creamy indulgence. And the fun doesn’t stop there! Consider adding toppings to elevate your chocolate covered strawberries to the next level. Chopped nuts, like almonds, pecans, or pistachios, add a delightful crunch and nutty flavor. Sprinkles, in all their colorful glory, are perfect for adding a touch of whimsy and fun, especially for celebrations. A drizzle of caramel or white chocolate adds an extra layer of sweetness and visual appeal. You could even try dipping them in crushed cookies or pretzels for a salty-sweet sensation. For serving suggestions, these beauties are incredibly versatile. They make a stunning addition to any dessert platter, perfect for parties, gatherings, or special occasions. Imagine presenting a platter of these glistening treats at your next dinner party your guests will be amazed! They’re also a thoughtful and romantic gift for Valentine’s Day, anniversaries, or just to show someone you care. And, of course, they’re perfect for enjoying all by yourself as a well-deserved treat. If you’re looking for a slightly different presentation, consider arranging them artfully on a tiered dessert stand. Or, for a more casual approach, simply arrange them on a pretty plate and let everyone help themselves. You can even pair them with a glass of champagne or sparkling wine for an extra touch of elegance. Don’t be intimidated by the idea of making these. Trust me, if I can do it, you can too! The recipe is straightforward, and the results are incredibly rewarding. The satisfaction of creating something so beautiful and delicious is truly unmatched. Plus, it’s a great activity to do with kids they’ll love helping with the dipping and decorating! So, what are you waiting for? Gather your ingredients, put on your apron, and get ready to create some magic. I’m confident that you’ll absolutely love these chocolate covered strawberries. They’re the perfect combination of simplicity, elegance, and deliciousness. I’m so excited for you to try this recipe! And I’d absolutely love to hear about your experience. Did you try any variations? What toppings did you use? How did your family and friends react? Please, share your photos and stories in the comments below. I can’t wait to see what you create! Happy dipping! Print
Chocolate Covered Strawberries: The Ultimate Guide to Making & Enjoying
- Total Time: 45
- Yield: 1 pound 1x
Description
Fresh, ripe strawberries dipped in luscious melted chocolate and adorned with your favorite toppings. Perfect for a romantic treat or a delightful dessert.
Ingredients
- 1 pound fresh strawberries, preferably large and ripe
- 12 ounces high-quality chocolate (dark, milk, or white, or a combination), chopped
- 1 tablespoon vegetable shortening or coconut oil (optional, for smoother chocolate)
- Optional toppings: chopped nuts, sprinkles, shredded coconut, sea salt, mini chocolate chips, crushed cookies
- Parchment paper or wax paper
Instructions
- Gently rinse strawberries under cool water. Pat completely dry with paper towels. Let air dry on a paper towel-lined baking sheet for at least 30 minutes to ensure they are completely dry.
- Line a baking sheet with parchment or wax paper.
- Fill a saucepan with 1-2 inches of water and simmer over medium heat.
- Place chopped chocolate (and shortening/coconut oil, if using) in a heatproof bowl that fits snugly over the saucepan without touching the water.
- Stir occasionally as the chocolate melts slowly.
- Remove from heat when completely melted and smooth.
- Place chopped chocolate (and shortening/coconut oil, if using) in a microwave-safe bowl.
- Microwave in 30-second intervals, stirring well after each interval.
- Continue microwaving in 15-second intervals, stirring well, until almost completely melted.
- Stir until smooth with residual heat.
- Hold a strawberry by the stem or leaves.
- Dip into the melted chocolate, swirling to coat evenly.
- Lift and let excess chocolate drip off. Tap gently against the bowl’s side.
- Place on the prepared baking sheet.
- Immediately add toppings, if desired.
- Repeat with remaining strawberries.
- Refrigerate for 15-20 minutes, or until the chocolate is firm.
- Remove from refrigerator and serve immediately. Best enjoyed within a few hours.
Notes
- Use high-quality chocolate for the best flavor.
- Be extremely careful not to get any water in the chocolate, as it can cause it to seize.
- Experiment with different types of chocolate and toppings.
- For a vegan option, use vegan chocolate and vegan-friendly toppings.
- To minimize chocolate bloom, avoid temperature fluctuations during melting and setting.
- Store leftover chocolate-covered strawberries in an airtight container in the refrigerator for up to 2 days.
- Prep Time: 15 minutes
- Cook Time: 10 minutes

Leave a Comment