
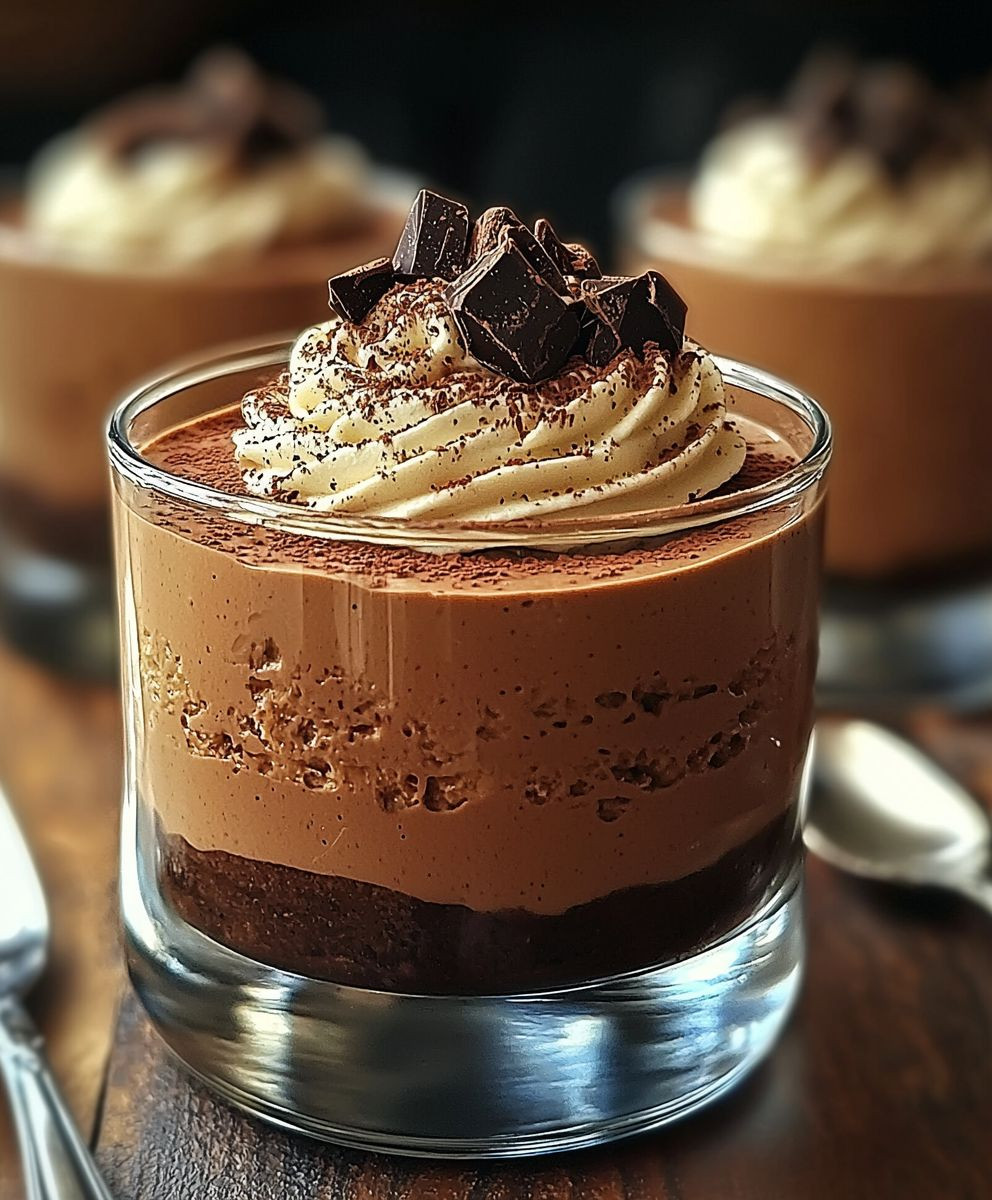
Chocolate Coffee Mousse: Prepare to be utterly captivated by this decadent dessert that effortlessly marries the rich intensity of dark chocolate with the robust aroma of freshly brewed coffee. Imagine a cloud of pure indulgence, light as air yet bursting with flavor, melting on your tongue with each spoonful. This isn’t just a dessert; it’s an experience.
While the exact origins of mousse are debated, its roots can be traced back to 18th-century France, where innovative chefs began experimenting with aerated desserts. The addition of coffee to chocolate, a pairing that seems almost divinely ordained, likely emerged later, as coffee became more widely accessible. The combination quickly gained popularity, celebrated for its ability to awaken the senses and provide a sophisticated, yet comforting, treat.
What makes this Chocolate Coffee Mousse so irresistible? It’s the symphony of textures the smooth, velvety mousse against the slight bitterness of the coffee, all culminating in a sweet, satisfying finish. It’s also incredibly versatile. Perfect for an elegant dinner party, a romantic evening in, or simply a well-deserved treat after a long day. Plus, it’s surprisingly easy to make! Who can resist a dessert that’s both impressive and achievable? I know I can’t!

Ingredients:
- 1 cup (240ml) heavy cream, cold
- 4 ounces (115g) bittersweet chocolate, finely chopped
- 2 ounces (57g) milk chocolate, finely chopped
- 2 large eggs, separated
- 1/4 cup (50g) granulated sugar, divided
- 1 tablespoon instant espresso powder
- 1 tablespoon hot water
- 1 teaspoon vanilla extract
- Pinch of salt
- Chocolate shavings, for garnish (optional)
- Whipped cream, for serving (optional)
Preparing the Chocolate Base:
Okay, let’s get started! The first thing we need to do is create a luscious chocolate base that will form the foundation of our mousse. This step is crucial for achieving that rich, intense chocolate flavor we’re after.
- Melt the Chocolate: In a heatproof bowl set over a saucepan of simmering water (make sure the bottom of the bowl doesn’t touch the water!), combine the bittersweet and milk chocolate. Stir occasionally until the chocolate is completely melted and smooth. Be patient and don’t rush this process, as burnt chocolate is a no-go!
- Dissolve the Espresso: While the chocolate is melting, in a small bowl, dissolve the instant espresso powder in the hot water. This will enhance the chocolate flavor and add a subtle coffee kick that complements the richness beautifully.
- Combine Espresso and Chocolate: Once the chocolate is melted and smooth, remove the bowl from the heat and stir in the dissolved espresso. Mix well until everything is evenly combined. The mixture should be glossy and fragrant.
- Cool Slightly: Let the chocolate mixture cool slightly for about 5-10 minutes. This is important because we don’t want to cook the egg yolks in the next step. You want it to be warm, but not hot to the touch.
Incorporating the Egg Yolks:
Now, we’re going to add the egg yolks, which will contribute to the mousse’s creamy texture and richness. This step requires a bit of finesse to ensure the yolks are properly incorporated without scrambling.
- Whisk the Egg Yolks: In a separate bowl, whisk the egg yolks with half of the granulated sugar (1/8 cup or 25g) until they are pale yellow and slightly thickened. This process helps to lighten the yolks and incorporate air, which will contribute to the mousse’s overall lightness.
- Temper the Chocolate: Slowly drizzle a small amount of the cooled chocolate mixture into the egg yolk mixture while whisking constantly. This is called tempering, and it helps to gradually raise the temperature of the egg yolks, preventing them from scrambling when added to the rest of the chocolate.
- Combine Everything: Once you’ve tempered the egg yolks, pour the egg yolk mixture into the remaining chocolate mixture and whisk until everything is smooth and well combined. Add the vanilla extract and a pinch of salt. The salt enhances the sweetness and balances the flavors.
Whipping the Egg Whites:
Next up, we’re going to whip the egg whites into a meringue. This is what will give our mousse its light and airy texture. Be sure to use a clean, grease-free bowl for the best results.
- Prepare the Egg Whites: In a clean, grease-free bowl (stainless steel or glass works best), add the egg whites. Make sure there are no traces of yolk in the whites, as this can prevent them from whipping properly.
- Whip to Soft Peaks: Using an electric mixer (either a stand mixer or a hand mixer), beat the egg whites on medium speed until soft peaks form. Soft peaks are when the whites hold their shape but the tips droop slightly.
- Gradually Add Sugar: Gradually add the remaining granulated sugar (1/8 cup or 25g) to the egg whites, one tablespoon at a time, while continuing to beat on medium speed.
- Whip to Stiff Peaks: Continue beating the egg whites until stiff, glossy peaks form. Stiff peaks are when the whites hold their shape and the tips stand straight up. Be careful not to overwhip, as this can make the meringue dry and grainy.
Whipping the Cream:
Now, let’s whip the heavy cream. This will add another layer of richness and creaminess to our mousse. Make sure your cream is very cold for the best results.
- Chill the Bowl and Whisk: Place the bowl and whisk (or beaters) in the freezer for about 15 minutes before whipping the cream. This will help the cream whip up faster and hold its shape better.
- Whip the Cream: Pour the cold heavy cream into the chilled bowl and whip with an electric mixer on medium speed until soft peaks form. Be careful not to overwhip, as this can turn the cream into butter. You want it to be thick and creamy, but still soft and pliable.
Combining Everything:
This is where the magic happens! We’re going to gently fold the whipped egg whites and whipped cream into the chocolate base, creating that signature mousse texture.
- Fold in Egg Whites: Gently fold about one-third of the whipped egg whites into the chocolate mixture. This will lighten the chocolate mixture and make it easier to incorporate the remaining egg whites. Use a rubber spatula and gently cut down through the center of the mixture, then fold the spatula over to bring the bottom of the mixture to the top. Rotate the bowl and repeat until the egg whites are partially incorporated.
- Fold in Remaining Egg Whites: Gently fold in the remaining whipped egg whites in two additions, using the same folding technique. Be careful not to overmix, as this will deflate the egg whites and result in a dense mousse. You want to retain as much air as possible.
- Fold in Whipped Cream: Gently fold in the whipped cream in two additions, using the same folding technique. Again, be careful not to overmix. The mixture should be light and airy, with no streaks of egg whites or whipped cream.
Chilling and Serving:
Almost there! Now, we just need to chill the mousse to allow the flavors to meld and the texture to set.
- Divide into Serving Dishes: Divide the mousse evenly among individual serving dishes or glasses.
- Chill: Cover the serving dishes with plastic wrap and refrigerate for at least 3 hours, or preferably overnight. This will allow the mousse to fully set and develop its flavor.
- Garnish and Serve: Before serving, garnish the mousse with chocolate shavings and a dollop of whipped cream, if desired. Enjoy your decadent and delicious Chocolate Coffee Mousse!
Conclusion:
This Chocolate Coffee Mousse isn’t just another dessert; it’s an experience. The rich, dark chocolate perfectly complements the robust coffee flavor, creating a symphony of taste that will leave you wanting more. The airy, light texture is a delightful contrast to the intense flavors, making it a truly unforgettable treat. If you’re looking for a dessert that’s both sophisticated and incredibly easy to make, look no further. This recipe is a guaranteed crowd-pleaser, perfect for impressing guests at a dinner party or simply indulging in a little self-care after a long day. But the best part? It’s incredibly versatile! Serve it chilled in elegant glasses for a classic presentation, or get creative with your toppings. A sprinkle of cocoa powder, a few chocolate shavings, or a dollop of whipped cream can elevate the mousse to a whole new level. For a more decadent experience, try adding a drizzle of chocolate sauce or a scattering of chopped nuts. Looking for variations? Absolutely! If you’re not a coffee lover (though I highly recommend trying it as is!), you can easily substitute it with a different flavor extract. A touch of vanilla, almond, or even orange extract can create a completely different, yet equally delicious, mousse. For a vegan version, experiment with using silken tofu or avocado as a base you might be surprised at how well it works! And for those who prefer a less intense chocolate flavor, you can use milk chocolate instead of dark chocolate. The possibilities are endless! I truly believe that this Chocolate Coffee Mousse recipe is a must-try for anyone who appreciates a good dessert. It’s simple enough for even beginner bakers to master, yet impressive enough to wow even the most discerning palates. The combination of rich chocolate and bold coffee is simply irresistible, and the light, airy texture makes it a truly guilt-free indulgence. So, what are you waiting for? Gather your ingredients, put on your apron, and get ready to create a dessert masterpiece. I’m confident that you’ll love this recipe as much as I do. And once you’ve tried it, I’d love to hear about your experience! Share your photos, your variations, and your thoughts in the comments below. Did you add any special toppings? Did you try a different flavor extract? I’m always looking for new and exciting ways to enjoy this delicious dessert. Don’t be afraid to experiment and make it your own. After all, the best recipes are the ones that are tailored to your own personal taste. And who knows, you might just discover your new favorite dessert! I can’t wait to see what you create. Happy baking! I am sure that you will enjoy this Chocolate Coffee Mousse as much as my family and friends do. It is a recipe that I have been perfecting for years, and I am so excited to finally share it with you. Print
Chocolate Coffee Mousse: A Decadent Dessert Recipe
- Total Time: 40 minutes
- Yield: 4–6 servings 1x
Description
Rich, decadent, and airy Chocolate Coffee Mousse. Combines bittersweet and milk chocolate with a hint of espresso for an unforgettable flavor.
Ingredients
- 1 cup (240ml) heavy cream, cold
- 4 ounces (115g) bittersweet chocolate, finely chopped
- 2 ounces (57g) milk chocolate, finely chopped
- 2 large eggs, separated
- 1/4 cup (50g) granulated sugar, divided
- 1 tablespoon instant espresso powder
- 1 tablespoon hot water
- 1 teaspoon vanilla extract
- Pinch of salt
- Chocolate shavings, for garnish (optional)
- Whipped cream, for serving (optional)
Instructions
- In a heatproof bowl set over a saucepan of simmering water (make sure the bottom of the bowl doesn’t touch the water!), combine the bittersweet and milk chocolate. Stir occasionally until the chocolate is completely melted and smooth.
- While the chocolate is melting, in a small bowl, dissolve the instant espresso powder in the hot water.
- Once the chocolate is melted and smooth, remove the bowl from the heat and stir in the dissolved espresso. Mix well until everything is evenly combined.
- Let the chocolate mixture cool slightly for about 5-10 minutes.
- In a separate bowl, whisk the egg yolks with half of the granulated sugar (1/8 cup or 25g) until they are pale yellow and slightly thickened.
- Slowly drizzle a small amount of the cooled chocolate mixture into the egg yolk mixture while whisking constantly.
- Once you’ve tempered the egg yolks, pour the egg yolk mixture into the remaining chocolate mixture and whisk until everything is smooth and well combined. Add the vanilla extract and a pinch of salt.
- In a clean, grease-free bowl (stainless steel or glass works best), add the egg whites.
- Using an electric mixer (either a stand mixer or a hand mixer), beat the egg whites on medium speed until soft peaks form. Soft peaks are when the whites hold their shape but the tips droop slightly.
- Gradually add the remaining granulated sugar (1/8 cup or 25g) to the egg whites, one tablespoon at a time, while continuing to beat on medium speed.
- Continue beating the egg whites until stiff, glossy peaks form. Stiff peaks are when the whites hold their shape and the tips stand straight up.
- Place the bowl and whisk (or beaters) in the freezer for about 15 minutes before whipping the cream.
- Pour the cold heavy cream into the chilled bowl and whip with an electric mixer on medium speed until soft peaks form.
- Gently fold about one-third of the whipped egg whites into the chocolate mixture. Use a rubber spatula and gently cut down through the center of the mixture, then fold the spatula over to bring the bottom of the mixture to the top. Rotate the bowl and repeat until the egg whites are partially incorporated.
- Gently fold in the remaining whipped egg whites in two additions, using the same folding technique.
- Gently fold in the whipped cream in two additions, using the same folding technique.
- Divide the mousse evenly among individual serving dishes or glasses.
- Cover the serving dishes with plastic wrap and refrigerate for at least 3 hours, or preferably overnight.
- Before serving, garnish the mousse with chocolate shavings and a dollop of whipped cream, if desired.
Notes
- Be careful not to burn the chocolate when melting.
- Make sure there are no traces of yolk in the egg whites, as this can prevent them from whipping properly.
- Don’t overwhip the egg whites or the cream.
- Fold the egg whites and whipped cream gently to avoid deflating them.
- Chilling the mousse is essential for the flavors to meld and the texture to set.
- Prep Time: 30 minutes
- Cook Time: 10 minutes


Leave a Comment