
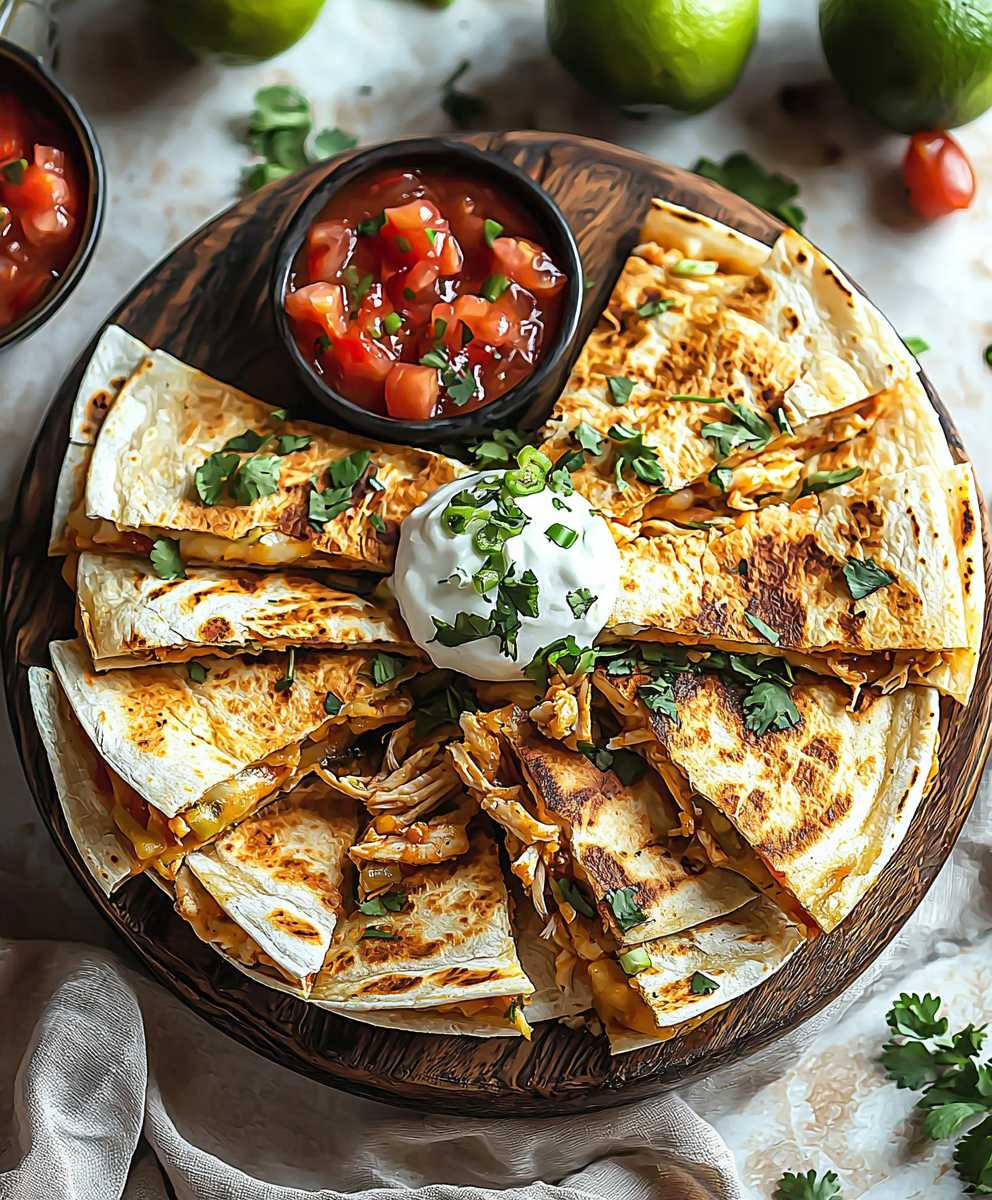
Chicken Quesadillas Baked to golden perfection are calling your name! Forget standing over a hot stove flipping tortillas this oven-baked method is a game-changer. Imagine biting into a warm, cheesy, and flavorful quesadilla, all with minimal effort. Sounds too good to be true? It’s not!
Quesadillas, a staple in Mexican cuisine, have a rich history dating back to the colonial era. Originally a simple dish of cheese-filled tortillas, they’ve evolved over time to incorporate a variety of fillings, reflecting the diverse culinary landscape of Mexico. While traditionally cooked on a griddle or comal, baking quesadillas offers a convenient and crowd-pleasing alternative.
What’s not to love about a quesadilla? The combination of melted cheese, savory chicken, and a crispy tortilla is simply irresistible. They’re incredibly versatile, easily customizable to your liking, and perfect for a quick lunch, a satisfying dinner, or even a party appetizer. Plus, baking them ensures that every quesadilla is evenly cooked and perfectly melted, eliminating the risk of burnt spots or cold centers. This Chicken Quesadillas Baked recipe takes all the best parts of a classic quesadilla and makes it even easier to enjoy. Get ready to say goodbye to stovetop stress and hello to perfectly baked quesadilla bliss!

Ingredients:
- For the Chicken Filling:
- 2 boneless, skinless chicken breasts (about 1.5 lbs total)
- 1 tablespoon olive oil
- 1 medium onion, chopped
- 1 red bell pepper, chopped
- 1 green bell pepper, chopped
- 1 (15 ounce) can black beans, rinsed and drained
- 1 (15 ounce) can corn, drained
- 1 (10 ounce) can diced tomatoes and green chilies (like Rotel), undrained
- 1 packet (1 ounce) taco seasoning
- 1/2 cup chicken broth
- 1/4 cup chopped fresh cilantro
- Salt and pepper to taste
- For the Quesadillas:
- 10-12 large (10-inch) flour tortillas
- 4 cups shredded cheddar cheese (or a Mexican cheese blend)
- Cooking spray
- Optional Toppings:
- Sour cream
- Guacamole
- Salsa
- Chopped green onions
Preparing the Chicken Filling:
- Cook the Chicken: I like to start by cooking my chicken. You can do this in a few ways. My preferred method is to poach the chicken breasts in simmering water until cooked through (about 15-20 minutes). This keeps the chicken moist and tender. Alternatively, you can bake the chicken breasts at 375°F (190°C) for about 20-25 minutes, or until the internal temperature reaches 165°F (74°C). You can even use leftover cooked chicken or rotisserie chicken to save time!
- Shred the Chicken: Once the chicken is cooked, let it cool slightly. Then, shred it using two forks. This is a crucial step for even distribution in the quesadillas.
- Sauté the Vegetables: Heat the olive oil in a large skillet over medium heat. Add the chopped onion and bell peppers and cook until softened, about 5-7 minutes. Stir occasionally to prevent burning. I love the sweetness that comes out of the peppers when they are properly sautéed.
- Combine Ingredients: Add the shredded chicken, black beans, corn, and diced tomatoes and green chilies to the skillet with the vegetables. Stir in the taco seasoning and chicken broth. Bring the mixture to a simmer and cook for about 10-15 minutes, stirring occasionally, until the sauce has thickened slightly and the flavors have melded together. This step is important for allowing the taco seasoning to fully bloom and infuse the chicken and vegetables.
- Season and Finish: Stir in the chopped cilantro. Taste and season with salt and pepper as needed. Remember, the taco seasoning already contains salt, so be careful not to over-salt. Set aside to cool slightly.
Assembling the Quesadillas:
- Preheat Oven: Preheat your oven to 375°F (190°C). Lightly grease a large baking sheet with cooking spray. This will prevent the quesadillas from sticking.
- Assemble the Quesadillas: Lay out a tortilla on a flat surface. Sprinkle about 1/2 cup of shredded cheese evenly over half of the tortilla. Top with about 1 cup of the chicken filling, spreading it evenly over the cheese. Sprinkle another 1/2 cup of shredded cheese over the chicken filling.
- Fold the Tortilla: Fold the tortilla in half, pressing gently to seal. Make sure the filling is evenly distributed so that the quesadilla cooks evenly.
- Repeat: Repeat steps 2 and 3 with the remaining tortillas, cheese, and chicken filling.
Baking the Quesadillas:
- Arrange on Baking Sheet: Place the assembled quesadillas on the prepared baking sheet in a single layer. Make sure they are not overlapping.
- Spray with Cooking Spray: Lightly spray the tops of the quesadillas with cooking spray. This will help them brown nicely in the oven.
- Bake: Bake for 10-12 minutes, or until the tortillas are golden brown and the cheese is melted and bubbly. Keep a close eye on them to prevent burning.
- Flip and Bake (Optional): For extra crispy quesadillas, carefully flip them halfway through baking and bake for another 2-3 minutes per side. This is optional, but I find it makes a big difference in texture.
- Let Cool Slightly: Remove the baking sheet from the oven and let the quesadillas cool for a few minutes before cutting. This will prevent the filling from spilling out.
Serving:
- Cut and Serve: Cut each quesadilla into wedges using a pizza cutter or a sharp knife.
- Serve with Toppings: Serve immediately with your favorite toppings, such as sour cream, guacamole, salsa, and chopped green onions. I personally love a dollop of sour cream and a sprinkle of fresh cilantro.
Tips and Variations:
- Spice it Up: For a spicier quesadilla, add a pinch of cayenne pepper to the chicken filling or use a spicier taco seasoning. You can also add some chopped jalapeños to the filling.
- Add More Vegetables: Feel free to add other vegetables to the chicken filling, such as diced zucchini, mushrooms, or spinach.
- Use Different Cheeses: Experiment with different types of cheese, such as Monterey Jack, pepper jack, or queso fresco.
- Make it Vegetarian: Omit the chicken and add more beans and vegetables for a vegetarian version.
- Make it Ahead: You can assemble the quesadillas ahead of time and store them in the refrigerator for up to 24 hours. Bake them just before serving.
- Freezing Instructions: To freeze baked quesadillas, let them cool completely. Wrap them individually in plastic wrap and then place them in a freezer bag. Freeze for up to 2 months. To reheat, bake in a preheated oven at 350°F (175°C) for about 15-20 minutes, or until heated through.
- Grilling Option: While this recipe focuses on baking, you can also grill these quesadillas. Preheat your grill to medium heat. Place the assembled quesadillas on the grill and cook for about 3-4 minutes per side, or until the tortillas are golden brown and the cheese is melted. Watch carefully to prevent burning.
- Pan-Fried Option: Another alternative is to pan-fry the quesadillas. Heat a lightly oiled skillet over medium heat. Place the assembled quesadillas in the skillet and cook for about 3-4 minutes per side, or until the tortillas are golden brown and the cheese is melted.
- Using Different Protein: If you’re not a fan of chicken, you can easily substitute it with ground beef, shredded pork, or even shrimp. Just make sure to cook the protein thoroughly before adding it to the filling.
- Tortilla Size Matters: I recommend using large (10-inch) flour tortillas for this recipe. Smaller tortillas will be more difficult to fill and fold.
- Don’t Overfill: Be careful not to overfill the quesadillas, as this can make them difficult to fold and bake. It’s better to use a little less filling than too much.
- Cheese Placement: Placing cheese both under and over the filling helps to bind everything together and creates a gooey, cheesy interior.
- Serving a Crowd: This recipe is easily scalable. Simply double or triple the ingredients to make more quesadillas for a larger group.
- Leftover Filling: If you have any leftover chicken filling, you can use it to make tacos, burritos, or even nachos.
Why Bake Instead of Fry?
Baking quesadillas is a healthier alternative to frying, as it requires less oil. It’s also a great option for making a large batch of quesadillas at once, as you can bake several at the same time. Plus, it’s less messy than frying!
Perfect for Meal Prep:
These baked chicken quesadillas are perfect for meal prep. You can make a batch on the weekend and enjoy them for lunch or dinner throughout the week. They reheat well in the microwave or oven.
Kid-Friendly:
Quesadillas are a kid-friendly meal that even picky eaters will enjoy. You can customize the filling to suit your child’s preferences.
A Versatile Recipe:
This recipe is a great starting point, but feel
Conclusion:
So, there you have it! These Chicken Quesadillas Baked are truly a game-changer for weeknight dinners, party appetizers, or even a satisfying lunch. I genuinely believe this recipe is a must-try because it combines the comforting flavors of a classic quesadilla with the ease and convenience of baking. Forget standing over a hot stove flipping individual quesadillas this method allows you to make a whole batch at once, freeing you up to focus on other things (like maybe mixing up a batch of margaritas!).
But the real magic lies in the texture. Baking the quesadillas creates a wonderfully crispy tortilla exterior while keeping the cheesy filling gooey and melty. It’s the perfect balance of textures that will have everyone coming back for more. Plus, the customizable filling options mean you can cater to everyone’s tastes and preferences.
And speaking of customization, let’s talk about serving suggestions and variations! While these quesadillas are delicious on their own, they’re even better with a few simple accompaniments. I highly recommend serving them with a dollop of sour cream or Greek yogurt, a scoop of fresh guacamole, and a drizzle of your favorite hot sauce. A side of pico de gallo or a simple salsa verde would also be fantastic.
For variations, the possibilities are endless! If you’re looking to add some extra veggies, try incorporating some sautéed bell peppers, onions, or mushrooms into the chicken mixture. Black beans or corn would also be delicious additions. For a spicier kick, add a pinch of cayenne pepper or a chopped jalapeño to the filling. And if you’re not a fan of chicken, you can easily substitute it with shredded beef, pulled pork, or even vegetarian options like black beans and sweet potatoes.
Consider using different types of cheese to change the flavor profile. Monterey Jack, cheddar, pepper jack, or even a blend of Mexican cheeses would all work well. You can also experiment with different types of tortillas. Whole wheat tortillas will add a nutty flavor, while spinach tortillas will give your quesadillas a vibrant green hue.
Don’t be afraid to get creative and experiment with different flavors and ingredients to create your own signature quesadilla recipe! The beauty of this recipe is its versatility and adaptability. It’s a blank canvas just waiting for your culinary inspiration.
I’m confident that once you try this recipe, it will become a staple in your kitchen. It’s quick, easy, delicious, and endlessly customizable. What more could you ask for?
So, what are you waiting for? Gather your ingredients, preheat your oven, and get ready to enjoy the best Chicken Quesadillas Baked you’ve ever had! I’m so excited for you to try this recipe and experience the deliciousness for yourself.
And most importantly, I’d love to hear about your experience! Did you make any variations? What were your favorite toppings? Share your photos and comments below I can’t wait to see what you create! Happy cooking! I am sure you will love this recipe as much as I do. Let me know what you think!
Chicken Quesadillas Baked: Easy Recipe & Baking Tips
Easy baked chicken quesadillas with chicken, black beans, corn, peppers, and cheese. Great for weeknight meals or appetizers!
Ingredients
- 2 boneless, skinless chicken breasts (about 1.5 lbs total)
- 1 tablespoon olive oil
- 1 medium onion, chopped
- 1 red bell pepper, chopped
- 1 green bell pepper, chopped
- 1 (15 ounce) can black beans, rinsed and drained
- 1 (15 ounce) can corn, drained
- 1 (10 ounce) can diced tomatoes and green chilies (like Rotel), undrained
- 1 packet (1 ounce) taco seasoning
- 1/2 cup chicken broth
- 1/4 cup chopped fresh cilantro
- Salt and pepper to taste
- 10-12 large (10-inch) flour tortillas
- 4 cups shredded cheddar cheese (or a Mexican cheese blend)
- Cooking spray
- Sour cream
- Guacamole
- Salsa
- Chopped green onions
Instructions
- Cook the Chicken: Poach chicken breasts in simmering water until cooked through (15-20 minutes) or bake at 375°F (190°C) for 20-25 minutes, until internal temperature reaches 165°F (74°C). Alternatively, use leftover cooked chicken.
- Shred the Chicken: Let the cooked chicken cool slightly, then shred it using two forks.
- Sauté the Vegetables: Heat olive oil in a large skillet over medium heat. Add chopped onion and bell peppers and cook until softened, about 5-7 minutes, stirring occasionally.
- Combine Ingredients: Add shredded chicken, black beans, corn, and diced tomatoes and green chilies to the skillet with the vegetables. Stir in taco seasoning and chicken broth. Bring to a simmer and cook for 10-15 minutes, stirring occasionally, until the sauce has thickened slightly.
- Season and Finish: Stir in chopped cilantro. Taste and season with salt and pepper as needed. Set aside to cool slightly.
- Preheat Oven: Preheat oven to 375°F (190°C). Lightly grease a large baking sheet with cooking spray.
- Assemble the Quesadillas: Lay out a tortilla on a flat surface. Sprinkle about 1/2 cup of shredded cheese evenly over half of the tortilla. Top with about 1 cup of the chicken filling, spreading it evenly over the cheese. Sprinkle another 1/2 cup of shredded cheese over the chicken filling.
- Fold the Tortilla: Fold the tortilla in half, pressing gently to seal.
- Repeat: Repeat steps 7 and 8 with the remaining tortillas, cheese, and chicken filling.
- Arrange on Baking Sheet: Place the assembled quesadillas on the prepared baking sheet in a single layer.
- Spray with Cooking Spray: Lightly spray the tops of the quesadillas with cooking spray.
- Bake: Bake for 10-12 minutes, or until the tortillas are golden brown and the cheese is melted and bubbly.
- Flip and Bake (Optional): For extra crispy quesadillas, carefully flip them halfway through baking and bake for another 2-3 minutes per side.
- Let Cool Slightly: Remove the baking sheet from the oven and let the quesadillas cool for a few minutes before cutting.
- Cut and Serve: Cut each quesadilla into wedges using a pizza cutter or a sharp knife.
- Serve with Toppings: Serve immediately with your favorite toppings, such as sour cream, guacamole, salsa, and chopped green onions.
Notes
- Spice it Up: Add cayenne pepper or chopped jalapeños to the filling.
- Add More Vegetables: Add diced zucchini, mushrooms, or spinach.
- Use Different Cheeses: Experiment with Monterey Jack, pepper jack, or queso fresco.
- Make it Vegetarian: Omit the chicken and add more beans and vegetables.
- Make it Ahead: Assemble quesadillas ahead of time and refrigerate for up to 24 hours.
- Freezing Instructions: Freeze baked quesadillas wrapped individually in plastic wrap for up to 2 months. Reheat at 350°F (175°C) for 15-20 minutes.
- Grilling Option: Grill quesadillas over medium heat for 3-4 minutes per side.
- Pan-Fried Option: Pan-fry quesadillas in a lightly oiled skillet over medium heat for 3-4 minutes per side.
- Using Different Protein: Substitute chicken with ground beef, shredded pork, or shrimp.
- Tortilla Size Matters: Use large (10-inch) flour tortillas.
- Don’t Overfill: Avoid overfilling the quesadillas.
- Cheese Placement: Place cheese both under and over the filling.
- Serving a Crowd: Double or triple the ingredients.
- Leftover Filling: Use leftover filling for tacos, burritos, or nachos.
Leave a Comment