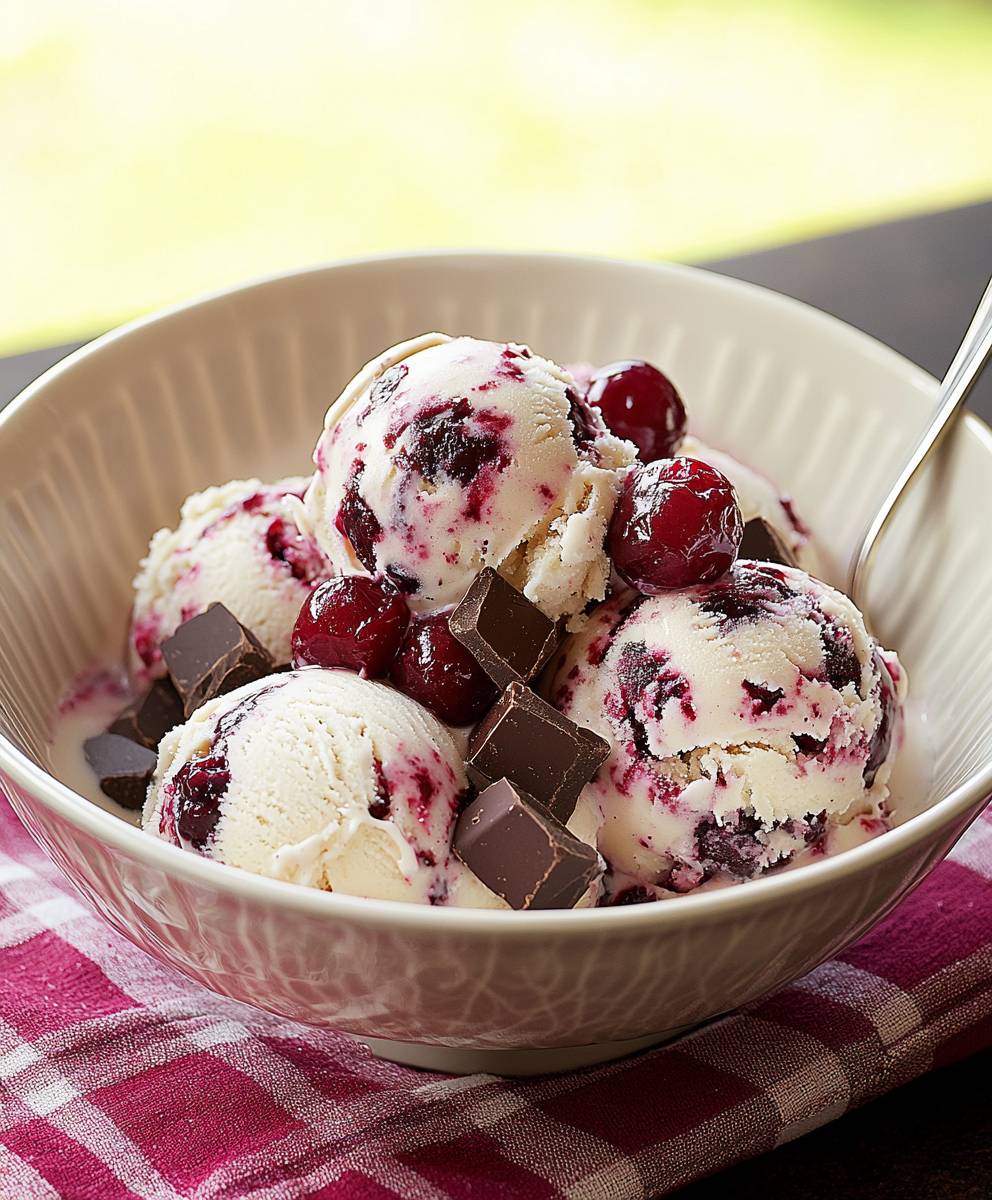
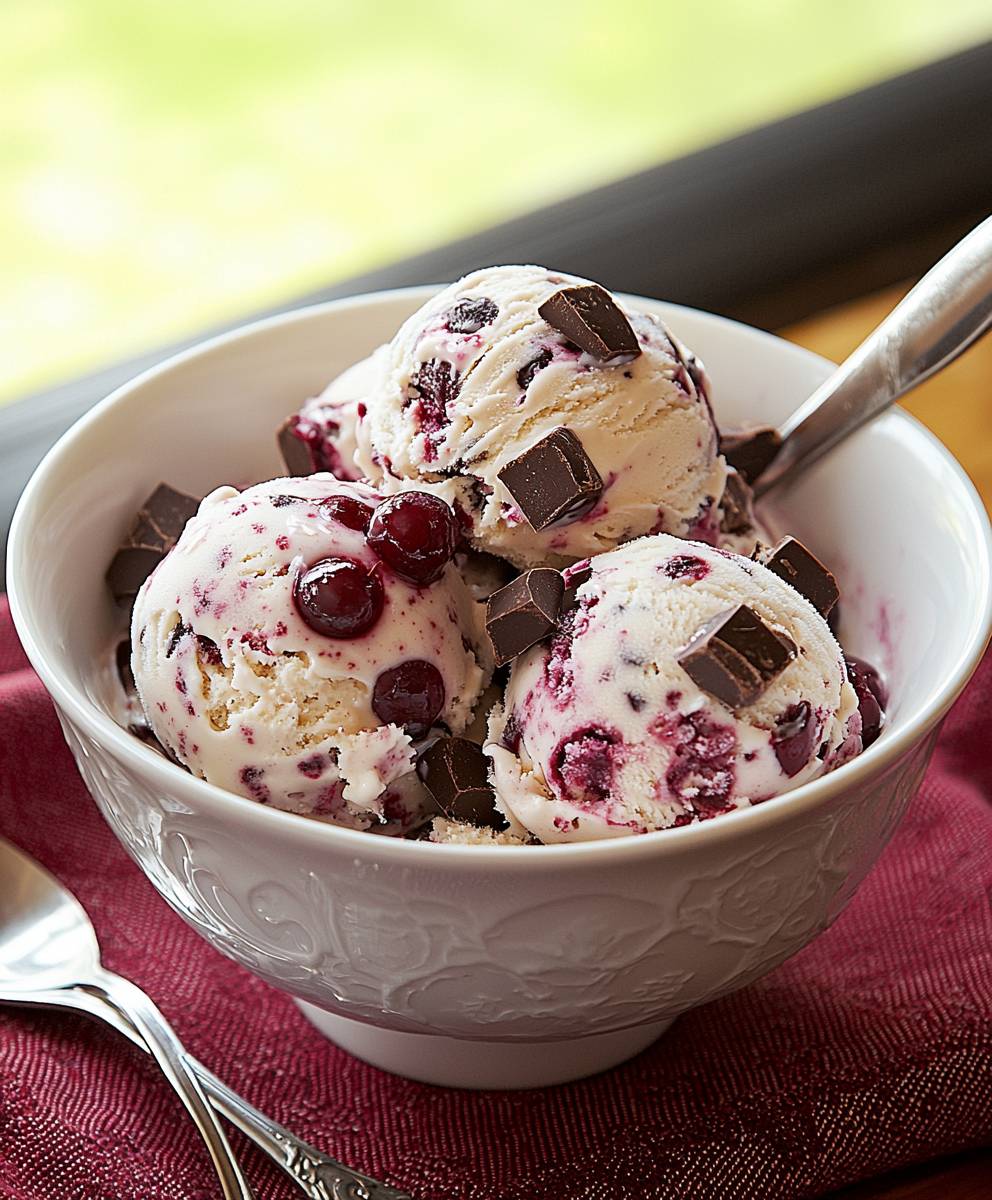
Cherry Chocolate Chunk Ice Cream: Prepare to embark on a frozen adventure that will tantalize your taste buds and leave you craving more! Imagine the creamy, dreamy texture of homemade ice cream, bursting with the sweet-tartness of ripe cherries and the satisfying crunch of decadent chocolate chunks. It’s a symphony of flavors and textures that will transport you to dessert heaven.
While the exact origins of cherry chocolate chunk ice cream are shrouded in delicious mystery, the combination of cherries and chocolate has been a beloved pairing for centuries. Cherries, with their vibrant color and unique flavor profile, have been enjoyed since ancient times, while chocolate, once reserved for royalty, has become a universally adored indulgence. Marrying these two ingredients in the cool embrace of ice cream is a stroke of culinary genius!
What makes cherry chocolate chunk ice cream so irresistible? It’s the perfect balance of sweet and tart, rich and refreshing. The creamy ice cream base provides a smooth canvas for the juicy cherries and the intense chocolate, creating a harmonious blend that delights the senses. Plus, making your own ice cream allows you to control the ingredients and customize the flavor to your liking. Whether you’re looking for a sophisticated dessert to impress your guests or a comforting treat to enjoy on a warm summer evening, this recipe is sure to be a winner. Get ready to churn up some happiness!
Ingredients:
- 1 cup (240ml) whole milk
- 2 cups (480ml) heavy cream
- ¾ cup (150g) granulated sugar
- ¼ teaspoon salt
- 1 teaspoon pure vanilla extract
- ½ teaspoon almond extract (optional, but highly recommended!)
- 1 cup (about 150g) fresh sweet cherries, pitted and halved or quartered depending on size
- 4 ounces (115g) high-quality dark chocolate (at least 70% cacao), coarsely chopped
- 2 tablespoons Kirsch (cherry liqueur), optional
Preparing the Cherry Chocolate Chunk Ice Cream Base
- Combine the Dairy, Sugar, and Salt: In a medium saucepan, whisk together the whole milk, heavy cream, granulated sugar, and salt. Make sure the sugar is well incorporated before moving on to the next step. This ensures a smooth and creamy texture in the final ice cream.
- Heat the Mixture: Place the saucepan over medium heat. Stir constantly with a heat-resistant spatula or wooden spoon until the sugar is completely dissolved and the mixture is warm to the touch. You don’t want it to boil! Heating the mixture helps the sugar dissolve properly and also pasteurizes the dairy, which improves the keeping quality of the ice cream. I usually aim for around 170°F (77°C) using a kitchen thermometer.
- Chill the Base: Remove the saucepan from the heat and stir in the vanilla extract and almond extract (if using). Pour the mixture into a heat-safe container, such as a glass bowl or a large measuring cup. Cover the surface of the mixture directly with plastic wrap to prevent a skin from forming. This is crucial for a smooth texture. Refrigerate for at least 4 hours, or preferably overnight. The colder the base, the better the ice cream will churn. I often make the base the day before I plan to churn it.
Preparing the Cherries and Chocolate
- Prepare the Cherries: While the ice cream base is chilling, prepare the cherries. Wash them thoroughly and remove the pits. Halve or quarter the cherries depending on their size. I prefer smaller pieces so they distribute evenly throughout the ice cream.
- Macerate the Cherries (Optional): In a small bowl, combine the pitted cherries with the Kirsch (cherry liqueur), if using. This step is optional, but it adds a wonderful depth of flavor to the cherries. The alcohol also helps to prevent the cherries from freezing completely solid in the ice cream. Let the cherries macerate for at least 30 minutes, or up to a few hours, stirring occasionally.
- Chop the Chocolate: Coarsely chop the dark chocolate into small chunks. I like to use a serrated knife for this, as it helps to create irregular pieces that add texture to the ice cream. Avoid using chocolate chips, as they tend to be too hard and don’t melt as nicely in the mouth.
Churning the Ice Cream
- Prepare Your Ice Cream Maker: Follow the manufacturer’s instructions for your ice cream maker. If you have a freezer bowl ice cream maker, make sure the bowl is completely frozen before you begin. This usually takes at least 24 hours.
- Churn the Base: Pour the chilled ice cream base into the prepared ice cream maker. Churn according to the manufacturer’s instructions, usually for about 20-25 minutes, or until the ice cream has reached a soft-serve consistency. Keep an eye on the ice cream as it churns, as the churning time can vary depending on your machine and the temperature of your base.
- Add the Cherries and Chocolate: In the last 2-3 minutes of churning, add the prepared cherries (including any liqueur from macerating) and the chopped chocolate to the ice cream maker. The machine will incorporate them into the ice cream as it continues to churn. Don’t add them too early, or they may sink to the bottom of the bowl.
Freezing and Serving the Ice Cream
- Transfer to a Freezer-Safe Container: Once the ice cream has reached a soft-serve consistency and the cherries and chocolate are evenly distributed, transfer it to a freezer-safe container. I like to use a loaf pan or a reusable ice cream container.
- Harden the Ice Cream: Press a piece of plastic wrap directly onto the surface of the ice cream to prevent ice crystals from forming. Freeze for at least 2-3 hours, or preferably overnight, to allow the ice cream to harden completely. This step is crucial for achieving a scoopable texture.
- Scoop and Serve: Before serving, let the ice cream sit at room temperature for a few minutes to soften slightly. This will make it easier to scoop. Use an ice cream scoop to scoop the ice cream into bowls or cones. Garnish with extra cherries or chocolate shavings, if desired.
Tips and Variations
- Use High-Quality Ingredients: The quality of your ingredients will directly impact the flavor of your ice cream. Use fresh, ripe cherries and high-quality dark chocolate for the best results.
- Adjust the Sweetness: If you prefer a less sweet ice cream, you can reduce the amount of sugar slightly. However, keep in mind that sugar also helps to prevent ice crystals from forming, so reducing it too much can affect the texture.
- Add Other Flavors: Feel free to experiment with other flavors. A pinch of cinnamon or a splash of bourbon would complement the cherry and chocolate flavors nicely.
- Make it Vegan: To make this ice cream vegan, substitute the whole milk and heavy cream with coconut milk and coconut cream. Use a vegan chocolate alternative.
- Storage: Homemade ice cream is best enjoyed within a week or two. Store it in an airtight container in the freezer to prevent freezer burn.
- Dealing with Hard Ice Cream: If your ice cream becomes too hard after freezing, try placing the container in the refrigerator for 15-20 minutes before scooping. This will help to soften it without melting it too much.
- Preventing Ice Crystals: The key to preventing ice crystals in homemade ice cream is to chill the base thoroughly and to freeze the ice cream quickly after churning. Adding a small amount of alcohol, like the Kirsch, also helps to prevent ice crystals from forming.
Troubleshooting
- Ice Cream is Too Icy: This is usually caused by not chilling the base thoroughly enough or by not freezing the ice cream quickly enough after churning. Make sure to chill the base for at least 4 hours, or preferably overnight, and to freeze the ice cream in a freezer-safe container as soon as it’s churned.
- Ice Cream is Too Soft: This can be caused by not churning the ice cream long enough or by not freezing it long enough after churning. Make sure to churn the ice cream until it reaches a soft-serve consistency and to freeze it for at least 2-3 hours, or preferably overnight, to allow it to harden completely.
- Ice Cream is Grainy: This can be caused by using low-quality ingredients or by over-churning the ice cream. Use high-quality ingredients and avoid over-churning the ice cream.
- Cherries Sank to the Bottom: This can happen if the ice cream base is too thin or if the cherries are too heavy. Make sure the ice cream base is thick enough and that the cherries are not too large. You can also try tossing the cherries in a little bit of flour before adding them to the ice cream, which will help them to stay suspended.
Enjoy your homemade Cherry Chocolate Chunk Ice Cream! I hope you love it as much as I do!
Conclusion:
So, there you have it! My take on Cherry Chocolate Chunk Ice Cream, and honestly, I think it’s a game-changer. If you’re looking for a dessert that’s both decadent and refreshing, with a perfect balance of sweet and slightly tart, then you absolutely must give this recipe a try. It’s not just ice cream; it’s an experience a symphony of flavors and textures that will leave you wanting more.
What makes this recipe a must-try? Well, first, the homemade aspect elevates it beyond anything you can find in the store. The fresh cherries, the high-quality chocolate, and the creamy base all combine to create something truly special. Second, it’s surprisingly easy to make! Don’t let the idea of homemade ice cream intimidate you. With a little patience and an ice cream maker, you’ll be enjoying scoops of this deliciousness in no time. And third, it’s incredibly versatile.
Serving Suggestions & Variations:
While this Cherry Chocolate Chunk Ice Cream is fantastic on its own, there are so many ways to enjoy it! For a classic sundae, top it with whipped cream, extra chocolate shavings, and a maraschino cherry. Or, try pairing it with a warm brownie or a slice of chocolate cake for an extra indulgent dessert. If you’re feeling adventurous, you could even use it to make an ice cream sandwich with homemade cookies.
Here are a few variations you might want to experiment with:
- Add a swirl of cherry jam: For an even more intense cherry flavor, swirl in a spoonful or two of your favorite cherry jam before churning.
- Use different types of chocolate: Experiment with dark chocolate, milk chocolate, or even white chocolate for a unique twist. You could also use a combination of different chocolates for added complexity.
- Incorporate nuts: Add chopped almonds, pecans, or walnuts for a crunchy texture and nutty flavor.
- Make it vegan: Substitute the heavy cream and milk with coconut cream and almond milk for a delicious vegan version. Just be sure to use a high-quality coconut cream for the best results.
- Boozy Cherry Chocolate Chunk Ice Cream: Add a tablespoon or two of Kirsch (cherry liqueur) to the base before churning for an adult twist.
The possibilities are endless! Feel free to get creative and customize this recipe to your liking. That’s the beauty of homemade ice cream you have complete control over the ingredients and flavors.
I truly believe that this Cherry Chocolate Chunk Ice Cream recipe is a winner. It’s the perfect treat for a hot summer day, a special occasion, or simply when you’re craving something sweet and satisfying. I’ve poured my heart into perfecting this recipe, and I’m confident that you’ll love it as much as I do.
So, what are you waiting for? Gather your ingredients, dust off your ice cream maker, and get ready to create some magic in your kitchen! I can’t wait to hear what you think. Once you’ve tried this recipe, please come back and share your experience in the comments below. Let me know what variations you tried, what you loved, and what you might do differently next time. Your feedback is invaluable, and it helps me continue to improve my recipes and share them with others.
Happy ice cream making! I hope you enjoy every delicious spoonful of this Cherry Chocolate Chunk Ice Cream. It’s a labor of love, but trust me, it’s worth every single minute.
Cherry Chocolate Chunk Ice Cream: A Delicious Homemade Recipe
Rich and creamy homemade ice cream with sweet cherries, dark chocolate chunks, and a hint of almond.
Ingredients
- 1 cup (240ml) whole milk
- 2 cups (480ml) heavy cream
- ¾ cup (150g) granulated sugar
- ¼ teaspoon salt
- 1 teaspoon pure vanilla extract
- ½ teaspoon almond extract (optional, but highly recommended!)
- 1 cup (about 150g) fresh sweet cherries, pitted and halved or quartered depending on size
- 4 ounces (115g) high-quality dark chocolate (at least 70% cacao), coarsely chopped
- 2 tablespoons Kirsch (cherry liqueur), optional
Instructions
- In a medium saucepan, whisk together the whole milk, heavy cream, granulated sugar, and salt. Make sure the sugar is well incorporated.
- Place the saucepan over medium heat. Stir constantly until the sugar is completely dissolved and the mixture is warm to the touch (around 170°F/77°C). Do not boil.
- Remove from heat, stir in vanilla and almond extracts (if using). Pour into a heat-safe container, cover the surface directly with plastic wrap, and refrigerate for at least 4 hours, or preferably overnight.
- Wash, pit, and halve or quarter the cherries.
- In a small bowl, combine the pitted cherries with the Kirsch (cherry liqueur), if using. Let the cherries macerate for at least 30 minutes, or up to a few hours, stirring occasionally.
- Coarsely chop the dark chocolate into small chunks.
- Follow the manufacturer’s instructions for your ice cream maker.
- Pour the chilled ice cream base into the prepared ice cream maker. Churn according to the manufacturer’s instructions, usually for about 20-25 minutes, or until the ice cream has reached a soft-serve consistency.
- In the last 2-3 minutes of churning, add the prepared cherries (including any liqueur from macerating) and the chopped chocolate to the ice cream maker.
- Transfer the ice cream to a freezer-safe container.
- Press a piece of plastic wrap directly onto the surface of the ice cream to prevent ice crystals from forming. Freeze for at least 2-3 hours, or preferably overnight, to allow the ice cream to harden completely.
- Let the ice cream sit at room temperature for a few minutes to soften slightly. Scoop and serve. Garnish with extra cherries or chocolate shavings, if desired.
Notes
- Use high-quality ingredients for the best flavor.
- Adjust the sweetness to your preference.
- Experiment with other flavors like cinnamon or bourbon.
- To make it vegan, substitute dairy with coconut milk and cream and use vegan chocolate.
- Homemade ice cream is best enjoyed within a week or two. Store in an airtight container in the freezer.
- If the ice cream becomes too hard, refrigerate for 15-20 minutes before scooping.
- Chilling the base thoroughly and freezing quickly helps prevent ice crystals. Adding a small amount of alcohol also helps.

Leave a Comment