
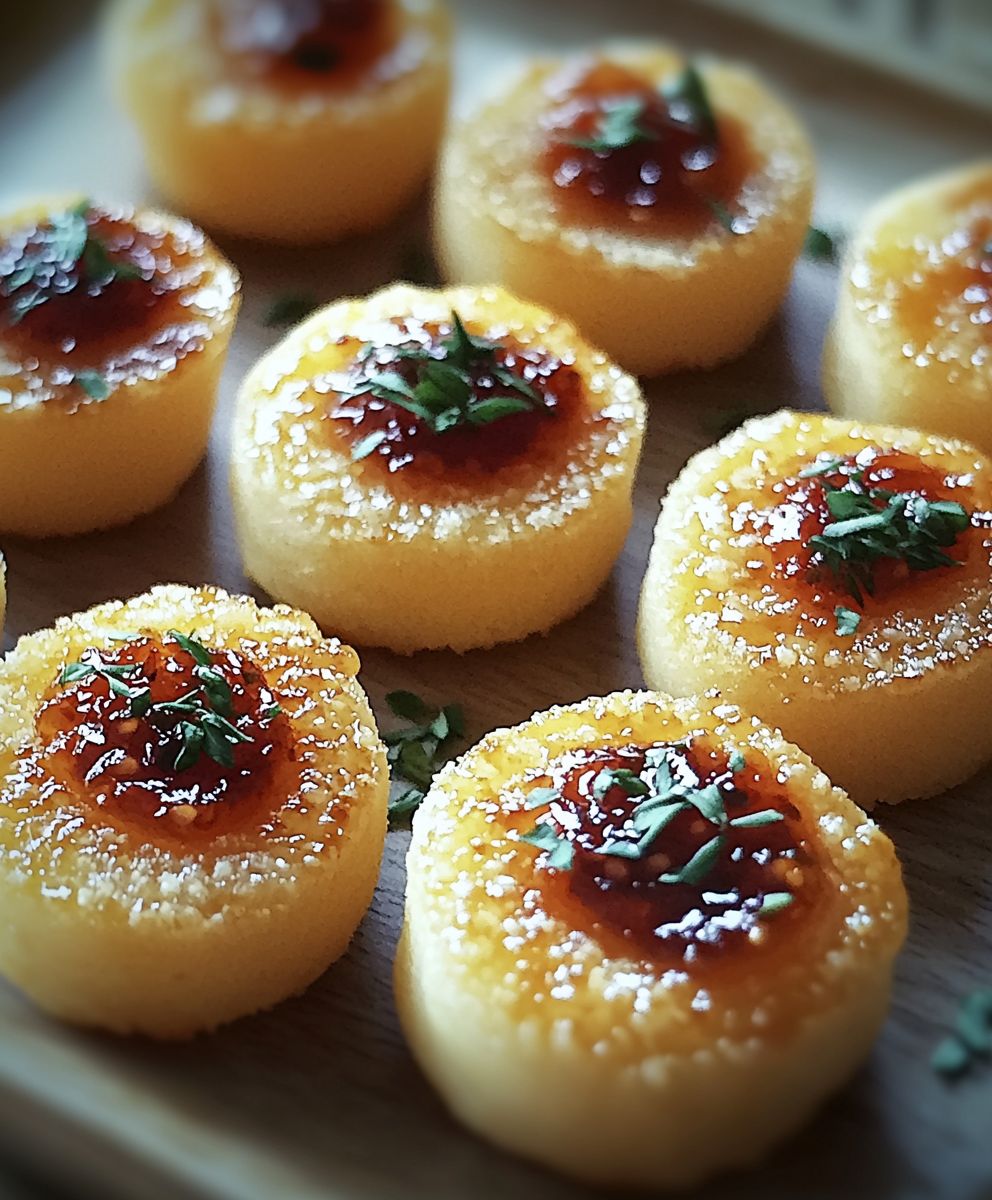
Cheesy Thumbprint Appetizers are the bite-sized bundles of joy that will disappear faster than you can say “hors d’oeuvre!” Imagine a buttery, melt-in-your-mouth cookie base, cradling a savory, cheesy filling it’s a flavor explosion in every single bite. I’ve been making these for years, and they are always the first thing to go at any party.
While the exact origins of thumbprint cookies are debated, many believe they evolved from similar cookies found in Sweden and Germany, where they were often filled with jam. This savory twist, however, is a more modern adaptation, perfect for those who prefer a cheesy, savory snack over something sweet. Think of them as mini savory tarts, ideal for cocktail parties, holiday gatherings, or even a sophisticated game-day spread.
People adore Cheesy Thumbprint Appetizers for several reasons. First, the combination of textures is simply irresistible: the delicate, crumbly cookie contrasting with the smooth, creamy cheese filling. Second, they are incredibly convenient. They can be made ahead of time and baked just before serving, freeing you up to focus on other aspects of your event. Finally, and perhaps most importantly, they are utterly delicious! The savory, cheesy flavor is a crowd-pleaser, guaranteed to satisfy even the most discerning palates. Get ready to impress your guests with these addictive little treats!
Ingredients:
- 1 cup (2 sticks) unsalted butter, softened
- 6 ounces cream cheese, softened
- 2 cups all-purpose flour
- 1/2 teaspoon salt
- 1/4 teaspoon garlic powder
- 1/4 teaspoon onion powder
- 1 cup shredded cheddar cheese
- 1/2 cup shredded Monterey Jack cheese
- 1/4 cup finely grated Parmesan cheese
- Optional toppings: Everything bagel seasoning, poppy seeds, sesame seeds, dried herbs (rosemary, thyme), finely chopped nuts
Making the Dough:
Okay, let’s get started! First things first, we need to create the base for our cheesy delights the dough. This part is super important, so pay close attention to the details. Trust me, it’s easier than it looks!
- Cream the Butter and Cream Cheese: In a large bowl, or the bowl of your stand mixer, combine the softened butter and cream cheese. Beat them together on medium speed until they are light and fluffy. This usually takes about 3-5 minutes. You want a smooth, creamy consistency, so don’t rush this step! Scrape down the sides of the bowl occasionally to ensure everything is evenly mixed.
- Combine Dry Ingredients: In a separate medium bowl, whisk together the flour, salt, garlic powder, and onion powder. Whisking helps to evenly distribute the salt and spices throughout the flour, which is crucial for a consistent flavor in every bite.
- Gradually Add Dry Ingredients to Wet Ingredients: Slowly add the dry ingredients to the creamed butter and cream cheese mixture, mixing on low speed. Add the flour mixture in about three additions, mixing until just combined after each addition. Be careful not to overmix! Overmixing can develop the gluten in the flour, resulting in a tough appetizer. We want these to be tender and melt-in-your-mouth.
- Incorporate the Cheeses: Add the shredded cheddar cheese, Monterey Jack cheese, and Parmesan cheese to the dough. Mix on low speed until the cheeses are evenly distributed throughout the dough. Again, be careful not to overmix. You just want the cheese to be incorporated, not completely pulverized.
- Form the Dough into a Disc: Turn the dough out onto a lightly floured surface. Gently form it into a disc, about 1 inch thick. This will help it chill evenly.
- Chill the Dough: Wrap the dough disc tightly in plastic wrap and refrigerate for at least 2 hours, or preferably overnight. Chilling the dough is essential! It allows the gluten to relax, making the dough easier to handle and preventing the appetizers from spreading too much during baking. It also helps the flavors meld together.
Shaping and Topping the Thumbprints:
Now that our dough is nicely chilled, it’s time to shape those thumbprints and add some flair with our toppings. This is where you can get creative and customize them to your liking!
- Preheat Oven and Prepare Baking Sheets: Preheat your oven to 350°F (175°C). Line two baking sheets with parchment paper. Parchment paper prevents the appetizers from sticking and makes cleanup a breeze.
- Roll the Dough into Balls: Remove the chilled dough from the refrigerator. On a lightly floured surface, roll the dough into small balls, about 1 inch in diameter. You should get around 36-48 appetizers from this recipe, depending on the size of your balls. Try to keep them uniform in size so they bake evenly.
- Place Dough Balls on Baking Sheets: Arrange the dough balls on the prepared baking sheets, leaving about 1 inch of space between each ball.
- Make the Thumbprints: Use your thumb (or the back of a small spoon) to make an indentation in the center of each dough ball. Be gentle, you don’t want to press all the way through the dough. The indentation should be deep enough to hold the toppings.
- Add Toppings: Now comes the fun part! Sprinkle your desired toppings over the thumbprints. You can use a single topping for all of them, or mix and match to create a variety of flavors. Some great options include:
- Everything bagel seasoning: Adds a savory, garlicky, and seedy flavor.
- Poppy seeds: Adds a subtle nutty flavor and a nice visual appeal.
- Sesame seeds: Adds a nutty flavor and a slight crunch.
- Dried herbs (rosemary, thyme): Adds an aromatic and earthy flavor.
- Finely chopped nuts (pecans, walnuts): Adds a nutty flavor and a satisfying crunch.
Feel free to experiment with other toppings as well! Get creative and have fun with it.
Baking the Cheesy Thumbprint Appetizers:
Almost there! Now it’s time to bake these little guys to golden-brown perfection. The baking time is crucial, so keep a close eye on them.
- Bake the Appetizers: Bake in the preheated oven for 12-15 minutes, or until the edges are lightly golden brown and the cheese is melted and bubbly. The baking time may vary depending on your oven, so start checking them at 12 minutes.
- Cool on Baking Sheets: Remove the baking sheets from the oven and let the appetizers cool on the baking sheets for a few minutes before transferring them to a wire rack to cool completely. This allows them to firm up slightly and prevents them from breaking when you move them.
Serving and Storing:
Congratulations, you’ve made delicious cheesy thumbprint appetizers! Now it’s time to enjoy them and learn how to store them properly.
- Serve Warm or at Room Temperature: These appetizers are delicious served warm or at room temperature. They are perfect for parties, gatherings, or just a tasty snack.
- Store Leftovers: Store any leftover appetizers in an airtight container at room temperature for up to 3 days, or in the refrigerator for up to 5 days.
- Reheating (Optional): If you want to reheat them, you can do so in a preheated oven at 350°F (175°C) for a few minutes, or in the microwave for a few seconds.
Tips and Variations:
Here are a few extra tips and variations to help you make the best cheesy thumbprint appetizers ever!
- Use High-Quality Cheese: The quality of the cheese will greatly impact the flavor of the appetizers. Use good quality cheddar, Monterey Jack, and Parmesan cheese for the best results.
- Don’t Overmix the Dough: Overmixing the dough can result in tough appetizers. Mix until just combined after each addition.
- Chill the Dough Thoroughly: Chilling the dough is essential for preventing the appetizers from spreading too much during baking.
- Get Creative with Toppings: Don’t be afraid to experiment with different toppings! Some other great options include:
- Everything bagel seasoning
- Poppy seeds
- Sesame seeds
- Dried herbs (rosemary, thyme)
- Finely chopped nuts (pecans, walnuts)
- Red pepper flakes (for a little heat)
- Sun-dried tomatoes (finely chopped)
- Olives (finely chopped)
- Make Ahead: The dough can be made ahead of time and stored in the refrigerator for up to 3 days. You can also freeze the dough for up to 2 months. Just thaw it in the refrigerator overnight before using.
- Freezing Baked Appetizers: You can also freeze the baked appetizers. Let them cool completely, then place them in a single layer on a baking sheet and freeze for about 30 minutes, or until solid. Then, transfer them to a freezer-safe bag or container and store them in the freezer for up to 2 months. To reheat, bake them in a preheated oven at 350°F (175°C) for a few minutes, or until heated through.
- Add a Touch of Spice: If you like a little heat, add a pinch of red pepper flakes to the dough or sprinkle them on top of the appetizers before baking.
- Use Different Cheeses: Feel free to experiment with different types of cheese! Gruyere, Swiss, or even a smoked Gouda would be delicious in these appetizers.
Enjoy!
I hope you enjoy making and eating these cheesy thumbprint appetizers as much as I do! They are always a hit at parties and gatherings, and they are so easy to make. Happy baking!
Conclusion:
And there you have it! These Cheesy Thumbprint Appetizers are truly a must-try for your next gathering, or even just a cozy night in. They’re incredibly easy to make, bursting with flavor, and offer that perfect balance of savory and cheesy goodness that everyone craves. I know I’ll be making them again very soon!
But why are these little bites so special? Well, beyond the simplicity of the recipe, it’s the versatility that really shines. The base is so adaptable, you can truly customize the fillings to suit your own tastes and preferences. Think of it as a blank canvas for your culinary creativity!
For serving suggestions, I love to arrange these on a platter with a variety of dips. A classic marinara sauce is always a winner, but don’t be afraid to get adventurous! A creamy pesto, a spicy sriracha mayo, or even a tangy balsamic glaze would all complement the cheesy flavor beautifully. You could also serve them alongside a simple green salad for a light and refreshing contrast.
And speaking of variations, the possibilities are endless! If you’re a fan of spice, try adding a pinch of red pepper flakes to the dough or incorporating some finely chopped jalapeños into the filling. For a vegetarian option, you could swap out the sausage for sautéed mushrooms, spinach, or sun-dried tomatoes. Or, if you’re feeling fancy, try using different types of cheese! Gruyere, fontina, or even a smoked gouda would all add a unique and delicious twist.
Another fun variation is to experiment with different herbs and spices. A sprinkle of dried oregano, thyme, or rosemary can add a wonderful aroma and depth of flavor. You could also try adding a touch of garlic powder or onion powder to the dough for an extra savory kick.
These Cheesy Thumbprint Appetizers are also perfect for making ahead of time. You can prepare the dough and filling in advance and store them separately in the refrigerator. Then, when you’re ready to bake, simply assemble the appetizers and pop them in the oven. This makes them a great option for busy weeknights or when you’re entertaining guests.
I truly believe that this recipe is a winner, and I’m confident that you’ll love it as much as I do. It’s the perfect combination of ease, flavor, and versatility, making it a go-to appetizer for any occasion.
So, what are you waiting for? Gather your ingredients, preheat your oven, and get ready to create some cheesy magic! I’m so excited for you to try this recipe and experience the deliciousness for yourself.
And most importantly, I want to hear about your experience! Did you try any variations? What dips did you serve them with? What did your friends and family think? Please, share your thoughts and photos in the comments below. I can’t wait to see what you create! Happy baking, and enjoy these delightful Cheesy Thumbprint Appetizers!
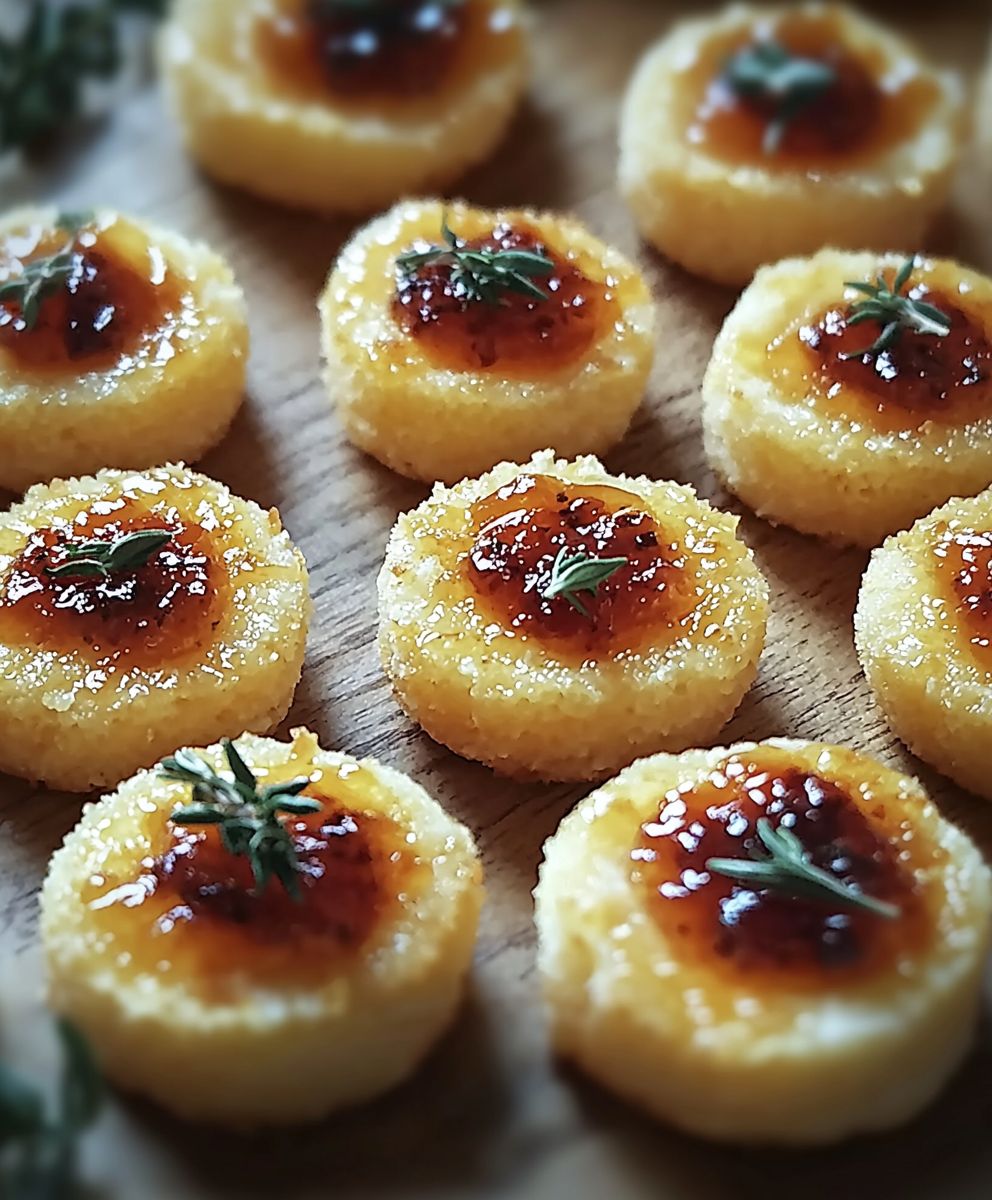
Cheesy Thumbprint Appetizers: The Perfect Holiday Bite
Savory, cheesy thumbprint appetizers perfect for parties! These bite-sized treats are made with cheddar, Monterey Jack, and Parmesan cheese and are customizable with your favorite toppings.
Ingredients
- 1 cup (2 sticks) unsalted butter, softened
- 6 ounces cream cheese, softened
- 2 cups all-purpose flour
- 1/2 teaspoon salt
- 1/4 teaspoon garlic powder
- 1/4 teaspoon onion powder
- 1 cup shredded cheddar cheese
- 1/2 cup shredded Monterey Jack cheese
- 1/4 cup finely grated Parmesan cheese
- Optional toppings: Everything bagel seasoning, poppy seeds, sesame seeds, dried herbs (rosemary, thyme), finely chopped nuts
Instructions
- Cream the Butter and Cream Cheese: In a large bowl, or the bowl of your stand mixer, combine the softened butter and cream cheese. Beat them together on medium speed until they are light and fluffy (3-5 minutes). Scrape down the sides of the bowl occasionally.
- Combine Dry Ingredients: In a separate medium bowl, whisk together the flour, salt, garlic powder, and onion powder.
- Gradually Add Dry Ingredients to Wet Ingredients: Slowly add the dry ingredients to the creamed butter and cream cheese mixture, mixing on low speed. Add the flour mixture in about three additions, mixing until just combined after each addition. Be careful not to overmix!
- Incorporate the Cheeses: Add the shredded cheddar cheese, Monterey Jack cheese, and Parmesan cheese to the dough. Mix on low speed until the cheeses are evenly distributed throughout the dough. Again, be careful not to overmix.
- Form the Dough into a Disc: Turn the dough out onto a lightly floured surface. Gently form it into a disc, about 1 inch thick.
- Chill the Dough: Wrap the dough disc tightly in plastic wrap and refrigerate for at least 2 hours, or preferably overnight.
- Preheat Oven and Prepare Baking Sheets: Preheat your oven to 350°F (175°C). Line two baking sheets with parchment paper.
- Roll the Dough into Balls: Remove the chilled dough from the refrigerator. On a lightly floured surface, roll the dough into small balls, about 1 inch in diameter. You should get around 36-48 appetizers from this recipe, depending on the size of your balls. Try to keep them uniform in size so they bake evenly.
- Place Dough Balls on Baking Sheets: Arrange the dough balls on the prepared baking sheets, leaving about 1 inch of space between each ball.
- Make the Thumbprints: Use your thumb (or the back of a small spoon) to make an indentation in the center of each dough ball. Be gentle, you don’t want to press all the way through the dough. The indentation should be deep enough to hold the toppings.
- Add Toppings: Sprinkle your desired toppings over the thumbprints. You can use a single topping for all of them, or mix and match to create a variety of flavors.
- Bake the Appetizers: Bake in the preheated oven for 12-15 minutes, or until the edges are lightly golden brown and the cheese is melted and bubbly. The baking time may vary depending on your oven, so start checking them at 12 minutes.
- Cool on Baking Sheets: Remove the baking sheets from the oven and let the appetizers cool on the baking sheets for a few minutes before transferring them to a wire rack to cool completely. This allows them to firm up slightly and prevents them from breaking when you move them.
- Serve Warm or at Room Temperature: These appetizers are delicious served warm or at room temperature. They are perfect for parties, gatherings, or just a tasty snack.
- Store Leftovers: Store any leftover appetizers in an airtight container at room temperature for up to 3 days, or in the refrigerator for up to 5 days.
- Reheating (Optional): If you want to reheat them, you can do so in a preheated oven at 350°F (175°C) for a few minutes, or in the microwave for a few seconds.
Notes
- Use high-quality cheese for the best flavor.
- Don’t overmix the dough.
- Chilling the dough is essential.
- Get creative with toppings!
- The dough can be made ahead of time and stored in the refrigerator for up to 3 days or frozen for up to 2 months.
- Baked appetizers can be frozen.
- Add a pinch of red pepper flakes for a little heat.
- Experiment with different cheeses.


Leave a Comment