
Buttermilk Rolls: Is there anything quite as comforting as the aroma of freshly baked bread wafting through your home? Today, we’re diving into a recipe that’s more than just food; it’s a warm hug in the form of a soft, pillowy roll. These aren’t just any rolls; they’re melt-in-your-mouth buttermilk rolls, and trust me, they’re worth every single minute of effort.
The history of buttermilk rolls is deeply rooted in Southern American cuisine, where resourcefulness and simple ingredients were transformed into culinary masterpieces. Buttermilk, a byproduct of butter churning, was a staple in Southern kitchens, and these rolls became a beloved way to utilize it. They represent a tradition of home baking and shared meals, often gracing holiday tables and family gatherings.
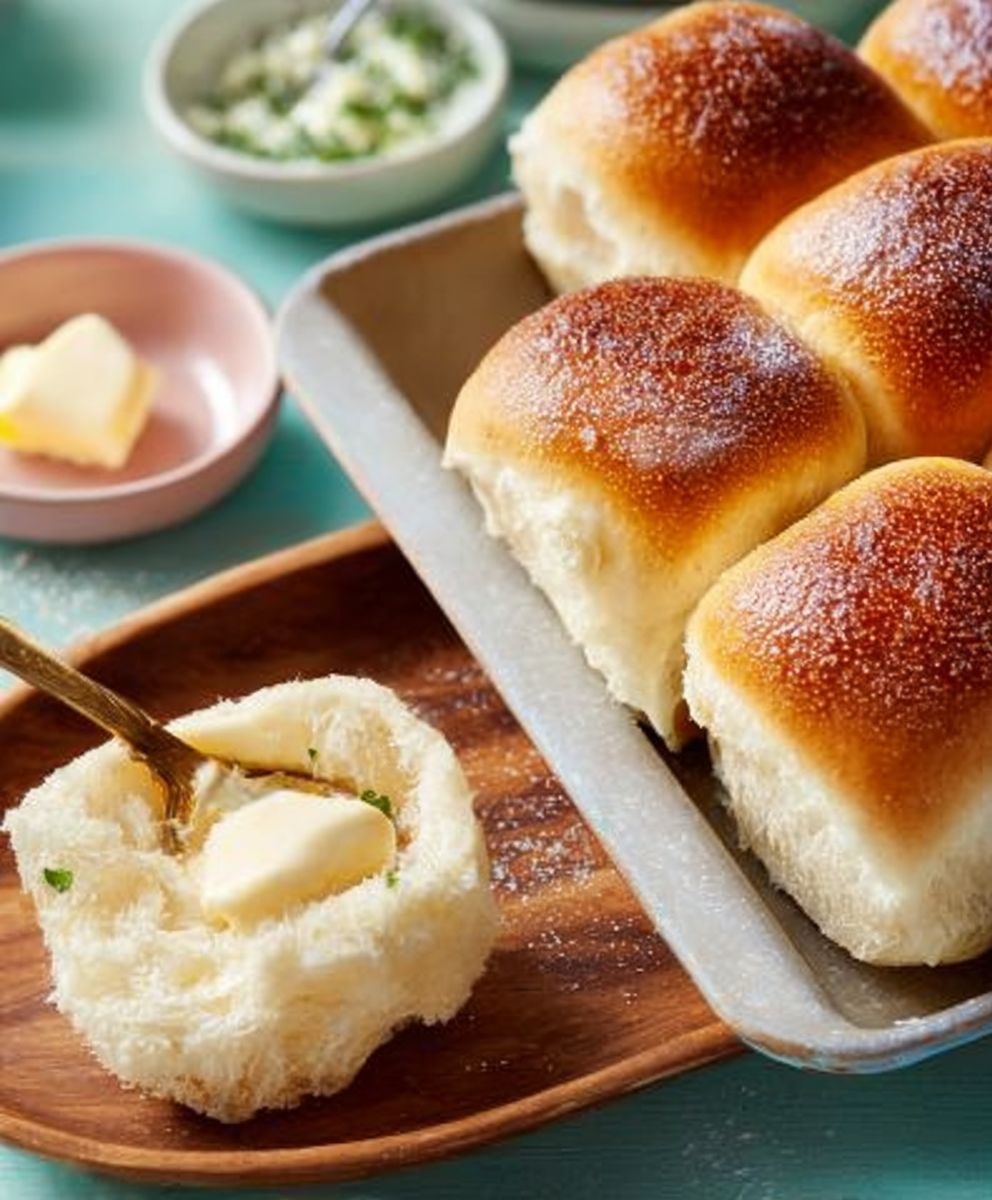
What makes these rolls so irresistible? It’s the perfect combination of a slightly tangy flavor from the buttermilk, a tender, almost feathery texture, and a golden-brown crust that practically begs to be slathered with butter. They’re incredibly versatile, pairing perfectly with everything from hearty stews and roasted chicken to a simple pat of butter and a cup of coffee. Plus, the process of making them is surprisingly therapeutic, a chance to slow down and connect with the simple pleasure of creating something delicious from scratch. Get ready to experience the joy of homemade bread with this incredible recipe!

Ingredients:
- 6 cups all-purpose flour, plus more for dusting
- 1 teaspoon baking soda
- 1 tablespoon baking powder
- 1 teaspoon salt
- 1 cup (2 sticks) cold unsalted butter, cut into cubes
- 2 ½ cups buttermilk, cold
- ¼ cup honey, plus more for brushing (optional)
Preparing the Dough:
- First things first, let’s get our dry ingredients ready. In a large bowl, whisk together 6 cups of all-purpose flour, 1 teaspoon of baking soda, 1 tablespoon of baking powder, and 1 teaspoon of salt. Make sure everything is well combined this helps ensure even rising and a consistent texture.
- Now comes the fun part incorporating the butter! Add 1 cup (that’s 2 sticks) of cold, unsalted butter, cut into cubes, to the flour mixture. The key here is to keep the butter cold. Cold butter creates little pockets of steam when baking, which results in those flaky layers we all love in a good roll.
- Using a pastry blender or your fingertips (if you’re feeling adventurous!), cut the butter into the flour until the mixture resembles coarse crumbs. You should still see small pieces of butter throughout don’t overmix! This is crucial for achieving that perfect flaky texture.
- Next, it’s time to add the wet ingredients. In a separate bowl, whisk together 2 ½ cups of cold buttermilk and ¼ cup of honey. The honey adds a touch of sweetness that complements the tanginess of the buttermilk beautifully.
- Pour the buttermilk mixture into the flour mixture and gently stir until just combined. Be careful not to overmix the dough a few streaks of flour are perfectly fine. Overmixing will develop the gluten too much, resulting in tough rolls.
- Turn the dough out onto a lightly floured surface. Gently pat it into a rectangle about 1 inch thick.
Creating the Layers:
- This is where we build those beautiful layers! Fold the dough in thirds, like you’re folding a letter. This creates layers of dough and butter that will separate and puff up in the oven.
- Rotate the dough 90 degrees and pat it into another rectangle about 1 inch thick. Repeat the folding process fold in thirds again.
- Wrap the dough in plastic wrap and refrigerate for at least 30 minutes. This allows the gluten to relax and the butter to firm up, making the dough easier to handle and resulting in even flakier rolls. You can even refrigerate it for longer, up to a few hours, if you need to prep ahead.
Shaping and Baking the Rolls:
- Preheat your oven to 425°F (220°C). While the oven is heating, grease a 9×13 inch baking dish.
- Remove the dough from the refrigerator and unwrap it. On a lightly floured surface, gently pat the dough into a rectangle about ½ inch thick.
- Using a 2-inch biscuit cutter or a sharp knife, cut out the rolls. If you don’t have a biscuit cutter, you can simply cut the dough into squares or rectangles.
- Arrange the rolls in the prepared baking dish, placing them close together so they touch. This helps them rise tall and stay soft.
- Bake for 20-25 minutes, or until the rolls are golden brown on top. Keep a close eye on them, as baking times may vary depending on your oven.
- While the rolls are baking, you can prepare a simple honey butter glaze, if desired. Melt a tablespoon of butter and stir in a tablespoon of honey.
- Once the rolls are out of the oven, brush them with the honey butter glaze (optional). This adds a touch of extra sweetness and shine.
Tips and Tricks for Perfect Buttermilk Rolls:
- Use cold ingredients: Cold butter and buttermilk are essential for creating flaky layers. Make sure your butter is straight from the refrigerator and your buttermilk is well-chilled.
- Don’t overmix the dough: Overmixing develops the gluten, resulting in tough rolls. Mix the dough until just combined, and don’t worry about a few streaks of flour.
- Refrigerate the dough: Refrigerating the dough allows the gluten to relax and the butter to firm up, making the dough easier to handle and resulting in even flakier rolls.
- Don’t overcrowd the baking dish: Arrange the rolls close together, but not too tightly. This allows them to rise tall and stay soft.
- Bake until golden brown: Bake the rolls until they are golden brown on top. This ensures that they are fully cooked and have a delicious flavor.
- Experiment with flavors: Feel free to add other flavors to your buttermilk rolls. Try adding herbs, cheese, or spices to the dough.
- Make ahead: You can prepare the dough ahead of time and refrigerate it for up to 24 hours. Just be sure to let it come to room temperature slightly before rolling and cutting.
- Freezing: Baked rolls can be frozen for up to 2 months. Wrap them tightly in plastic wrap and then in foil. To reheat, thaw overnight in the refrigerator and then warm in a low oven. You can also freeze the unbaked rolls after cutting them out. Place them on a baking sheet lined with parchment paper and freeze until solid. Then transfer them to a freezer bag. When ready to bake, bake from frozen, adding a few extra minutes to the baking time.
Serving Suggestions:
These buttermilk rolls are delicious served warm with butter, jam, or honey. They’re also a great addition to any meal, from breakfast to dinner. Here are a few serving suggestions:
- Serve them with scrambled eggs and bacon for a hearty breakfast.
- Serve them alongside a bowl of soup or chili for a comforting lunch.
- Serve them with roasted chicken or pork for a delicious dinner.
- Use them to make mini sandwiches for a party or picnic.
- Enjoy them as a sweet treat with a dollop of whipped cream and fresh berries.
Variations:
Want to mix things up a bit? Here are a few variations you can try:
- Herb Buttermilk Rolls: Add 1-2 tablespoons of chopped fresh herbs, such as rosemary, thyme, or chives, to the dough.
- Cheese Buttermilk Rolls: Add ½ cup of shredded cheese, such as cheddar, Monterey Jack, or Parmesan, to the dough.
- Garlic Buttermilk Rolls: Add 1-2 cloves of minced garlic to the dough.
- Sweet Potato Buttermilk Rolls: Substitute ½ cup of the buttermilk with ½ cup of mashed cooked sweet potato. This will give the rolls a slightly sweet and earthy flavor.
- Whole Wheat Buttermilk Rolls: Substitute up to half of the all-purpose flour with whole wheat flour. This will give the rolls a slightly nutty flavor and a more wholesome texture.
Troubleshooting:
Sometimes things don’t go exactly as planned. Here are a few common problems and how to fix them:
- Rolls are tough: This is usually caused by overmixing the dough. Be careful not to overmix the dough, and mix it until just combined.
- Rolls are not rising: This could be caused by several factors, including using old baking powder or baking soda, not using cold enough ingredients, or not refrigerating the dough long enough. Make sure your baking powder and baking soda are fresh, use cold butter and buttermilk, and refrigerate the dough for at least 30 minutes.
- Rolls are too dry: This could be caused by using too much flour. Be careful not to add too much flour to the dough, and use just enough to prevent it from sticking to the surface.
- Rolls are burning on the bottom: This could be caused by baking the rolls on too low of a rack in the oven. Make sure to bake the rolls on the middle rack of the oven.
Why Buttermilk?
You might be wondering why buttermilk is so important in this recipe. Buttermilk adds a subtle tanginess and richness to the rolls that you just can’t get with regular milk. It also helps to tenderize the dough, resulting in a softer and more delicate crumb. The acidity in buttermilk reacts with the baking soda, creating carbon dioxide, which helps the rolls rise. If you don’t have buttermilk on hand, you can make a substitute by adding 1 tablespoon of lemon juice or white vinegar to 1 cup of milk. Let it sit for 5 minutes before using.
Enjoy!
I hope you enjoy these delicious buttermilk rolls as much as I do! They’re perfect for any occasion and are sure to be a crowd-pleaser. Happy baking!
Conclusion:
And there you have it! These aren’t just any rolls; they’re Buttermilk Rolls, a taste of pure comfort and homemade goodness that will elevate any meal. I truly believe this recipe is a must-try for anyone who appreciates the simple pleasures of baking and the satisfaction of creating something truly delicious from scratch. The soft, pillowy texture, the subtle tang of buttermilk, and the golden-brown crust all combine to create a roll that’s simply irresistible.
But why is this recipe so special? It’s more than just the ingredients; it’s the process. It’s the gentle kneading, the patient waiting as the dough rises, and the anticipation as the aroma fills your kitchen. It’s about creating a connection to the past, to generations of bakers who have passed down their knowledge and love of breadmaking. And most importantly, it’s about sharing that love with your family and friends.
These Buttermilk Rolls are incredibly versatile. Serve them warm with a pat of butter for a classic accompaniment to any dinner. They’re fantastic with soups, stews, and salads, adding a touch of warmth and comfort to any meal. Imagine them alongside a hearty bowl of chili on a cold winter evening, or as the perfect side to a summer barbecue.
But don’t stop there! Get creative with your serving suggestions. Use them to make mini sliders with pulled pork or shredded chicken. Slice them in half and use them as the base for breakfast sandwiches with eggs, bacon, and cheese. Or, for a sweet treat, brush them with melted butter and sprinkle with cinnamon sugar.
Looking for variations? Try adding a tablespoon of honey or maple syrup to the dough for a touch of sweetness. Incorporate herbs like rosemary or thyme for a savory twist. Or, for a truly decadent treat, brush the tops with melted garlic butter before baking. The possibilities are endless!
I’ve poured my heart into perfecting this recipe, and I’m confident that you’ll love it as much as I do. It’s a recipe that’s been passed down through my family, and it’s one that I cherish. I’m so excited to share it with you, and I can’t wait to hear about your experiences.
So, what are you waiting for? Gather your ingredients, preheat your oven, and get ready to bake some magic. Don’t be intimidated by the thought of making bread from scratch. This recipe is surprisingly easy to follow, and the results are well worth the effort.
I encourage you to try this Buttermilk Rolls recipe and experience the joy of homemade baking. Once you’ve made them, please come back and share your thoughts in the comments below. Did you make any variations? What did you serve them with? I’d love to hear all about your baking adventures! And don’t forget to share your photos on social media using [Your Hashtag] so I can see your beautiful creations. Happy baking!
Buttermilk Rolls: The Ultimate Guide to Soft & Fluffy Perfection
Flaky, tender buttermilk rolls with a hint of honey, perfect for any occasion.
Ingredients
- 6 cups all-purpose flour, plus more for dusting
- 1 teaspoon baking soda
- 1 tablespoon baking powder
- 1 teaspoon salt
- 1 cup (2 sticks) cold unsalted butter, cut into cubes
- 2 ½ cups buttermilk, cold
- ¼ cup honey, plus more for brushing (optional)
Instructions
- Prepare Dry Ingredients: In a large bowl, whisk together flour, baking soda, baking powder, and salt.
- Incorporate Butter: Add cold, cubed butter to the flour mixture. Cut the butter into the flour using a pastry blender or fingertips until the mixture resembles coarse crumbs.
- Add Wet Ingredients: In a separate bowl, whisk together cold buttermilk and honey.
- Combine: Pour the buttermilk mixture into the flour mixture and gently stir until just combined. Do not overmix.
- Shape: Turn the dough out onto a lightly floured surface. Gently pat it into a rectangle about 1 inch thick.
- First Fold: Fold the dough in thirds, like folding a letter.
- Second Fold: Rotate the dough 90 degrees and pat it into another rectangle about 1 inch thick. Repeat the folding process fold in thirds again.
- Chill: Wrap the dough in plastic wrap and refrigerate for at least 30 minutes (or up to a few hours).
- Preheat: Preheat oven to 425°F (220°C). Grease a 9×13 inch baking dish.
- Shape Rolls: Remove the dough from the refrigerator and unwrap it. On a lightly floured surface, gently pat the dough into a rectangle about ½ inch thick.
- Cut Rolls: Using a 2-inch biscuit cutter or a sharp knife, cut out the rolls.
- Arrange: Arrange the rolls in the prepared baking dish, placing them close together so they touch.
- Bake: Bake for 20-25 minutes, or until the rolls are golden brown on top.
- Honey Butter Glaze (Optional): While the rolls are baking, melt a tablespoon of butter and stir in a tablespoon of honey.
- Glaze (Optional): Once the rolls are out of the oven, brush them with the honey butter glaze.
Notes
- Use cold ingredients for flaky layers.
- Do not overmix the dough.
- Refrigerate the dough to relax the gluten and firm up the butter.
- Arrange the rolls close together in the baking dish.
- Bake until golden brown.
- Experiment with flavors by adding herbs, cheese, or spices.
- Dough can be made ahead and refrigerated for up to 24 hours.
- Baked rolls can be frozen for up to 2 months.
- Unbaked rolls can be frozen after cutting them out.


Leave a Comment