
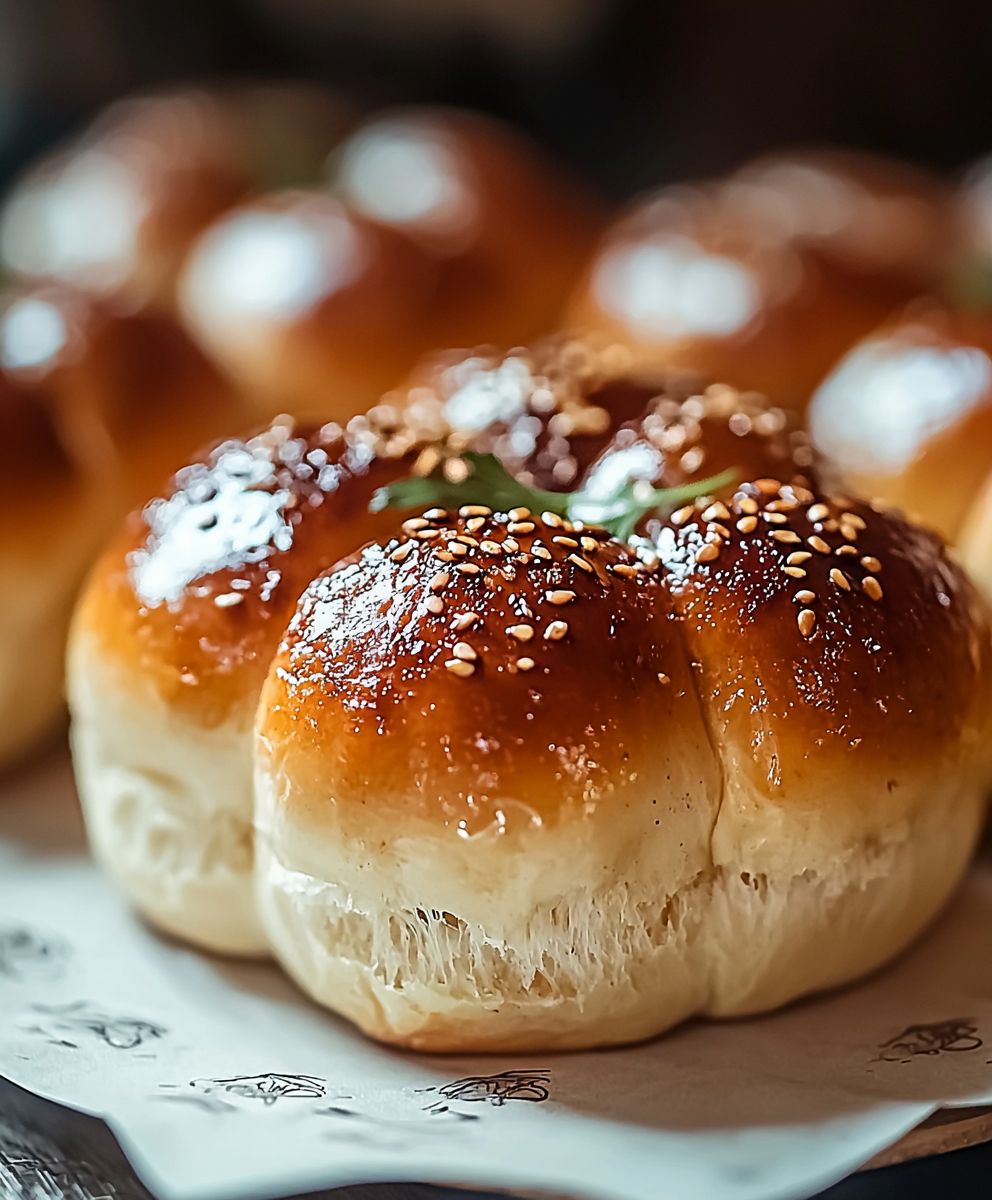
Bunny shaped buns, aren’t they just the cutest? Imagine the delight on your family’s faces when you present a basket overflowing with these adorable, fluffy treats! This isn’t just baking; it’s crafting edible art that brings joy to any occasion, especially Easter.
While the exact origins of shaping bread into animals are a bit hazy, the practice is deeply rooted in various cultures. Think of the intricate animal-shaped breads found in some European traditions, often used for celebrations and symbolic offerings. These bunny shaped buns take that time-honored tradition and add a modern, playful twist.
What makes these buns so irresistible? It’s a combination of factors! First, there’s the visual appeal. Who can resist a perfectly formed bunny, complete with perky ears? Then, there’s the texture a soft, slightly sweet dough that melts in your mouth. And let’s not forget the convenience! This recipe is surprisingly straightforward, making it perfect for both seasoned bakers and those just starting their culinary journey. Whether you’re looking to impress guests, create a memorable family activity, or simply indulge in a delicious treat, these bunny buns are sure to hop their way into your heart (and your stomach!).

Ingredients:
- For the Dough:
- 3 ½ cups (420g) all-purpose flour, plus more for dusting
- ¼ cup (50g) granulated sugar
- 1 teaspoon salt
- 1 packet (2 ¼ teaspoons) active dry yeast
- 1 cup (240ml) lukewarm milk (about 105-115°F)
- ¼ cup (60ml) lukewarm water (about 105-115°F)
- ¼ cup (60ml) unsalted butter, melted
- 1 large egg, lightly beaten
- For the Filling (Optional):
- ½ cup (120g) Nutella, chocolate spread, or your favorite jam
- ¼ cup (30g) chopped nuts (optional, for Nutella filling)
- For the Egg Wash:
- 1 large egg
- 1 tablespoon milk or water
- For Decoration:
- Black sesame seeds or mini chocolate chips for eyes
- Pink food coloring (optional, for rosy cheeks)
Preparing the Dough:
- Activate the Yeast: In a large bowl, combine the lukewarm milk, lukewarm water, sugar, and active dry yeast. Stir gently and let it sit for 5-10 minutes, or until the yeast is foamy. This step ensures that your yeast is alive and active, which is crucial for a good rise. If the yeast doesn’t foam, it might be expired, and you’ll need to use a fresh packet.
- Combine Wet and Dry Ingredients: Add the melted butter and lightly beaten egg to the yeast mixture. Whisk well to combine all the wet ingredients. In a separate large bowl, whisk together the flour and salt.
- Form the Dough: Gradually add the dry ingredients to the wet ingredients, mixing with a wooden spoon or a stand mixer fitted with a dough hook. Mix until a shaggy dough forms. If using a stand mixer, continue kneading on low speed for 8-10 minutes. If kneading by hand, turn the dough out onto a lightly floured surface and knead for 10-12 minutes, or until the dough is smooth and elastic. The dough should be slightly sticky but not unmanageable. If it’s too sticky, add a tablespoon of flour at a time until it reaches the right consistency.
- First Rise: Place the dough in a lightly oiled bowl, turning to coat all sides. Cover the bowl with plastic wrap or a clean kitchen towel. Let the dough rise in a warm place for 1-1.5 hours, or until doubled in size. The rising time will depend on the temperature of your room. A warmer environment will speed up the process.
Shaping the Bunny Buns:
- Punch Down the Dough: Once the dough has doubled, gently punch it down to release the air. Turn the dough out onto a lightly floured surface.
- Divide the Dough: Divide the dough into equal portions. The number of portions will depend on the size of the buns you want to make. For medium-sized buns, divide the dough into 10-12 pieces.
- Shape the Bunny Heads: Take one portion of dough and roll it into a ball. This will be the bunny’s head. Place the ball on a baking sheet lined with parchment paper.
- Create the Ears: Take another small piece of dough and divide it in half. Roll each half into a small oval shape. Gently flatten the ovals and shape them into bunny ears. You can make them pointy or rounded, depending on your preference.
- Attach the Ears: Moisten the bottom of each ear with a little water and attach them to the top of the bunny head. Press gently to secure them.
- Optional Filling: If you’re using a filling, flatten each dough portion into a small disc. Place a teaspoon of Nutella, chocolate spread, or jam in the center. If using Nutella, you can add a sprinkle of chopped nuts. Bring the edges of the dough up and pinch them together to seal the filling inside. Roll the filled dough into a ball and then shape it into a bunny head as described above. Attach the ears in the same way.
- Repeat: Repeat steps 3-6 with the remaining dough portions until all the bunny buns are shaped.
Second Rise:
- Cover and Rest: Cover the shaped bunny buns with plastic wrap or a clean kitchen towel. Let them rise in a warm place for another 30-45 minutes, or until they are puffy and slightly increased in size. This second rise is important for creating light and airy buns.
Baking the Bunny Buns:
- Preheat the Oven: Preheat your oven to 350°F (175°C). Make sure the oven is fully preheated before baking the buns.
- Prepare the Egg Wash: In a small bowl, whisk together the egg and milk or water. This egg wash will give the buns a beautiful golden-brown color.
- Apply the Egg Wash: Gently brush the tops of the risen bunny buns with the egg wash. Be careful not to deflate the buns.
- Decorate: Place black sesame seeds or mini chocolate chips on the bunny heads to create eyes. If you want to add rosy cheeks, mix a tiny drop of pink food coloring with a little water and use a small brush to paint the cheeks.
- Bake: Bake the bunny buns for 15-20 minutes, or until they are golden brown. The baking time will depend on the size of the buns and your oven. Keep an eye on them to prevent them from burning.
- Cool: Once the buns are baked, remove them from the oven and let them cool on the baking sheet for a few minutes before transferring them to a wire rack to cool completely.
Tips and Variations:
- Make Ahead: You can prepare the dough ahead of time and store it in the refrigerator for up to 24 hours. Let it come to room temperature before shaping the buns.
- Different Fillings: Get creative with the fillings! Try using different types of jam, fruit preserves, or even savory fillings like cheese or ham.
- Vegan Option: To make these bunny buns vegan, use plant-based milk and butter. You can also replace the egg with a flax egg (1 tablespoon ground flaxseed mixed with 3 tablespoons water).
- Gluten-Free Option: While I haven’t tested this recipe with gluten-free flour, you can try using a gluten-free all-purpose flour blend. Keep in mind that the texture of the buns may be slightly different.
- Storage: Store the baked bunny buns in an airtight container at room temperature for up to 2 days. You can also freeze them for longer storage.
- Troubleshooting: If your dough doesn’t rise, make sure your yeast is fresh and that the milk and water are lukewarm, not hot. If your buns are browning too quickly, cover them loosely with aluminum foil during the last few minutes of baking.
Conclusion:
And there you have it! These adorable bunny-shaped buns are more than just a treat; they’re a guaranteed conversation starter and a delightful way to bring some springtime cheer to your table. I truly believe this recipe is a must-try, not only for its cuteness factor but also for the incredibly soft and fluffy texture of the buns themselves. The subtle sweetness is perfectly balanced, making them ideal for both sweet and savory fillings. Think of the possibilities! You could serve these little bunnies warm with a pat of butter and a sprinkle of cinnamon sugar for a simple yet satisfying breakfast. Or, for a more substantial meal, try filling them with ham and cheese for a fun and festive lunch. They would also be absolutely perfect alongside a bowl of hearty soup. But the fun doesn’t stop there! Feel free to get creative with your fillings and toppings. A dollop of homemade jam, a swirl of Nutella, or even a savory cream cheese spread would all be delicious. For a vegan option, simply substitute the milk and butter with plant-based alternatives. You can even experiment with different flours to add a unique flavor profile. Whole wheat flour would give them a slightly nutty taste, while rye flour would add a touch of earthiness. Don’t be intimidated by the shaping process! While they may look intricate, the bunny shape is surprisingly easy to achieve with a little practice. And even if your bunnies don’t turn out perfectly, they’ll still be incredibly delicious. Remember, the most important ingredient is love! I’ve poured my heart into perfecting this recipe, and I’m confident that you’ll love it as much as I do. The aroma of freshly baked bread filling your kitchen is simply irresistible, and the joy of seeing the smiles on your loved ones’ faces as they bite into these adorable bunny shaped buns is priceless. So, what are you waiting for? Gather your ingredients, preheat your oven, and get ready to embark on a baking adventure! I promise you, the results will be well worth the effort.Serving Suggestions and Variations:
* Sweet Treats: Serve warm with butter and jam, Nutella, or a sprinkle of powdered sugar. * Savory Delights: Fill with ham and cheese, cream cheese and chives, or your favorite sandwich fillings. * Soup Companions: Enjoy alongside a bowl of hearty soup for a comforting meal. * Vegan Option: Substitute milk and butter with plant-based alternatives. * Flour Power: Experiment with different flours like whole wheat or rye for unique flavors. I’m so excited to hear about your baking experience! Please, please, please try this recipe and share your creations with me. Tag me in your photos on social media I can’t wait to see your adorable bunny buns! Let me know in the comments below what fillings and toppings you tried, and any variations you made. Your feedback is invaluable, and it helps me to continue creating delicious and inspiring recipes for you. Happy baking! Print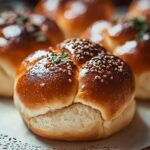
Bunny Shaped Buns: A Delicious and Adorable Baking Guide
- Total Time: 165 minutes
- Yield: 10–12 bunny buns 1x
Description
Adorable bunny buns, perfect for Easter or spring! Soft, sweet dough shaped like bunnies, filled with Nutella, jam, or your favorite filling.
Ingredients
- 3 ½ cups (420g) all-purpose flour, plus more for dusting
- ¼ cup (50g) granulated sugar
- 1 teaspoon salt
- 1 packet (2 ¼ teaspoons) active dry yeast
- 1 cup (240ml) lukewarm milk (about 105-115°F)
- ¼ cup (60ml) lukewarm water (about 105-115°F)
- ¼ cup (60ml) unsalted butter, melted
- 1 large egg, lightly beaten
- ½ cup (120g) Nutella, chocolate spread, or your favorite jam
- ¼ cup (30g) chopped nuts (optional, for Nutella filling)
- 1 large egg
- 1 tablespoon milk or water
- Black sesame seeds or mini chocolate chips for eyes
- Pink food coloring (optional, for rosy cheeks)
Instructions
- Activate the Yeast: In a large bowl, combine the lukewarm milk, lukewarm water, sugar, and active dry yeast. Stir gently and let it sit for 5-10 minutes, or until the yeast is foamy.
- Combine Wet and Dry Ingredients: Add the melted butter and lightly beaten egg to the yeast mixture. Whisk well to combine. In a separate large bowl, whisk together the flour and salt.
- Form the Dough: Gradually add the dry ingredients to the wet ingredients, mixing with a wooden spoon or a stand mixer fitted with a dough hook. Mix until a shaggy dough forms. If using a stand mixer, knead on low speed for 8-10 minutes. If kneading by hand, turn the dough out onto a lightly floured surface and knead for 10-12 minutes, or until the dough is smooth and elastic.
- First Rise: Place the dough in a lightly oiled bowl, turning to coat all sides. Cover the bowl with plastic wrap or a clean kitchen towel. Let the dough rise in a warm place for 1-1.5 hours, or until doubled in size.
- Punch Down the Dough: Once the dough has doubled, gently punch it down to release the air. Turn the dough out onto a lightly floured surface.
- Divide the Dough: Divide the dough into equal portions (10-12 for medium-sized buns).
- Shape the Bunny Heads: Take one portion of dough and roll it into a ball. Place the ball on a baking sheet lined with parchment paper.
- Create the Ears: Take another small piece of dough and divide it in half. Roll each half into a small oval shape. Gently flatten the ovals and shape them into bunny ears.
- Attach the Ears: Moisten the bottom of each ear with a little water and attach them to the top of the bunny head. Press gently to secure them.
- Optional Filling: If using a filling, flatten each dough portion into a small disc. Place a teaspoon of Nutella, chocolate spread, or jam in the center. If using Nutella, you can add a sprinkle of chopped nuts. Bring the edges of the dough up and pinch them together to seal the filling inside. Roll the filled dough into a ball and then shape it into a bunny head as described above. Attach the ears in the same way.
- Repeat: Repeat steps 7-10 with the remaining dough portions until all the bunny buns are shaped.
- Second Rise: Cover the shaped bunny buns with plastic wrap or a clean kitchen towel. Let them rise in a warm place for another 30-45 minutes, or until they are puffy and slightly increased in size.
- Preheat the Oven: Preheat your oven to 350°F (175°C).
- Prepare the Egg Wash: In a small bowl, whisk together the egg and milk or water.
- Apply the Egg Wash: Gently brush the tops of the risen bunny buns with the egg wash.
- Decorate: Place black sesame seeds or mini chocolate chips on the bunny heads to create eyes. If you want to add rosy cheeks, mix a tiny drop of pink food coloring with a little water and use a small brush to paint the cheeks.
- Bake: Bake the bunny buns for 15-20 minutes, or until they are golden brown.
- Cool: Once the buns are baked, remove them from the oven and let them cool on the baking sheet for a few minutes before transferring them to a wire rack to cool completely.
Notes
- Make Ahead: You can prepare the dough ahead of time and store it in the refrigerator for up to 24 hours. Let it come to room temperature before shaping the buns.
- Different Fillings: Get creative with the fillings! Try using different types of jam, fruit preserves, or even savory fillings like cheese or ham.
- Vegan Option: To make these bunny buns vegan, use plant-based milk and butter. You can also replace the egg with a flax egg (1 tablespoon ground flaxseed mixed with 3 tablespoons water).
- Gluten-Free Option: While I haven’t tested this recipe with gluten-free flour, you can try using a gluten-free all-purpose flour blend. Keep in mind that the texture of the buns may be slightly different.
- Storage: Store the baked bunny buns in an airtight container at room temperature for up to 2 days. You can also freeze them for longer storage.
- Troubleshooting: If your dough doesn’t rise, make sure your yeast is fresh and that the milk and water are lukewarm, not hot. If your buns are browning too quickly, cover them loosely with aluminum foil during the last few minutes of baking.
- Prep Time: 45 minutes
- Cook Time: 15 minutes


Leave a Comment