
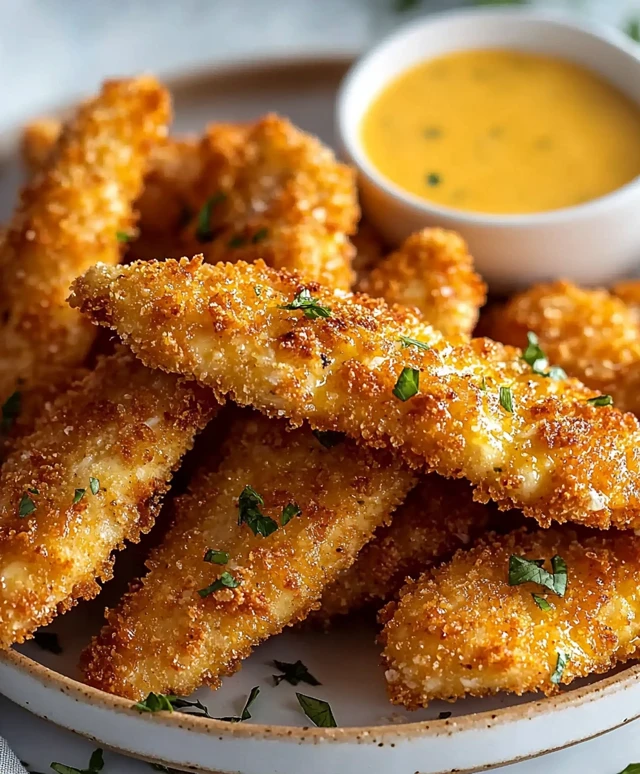
Breaded Chicken Tenders are a beloved dish that brings comfort and joy to dinner tables around the world. As a fan of crispy, golden-brown delights, I cant help but share my enthusiasm for this classic recipe. The history of chicken tenders dates back to the mid-20th century, where they quickly became a staple in American cuisine, often enjoyed by both children and adults alike. What makes breaded chicken tenders so irresistible is their perfect combination of crunchy exterior and tender, juicy meat inside. They are not only delicious but also incredibly convenient to prepare, making them a go-to option for busy weeknights or casual gatherings. Whether served with a side of dipping sauce or nestled in a sandwich, these tenders are sure to please everyone at the table!
Ingredients:
- 1 pound of boneless, skinless chicken breasts
- 1 cup all-purpose flour
- 2 large eggs
- 1 cup breadcrumbs (preferably panko for extra crunch)
- 1 teaspoon garlic powder
- 1 teaspoon onion powder
- 1 teaspoon paprika
- 1 teaspoon salt
- 1/2 teaspoon black pepper
- 1/2 teaspoon dried oregano
- 1/2 teaspoon dried thyme
- Vegetable oil (for frying)
- Optional: dipping sauces (like honey mustard, ranch, or barbecue sauce)
Preparing the Chicken
1. Start by rinsing the chicken breasts under cold water. Pat them dry with paper towels to remove excess moisture. This step is crucial as it helps the breading stick better. 2. Next, slice the chicken breasts into strips. Aim for about 1-inch wide pieces. This size ensures they cook evenly and are easy to handle. If you prefer, you can also pound the chicken to an even thickness before cutting, which helps with tenderness. 3. Once your chicken is cut, season it with salt, pepper, garlic powder, onion powder, paprika, oregano, and thyme. I like to use my hands to rub the spices into the chicken, ensuring every piece is well-coated. Let the chicken sit for about 15-20 minutes to absorb the flavors.Preparing the Breading Station
4. While the chicken is marinating, its time to set up your breading station. Youll need three shallow bowls for this process. 5. In the first bowl, add the all-purpose flour. You can also mix in a pinch of salt and pepper for extra flavor. 6. In the second bowl, crack the two large eggs and whisk them until they are fully combined. You can add a splash of water or milk to make the egg wash a bit lighter, but its not necessary. 7. In the third bowl, pour in the breadcrumbs. If youre using plain breadcrumbs, feel free to add a bit more seasoning to this mixture to enhance the flavor.Breading the Chicken Tenders
8. Now, its time to bread the chicken! Take one chicken strip and first dip it into the flour, making sure to coat it evenly. Shake off any excess flour. 9. Next, dip the floured chicken into the egg wash, ensuring its fully coated. Let any excess egg drip off. 10. Finally, roll the chicken strip in the breadcrumbs, pressing gently to ensure the breadcrumbs adhere well. Place the breaded chicken tenders on a plate or a baking sheet lined with parchment paper. Repeat this process for all the chicken strips.Cooking the Chicken Tenders
11. In a large skillet, pour enough vegetable oil to cover the bottom of the pan by about 1/4 inch. Heat the oil over medium-high heat. To test if the oil is hot enough, drop a small piece of bread into the oil; if it sizzles, youre ready to go! 12. Carefully add the breaded chicken tenders to the hot oil, making sure not to overcrowd the pan. Depending on the size of your skillet, you may need to cook them in batches. 13. Fry the chicken tenders for about 4-5 minutes on each side, or until they are golden brown and cooked through. You can use a meat thermometer to check the internal temperature; it should read 165°F (75°C). 14. Once cooked, transfer the chicken tenders to a plate lined with paper towels to absorb any excess oil. This step keeps them crispy and not greasy.Assembling and Serving
15. After all the chicken tenders are cooked, its time to serve! You can arrange them on a platter or individual plates. 16. If you want to add a little flair, garnish with fresh parsley or serve with lemon wedges for a zesty touch. 17. Dont forget the dipping sauces! Set out a variety of options like honey mustard, ranch, or barbecue sauce for everyone to enjoy. 18. For a complete meal, consider serving the chicken tenders with a side of fries, a fresh salad, or some steamed vegetables.Storing Leftovers
19. If you have any leftovers (which is rare because theyre so delicious!), let the chicken tenders cool completely. Then, store them in an airtight container in the refrigerator for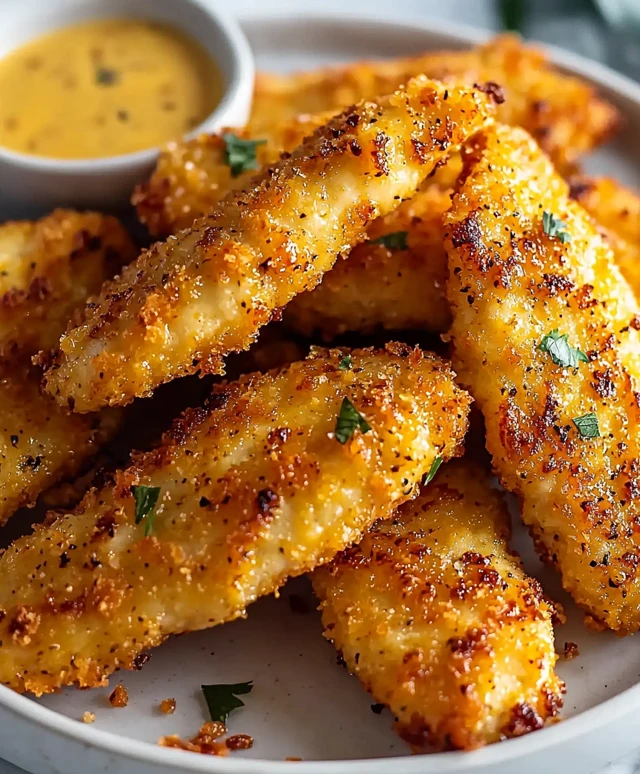
Conclusion:
In summary, these breaded chicken tenders are an absolute must-try for anyone looking to elevate their weeknight dinners or impress guests at a gathering. The crispy, golden exterior combined with the juicy, tender chicken inside creates a delightful contrast that is simply irresistible. Plus, the versatility of this recipe means you can easily customize it to suit your taste. Consider serving them with a variety of dipping sauces like honey mustard, barbecue, or a spicy sriracha mayo for an extra kick. You can also experiment with different seasonings in the breading, such as Italian herbs or a dash of paprika, to give your tenders a unique twist. I encourage you to give this recipe a go and experience the joy of making your own chicken tenders at home. Trust me, once you try them, youll never want to go back to store-bought! Dont forget to share your experience and any variations you come up with; Id love to hear how your breaded chicken tenders turn out! Happy cooking! PrintBreaded Chicken Tenders: The Ultimate Guide to Crispy Perfection
- Total Time: 35 minutes
- Yield: 4 servings 1x
Description
Crispy homemade chicken tenders that are perfectly seasoned and breaded for a delicious crunch. Ideal for dipping and loved by both kids and adults, these tenders are easy to make and perfect for any meal or snack time.
Ingredients
- 1 pound of boneless, skinless chicken breasts
- 1 cup all-purpose flour
- 2 large eggs
- 1 cup breadcrumbs (preferably panko for extra crunch)
- 1 teaspoon garlic powder
- 1 teaspoon onion powder
- 1 teaspoon paprika
- 1 teaspoon salt
- 1/2 teaspoon black pepper
- 1/2 teaspoon dried oregano
- 1/2 teaspoon dried thyme
- Vegetable oil (for frying)
- Optional: dipping sauces (like honey mustard, ranch, or barbecue sauce)
Instructions
- Rinse the chicken breasts under cold water and pat them dry with paper towels.
- Slice the chicken breasts into 1-inch wide strips. Optionally, pound the chicken to an even thickness.
- Season the chicken strips with salt, pepper, garlic powder, onion powder, paprika, oregano, and thyme. Rub the spices into the chicken and let it sit for 15-20 minutes.
- Set up your breading station with three shallow bowls:
- In the first bowl, add all-purpose flour (season with a pinch of salt and pepper if desired).
- In the second bowl, whisk the two large eggs until combined.
- In the third bowl, pour in the breadcrumbs (season if using plain).
- Bread the chicken strips by dipping each one into the flour, then the egg wash, and finally rolling it in the breadcrumbs. Place the breaded strips on a plate.
- In a large skillet, heat enough vegetable oil to cover the bottom by about 1/4 inch over medium-high heat.
- Test the oil by dropping in a small piece of bread; if it sizzles, the oil is ready.
- Carefully add the breaded chicken tenders to the hot oil, cooking in batches if necessary. Fry for 4-5 minutes on each side until golden brown and cooked through (internal temperature should be 165°F/75°C).
- Transfer the cooked chicken tenders to a plate lined with paper towels to absorb excess oil.
- Serve the chicken tenders on a platter or individual plates, garnished with fresh parsley or lemon wedges, and accompanied by dipping sauces.
Notes
- For extra crunch, use panko breadcrumbs.
- Feel free to customize the seasoning to your taste.
- Serve with sides like fries, salad, or steamed vegetables for a complete meal.
- Prep Time: 20 minutes
- Cook Time: 15 minutes


Leave a Comment