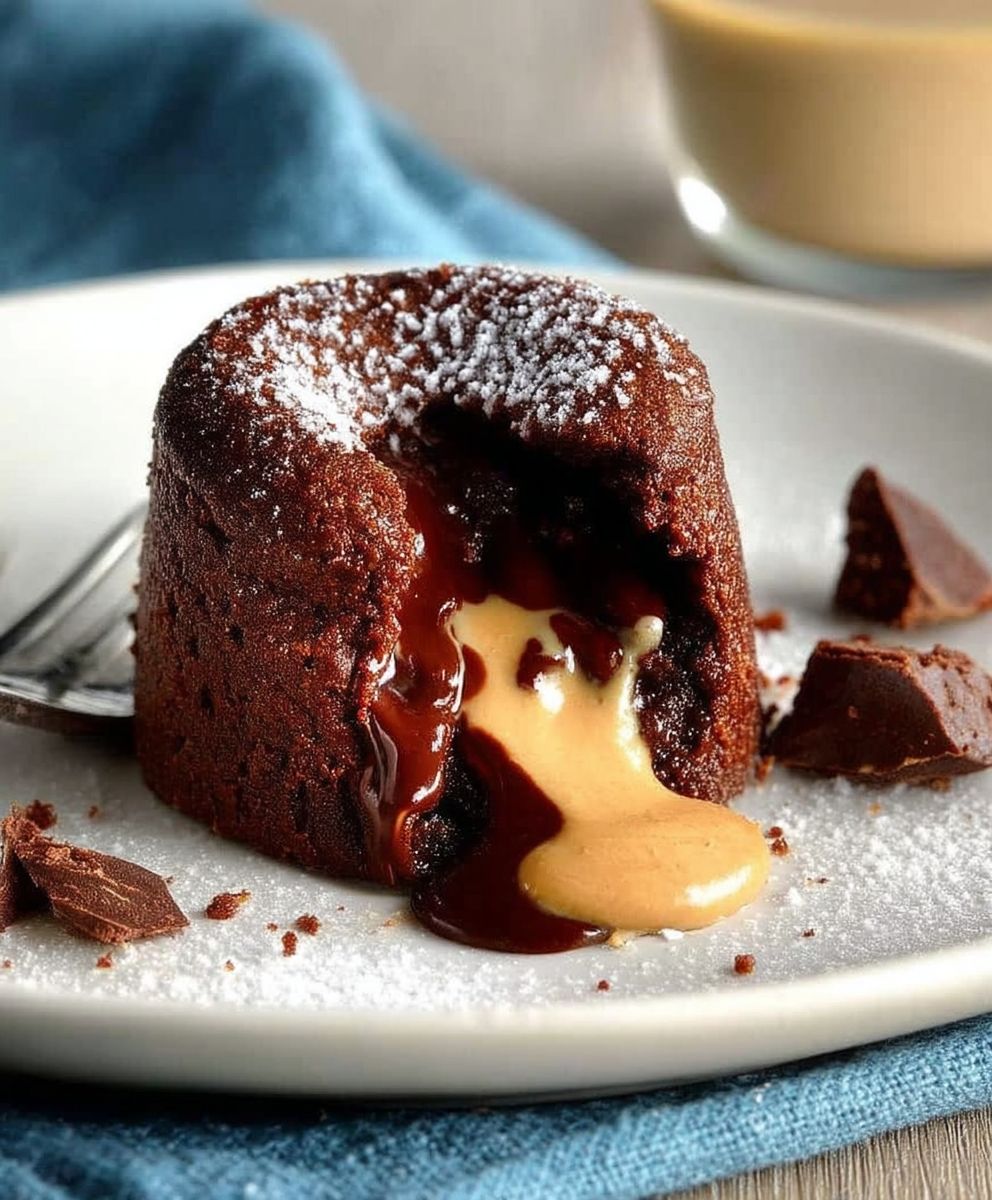
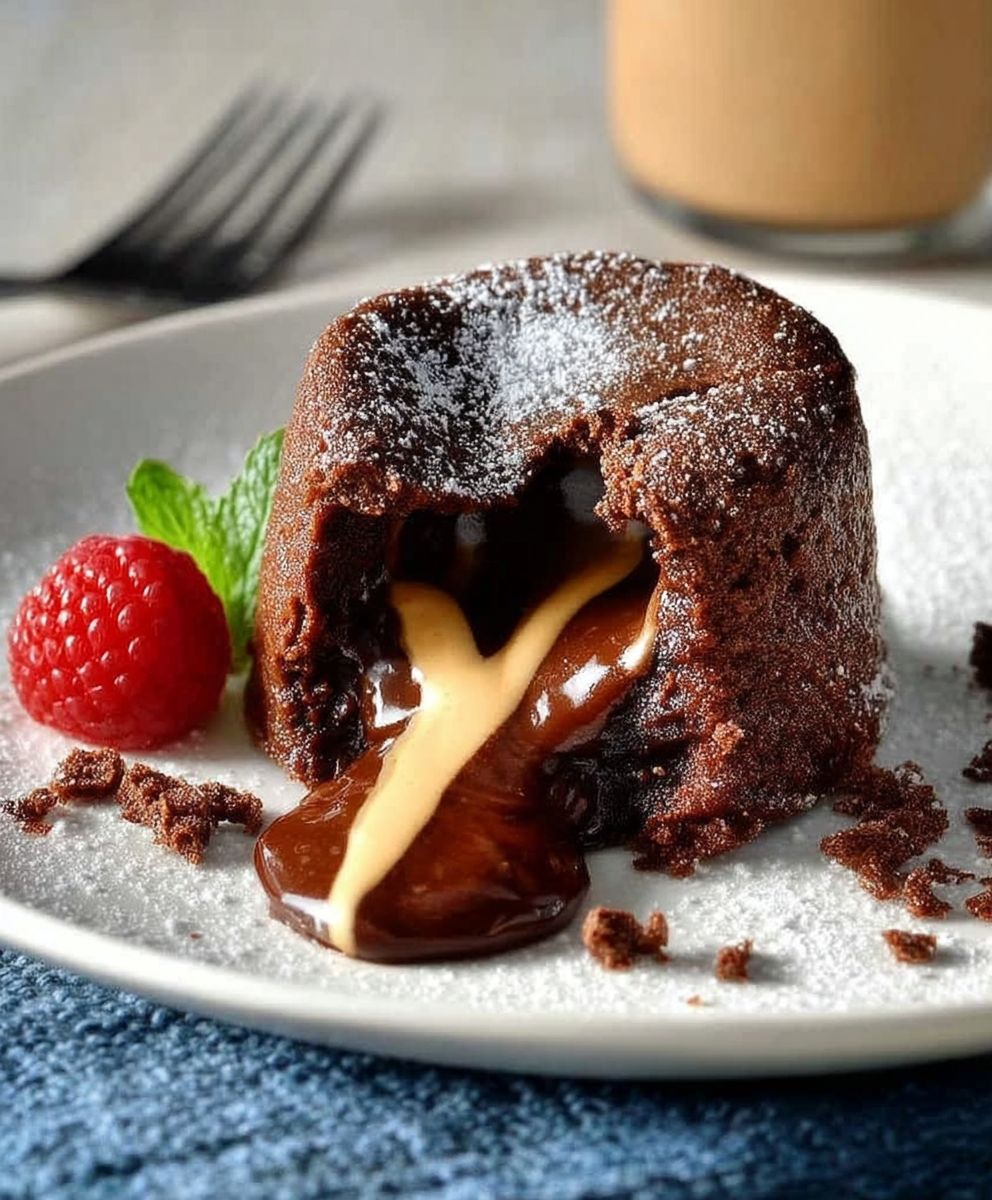
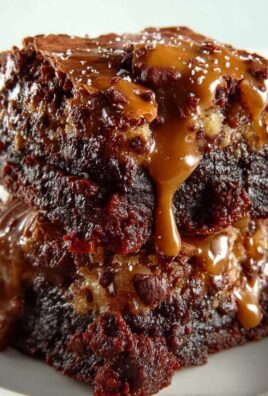
Peanut Butter Chocolate Lava Cake: Prepare to indulge in a dessert experience that’s both decadent and deeply satisfying! Imagine sinking your spoon into a warm, gooey center of molten chocolate and creamy peanut butter a symphony of flavors that will leave you craving more. This isn’t just a cake; it’s a moment of pure bliss.
While the exact origins of lava cake are debated, its popularity exploded in the 1990s, quickly becoming a restaurant staple. Our version elevates this classic with the irresistible combination of peanut butter and chocolate, a pairing that has captivated taste buds for generations. Think of it as a sophisticated twist on the beloved peanut butter cup, transformed into an elegant and comforting dessert.
What makes this Peanut Butter Chocolate Lava Cake so irresistible? It’s the contrast of textures the slightly firm, cake-like exterior giving way to the molten, flowing center. The rich, dark chocolate is perfectly balanced by the salty-sweetness of the peanut butter, creating a flavor profile that’s both comforting and exciting. Plus, it’s surprisingly easy to make! This recipe requires minimal effort, making it perfect for a weeknight treat or an impressive dessert for a special occasion. Get ready to experience a little slice of heaven!
Ingredients:
- 1/2 cup (1 stick) unsalted butter, plus more for greasing ramekins
- 1/2 cup granulated sugar
- 1/4 cup packed light brown sugar
- 1/2 cup creamy peanut butter
- 2 large eggs
- 2 large egg yolks
- 1 teaspoon vanilla extract
- 1/4 teaspoon salt
- 1/2 cup all-purpose flour
- 4 ounces bittersweet chocolate, finely chopped
- 4 ounces milk chocolate, finely chopped
- Powdered sugar, for dusting (optional)
- Vanilla ice cream, for serving (optional)
Preparing the Chocolate Peanut Butter Mixture
- Melt the butter and chocolate: In a heatproof bowl set over a saucepan of simmering water (or in the microwave in 30-second intervals), melt the butter, bittersweet chocolate, and milk chocolate together, stirring occasionally until smooth. Be careful not to overheat the chocolate, as it can seize up. If using the microwave, stir well after each interval.
- Cool slightly: Remove the bowl from the heat and let the chocolate mixture cool for a few minutes. This is important because you don’t want to cook the eggs when you add them.
- Add the sugars: Stir in the granulated sugar and brown sugar until well combined. The mixture should be smooth and glossy.
- Incorporate the peanut butter: Add the peanut butter and stir until fully incorporated and the mixture is homogenous. Make sure there are no streaks of peanut butter remaining.
Adding the Eggs and Dry Ingredients
- Whisk in the eggs and yolks: Add the eggs and egg yolks one at a time, whisking well after each addition. This is crucial for creating the rich, molten center. Make sure each egg is fully incorporated before adding the next.
- Add the vanilla and salt: Stir in the vanilla extract and salt. The vanilla enhances the chocolate flavor, and the salt balances the sweetness.
- Gently fold in the flour: Gradually add the flour, folding it in gently with a spatula until just combined. Be careful not to overmix, as this can lead to a tougher cake. A few streaks of flour are okay.
Preparing the Ramekins and Baking
- Preheat the oven: Preheat your oven to 425°F (220°C). Make sure your oven is properly preheated for even baking.
- Prepare the ramekins: Generously butter four 6-ounce ramekins. This will prevent the cakes from sticking and ensure they release easily. You can also dust the ramekins with cocoa powder for an extra layer of chocolate flavor and to help with release.
- Fill the ramekins: Divide the batter evenly among the prepared ramekins. Each ramekin should be about three-quarters full.
- Bake the lava cakes: Bake for 12-15 minutes, or until the edges are set but the center is still soft and molten. The baking time may vary depending on your oven, so keep a close eye on them. The tops should look slightly puffed up and the edges should be firm.
- Check for doneness: Gently shake one of the ramekins. The edges should be set, but the center should jiggle slightly. This indicates that the center is still molten. If the entire cake is firm, it’s overbaked.
- Cool slightly: Let the lava cakes cool in the ramekins for a minute or two before inverting them onto plates. This allows them to set slightly and makes them easier to release.
Serving the Lava Cakes
- Invert onto plates: Carefully run a thin knife around the edges of each lava cake to loosen it from the ramekin. Place a plate over the ramekin and quickly invert it. Gently tap the bottom of the ramekin to release the cake.
- Dust with powdered sugar (optional): Dust the lava cakes with powdered sugar for a beautiful presentation.
- Serve immediately: Serve the lava cakes immediately while they are still warm and the center is molten.
- Add ice cream (optional): Top with a scoop of vanilla ice cream for a delicious contrast of hot and cold. The ice cream will melt slightly over the warm cake, creating a decadent sauce.
- Garnish (optional): You can also garnish with fresh berries, chocolate shavings, or a drizzle of chocolate sauce.
Tips for Success
- Don’t overbake: The key to a perfect lava cake is to underbake it slightly so that the center remains molten. Keep a close eye on the cakes while they are baking and remove them from the oven as soon as the edges are set but the center is still soft.
- Use high-quality chocolate: The quality of the chocolate will greatly affect the flavor of the lava cakes. Use a good-quality bittersweet and milk chocolate for the best results.
- Prepare the ramekins well: Generously buttering the ramekins is essential for preventing the cakes from sticking. You can also dust them with cocoa powder for an extra layer of protection.
- Adjust baking time: Baking times may vary depending on your oven. Start checking the cakes after 12 minutes and adjust the baking time as needed.
- Make ahead: You can prepare the batter ahead of time and store it in the refrigerator for up to 24 hours. When ready to bake, let the batter come to room temperature for about 30 minutes before filling the ramekins and baking.
Variations
- Add espresso powder: For a mocha flavor, add 1 teaspoon of espresso powder to the chocolate mixture.
- Use different nut butters: Experiment with different nut butters, such as almond butter or cashew butter.
- Add spices: Add a pinch of cinnamon or nutmeg to the batter for a warm, spiced flavor.
- Make it gluten-free: Substitute the all-purpose flour with a gluten-free all-purpose flour blend.
Troubleshooting
- Cakes didn’t release: If the cakes didn’t release easily, try running a thin knife around the edges again. You can also try placing the ramekins in a warm water bath for a few minutes to loosen the cakes.
- Cakes are overbaked: If the cakes are overbaked, they will be dry and the center will not be molten. Unfortunately, there’s not much you can do to fix overbaked lava cakes, but they will still taste delicious!
- Cakes are too runny: If the cakes are too runny, they may not have been baked long enough. Try baking them for a few more minutes.
Conclusion:
This isn’t just another dessert recipe; it’s a gateway to pure, unadulterated chocolate and peanut butter bliss. Seriously, if you’re looking for a show-stopping dessert that’s surprisingly easy to make, this Peanut Butter Chocolate Lava Cake is your answer. The molten center, the rich chocolate flavor, and the salty-sweet peanut butter swirl create a symphony of textures and tastes that will leave you and your guests utterly speechless. Trust me, the first bite is an experience.
But why is this lava cake a must-try? It’s more than just delicious; it’s incredibly versatile. Imagine serving it warm with a scoop of vanilla bean ice cream melting slowly over the top, creating a delightful contrast of temperatures and flavors. Or, for an extra touch of decadence, drizzle it with a homemade chocolate sauce or a salted caramel sauce. The possibilities are endless!
Serving Suggestions and Variations:
* Ice Cream Pairing: Vanilla, chocolate, peanut butter, or even coffee ice cream all complement the richness of the cake beautifully.
* Sauce Sensations: Chocolate sauce, salted caramel sauce, or even a simple raspberry coulis can elevate the dessert to another level.
* Nutty Additions: Sprinkle chopped peanuts, pecans, or walnuts on top for added crunch and flavor.
* Berry Bliss: Fresh raspberries, strawberries, or blueberries add a touch of brightness and acidity that cuts through the richness of the cake.
* Espresso Kick: Add a teaspoon of instant espresso powder to the batter for a deeper, more intense chocolate flavor.
* White Chocolate Swirl: Drizzle melted white chocolate over the top before baking for a beautiful marbled effect.
* Individual Portions: Bake the batter in ramekins for individual lava cakes, perfect for portion control and elegant presentation. Just adjust the baking time accordingly, checking for the molten center.
* Gluten-Free Option: Substitute the all-purpose flour with a gluten-free blend for a delicious and inclusive dessert.
I’ve personally made this Peanut Butter Chocolate Lava Cake countless times, and it’s always a crowd-pleaser. It’s the perfect dessert for a romantic date night, a family gathering, or even just a cozy night in. The simplicity of the recipe belies the incredible flavor and texture, making it a truly impressive dessert that anyone can master.
So, what are you waiting for? Preheat your oven, gather your ingredients, and get ready to experience the magic of this incredible lava cake. I promise you won’t be disappointed.
And most importantly, I want to hear about your experience! Did you try any of the variations? Did you add your own special touch? Share your photos and stories in the comments below. I can’t wait to see your creations and hear how much you enjoyed this decadent treat. Happy baking, and enjoy every single, glorious bite of this unforgettable Peanut Butter Chocolate Lava Cake! Let me know if you have any questions, and I’ll be happy to help. This recipe is truly a winner, and I’m confident it will become a staple in your dessert repertoire.
Peanut Butter Chocolate Lava Cake: Decadent Recipe & Baking Tips
Decadent chocolate peanut butter lava cakes with a molten center. A rich and indulgent dessert perfect for any occasion.
Ingredients
- 1/2 cup (1 stick) unsalted butter, plus more for greasing ramekins
- 1/2 cup granulated sugar
- 1/4 cup packed light brown sugar
- 1/2 cup creamy peanut butter
- 2 large eggs
- 2 large egg yolks
- 1 teaspoon vanilla extract
- 1/4 teaspoon salt
- 1/2 cup all-purpose flour
- 4 ounces bittersweet chocolate, finely chopped
- 4 ounces milk chocolate, finely chopped
- Powdered sugar, for dusting (optional)
- Vanilla ice cream, for serving (optional)
Instructions
- In a heatproof bowl set over a saucepan of simmering water (or in the microwave in 30-second intervals), melt the butter, bittersweet chocolate, and milk chocolate together, stirring occasionally until smooth. Be careful not to overheat the chocolate, as it can seize up. If using the microwave, stir well after each interval.
- Remove the bowl from the heat and let the chocolate mixture cool for a few minutes. This is important because you don’t want to cook the eggs when you add them.
- Stir in the granulated sugar and brown sugar until well combined. The mixture should be smooth and glossy.
- Add the peanut butter and stir until fully incorporated and the mixture is homogenous. Make sure there are no streaks of peanut butter remaining.
- Add the eggs and egg yolks one at a time, whisking well after each addition. This is crucial for creating the rich, molten center. Make sure each egg is fully incorporated before adding the next.
- Stir in the vanilla extract and salt. The vanilla enhances the chocolate flavor, and the salt balances the sweetness.
- Gradually add the flour, folding it in gently with a spatula until just combined. Be careful not to overmix, as this can lead to a tougher cake. A few streaks of flour are okay.
- Preheat your oven to 425°F (220°C). Make sure your oven is properly preheated for even baking.
- Generously butter four 6-ounce ramekins. This will prevent the cakes from sticking and ensure they release easily. You can also dust the ramekins with cocoa powder for an extra layer of chocolate flavor and to help with release.
- Divide the batter evenly among the prepared ramekins. Each ramekin should be about three-quarters full.
- Bake for 12-15 minutes, or until the edges are set but the center is still soft and molten. The baking time may vary depending on your oven, so keep a close eye on them. The tops should look slightly puffed up and the edges should be firm.
- Gently shake one of the ramekins. The edges should be set, but the center should jiggle slightly. This indicates that the center is still molten. If the entire cake is firm, it’s overbaked.
- Let the lava cakes cool in the ramekins for a minute or two before inverting them onto plates. This allows them to set slightly and makes them easier to release.
- Carefully run a thin knife around the edges of each lava cake to loosen it from the ramekin. Place a plate over the ramekin and quickly invert it. Gently tap the bottom of the ramekin to release the cake.
- Dust the lava cakes with powdered sugar for a beautiful presentation.
- Serve the lava cakes immediately while they are still warm and the center is molten.
- Top with a scoop of vanilla ice cream for a delicious contrast of hot and cold. The ice cream will melt slightly over the warm cake, creating a decadent sauce.
- You can also garnish with fresh berries, chocolate shavings, or a drizzle of chocolate sauce.
Notes
- Don’t overbake: The key to a perfect lava cake is to underbake it slightly so that the center remains molten. Keep a close eye on the cakes while they are baking and remove them from the oven as soon as the edges are set but the center is still soft.
- Use high-quality chocolate: The quality of the chocolate will greatly affect the flavor of the lava cakes. Use a good-quality bittersweet and milk chocolate for the best results.
- Prepare the ramekins well: Generously buttering the ramekins is essential for preventing the cakes from sticking. You can also dust them with cocoa powder for an extra layer of protection.
- Adjust baking time: Baking times may vary depending on your oven. Start checking the cakes after 12 minutes and adjust the baking time as needed.
- Make ahead: You can prepare the batter ahead of time and store it in the refrigerator for up to 24 hours. When ready to bake, let the batter come to room temperature for about 30 minutes before filling the ramekins and baking.
- Add espresso powder: For a mocha flavor, add 1 teaspoon of espresso powder to the chocolate mixture.
- Use different nut butters: Experiment with different nut butters, such as almond butter or cashew butter.
- Add spices: Add a pinch of cinnamon or nutmeg to the batter for a warm, spiced flavor.
- Make it gluten-free: Substitute the all-purpose flour with a gluten-free all-purpose flour blend.
- Cakes didn’t release: If the cakes didn’t release easily, try running a thin knife around the edges again. You can also try placing the ramekins in a warm water bath for a few minutes to loosen the cakes.
- Cakes are overbaked: If the cakes are overbaked, they will be dry and the center will not be molten. Unfortunately, there’s not much you can do to fix overbaked lava cakes, but they will still taste delicious!
- Cakes are too runny: If the cakes are too runny, they may not have been baked long enough. Try baking them for a few more minutes.

Leave a Comment