
Chocolate Cake: just the name alone conjures up images of decadent indulgence, doesn’t it? Forget your troubles and imagine sinking your fork into a slice of moist, rich, and utterly irresistible chocolate perfection. This isn’t just any cake; it’s an experience, a celebration, a warm hug on a plate. And today, I’m thrilled to share my foolproof recipe for the ultimate Chocolate Cake that will have everyone begging for seconds!
The history of chocolate cake is as rich and complex as the dessert itself. While the Aztecs and Mayans enjoyed unsweetened chocolate beverages for centuries, it wasn’t until the 19th century that the first true chocolate cakes began to emerge. These early versions were often dense and fudgy, a far cry from the light and airy cakes we enjoy today. Over time, bakers experimented with different techniques and ingredients, resulting in the diverse range of chocolate cakes we know and love.
But what is it about chocolate cake that makes it so universally appealing? Is it the intense chocolate flavor that satisfies our deepest cravings? Or perhaps it’s the soft, tender crumb that melts in our mouth? Maybe it’s the sheer versatility of the dessert perfect for birthdays, holidays, or simply a cozy night in. Whatever the reason, chocolate cake has earned its place as a beloved classic, a timeless treat that brings joy to people of all ages. So, let’s get baking and create some chocolate magic!

Ingredients:
- For the Cake:
- 2 cups all-purpose flour
- 2 cups granulated sugar
- ¾ cup unsweetened cocoa powder
- 1 ½ teaspoons baking powder
- 1 ½ teaspoons baking soda
- 1 teaspoon salt
- 1 cup buttermilk
- ½ cup vegetable oil
- 2 large eggs
- 2 teaspoons vanilla extract
- 1 cup boiling water
- For the Chocolate Buttercream Frosting:
- 1 cup (2 sticks) unsalted butter, softened
- 3 cups powdered sugar
- ¾ cup unsweetened cocoa powder
- ½ cup heavy cream
- 1 teaspoon vanilla extract
- Pinch of salt
- Optional Decorations:
- Chocolate shavings
- Sprinkles
- Fresh berries
Preparing the Cake Batter:
- Preheat and Prepare: First things first, preheat your oven to 350°F (175°C). Grease and flour two 9-inch round cake pans. I like to use baking spray with flour already in it it makes life so much easier! Make sure you get into all the nooks and crannies to prevent sticking. You can also line the bottom of the pans with parchment paper rounds for extra insurance.
- Combine Dry Ingredients: In a large mixing bowl, whisk together the flour, sugar, cocoa powder, baking powder, baking soda, and salt. Whisking is key here to ensure everything is evenly distributed. You don’t want pockets of baking soda in your cake!
- Add Wet Ingredients: In a separate bowl, combine the buttermilk, vegetable oil, eggs, and vanilla extract. Whisk until well combined. The buttermilk adds a lovely tang and helps keep the cake moist.
- Combine Wet and Dry: Gradually add the wet ingredients to the dry ingredients, mixing on low speed until just combined. Be careful not to overmix! Overmixing develops the gluten in the flour, which can lead to a tough cake.
- Add Boiling Water: This is the secret ingredient! Slowly pour in the boiling water while mixing on low speed. The batter will be very thin don’t worry, that’s normal! The hot water helps to bloom the cocoa powder, intensifying the chocolate flavor.
- Divide the Batter: Divide the batter evenly between the prepared cake pans. I like to use a kitchen scale to ensure each pan has the same amount of batter. This helps the cakes bake evenly.
Baking the Cakes:
- Bake: Bake for 30-35 minutes, or until a wooden skewer inserted into the center comes out clean. Keep a close eye on them ovens can vary, and you don’t want to overbake them.
- Cool in Pans: Let the cakes cool in the pans for 10 minutes before inverting them onto a wire rack to cool completely. This prevents them from sticking and breaking.
Making the Chocolate Buttercream Frosting:
- Cream the Butter: In a large mixing bowl, beat the softened butter with an electric mixer until light and fluffy. This usually takes about 3-5 minutes. Make sure your butter is truly softened, but not melted.
- Add Powdered Sugar and Cocoa: Gradually add the powdered sugar and cocoa powder, beating on low speed until combined. Start with a low speed to prevent a powdered sugar cloud!
- Add Heavy Cream and Vanilla: Add the heavy cream, vanilla extract, and salt. Beat on medium speed until smooth and creamy. You may need to add a little more heavy cream if the frosting is too thick, or a little more powdered sugar if it’s too thin.
Assembling the Cake:
- Level the Cakes: Once the cakes are completely cool, use a serrated knife to level the tops. This will ensure your cake is stable and looks professional.
- Place First Layer: Place one cake layer on a serving plate or cake stand.
- Frost the First Layer: Spread a generous layer of chocolate buttercream frosting evenly over the first cake layer.
- Add Second Layer: Carefully place the second cake layer on top of the frosting.
- Frost the Entire Cake: Frost the top and sides of the cake with the remaining chocolate buttercream frosting. You can create a smooth finish or add swirls and texture with a spatula.
- Decorate (Optional): Decorate the cake with chocolate shavings, sprinkles, fresh berries, or any other decorations you like. Get creative!
- Chill (Optional): Chill the cake for at least 30 minutes before serving. This will help the frosting set and make it easier to slice.
Tips for Success:
- Room Temperature Ingredients: Using room temperature ingredients, especially the butter and eggs, helps them emulsify properly, resulting in a smoother batter and a more tender cake.
- Don’t Overmix: Overmixing the batter develops the gluten in the flour, leading to a tough cake. Mix until just combined.
- Accurate Measurements: Baking is a science, so accurate measurements are crucial. Use measuring cups and spoons, and level them off with a knife.
- Cool Completely: Make sure the cakes are completely cool before frosting. Otherwise, the frosting will melt and slide off.
- Patience is Key: Don’t rush the process. Take your time and enjoy the baking experience!
Variations:
- Mocha Cake: Add 1-2 tablespoons of instant espresso powder to the boiling water for a mocha-flavored cake.
- Peanut Butter Frosting: Substitute some of the butter in the frosting with peanut butter for a peanut butter chocolate cake.
- Mint Chocolate Cake: Add a few drops of peppermint extract to the frosting for a mint chocolate cake.
- Different Extracts: Experiment with different extracts, such as almond or hazelnut, to add a unique flavor to the cake.
- Add Chocolate Chips: Fold chocolate chips into the batter for an extra chocolatey treat.
Storage Instructions:
Store the cake in an airtight container at room temperature for up to 3 days, or in the refrigerator for up to 5 days. You can also freeze the cake for up to 2 months. Wrap it tightly in plastic wrap and then in foil before freezing.
Troubleshooting:
- Cake is Dry: Overbaking is the most common cause of a dry cake. Make sure to check the cake for doneness with a wooden skewer, and don’t overbake it. You can also try adding a little more buttermilk or oil to the batter next time.
- Cake is Dense: Overmixing the batter can lead to a dense cake. Mix until just combined. Also, make sure your baking powder and baking soda are fresh.
- Cake is Sinking: This can be caused by several factors, including using too much liquid, not baking the cake long enough, or opening the oven door too frequently during baking.
- Frosting is Too Thin: Add more powdered sugar, a tablespoon at a time, until the frosting reaches the desired consistency.
- Frosting is Too Thick: Add more heavy cream, a teaspoon at a time, until the frosting reaches the desired consistency.
Enjoy your delicious homemade chocolate cake! I hope you found this recipe helpful and easy to follow. Happy baking!
Conclusion:
This isn’t just another chocolate cake recipe; it’s a gateway to pure, unadulterated chocolate bliss. From its intensely rich flavor to its unbelievably moist texture, this chocolate cake is guaranteed to become a family favorite. I’ve baked countless cakes in my time, and I can honestly say this one consistently receives rave reviews. It’s the kind of cake that disappears in a flash, leaving everyone craving just one more slice.
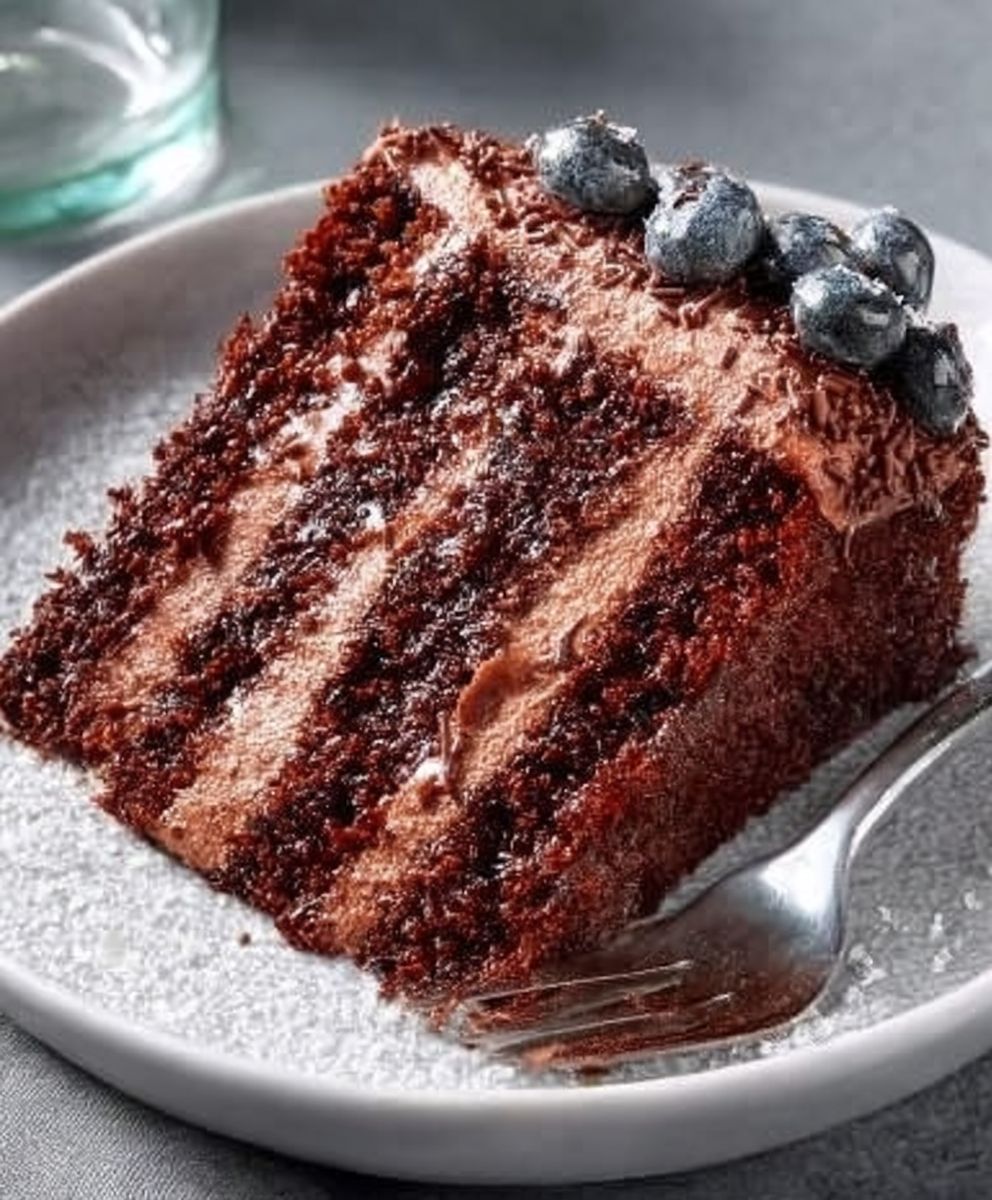
But what truly sets this recipe apart is its versatility. While it’s absolutely divine served simply with a dusting of powdered sugar, the possibilities are truly endless. For a classic touch, try pairing it with a generous dollop of freshly whipped cream and a scattering of ripe berries. The tartness of the berries perfectly complements the deep, dark chocolate, creating a symphony of flavors in your mouth.
If you’re feeling a bit more adventurous, consider frosting it with a decadent chocolate ganache. The smooth, glossy ganache adds an extra layer of richness and sophistication, transforming this cake into a show-stopping centerpiece for any occasion. Or, for a lighter option, a simple vanilla buttercream frosting works wonders, providing a sweet and creamy contrast to the intense chocolate flavor.
And don’t stop there! Get creative with your toppings. A sprinkle of chopped nuts, such as walnuts or pecans, adds a delightful crunch. Chocolate shavings, a drizzle of caramel sauce, or even a scoop of your favorite ice cream can elevate this cake to new heights of deliciousness.
For a fun twist, you can even transform this cake into cupcakes! Simply adjust the baking time accordingly, and you’ll have a batch of adorable and irresistible chocolate cupcakes perfect for parties or lunchbox treats. You could also layer it with mousse or pudding for a trifle.
I’ve also experimented with adding different extracts to the batter. A teaspoon of peppermint extract creates a festive holiday cake, while a hint of orange extract adds a bright and citrusy note. A splash of coffee enhances the chocolate flavor even further, creating a mocha-inspired masterpiece.
The beauty of this recipe is that it’s incredibly forgiving. Even if you’re not an experienced baker, you can still achieve amazing results. Just follow the instructions carefully, and don’t be afraid to experiment with different variations to find your perfect combination.
I truly believe that everyone should have a go-to chocolate cake recipe, and this one is mine. It’s reliable, delicious, and always a crowd-pleaser. So, what are you waiting for? Preheat your oven, gather your ingredients, and get ready to bake the best chocolate cake you’ve ever tasted!
I’m so confident that you’ll love this recipe that I can’t wait to hear about your experience. Please, give this chocolate cake a try and share your photos and feedback in the comments below. Let me know what variations you tried and how they turned out. Did you add any special toppings or frostings? Did you make it for a special occasion? I’m eager to hear all about your baking adventures! Happy baking!
Chocolate Cake: The Ultimate Guide to Baking Perfection
A classic, moist, and intensely chocolatey layer cake with a rich chocolate buttercream frosting. Perfect for birthdays, celebrations, or any chocolate craving!
Ingredients
- 2 cups all-purpose flour
- 2 cups granulated sugar
- ¾ cup unsweetened cocoa powder
- 1 ½ teaspoons baking powder
- 1 ½ teaspoons baking soda
- 1 teaspoon salt
- 1 cup buttermilk
- ½ cup vegetable oil
- 2 large eggs
- 2 teaspoons vanilla extract
- 1 cup boiling water
- 1 cup (2 sticks) unsalted butter, softened
- 3 cups powdered sugar
- ¾ cup unsweetened cocoa powder
- ½ cup heavy cream
- 1 teaspoon vanilla extract
- Pinch of salt
- Chocolate shavings
- Sprinkles
- Fresh berries
Instructions
- Preheat oven to 350°F (175°C). Grease and flour two 9-inch round cake pans (or use baking spray with flour). Line the bottom of the pans with parchment paper rounds for extra insurance.
- In a large mixing bowl, whisk together the flour, sugar, cocoa powder, baking powder, baking soda, and salt.
- In a separate bowl, combine the buttermilk, vegetable oil, eggs, and vanilla extract. Whisk until well combined.
- Gradually add the wet ingredients to the dry ingredients, mixing on low speed until just combined. Be careful not to overmix!
- Slowly pour in the boiling water while mixing on low speed. The batter will be very thin don’t worry, that’s normal!
- Divide the batter evenly between the prepared cake pans. Use a kitchen scale to ensure each pan has the same amount of batter.
- Bake for 30-35 minutes, or until a wooden skewer inserted into the center comes out clean.
- Let the cakes cool in the pans for 10 minutes before inverting them onto a wire rack to cool completely.
- In a large mixing bowl, beat the softened butter with an electric mixer until light and fluffy (3-5 minutes).
- Gradually add the powdered sugar and cocoa powder, beating on low speed until combined.
- Add the heavy cream, vanilla extract, and salt. Beat on medium speed until smooth and creamy. Adjust cream/sugar for desired consistency.
- Once the cakes are completely cool, use a serrated knife to level the tops.
- Place one cake layer on a serving plate or cake stand.
- Spread a generous layer of chocolate buttercream frosting evenly over the first cake layer.
- Carefully place the second cake layer on top of the frosting.
- Frost the top and sides of the cake with the remaining chocolate buttercream frosting.
- Decorate the cake with chocolate shavings, sprinkles, fresh berries, or any other decorations you like.
- Chill the cake for at least 30 minutes before serving.
Notes
- Room Temperature Ingredients: Use room temperature butter and eggs for best results.
- Don’t Overmix: Overmixing leads to a tough cake.
- Accurate Measurements: Baking is a science! Use proper measuring tools.
- Cool Completely: Ensure cakes are fully cooled before frosting to prevent melting.
- Variations:
- Mocha Cake: Add 1-2 tablespoons of instant espresso powder to the boiling water.
- Peanut Butter Frosting: Substitute some butter with peanut butter in the frosting.
- Mint Chocolate Cake: Add peppermint extract to the frosting.
- Different Extracts: Experiment with almond or hazelnut extract.
- Add Chocolate Chips: Fold chocolate chips into the batter.
- Storage: Store in an airtight container at room temperature for up to 3 days, or in the refrigerator for up to 5 days. Freeze for up to 2 months (wrap tightly).
- Troubleshooting: Refer to the troubleshooting section in the original document for solutions to common baking issues.


Leave a Comment